
I grew eight basil plants last summer. By August I had so much basil I started giving bags away to neighbors, then coworkers, then strangers at the farmer’s market.
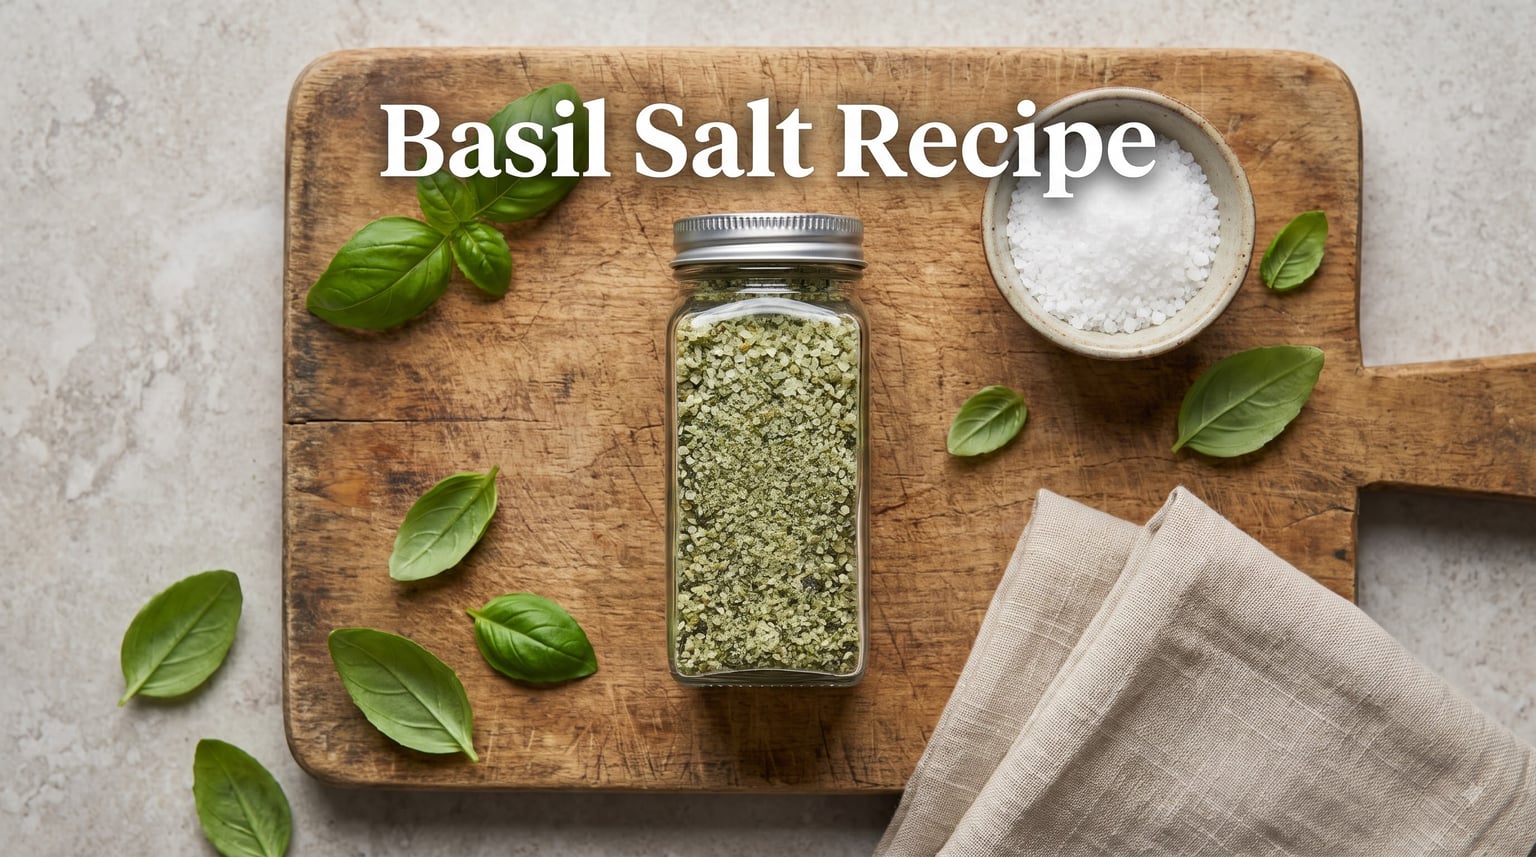
That’s the moment I discovered basil salt. One afternoon I blended a few cups of leaves with coarse salt, dried the mixture on a sheet pan, and ended up with a fragrant seasoning that tasted like August in a jar.
This basil salt recipe is now my favorite way to preserve basil. It takes about 30 minutes of hands-on time, requires zero canning equipment, and gives you a shelf-stable seasoning you can use all winter on tomatoes, grilled chicken, eggs, and even cocktail rims.
In this guide I’ll walk you through the exact process I use, plus which salt works best, how to dry basil three different ways, what to do with bolted basil, and eight ways to use your finished basil salt. I’ve also answered the questions I get asked most often from friends who’ve tried this recipe.
Table of Contents
What Is Basil Salt and Why Make It?
Basil salt is a flavored seasoning made by combining fresh basil leaves with salt and drying the mixture until completely moisture-free. The salt draws liquid out of the basil while the drying step concentrates the herb’s natural oils.
The result is a green-flecked salt with intense basil aroma and flavor. Think of it as homemade seasoned salt, but better, because you control every ingredient and the basil taste is much stronger than anything you’ll find at the grocery store.
Salt works as a natural preservative. Bacteria need moisture to grow, and salt dehydrates anything it touches. That’s why this technique has been used for centuries to preserve meat, fish, vegetables, and herbs long before refrigeration existed.
I make basil salt every summer for three reasons. First, my garden produces far more basil than I can use fresh or turn into pesto. Second, basil salt lasts a year in the pantry, so I get to use summer basil in January. Third, it makes a thoughtful edible gift that costs about a dollar per jar to make.
If you’ve ever thrown out wilted store-bought basil or watched your garden plants bolt and go to seed, basil salt solves that problem. Nothing goes to waste, and you end up with a versatile seasoning that costs a fraction of artisan herb salts.
Choosing the Best Salt for Basil Salt
The best salt for basil salt is coarse kosher salt or coarse sea salt. Fine table salt dissolves too quickly and creates a clumpy texture, while flake salts like Maldon are too precious and expensive for this application.
Here’s how the main salt types compare for making basil salt:
Kosher salt – The most popular choice. Diamond Crystal kosher salt has a flat, coarse flake that blends well with basil and dries predictably. Morton kosher salt is denser, so use slightly less by volume.
Coarse sea salt – Celtic grey sea salt, Mediterranean sea salt, and similar products add subtle mineral flavor. Works beautifully but costs more than kosher salt.
Pink Himalayan salt – Adds a mild mineral taste and pretty color. Functional for basil salt but the price rarely justifies the benefit for a herb-heavy blend.
Fine table salt – Not recommended. The small crystals clump during drying and you lose the texture that makes basil salt pleasant to sprinkle.
Flake finishing salts – Save these for finishing dishes. They’re too delicate and expensive for blending with basil.
I tested this recipe with Diamond Crystal kosher, Morton kosher, and coarse Celtic sea salt over three batches. Diamond Crystal produced the best texture and the cleanest basil flavor. Celtic sea salt came in second with a slightly more complex taste. Both kosher and sea salt versions kept for 10 months in my pantry without clumping or losing potency.
Whatever salt you choose, make sure it’s labeled coarse or kosher. Iodine doesn’t matter here since we’re drying the mixture, but anti-caking agents in some table salts can create a metallic taste when combined with herbs.
Picking the Right Basil: Varieties and Bolted Basil
The best basil for basil salt is sweet Genovese basil because of its classic, balanced flavor. But almost any basil variety works, and each one gives the finished salt a slightly different personality.
Here’s a quick comparison of common basil varieties and how they perform in basil salt:
Sweet basil (Genovese) – The standard choice. Sweet, slightly peppery, and the flavor most people expect from basil. My top recommendation.
Thai basil – Has purple stems and an anise-licorice note. Makes a bold, savory basil salt that pairs well with Asian dishes, grilled meats, and pho.
Lemon basil – Bright citrus notes. Excellent in basil salt used for fish, chicken, and summer salads. Doubles as a lemon-pepper alternative.
Purple basil – Mild flavor similar to sweet basil. Adds gorgeous purple-red color to the salt. Best mixed 50/50 with green basil for balanced taste.
Holy basil (Tulsi) – Peppery and clove-like. Works but the strong flavor can overwhelm delicate dishes. Use in blends with sweet basil.
One question I hear all the time from gardeners: can you use bolted basil to make salt? Yes, absolutely. Once basil flowers and goes to seed, the leaves often turn bitter, but basil salt masks that bitterness beautifully because the drying process concentrates flavor in a different way.
If your basil has bolted, just remove the flowers and any woody stems before blending. The leaves themselves are still usable for salt even if they’re too bitter for fresh eating. This is one reason basil salt is such a valuable technique for anyone growing basil indoors or in a backyard garden who wants to use every last leaf.
Pick basil in the morning after the dew dries but before the day gets hot. The essential oil content peaks at this time, which means more flavor in your finished salt. Wash gently, pat dry, and you’re ready to start.
Basil Salt Recipe: Step-by-Step Instructions
This basil salt recipe makes about 1.5 cups of finished seasoning, enough to fill two small spice jars. The active time is roughly 20 minutes, plus 2 to 4 hours of drying time depending on your method.
Ingredients
1 cup loosely packed fresh basil leaves (about 30 grams)
1 cup coarse kosher salt or coarse sea salt (about 240 grams)
Optional: 1 teaspoon lemon zest
Optional: 2 cloves garlic, minced
Instructions
Step 1: Wash and dry the basil. Rinse the leaves under cool water and spin them dry in a salad spinner or pat them thoroughly with clean kitchen towels. Any remaining water will make your basil salt take longer to dry and could cause clumping.
Step 2: Strip the leaves from stems. Pinch the leaves off the stems and discard the stems. Stems are woody and don’t blend well, plus they can create bitter notes in the finished salt.
Step 3: Pulse the basil and salt together. Add the basil leaves and salt to a food processor. Pulse 8 to 10 times in short bursts, scraping down the sides as needed. You’re aiming for small basil pieces distributed throughout the salt, not a paste. Stop while the basil still has visible texture.
Step 4: Add optional flavorings. If using lemon zest or minced garlic, add them now and pulse 2 more times to combine. Skip the garlic if you want a longer shelf life, since garlic adds moisture and increases spoilage risk.
Step 5: Dry the mixture. Spread the basil-salt blend in a thin, even layer on a parchment-lined baking sheet, a dehydrator tray, or a wire rack. The layer should be no thicker than about a quarter inch so air circulates around every grain.
Step 6: Dry until completely moisture-free. Oven method: 170°F for 2 hours, stirring every 30 minutes. Dehydrator method: 130°F for 4 hours. Air-dry method: 24 to 48 hours at room temperature in a dry, well-ventilated spot. The basil salt is done when the basil feels crispy and the salt flows freely without clumping.
Step 7: Cool and store. Let the basil salt cool completely to room temperature before transferring it to jars. Any residual warmth will create condensation inside the container, which leads to clumping and potential spoilage.
The total ratio of basil to salt can shift depending on your preference. Some readers prefer a 1:2 basil-to-salt ratio for a milder herbal note, while others go up to 1:1 for a punchier blend. The 1:1 ratio in my main recipe produces a balanced basil salt that I think works for most uses.
Drying Methods Compared: Oven vs Dehydrator vs Air Dry
The three best ways to dry basil salt are oven drying, dehydrator drying, and air drying. Each method has trade-offs in time, energy use, and final texture.
Oven drying – Fastest method at 2 hours. Uses more electricity but produces consistent results. Best for beginners and anyone who wants same-day basil salt.
Dehydrator drying – Takes 4 hours at low temperature. Uses less energy than the oven and gives the most even drying. Best if you already own a dehydrator and process herbs regularly.
Air drying – Slowest at 24 to 48 hours. Uses no electricity at all. Requires low humidity and good airflow. Best in dry climates or air-conditioned homes.
I default to the oven method because it’s fast and my dehydrator stays busy with fruit leather and jerky. If you live somewhere humid, skip the air-dry option. Even a small amount of leftover moisture can cause mold in stored basil salt, and humid air makes it nearly impossible to dry herbs completely without a dehydrator or oven.
Whichever method you choose, spread the basil salt thin and stir every 30 to 60 minutes. Stirring breaks up clumps and exposes fresh surface area to the air. Without stirring, the bottom layer tends to stay damp while the top layer dries out, leading to inconsistent results.
For the oven, set the temperature as low as your oven allows. Most ovens go down to 170°F, which is ideal. Higher temperatures can brown the basil and create a roasted, less fresh flavor. If your oven runs hot, prop the door open slightly with a wooden spoon to keep air circulating.
How to Store Basil Salt and Shelf Life
Store basil salt in an airtight container in a cool, dark place like a pantry or cupboard. Properly dried basil salt keeps for 6 to 12 months at room temperature, and up to 18 months in the refrigerator.
Glass spice jars with tight-fitting lids work best. Mason jars, repurposed baby food jars, or small Weck jars all keep the salt dry and let you see what’s inside. Avoid plastic containers for long-term storage since basil oil can stain and the salt can absorb odors.
Keep the jar away from direct sunlight, the stove, and any heat source. Light and heat break down the basil oils and dull the flavor. A pantry shelf or a closed cabinet next to your other spices is the ideal spot.
How do you know when basil salt has gone bad? Watch for three warning signs: clumping that doesn’t break apart, off smells like mustiness or sourness, and any visible mold or discoloration. Properly dried basil salt should remain loose, fragrant, and green-flecked for the entire shelf life.
Can you freeze basil salt? Yes, and it’s a great option if you live somewhere hot and humid. Freezing extends the shelf life to 2 years and preserves more of the bright basil color than room-temperature storage. Just make sure the jar is completely dry before adding the salt, since freezer burn can affect the texture.
What to Use Basil Salt On: Serving Ideas
Basil salt is one of the most versatile seasonings you can keep in your kitchen. Use it anywhere you’d reach for plain salt and want a boost of herbal flavor.
Here are my eight favorite ways to use basil salt:
Caprese salad – Sprinkle on sliced tomatoes and fresh mozzarella instead of plain salt and basil leaves. The flavor is more intense and the dish needs no extra dressing.
Grilled chicken or fish – Season before cooking or sprinkle on top right after grilling. The basil oil caramelizes slightly and creates an amazing crust.
Tomato slices with olive oil – The simplest summer snack becomes something special with a pinch of basil salt and a drizzle of good olive oil.
Avocado toast – Replaces plain salt and adds herby depth. Works on any savory toast, including margherita pizza-style variations.
Cocktail rimmer – Mix with a little sugar and use on the rim of a Bloody Mary or gin and tonic. Looks beautiful and tastes incredible.
Roasted vegetables – Toss with zucchini, summer squash, or eggplant before roasting. The basil flavor complements the vegetables’ sweetness.
Fresh fruit – Especially good on watermelon, strawberries, and pineapple. Try it with cantaloupe and a squeeze of lime for a quick summer salad.
Herb butter – Stir a teaspoon into softened butter for spreading on bread, corn on the cob, or roasted turkey.
Basil salt also works beautifully as a finishing salt for pasta, scrambled eggs, popcorn, and homemade focaccia. Anywhere you want a quick flavor boost without pulling out multiple seasonings, basil salt does the job.
For drinks, try it on the rim of a strawberry basil lemonade or any of these green cocktails with basil. A small bowl of basil salt on a cheese board is also a great conversation starter at dinner parties.
Basil Salt Variations and Add-Ins
The basic basil salt recipe is a starting point. Once you have the technique down, you can create custom blends that match your cooking style or use up other herbs from the garden.
Here are my favorite basil salt variations:
Basil garlic salt – Add 2 cloves of minced garlic to the food processor. Best used within 3 months since garlic shortens shelf life. Excellent on steak, garlic bread, and roasted potatoes.
Lemon basil salt – Add the zest of one lemon along with the basil. Bright and fresh. Perfect for fish, chicken, and summer salads.
Rosemary basil salt – Add 2 tablespoons of fresh rosemary leaves. The combination of basil and rosemary works on lamb, roasted potatoes, and focaccia. This is a classic herb salt blend.
Spicy basil salt – Add 1 teaspoon of red pepper flakes or 1 small dried chili. Great on pizza, pasta, and grilled vegetables.
Citrus herb salt – Mix basil with orange zest, thyme, and a little black pepper. Beautiful on roasted chicken and turkey.
You can also blend basil with other soft herbs like parsley, chives, or cilantro using the same 1:1 herb-to-salt ratio. Just keep in mind that herbs with higher water content, like mint and cilantro, may need extra drying time.
For larger harvests, scale the recipe up using the same 1:1 ratio. I’ve made batches with 4 cups of basil and 4 cups of salt in a large food processor, then dried them on multiple sheet pans in the oven at 170°F for about 3 hours. The trick is to work in small food processor batches so the basil gets evenly distributed through the salt.
Troubleshooting Common Basil Salt Problems
Even with a simple recipe, things can go wrong. Here are the most common basil salt problems and how to fix them.
Problem: Basil salt is clumpy. This usually means it wasn’t dried long enough. Return the salt to the oven at 170°F for another 30 to 60 minutes, breaking up clumps with a fork every 15 minutes. If the salt still clumps after extended drying, you may have started with wet basil leaves.
Problem: Basil salt smells musty or sour. Toss it. Musty or sour smells mean moisture remained in the mixture and bacteria or mold started growing. This is rare if the salt was dried thoroughly, but it can happen in humid kitchens or if the salt was stored while still warm.
Problem: Basil salt tastes too salty. You used too much salt or processed the mixture too long, breaking the salt into finer particles. Next time, stick to the 1:1 ratio and pulse just until combined. You can balance an overly salty batch by mixing in dried herbs like oregano or parsley.
Problem: Basil salt lost its green color. Heat from the oven or direct sunlight can fade the basil. The flavor is usually still good, just less vibrant. Store future batches in dark glass jars or opaque containers to preserve color.
Problem: Basil salt developed mold. Discard the entire batch. Mold means moisture was present, and you can’t safely salvage moldy herb salts. To prevent this, always let the salt cool completely before jarring and store in truly airtight containers.
FAQ: Basil Salt Recipe Questions Answered
How long will homemade basil salt last?
Homemade basil salt keeps for 6 to 12 months in a cool, dark pantry when stored in an airtight container. If you refrigerate it, the shelf life extends to about 18 months. Freezing in a sealed jar pushes it even further, up to 2 years. The key is making sure the basil is completely dry before storage. Any leftover moisture causes clumping and shortens the shelf life dramatically.
How to make your own basil salt?
To make your own basil salt, combine 1 cup fresh basil leaves with 1 cup coarse kosher or sea salt in a food processor. Pulse 8 to 10 times until the basil is broken into small pieces and evenly distributed through the salt. Spread the mixture in a thin layer on a parchment-lined baking sheet and dry at 170°F for about 2 hours, stirring every 30 minutes. Let it cool completely, then store in an airtight jar.
What do you do with basil salt?
Use basil salt anywhere you would use regular salt with a desire for extra herbal flavor. It’s especially good on caprese salad, grilled chicken or fish, avocado toast, roasted vegetables, scrambled eggs, and fresh fruit like watermelon or strawberries. Basil salt also makes a great cocktail rimmer for Bloody Marys and gin and tonics. You can stir it into softened butter for spreading on bread or use it as a finishing salt on pasta and pizza.
Is basil salt good for you?
Basil salt is a seasoning, so it carries the same sodium considerations as any salt. The good news is that basil itself contains beneficial plant compounds, including essential oils with antioxidant and anti-inflammatory properties. Using basil salt lets you get some of those benefits from a preserved form of basil. As with any salt, use it in moderation if you’re watching your sodium intake, or check out our low sodium pesto recipe for a fresh basil option with less salt.
What kind of salt works best for basil salt?
Coarse kosher salt or coarse sea salt works best for basil salt. Diamond Crystal kosher salt is my top pick because of its flat, coarse flakes that blend evenly with basil and dry predictably. Avoid fine table salt, which clumps during drying, and save expensive finishing salts like Maldon for sprinkling on finished dishes rather than blending into herb salts.
Can I use dried basil to make basil salt?
Yes, you can use dried basil to make basil salt, though the flavor won’t be as bright as using fresh basil. Use about 1/3 cup of dried basil per 1 cup of coarse salt since dried basil is more concentrated. Pulse gently to combine and skip the drying step, or dry for only 15 to 20 minutes just to refresh the dried basil. The result is convenient but lacks the punch of fresh basil salt.
Can I use bolted basil for basil salt?
Yes, bolted basil works great for basil salt. Once basil flowers and the leaves turn bitter, the salt-making process masks that bitterness and preserves the essential oils. Just remove the flowers and any woody stems before blending. This is one of the best ways to use up basil that has bolted late in the season when pesto would taste bitter.
How do I know when basil salt has gone bad?
Basil salt has gone bad if you notice any of three warning signs: persistent clumping that doesn’t break apart, off smells like mustiness or sourness, or visible mold or discoloration. Properly dried and stored basil salt should remain loose, fragrant, and green-flecked for its entire shelf life. If you see any of these signs, discard the batch and check your drying process for next time.
Final Thoughts: Making Basil Salt Part of Your Kitchen
If you’ve been looking for a way to use up abundant basil without spending hours over a hot stove, basil salt is the answer. It’s fast, forgiving, and produces a seasoning that costs pennies per jar but tastes like something from a specialty food shop.
This basil salt recipe has become one of my summer rituals, right up there with making pesto and freezing herbs in olive oil. Every August I make at least four jars to last the rest of the year. Some I keep for myself, some I give away as gifts, and some end up at dinner parties where someone always asks what the green-flecked salt is.
The recipe works with any basil variety, scales up easily for big harvests, and stores for up to a year on a pantry shelf. Once you’ve made it once, you’ll start seeing basil salt as the answer to the question every gardener faces in late summer: what do I do with all this basil?
Start with the basic recipe and a small batch. Once you’re comfortable with the technique, experiment with garlic, lemon zest, or other herbs from your garden. You’ll find that basil salt becomes the kind of homemade staple you wonder how you ever cooked without.
For more ways to enjoy basil in your kitchen, check out our low sodium pesto recipe, our guide to growing basil indoors, or try basil salt as a rimmer on one of these basil mocktails. Happy preserving.