The Brew in a Bag method, commonly called BIAB, is one of the simplest ways to make all-grain beer at home. This technique has gained popularity among homebrewers who want to transition from extract brewing to full all-grain batches without investing in multiple vessels and complex equipment. If you have been curious about all-grain brewing but feel intimidated by the traditional three-vessel systems, BIAB offers a straightforward path forward.
Our team has spent considerable time testing and refining BIAB techniques over the years. We have talked to dozens of homebrewers, from complete beginners to experienced crafters, and we understand exactly what questions arise when someone first encounters this method. This guide walks you through everything you need to know to brew confidently using the Brew in a Bag approach.
What is the Brew in a Bag Method?
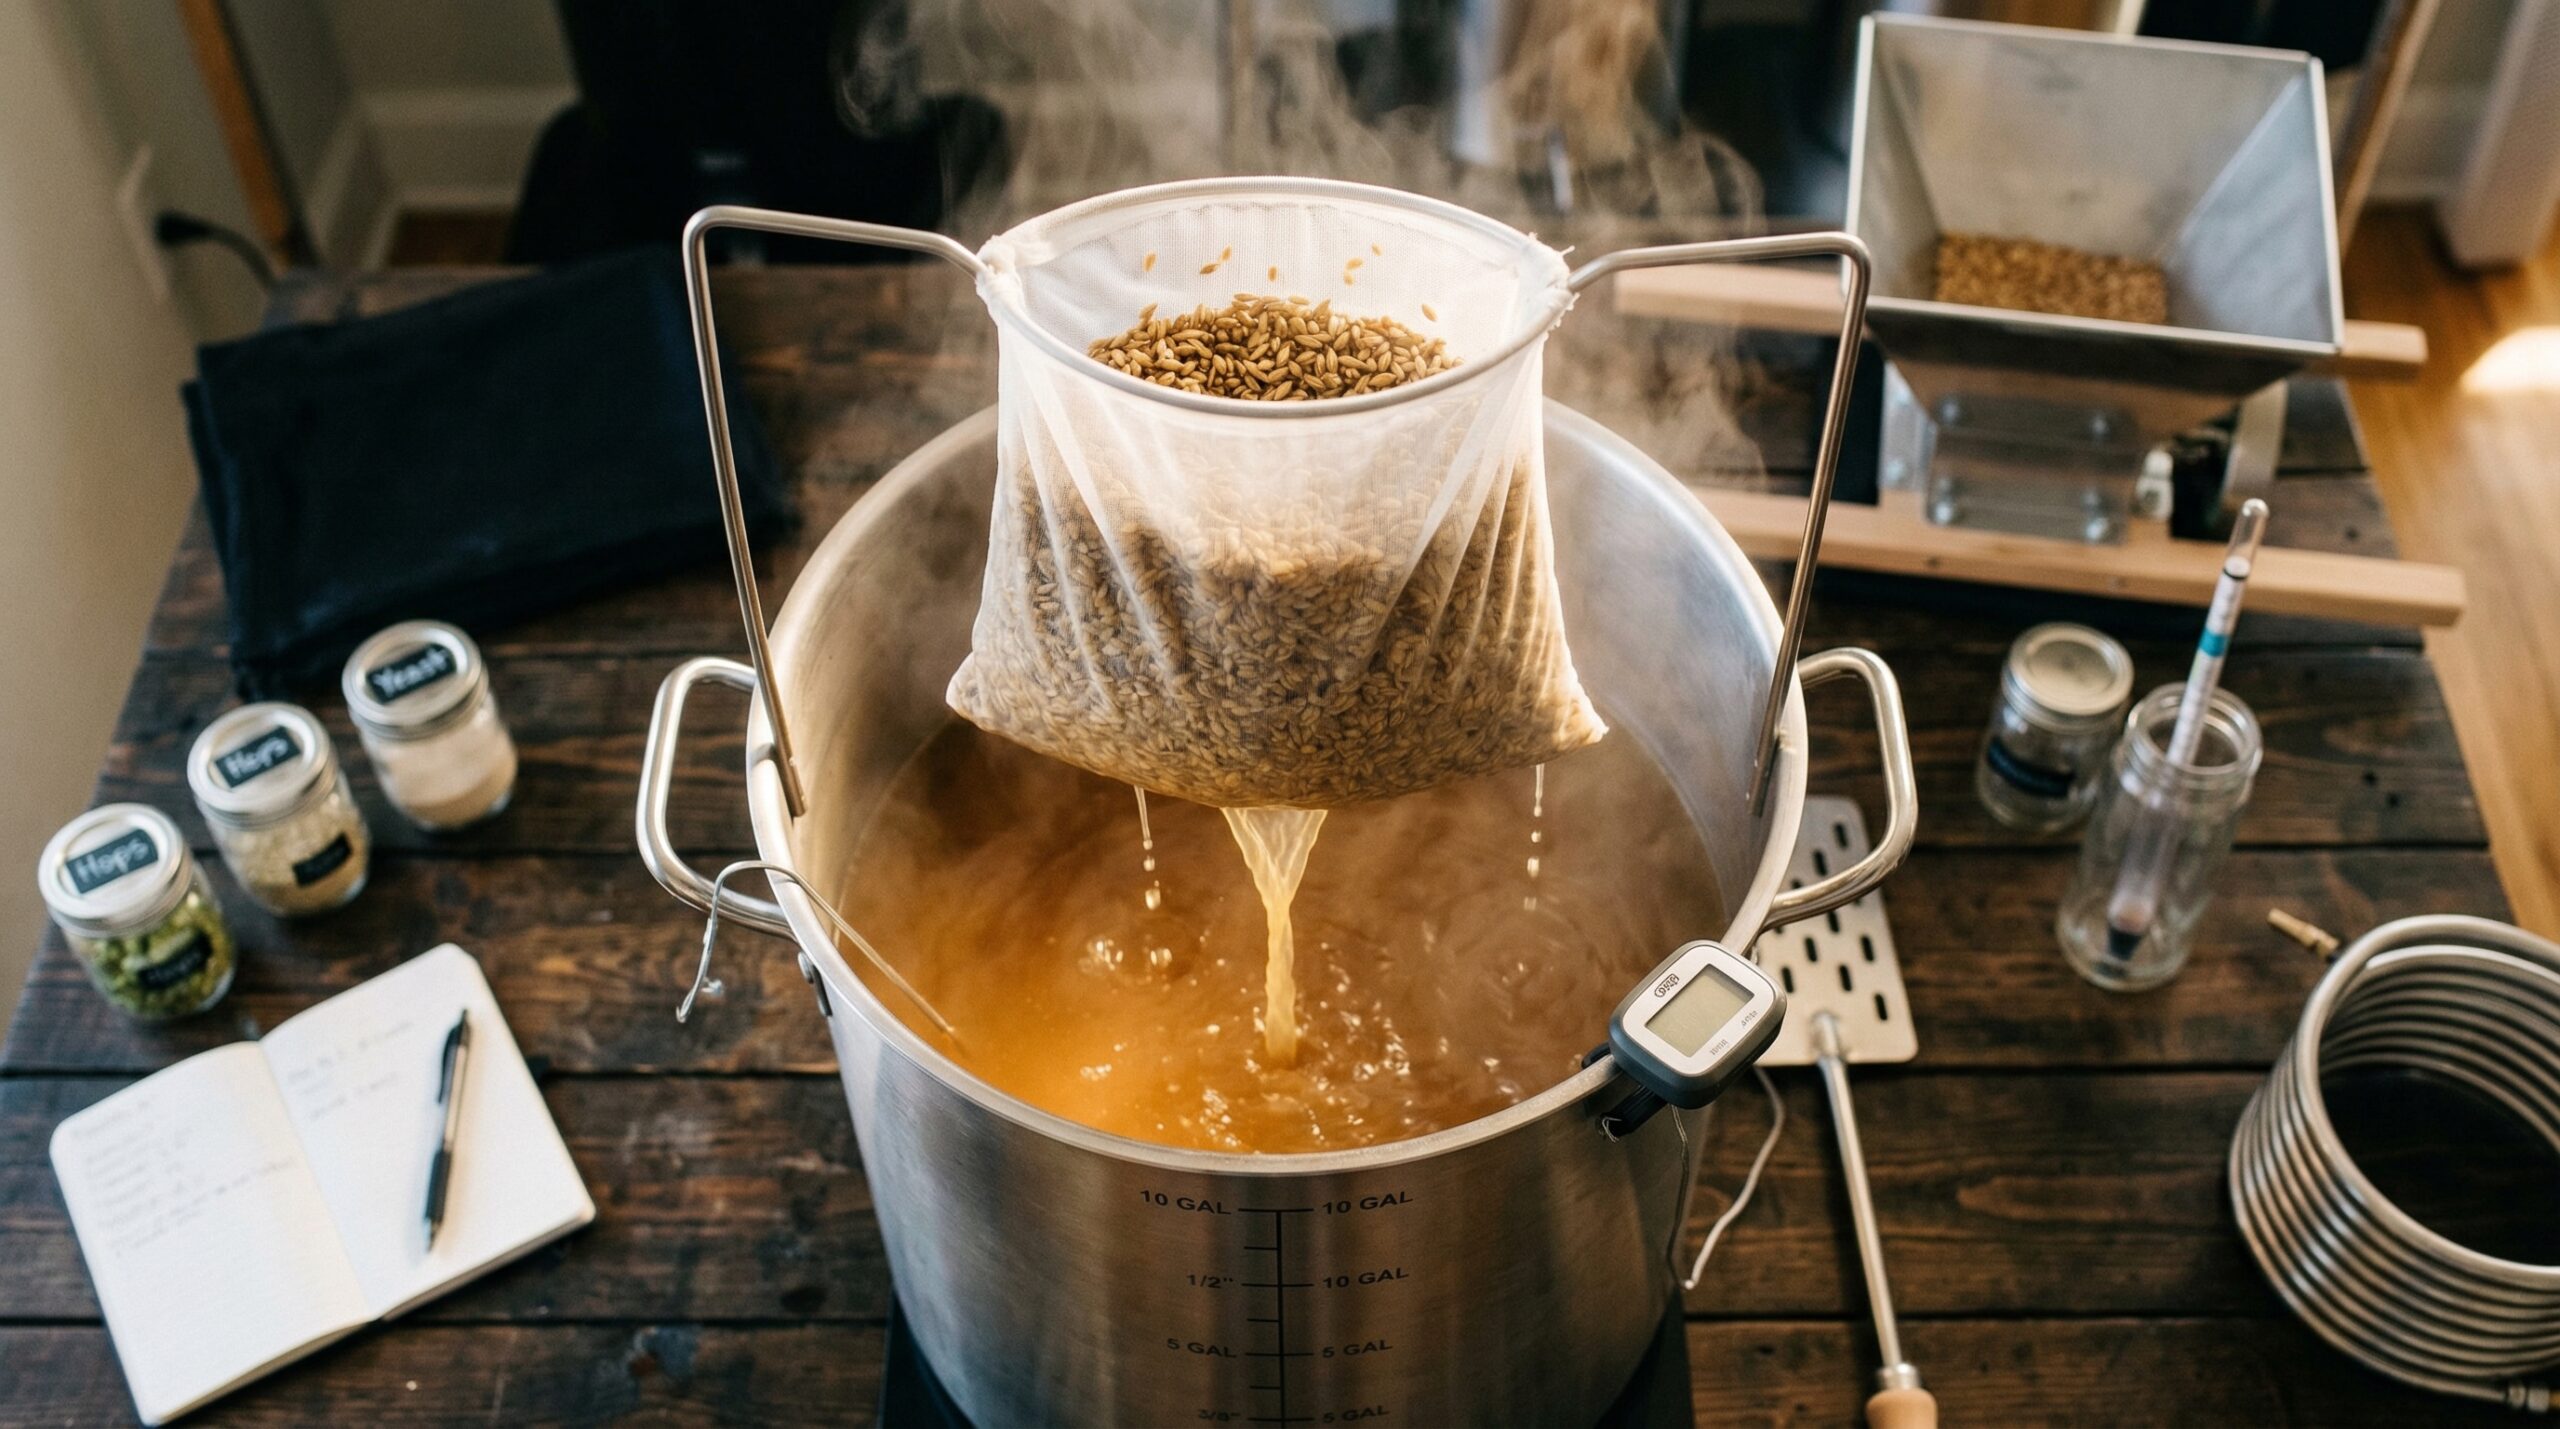
The Brew in a Bag method is an all-grain brewing technique where grains are placed inside a single large mesh bag and submerged in water within one vessel. The bag acts as both your mash tun and lauter tun, eliminating the need for separate equipment. You heat your strike water, add the grain bag, hold it at the target temperature for the mash duration, then simply lift the bag out when finished.
This approach differs significantly from extract brewing, where you simply dissolve pre-made malt extract in water and then boil and ferment. With BIAB, you control the entire mashing process yourself, which gives you greater flexibility over the final beer character. Extract brewers often plateau in their craft because they rely on the extract manufacturer for base malt character. BIAB unlocks that creative control.
Compared to traditional three-vessel all-grain systems, BIAB dramatically simplifies the process. Traditional setups require a mash tun, hot liquor tank, and boil kettle as separate vessels, plus pumps and tubing to move liquid between them. BIAB reduces this to one vessel, usually a large kettle, plus the grain bag. The equipment cost drops substantially, and so does the complexity of each brew day.
The appeal for many homebrewers comes down to space and simplicity. Apartment brewers can use a single pot on the stovetop. Garage brewers can scale up to larger kettles for five-gallon batches. The cleanup process involves essentially one bag and one pot, which saves time and effort compared to cleaning multiple vessels.
Equipment Needed for Brew in a Bag
BIAB requires minimal equipment compared to traditional all-grain brewing, but getting the right gear matters for consistent results. The most critical piece is a vessel large enough to hold your grain bill plus water with room to spare. For a typical five-gallon batch, you want at least an eight-gallon kettle to accommodate the grain absorption and boil-off while preventing messy overflows.
The grain bag itself deserves careful attention. You need a mesh bag specifically designed for brewing, not a standard paint straining bag from the hardware store. Look for food-safe nylon mesh with a fine weave that allows good flow-through while keeping grain particles contained. The bag should be large enough to fully submerge your grain bill and allow room for swelling. Many brewers prefer bags with reinforced seams and sturdy drawstrings for easy lifting.
A good thermometer ranks as essential for BIAB success. You need to measure strike water temperature accurately and monitor your mash throughout the process. Digital thermometers with instant read functionality work well for strike water, while stick-on aquarium-style thermometers on the kettle exterior work for continuous monitoring during the mash. Without accurate temperature measurement, hitting your target mash parameters becomes guesswork.
Additional helpful equipment includes a hoist or pulley system for lifting heavy grain bags, especially for full five-gallon batches. Forum discussions reveal that many brewers strain their backs attempting to lift saturated grain bags from large kettles. A simple counterweight system or hoist saves your spine and makes the process much more manageable. Other nice-to-have items include a refractometer or hydrometer for measuring gravity, a thievable bag for sample collection, and an insulated blanket or sleeping bag for maintaining mash temperature in cooler environments.
Strike Water Temperature and Calculations
Calculating strike water correctly forms the foundation of a successful BIAB brew day. The goal is to heat water to a temperature that will drop to your target mash temperature once you add the grains. This sounds more complicated than it actually is, and the basic calculation becomes intuitive after a few batches.
Grain absorbs approximately 0.08 to 0.12 gallons of water per pound of grain, depending on the grain type and crush. For a typical five-gallon batch using 10 pounds of grain, you should account for roughly one gallon of absorption loss. Your target pre-boil volume should be about 6.5 to 7 gallons to end up with five gallons in the fermenter after boil and trub loss.
The strike water temperature depends on your grain temperature, target mash temperature, and the ratio of water to grain. A common starting formula suggests heating water to about 7 to 10 degrees Fahrenheit above your target mash temperature for a typical 1.25 quarts per pound water-to-grain ratio. If your grains are cold from storage, you need a higher initial temperature. Warmer grains require less adjustment.
For example, if you aim for a mash temperature of 152F and your grains are at room temperature (70F), you might heat your strike water to around 162-165F. Add the grain bag, stir thoroughly to eliminate temperature gradients, and check your reading. With experience, you will dial in the exact strike temperature for your specific setup and environment. Factors like kettle thickness, ambient temperature, and initial water temperature all influence the final result.
Step-by-Step BIAB Mash Process
- Step 1 involves heating your calculated strike water volume to the target temperature. Use your recipe calculations to determine how much water you need, accounting for grain absorption and expected boil-off. Heat the water in your kettle to approximately 7-10 degrees above your desired mash temperature, stirring occasionally to ensure even heating throughout.
- Step 2 requires preparing your grain bag before adding it to the water. Some brewers like to preheat the bag by soaking it in hot water, which helps sanitize it and prevents the bag from drawing heat from your strike water when first submerged. Place the bag in the kettle with the grain, ensuring it can expand freely as it fills with grain.
- Step 3 means adding the grain to your strike water. Pour the milled grains slowly into the bag while stirring continuously. This is where many beginners struggle with dough balls, which are dry clumps of grain that fail to mix with the water. Stir vigorously as you add grain, and break apart any clumps immediately with your spoon or paddle. Proper mixing at this stage prevents uneven conversion and ensures consistent results.
- Step 4 covers reaching and maintaining your target mash temperature. After adding all grain, check your thermometer reading. If you are within 2-3 degrees of target, you are in good shape. If needed, apply gentle heat to raise temperature, or add small amounts of hot water to bring it up. Once at target, cover the kettle with a lid and let it rest for the duration of your mash, typically 60 minutes for most recipes.
- Step 5 addresses maintaining temperature throughout the mash. Forum discussions reveal this as one of the most common challenges, especially in cooler environments. Many homebrewers wrap their kettle in a sleeping bag or blanket to insulate it during the mash. Some use sous vide controllers for precise temperature maintenance. A temperature drop of more than 2-3 degrees during the mash may affect conversion efficiency.
- Step 6 is the critical grain bag removal process. When your timer signals the end of the mash, it is time to extract the grain bag. Allow the bag to drip freely over the kettle for several minutes to maximize yield. Resist the urge to squeeze immediately, as squeezing can extract tannins and create astringency in your beer. After thorough draining, you can apply gentle pressure to extract additional liquid, but do so carefully.
- Step 7 involves the optional sparge step. Traditional BIAB brewing often skips sparging entirely, relying on the no-sparge method for simplicity. However, some brewers perform a light sparge by sprinkling hot water over the grain bag as it drains to improve efficiency. If you choose to sparge, use water at approximately 170-175F and limit the additional volume to avoid over-extraction.
Tips and Techniques for Better BIAB Results
Temperature management separates successful BIAB brewers from frustrated ones. If you brew in a garage during winter, your mash will lose heat rapidly without insulation. Conversely, in a warm kitchen, you may need to add cold water to bring temperatures down after adding grains. Experiment with your specific environment and adjust accordingly. Many experienced BIAB brewers keep a heating pad or brew blanket specifically for temperature maintenance.
Avoiding dough balls requires attention during grain addition and thorough initial mixing. Run your immersion heater or element at low power while adding grain to provide gentle circulation. Stir in multiple directions, reaching into corners of your kettle to find dry pockets. If you notice dough balls after the fact, smash them with your spoon or immersion blender until they disperse. The starch inside these clumps will not convert properly if left alone.
Efficiency in BIAB varies considerably based on technique and equipment. Forum users report ranges from 65% to 84% efficiency in their batches. The variation stems from factors like grain crush, water-to-grain ratio, mash thickness, and how thoroughly you extract the grain bag. Thicker mashes (lower water-to-grain ratios) tend to produce higher sugar concentrations but can suffer from poor conversion. Most BIAB brewers target around 70-75% efficiency and adjust recipes accordingly.
Grain crush significantly impacts your results. BIAB requires a finer crush than traditional fly-sparging systems because the grain bed does not have a false bottom or manifold to separate liquid from solids. A standard homebrew mill setting of 0.035-0.040 inches works well. If you purchase pre-milled grain from a homebrew shop, ask for a fine crush specifically suited for BIAB or fly sparging systems rather than the standard crack recommended for extract brewing.
The squeeze debate continues among BIAB practitioners. Some argue that squeezing releases too many tannins and creates astringent flavors. Others find that gentle squeezing improves efficiency without noticeable flavor impact. Our team recommends allowing extended draining time (10-15 minutes) before attempting any squeezing, and only applying light pressure if needed. For most batches, proper draining time yields sufficient volume without the risk.
Troubleshooting Common BIAB Problems
Temperature drops during the mash often plague BIAB brewers, especially those using thin-walled pots or brewing in cold spaces. The solution involves improving insulation rather than adding heat during the mash. Wrap your kettle in a sleeping bag, comforter, or specialized brew blanket before the mash begins. Some brewers preheat their kettle and grains in a warm location. If you must add heat, do so very gently to avoid hot spots that can denature enzymes on the edges of your grain bed.
Stuck mashes, where liquid fails to drain properly from the grain bag, rarely occur in BIAB because the bag acts as a filter rather than a grain bed in a separate tun. However, if you experience slow drainage, check your bag mesh size. Too fine a mesh can create suction and slow drainage. Also ensure the bag is not folded or twisted in a way that blocks flow. Running a small amount of backflush water through the bag after each brew helps maintain proper flow for future batches.
Low efficiency manifests as lower-than-expected original gravity readings. Before assuming something is wrong with your process, verify your hydrometer calibration and temperature correction. If readings remain low, consider whether your grain crush is adequate. Finer crush improves conversion but risks stuck mashes. Also evaluate whether you are extracting enough liquid from the grain bag through draining and gentle squeezing. Finally, check that your volume measurements are accurate at each stage.
Dough balls indicate insufficient mixing during grain addition. Beyond the frustration of wasted grain, unconverted dough balls represent efficiency loss because the starch inside never contacts the enzymatic activity needed to convert it to sugar. If you consistently struggle with dough balls, try adding grains more slowly while maintaining vigorous stirring. Some brewers use a drill-mounted paint mixer for hands-free agitation. Others find that a second pair of hands makes the process much smoother.
Unexpected flavors in your BIAB beer often trace to extraction issues. Aversions to squeeze technique usually focus on tannin extraction, which occurs most readily when pH rises and temperature increases. Keeping your squeeze gentle and ensuring grain temperature stays below 170F minimizes this risk. Off-flavors can also stem from infection, which means reviewing your sanitation practices for every piece of equipment contacting cooled wort.
BIAB vs Other Brewing Methods
Comparing BIAB to extract brewing reveals fundamental differences in process and control. Extract brewing uses pre-made malt syrup or powder that breweries produce using industrial equipment. This ensures consistent fermentable sugar composition but limits your ability to customize the grain bill or adjust malt character. Extract brewers cannot truly perform a mash because the conversion already happened at the manufacturer. BIAB gives you complete control over this foundational step.
The transition from extract to BIAB represents a significant milestone in many homebrewers journeys. You will notice that your grain bill suddenly expands from a few specialty grains to handling ten or more pounds of base malt. The process takes longer and requires more attention, but the creative possibilities expand dramatically. You can formulate any beer style by selecting grains and adjusting the mash profile to target specific sugar profiles.
Against traditional three-vessel all-grain systems, BIAB sacrifices some efficiency for simplicity. Traditional systems use fly sparging or batch sparging to extract maximum sugar from grain beds through repeated rinsing. BIAB performs a single extraction, which typically yields 5-10% lower efficiency than multi-step sparging methods. In practice, BIAB brewers compensate by using slightly larger grain bills or adjusting recipe calculations to hit target gravities.
The equipment advantage of BIAB becomes clear when considering space, cost, and cleanup. A complete three-vessel system requires substantial floor space and hundreds of dollars in vessels, pumps, and accessories. BIAB beginners can start with a single eight-gallon kettle and a bag for under fifty dollars. Cleanup involves rinsing one pot and laundering one bag. For homebrewers with limited space or budget, BIAB removes the biggest barrier to all-grain brewing.
FAQs
What is the brew in a bag method?
The Brew in a Bag method is an all-grain brewing technique where grains are placed inside a single mesh bag submerged in water within one vessel. The bag acts as both mash tun and lauter tun. You heat strike water, add the grain bag, hold it at target temperature for the mash duration, then lift the bag out when finished. This simplifies all-grain brewing by eliminating separate vessels for mashing, sparging, and boiling.
How long do you brew in a bag mash?
A typical BIAB mash lasts 60 minutes at the target temperature, which usually falls between 148F and 154F depending on the beer style. Some recipes with specialty grains may use shorter rests of 30-45 minutes, while certain high-gravity styles benefit from longer mashes up to 90 minutes. Most homebrewers use a 60-minute mash as their default and adjust based on recipe requirements.
Do you sparge with brew in a bag?
Sparging is optional in BIAB brewing. Traditional BIAB uses a no-sparge method where you simply lift the grain bag after the mash and let it drain. However, many brewers perform a light sparge by sprinkling hot water (170-175F) over the grain bag to improve efficiency by 5-10%. If you choose to sparge, use minimal water volume to avoid over-extraction and astringency.
What do I need for brew in a bag?
Essential BIAB equipment includes a large kettle (at least 8 gallons for 5-gallon batches), a food-safe mesh grain bag, a reliable thermometer, and a heat source. Optional but recommended items include a hoist or pulley system for lifting heavy bags, a refractometer or hydrometer for gravity readings, an insulated blanket for temperature maintenance, and a stick-on thermometer for continuous monitoring. Starting with basic equipment, you can upgrade as you gain experience.
Conclusion
The Brew in a Bag method opens the door to all-grain brewing without requiring a garage full of equipment or years of experience to get started. You can produce professional-quality beer with a single kettle, a grain bag, and attention to temperature management. The technique has proven itself among thousands of homebrewers who have made the transition from extract brewing to full all-grain control.
Start with a simple recipe and focus on hitting your temperature targets consistently. Once you have a few successful batches behind you, experiment with different grain bills and mash temperatures to understand how the process affects final flavor. The beauty of BIAB lies in its simplicity, but the depth of customization rewards continued learning and refinement.