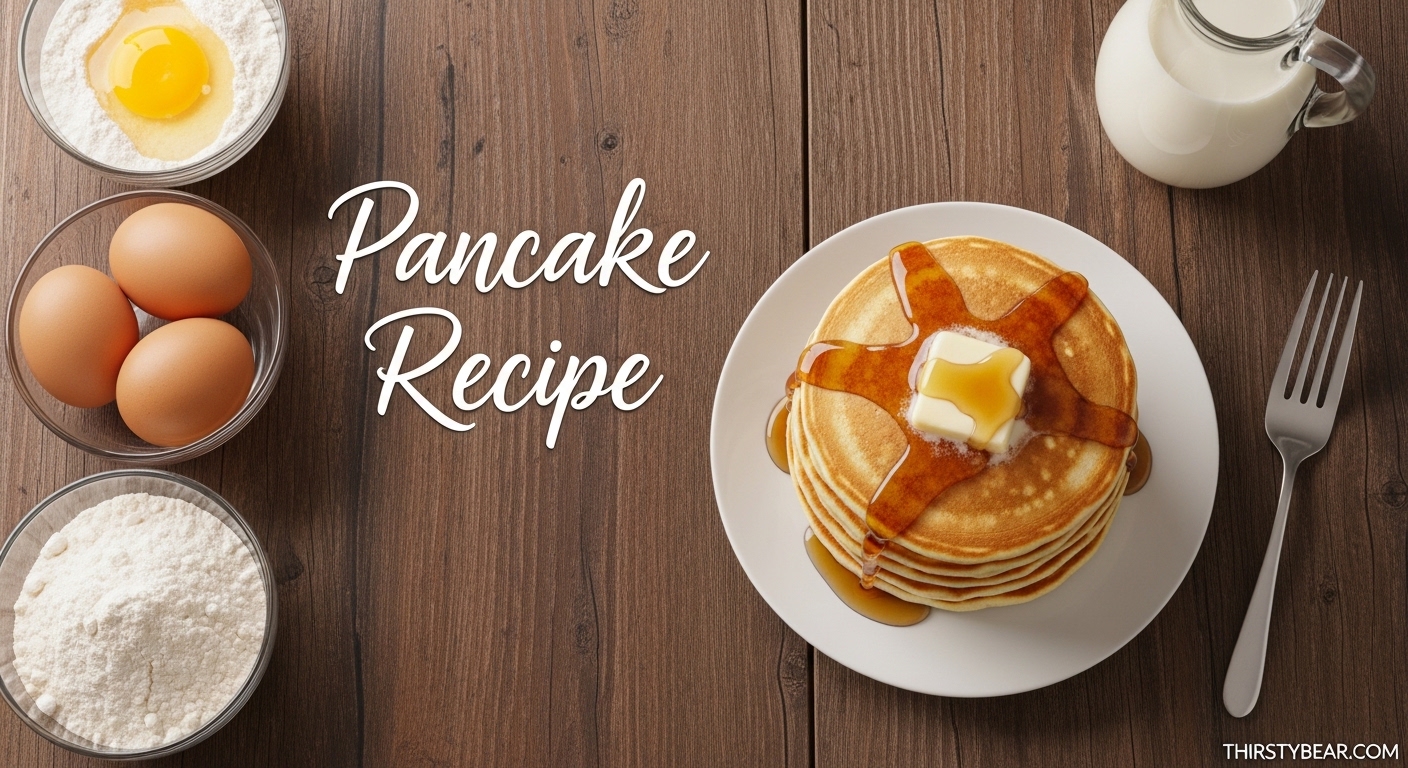
This pancake recipe is your ultimate guide to making the fluffiest, most golden-brown stacks right in your own kitchen. In just a few simple steps, you will learn how to mix the perfect batter, the secret ingredient that guarantees height, and the exact temperature needed for that golden crust. By the time you’re done reading, you’ll be flipping like a pro.
Here is exactly what I’m going to cover in this article:
- The secret “resting” trick for fluffier cakes
- A breakdown of the essential ingredients and why they matter
- Step-by-step cooking instructions anyone can follow
- My favorite flavor variations to spice things up
- Troubleshooting tips for common pancake fails
There’s nothing quite like the smell of butter hitting a hot griddle on a lazy Sunday morning. I used to think making pancakes from scratch was some kind of culinary sorcery reserved for diners and grandmas. I honestly believed the boxed mixes were “good enough.” That was until I spent a full month testing flour ratios and milk combinations in my tiny kitchen. I realized pretty quickly that the difference between a flat, rubbery disc and a cloud-like pancake comes down to a few tiny details—details that most recipes skip over. Today, I’m handing over the keys to the kingdom. This isn’t just a list of instructions; it’s the culmination of my obsession with breakfast perfection.
Why This Is The Only Pancake Recipe You’ll Ever Need
I’ve tried dozens of “best ever” recipes online. Some were too complicated, requiring you to separate eggs and whip whites for twenty minutes. Others were too simple, resulting in bland, dense hockey pucks. I wanted something in the middle—a recipe that feels easy enough to make while I’m still drinking my first cup of coffee, but tastes like it came from a high-end brunch spot.
What makes this specific pancake recipe stand out is the balance of ingredients. We aren’t just mixing flour and milk; we are building a structure.
The Science Behind the Fluff
Okay, I promise not to bore you with a chemistry lecture, but understanding why things happen helps you cook better. The “fluff” in a pancake comes from two things: chemical leaveners and steam.
Most recipes call for baking powder, and that’s our heavy lifter here. But what many people miss is the reaction that happens when the wet ingredients hit the dry. You see those bubbles forming? That’s the gas being released. If you cook the batter immediately, you trap that gas. If you let the batter sit for 10 minutes (which I highly recommend), the flour hydrates, and the baking powder gets a head start. This is the secret sauce.
The Essential Ingredients for Success
Before we even turn on the stove, let’s talk about what goes into the bowl. Quality matters here, but substitutions work too if you know the rules.
- All-Purpose Flour: This is your standard base. I’ve tested this with cake flour (too soft) and bread flour (too chewy). Stick to AP flour for that classic texture. If you want a healthier twist, you can swap half for whole wheat, but expect a denser result.
- Baking Powder: Make sure yours is fresh. If it’s been sitting in your pantry since last 2026, toss it. It loses potency after six months, and your pancakes will pay the price.
- Sugar: I use white sugar for a neutral sweetness, but brown sugar adds a lovely caramel note. It’s up to you!
- Salt: Don’t skip this. It balances the sugar and wakes up the flavors. Without salt, pancakes taste flat.
- Egg: One large egg provides structure and richness. I always bring mine to room temperature so it blends easier with the milk.
- Milk: Whole milk creates a rich batter. If you are dairy-free, almond or oat milk works surprisingly well. In fact, I sometimes use buttermilk for a tangier, diner-style flavor.
- Melted Butter: Unsalted is best so you can control the salt level. This adds that crispy edge we all love.
My Go-To Fluffy Pancake Recipe
Here is the moment you’ve been waiting for. Grab your apron, and let’s get mixing. This is the exact ratio I use every single weekend, and it has never let me down.
Prep time: 10 minutes
Cook time: 15 minutes
Servings: 4 hungry people
The Ingredients
- 1 ½ cups all-purpose flour
- 3 ½ teaspoons baking powder (yes, that much!)
- 1 tablespoon white sugar
- ¼ teaspoon salt
- 1 ¼ cups milk (plus more if needed for thinning)
- 1 egg
- 3 tablespoons melted butter (plus extra for the pan)
- 1 teaspoon vanilla extract (don’t skimp on this!)
The Instructions
- Whisk the Dry Ingredients: Grab a large mixing bowl. Add the flour, baking powder, sugar, and salt. Whisk them together thoroughly. You want to make sure the baking powder is evenly distributed so every pancake rises the same amount. I can’t tell you how many times I’ve bitten into a pancake with a clump of baking powder—it’s not a fun experience!
- Mix the Wet Ingredients: In a separate bowl or a large measuring jug, whisk the egg, milk, melted butter, and vanilla extract. Pro tip: Let the butter cool slightly before adding it to the milk and egg, or you might end up with scrambled egg bits.
- The Gentle Fold: Pour the wet mixture into the dry mixture. Now, this is where most people mess up. Use a spatula or a spoon, not a whisk. Mix until just combined. I’m talking about stopping while there are still streaks of flour and lumps of batter.
- Why? Because over-mixing develops gluten. Gluten is great for bread, but it’s the enemy of a tender pancake. If you mix until smooth, your pancakes will be tough and rubbery. Trust the lumps—they will disappear on the griddle.
- The Rest Period: Let the batter sit on the counter for 5 to 10 minutes. This is non-negotiable in my kitchen. While it rests, the flour relaxes, and the baking powder starts forming bubbles inside the batter. You’ll see the top of the batter get slightly foamy. That’s the sign of a good rise.
- Preheat Your Pan: Heat a non-stick pan or a cast-iron skillet over medium-low heat. I usually set my burner to about a 3 or 4 out of 10. You want it hot enough to sizzle but not so hot that it burns the butter. To test if it’s ready, flick a few drops of water onto the surface. If they dance and sizzle, you’re good to go.
- Cook to Perfection: Lightly grease the pan with a little butter (or oil). Ladle about ¼ cup of batter per pancake onto the skillet. Don’t crowd the pan; give them space to grow.
- Watch for the bubbles. You’ll see them start to form on the edges and then move toward the center. Once the bubbles start popping and leaving small holes that stay open (usually after 2-3 minutes), it’s time to flip.
- The Flip: Slide your spatula underneath confidently and flip in one smooth motion. Cook the other side for another 1-2 minutes until golden brown. I always peek underneath to check the color.
Common Mistakes to Avoid
I’ve made every mistake in the book so you don’t have to. Here are the top pitfalls I see people run into when trying a new pancake recipe.
1. Cooking on High Heat
This is the number one error. If your heat is too high, the outside burns while the inside stays raw and gummy. Low and slow is the name of the game. If your pancakes are getting dark too fast, turn that dial down.
2. Pressing Down with the Spatula
Please, for the love of breakfast, do not press down on your pancakes after you flip them! I see people doing this at diners all the time and it hurts my soul. Pressing them down squishes out the air pockets we worked so hard to create. Let them cook undisturbed.
3. Measuring Flour Incorrectly
Scooping the measuring cup directly into the flour bag packs it down. You could end up with way more flour than the recipe calls for, resulting in dry pancakes. Instead, spoon the flour into the cup and level it off with a knife. Or better yet, get a kitchen scale. It changed my baking life.
Delicious Variations to Try
Once you master the base recipe, the world is your oyster—or your pancake house. I love playing around with add-ins. Here are my family’s favorites:
- Blueberry Lemon: Add ½ cup of fresh blueberries and the zest of one lemon to the batter right before cooking. The lemon zest cuts through the sweetness beautifully.
- Chocolate Chip: A classic for a reason. Sprinkle chocolate chips onto the pancakes after you pour the batter into the pan, rather than mixing them into the bowl. This prevents the chips from smearing or burning on the bottom of the bowl.
- Cinnamon Streusel: Mix 2 tablespoons of brown sugar with 1 teaspoon of cinnamon. Sprinkle this over the wet side of the pancake right before flipping. It creates a crunchy, cinnamon-sugar crust that tastes like a coffee cake.
Topping Ideas Beyond Maple Syrup
Don’t get me wrong, I love pure maple syrup. But sometimes I want to elevate the experience.
- Whipped Cream & Fresh Fruit: A classic combo that makes breakfast feel like dessert. Strawberries, bananas, or even sautéed apples work wonders.
- Nut Butter Drizzle: Warm up some peanut butter or almond butter in the microwave for 15 seconds. Drizzle it over the stack for a protein-packed topping.
- Yogurt & Honey: For a lighter vibe, top with Greek yogurt, a drizzle of honey, and a handful of granola. It adds a nice crunch.
Troubleshooting Your Pancake Recipe
Even with the best instructions, things happen. Here is a quick diagnostic guide if your pancakes don’t turn out exactly right.
Why are my pancakes flat?
Your baking powder might be expired, or you might have over-mixed the batter. Remember, lumps are friends! Also, make sure you didn’t skimp on the milk—batter that is too thick won’t spread properly.
Why are they rubbery?
This is almost always over-mixing. You developed too much gluten. Next time, stop mixing as soon as the dry flour disappears.
Why are they burnt on the outside and raw inside?
Your pan is too hot. Drop the heat down to medium-low and give them a little more time to cook through.
How to Store and Reheat Leftovers
I often double this pancake recipe just so I have leftovers for the busy weekdays. Here is how I store them so they taste just as good the next day.
- Refrigerating: Let the pancakes cool completely. Stack them with a piece of parchment paper between each one so they don’t stick together. Place them in a zip-top bag or an airtight container. They will keep in the fridge for up to 3 days.
- Freezing: This is my favorite meal prep hack. Freeze them on a baking sheet first (so they don’t freeze together in a block), then transfer to a freezer bag. They’ll stay good for up to 2 months.
- Reheating: The microwave is easy, but it makes them soft. For that “just off the griddle” texture, pop them in the toaster. It reheats the center and crisps up the edges perfectly.
Pro Tips for the Perfect Breakfast
As we near the end of our culinary journey, I want to leave you with a few final nuggets of wisdom I’ve picked up over the years.
- Use a Ladle or Ice Cream Scoop: This ensures all your pancakes are the same size, which helps them cook evenly.
- Wipe the Pan Between Batches: If you are using butter, the milk solids can burn and leave black specks on your next batch. Give the pan a quick wipe with a paper towel and add fresh butter.
- Make it a Bar: Set out bowls of toppings (nuts, syrups, fruits, whipped cream) and let your family build their own stacks. It turns cooking into an event.
Frequently Asked Questions
I get asked a lot of questions about this process, so I compiled the most common ones here to help you out.
Can I make this pancake recipe dairy-free?
Absolutely! You can swap the milk for almond milk, soy milk, or oat milk one-for-one. For the butter, you can use a neutral oil like vegetable or canola oil, or a vegan butter alternative. The texture might be slightly different, but they will still be delicious.
Why do I need to let the batter rest?
Resting the batter is crucial. It allows the gluten strands that formed during mixing to relax, making the pancakes tender. It also gives the baking powder time to activate, which creates those tiny air bubbles that lead to a fluffy interior.
Can I add protein powder to the mix?
Yes, you can! I do this often. Replace about ¼ cup of the flour with a scoop of vanilla protein powder. You might need to add a splash more milk to get the right consistency, as protein powder absorbs liquid differently than flour.
Is it better to use oil or butter for cooking?
It depends on what you like. Butter adds a rich, nutty flavor and helps create that beautiful golden crust. However, butter burns easily. Oil has a higher smoke point and creates a more uniform surface, but it lacks that buttery flavor. I usually use butter for flavor and keep a close eye on the heat.
Final Thoughts
Cooking doesn’t have to be complicated to be amazing. This pancake recipe is proof that a few simple techniques—like resting the batter and using the right heat—can transform basic pantry staples into something spectacular. I hope this guide gives you the confidence to put away the boxed mix forever.
Remember, it’s okay if your first batch isn’t picture-perfect. It took me plenty of tries to get my flip right and my batter consistency down. The most important thing is that you enjoy the process and, of course, the delicious results.
If you loved this guide, make sure to bookmark this page for your next weekend brunch! I’m always updating my recipes with new tips and tricks. Happy cooking!