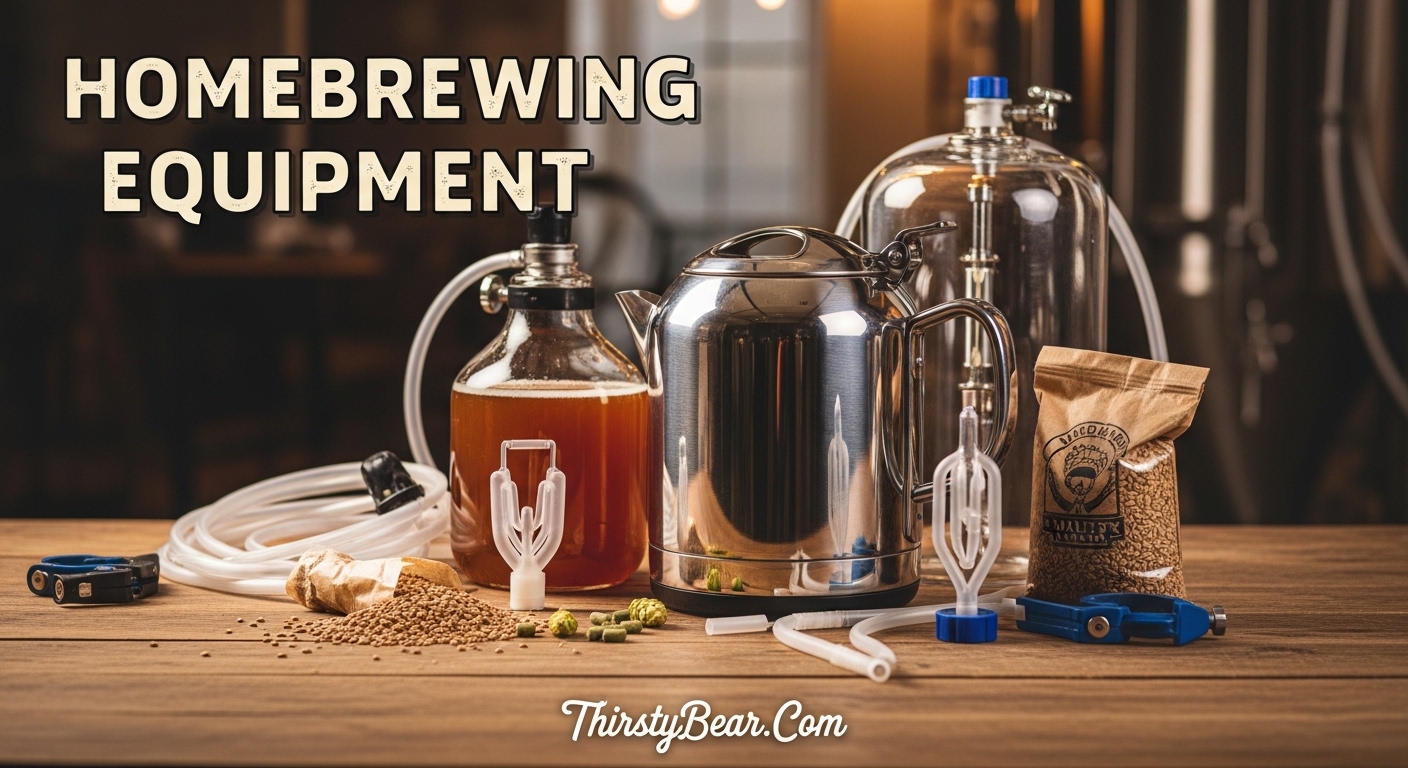
So you want to brew your own beer at home. I get it. The idea of cracking open a cold one that you made yourself, right in your kitchen, is pretty satisfying. But before you start picturing yourself as a craft beer mogul, you need to understand one thing: the right homebrewing equipment separates the brewers who consistently make great beer from those who dump batch after batch down the drain.
This guide cuts through the noise. No fluff, no fancy jargon, just the equipment you actually need to start brewing drinkable beer today. We will cover the bare minimum, the essentials that make better beer, and the common mistakes that trip up most beginners.
The good news? You do not need to spend a fortune to get started. Many homebrewers built their first solid setups for under $150, and you can scale up as you get more serious. Let us walk through exactly what to buy and why.
Quick Checklist of Homebrewing Equipment Essentials
If you want the short version, here is what you need to get started brewing at home:
- Fermenter with airlock – A 5-gallon glass carboy or plastic bucket
- Brewing kettle – At least an 8-gallon stock pot for 5-gallon batches
- Sanitizer – No-rinse food-grade sanitizer like Star-San
- Thermometer – Digital thermometer for hitting mash temperatures
- Racking cane or auto-siphon – For transferring beer between vessels
- Bottling bucket with spigot – For adding priming sugar and bottling
- Bottles – 48 bottles for a 5-gallon batch, or use one big jug
- Capper and crown caps – For sealing your bottles
- Hydrometer – For measuring gravity and tracking fermentation
That is the complete list. Everything else is optional, though some extras genuinely make the process easier. We will get into all of that below.
The Fermenter and Airlock: Your Most Important Piece of Equipment
The fermenter is where the magic happens. Yeast converts sugar into alcohol and CO2 inside this vessel, and picking the right one matters more than most beginners realize.
You have three main options: plastic bucket, glass carboy, or conical (Fermonster) plastic. Each has trade-offs.
- Plastic bucket fermenters are cheap, lightweight, and easy to clean. The downside is they can scratch and harbor bacteria in those scratches over time. Most beginners start here because kits often include one.
- Glass carboys are the classic choice. They do not scratch, they are easy to see through, and many brewers swear by them. The problem is they are heavy, fragile, and awkward to move when full. One crack can ruin your batch.
- Conical fermenters like the Fermonster are my recommendation if you plan to brew more than a few batches. The bottom dumps trub and sediment easily, and you can dry-hop and crash the beer without complicated transfers.
Whatever you pick, you need an airlock. This little device lets CO2 escape during fermentation while keeping oxygen and contaminants out. Fill it with a few drops of sanitizer or water. During active fermentation, you will see it bubble away. That bubble is proof your yeast is alive and working.
Brewing Kettle Requirements
Your brew kettle needs to be big enough to handle a full batch plus room for boiling. For a standard 5-gallon batch of finished beer, you typically start with about 6-7 gallons of wort because of boil-off and trub loss.
That means you need at least an 8-gallon kettle, preferably 10 gallons to be safe. The extra space prevents boil-overs, which are messy and stressful.
Material-wise, stainless steel is the way to go. It heats evenly, does not react with beer, and lasts forever. Avoid aluminum if you can, though it works in a pinch. Do not use anything with non-stick coating, as it can flake and ruin your beer.
If you are doing extract brewing, your kettle needs to reach boiling temperatures only. For all-grain brewing, you need precise temperature control for mashing, which adds complexity. Start with extract if you want to keep things simple.
Sanitization Equipment: Do Not Skip This
Here is a hard truth that many beginners learn the hard way: sanitation is the difference between good beer and a contaminated mess. Off-flavors, infections, and ruined batches almost always trace back to poor sanitation.
The good news is that modern no-rinse sanitizers make this easy. My go-to is Star-San, a food-grade acid sanitizer that you mix with water and simply dump into your equipment. No rinsing needed. Just let it sit for a minute, then pour it out and brew.
PBW (Powdered Brewery Wash) is great for cleaning before you sanitize. It removes organic gunk that sanitizer cannot handle alone. Think of it as dish soap for your brewing equipment.
One common beginner mistake is thinking that boiling or dishwashing is enough. It is not. You need actual sanitizer to kill the bacteria and wild yeast that soap and hot water leave behind.
Keep your sanitizer in a spray bottle for quick touch-ups during brewing. Anything that touches your beer after fermentation starts needs to be sanitized: tubing, racking canes, spoons, thermometers, everything.
Thermometer and Hydrometer
Temperature control is critical in brewing, and you need two different measuring tools for two different jobs.
A digital thermometer tells you the temperature of your wort at various stages. For extract brewing, you mainly need it to check that your wort is cool enough to pitch yeast (below 80F). For all-grain brewing, hitting precise mash temperatures (typically 145-158F) directly affects the sugars your grain produces.
Look for a thermometer with a fast response time and decent range. Thin probes work better than bulky ones for getting readings in small spaces. Many brewers keep a backup because thermometers fail at the worst times.
A hydrometer measures the specific gravity of your beer, which tells you how much sugar is dissolved in the liquid. You use it to calculate your original gravity (before fermentation) and final gravity (after fermentation), which lets you determine your beer ABV and whether fermentation is complete.
Using a hydrometer is simple. Fill a test jar with sample beer, float the hydrometer in it, and read where the liquid crosses the scale. Write down the numbers. This data helps you replicate successful batches and troubleshoot problems.
Siphoning and Transfer Equipment
Moving beer from one vessel to another without stirring up sediment is an art. Siphoning lets you transfer clear beer while leaving the gunk behind.
The classic setup is a racking cane (a bent plastic tube) connected to tubing. You start the siphon by sucking on the tubing like a straw, then clamp it off and direct the flow into your bottling bucket or secondary fermenter.
Many beginners hate this step because sucking on a tube feels weird and sometimes you get beer in your mouth. Auto-siphons solve this problem. They have a larger diameter and start flowing automatically once you fill them, no mouth-sucking required.
Get at least 3-4 feet of food-grade tubing. You need length to reach your destination vessel without stirring up the source. Clear tubing helps you see what is happening, though opaque works too.
Bottling Essentials
Once fermentation is done, you need to get your beer into bottles. This requires a few specific pieces of equipment.
- Bottles: You need about 48 twelve-ounce bottles for a 5-gallon batch. You can reuse bottles from store-bought beer (twist-offs work fine with a bench capper) or buy new ones. Amber bottles protect against light skunking better than green or clear bottles.
- Bottling bucket: This is a plastic bucket with a spigot near the bottom. You add priming sugar to the bucket, rack your finished beer on top, and the carbonation happens naturally in the bottles over the next 2-3 weeks.
- Bottle filler: This spring-loaded wand makes filling bottles easy. You push it to the bottom of each bottle, open the spigot, and withdraw slowly as the bottle fills. This prevents splashing and oxygen uptake.
- Caps and capper: You need crown corks and a capper to seal them. Bench cappers are more reliable than wing cappers, which can bend caps. A good capper lasts decades.
- Priming sugar: Typically corn sugar or DME, this feeds the remaining yeast and creates CO2 for carbonation. The amount depends on your batch size and desired carbonation level. Most priming sugar packs come with directions.
The Mash Temperature Enzyme Chart
If you plan to do all-grain brewing, understanding mash temperature is essential. The enzymes in your grain convert starches to sugars, and temperature controls which enzymes are active and what kind of sugars they produce.
Here is how it works:
- Beta-Amylase (145-150F): This enzyme produces more fermentable sugars. Lower mash temps in this range create drier, more attenuated beers with higher alcohol potential. Great for saisons, table beers, and dry IPAs.
- Alpha-Amylase (158-162F): This enzyme produces more unfermentable sugars. Higher mash temps create sweeter, fuller-bodied beers with more mouthfeel. Great for stouts, porters, and malty amber ales.
- Medium Range (150-158F): A balance between the two. Most commercial breweries target this range for balanced, drinkable beers.
- Mash thickness (water-to-grain ratio) also affects enzyme activity, but that is an advanced topic. For now, focus on temperature control within 2-3 degrees of your target.
Budget Considerations: What Does Homebrewing Equipment Cost?
One of the biggest questions beginners ask is how much they need to spend. Here is a realistic breakdown.
- Starter kit route: A basic kit with fermenter, bottling bucket, racking cane, tube, thermometer, and bottles often runs $80-120. Add a $30-50 brew kettle and you are at $110-170 total.
- Individual pieces route: Buying separately gives you better quality control but costs more upfront. A solid setup runs $150-250 minimum if you shop carefully.
- Essential-only budget: If money is tight, you can start with just a fermenter, airlock, sanitizer, a big pot, and basic bottling supplies for around $75-100. You will be limited in batch size but you can brew.
- Upscale starter: Want a nice setup from day one? Budget $300-500 for a stainless kettle, conical fermenter, auto-siphon, and quality thermometer and hydrometer. This lasts you years without upgrades.
My advice? Start mid-range. Too cheap and you will fight your equipment. Too fancy and you might quit before you learn what matters. $150-200 is the sweet spot for most beginners.
Space Requirements for Apartment Brewers
You do not need a garage or basement to brew beer. Many excellent homebrewers work in studio apartments and small kitchens.
For a basic extract setup, you need counter space for your brew kettle and floor space for your fermenter during fermentation (which takes 1-2 weeks). The fermenter should be somewhere with stable temperature, away from direct sunlight, and out of the way.
A 5-gallon batch of beer in a glass carboy weighs over 40 pounds when full. Make sure your floor or shelf can handle that weight.
If space is really tight, consider a 1-gallon batch kit instead. These small-batch systems fit in a kitchen cabinet, use a single glass jug instead of a carboy, and require only about 12 bottles per batch. You learn the same principles with a fraction of the space and ingredient commitment.
Storage is another consideration. Where will you keep bottles between batches? A closet works. Do not underestimate how many bottles accumulate if you brew regularly.
Starter Kit vs Individual Pieces
Kits are popular for a reason. They include everything you need to brew your first batch, and everything works together. The downside is that kits often include lower-quality components that experienced brewers would replace.
If you buy a kit, check what kettle size it includes. Many starter kits come with a 4-gallon pot, which is too small for a proper 5-gallon batch. You may need to upgrade that immediately.
Buying separately lets you choose better components from the start. You might spend 20-30% more, but you get equipment that lasts longer and performs better.
My recommendation: if you found this article, do your research before buying. Make a list of exactly what you need, read reviews, and buy the best quality you can afford. A well-chosen setup pays for itself in fewer ruined batches.
Common Beginner Mistakes to Avoid
After watching hundreds of new brewers stumble, here are the mistakes I see most often.
- Skipping sanitation: I already mentioned this, but it deserves repeating. Sanitize everything. Every. Single. Thing. That touches your beer after the boil.
- Ignoring temperature: Fermentation temperature matters enormously. Yeast produces off-flavors when too hot, and can stall when too cold. 65-68F is ideal for most ale yeasts. Do not ferment in a hot garage in summer.
- Rushing the process: Patience is a brewer virtue. Beer takes time. Rushing fermentation, bottling too early, or drinking before carbonation is complete are common rookie errors.
- Not taking gravity readings: You cannot know if fermentation is finished without a hydrometer reading. Guessing is not good enough.
- Overcomplicating early: Start with simple extract recipes. Master the basics before trying fancy techniques. Build your process before your equipment wishlist.
FAQ: Your Homebrewing Equipment Questions Answered
What’s the essential equipment I need to get started?
At minimum, you need a 5-gallon fermenter with airlock, an 8-10 gallon brew kettle, no-rinse sanitizer, thermometer, racking equipment, bottling bucket with spigot, bottles, caps, and a capper.
What are the bare minimum equipment to be purchased to start homebrew?
The bare minimum is a fermenter, airlock, brew kettle, sanitizer, thermometer, and basic bottling supplies. You can start for under $100 with carefully chosen components.
What is must have brewing equipment?
The fermenter with airlock is the most critical piece. Without it, you cannot ferment beer. Everything else supports the fermentation process or handles the beer afterward.
How much does homebrewing equipment cost for beginners?
A basic starter kit runs $80-120, plus $30-50 for a kettle. A complete quality setup costs $150-200. Premium equipment can run $300-500 but lasts much longer.
Why is sanitation so important in homebrewing?
Bacteria and wild yeast contaminate beer, causing off-flavors, infections, and ruined batches. Sanitizer kills these contaminants. Most brewing failures trace back to poor sanitation practices.
Final Thoughts: Getting Started with Homebrewing Equipment
Homebrewing equipment does not have to be overwhelming. Start with the essentials, learn your process, and upgrade as you go. The best brewers did not build their dream setups overnight. They started with basic gear, made mistakes, and gradually improved.
Focus on sanitation, temperature control, and patience. Those three things matter more than any fancy equipment. A beginner with a plastic bucket, a stock pot, and disciplined sanitation will make better beer than a careless brewer with $1000 of gear.
Invest in quality where it counts: a good fermenter, reliable thermometer, and food-grade tubing. Everything else can be basic. When you are ready to upgrade, you will know exactly what you need because you will have felt the limitation.
Now go brew something. That first batch you make yourself, even if it is not perfect, will taste better than anything you bought. Because you made it.