Making your own cocktail bitters at home is one of the most rewarding projects you can tackle in your home bar. These concentrated botanical extracts transform ordinary drinks into something special, adding depth and complexity with just a few drops. While bitters have been a staple of classic cocktails for centuries, most home bartenders never realize how simple they are to make from scratch.
In this guide, I’ll walk you through the complete process of making cocktail bitters at home. You’ll learn what bitters actually are, which ingredients you need, and exactly how to extract those powerful flavors. By the end, you’ll have the knowledge to create your own custom bitters and elevate every drink you make. This technique has been used by professional mixologists for generations, and now you can do it in your own kitchen with nothing more than a few jars and some patience.
Table of Contents
What Are Cocktail Bitters?
Cocktail bitters are high-proof alcohol infusions made with bittering agents, herbs, spices, and dried fruit. They function as what bartenders call “cocktail seasoning” — similar to how salt enhances food, bitters bring out the best in cocktails. A few dashes can balance sweetness, add complexity, and tie together all the flavors in a drink.
The key to true bitters lies in the bittering agents. These are plants that contain bitter compounds, primarily gentian root, which provides the signature bitter flavor without adding much of its own taste. Other bittering agents include cinchona bark (the same thing used in tonic water), quassia bark, and wormwood. Without these base ingredients, you’re just making flavored vodka — not true bitters.
Commercial brands like Angostura bitters have been around since the 1800s, but making your own allows you to create unique flavor profiles. You can experiment with different botanicals, adjust the bitterness level, and produce something that simply cannot be found on any store shelf. The process takes anywhere from two to four weeks, but most of that time is simply waiting for extraction to do its work.
Ingredients for Making Cocktail Bitters
Every batch of bitters starts with a foundation of high-proof alcohol. This is not the place to use your everyday vodka. You need something at least 100 proof (50% ABV) to properly extract the bitter compounds and volatile oils from your botanicals. Everclear (190 proof) is the most common choice among home bitters makers, though 151-proof rum also works well and adds a subtle sweetness.
For the bittering base, you’ll need gentian root. This is the essential ingredient that makes bitters actually bitter. Gentian root comes from the Gentiana plant family and provides a clean, dry bitterness that forms the backbone of your bitters. You can find it dried from herbal suppliers. Plan on using about one tablespoon of gentian root per cup of alcohol for a properly bitter result.
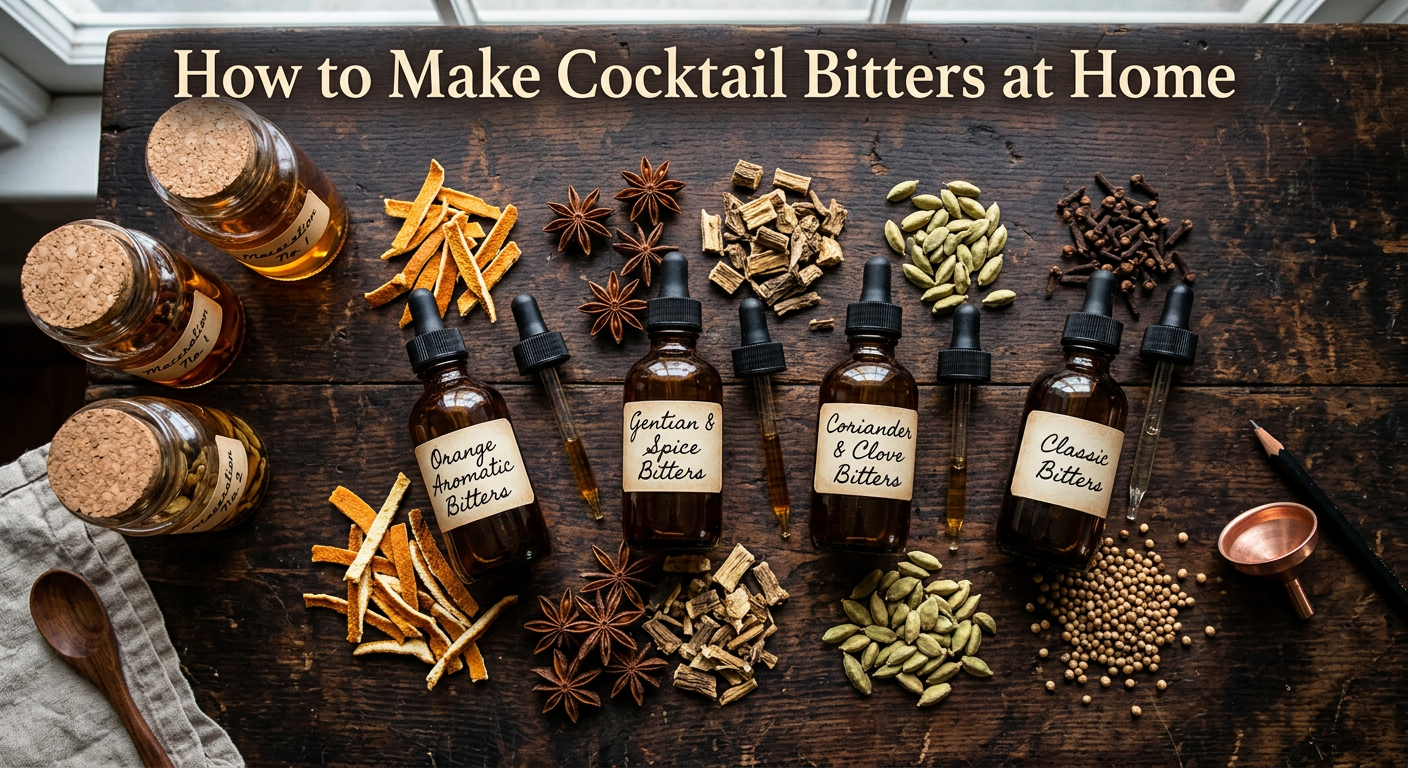
Your flavor botanicals are where you can get creative. Here is what experienced bitters makers recommend as a starting point:
- Dried orange peel (from organic oranges, unsprayed)
- Coriander seeds
- Whole cloves
- Cardamom seeds
- Star anise
- Allspice berries
- Fennel seeds
- Cinnamon sticks
Use about one teaspoon of each spice for a balanced orange-forward bitters. You can scale these up or down based on your preferences. Some makers also add vanilla beans, coffee beans, or even cacao nibs for additional complexity.
If you want a touch of sweetness in your finished bitters (like commercial brands), you can add simple syrup or caramel at the end. This is optional but helps round out very sharp bitter notes and makes the final product more versatile in cocktails.
Equipment Needed
The equipment requirements for making bitters are minimal, which is part of why this project is so accessible. You will need glass jars with tight-fitting lids for steeping — pint-sized mason jars work perfectly. These need to be large enough to hold your alcohol and botanicals with room for shaking.
For straining, you absolutely need a coffee filter. This is critical. Forum discussions reveal that using cheesecloth alone results in cloudy bitters. A simple pour-through coffee filter does the job, though it takes several hours for all the liquid to pass through. Be patient and do not squeeze the filter, as this introduces cloudiness.
You will also need small bottles for storage. Amber dropper bottles (1-2 oz) are ideal because they allow you to dispense bitters in precise dashes and protect the contents from light degradation. These are available from brewing suppliers and some craft stores.
Finally, grab a small funnel for transferring liquid between containers. That is really all you need beyond your ingredients.
Step-by-Step bitters Making Process
Here is the step-by-step process for making your first batch of cocktail bitters at home.
Step 1: Dry Your Citrus Peels
If you are using fresh orange peels (and you should, for orange bitters), start by removing the peels from four organic oranges. Try to get thick peels without too much pith attached, as the pith adds unpleasant bitterness beyond what you want. Lay the peels flat on a baking sheet and let them air dry for 24-48 hours, or until they are completely dried out and slightly leathery.
You can speed this up by using your oven on its lowest setting (around 200F) for 1-2 hours. Watch carefully to make sure they do not burn. Properly dried peels will shrink slightly and become firm to the touch. Any moisture left in the peels will dilute your alcohol and potentially spoil the batch.
Step 2: Combine Ingredients in Your Jar
Place your bittering agent (gentian root) and all your flavor botanicals into a clean glass jar. Add 1 cup of high-proof alcohol for every tablespoon of dried botanicals you are using. The ratio matters here — forum users consistently report that too little alcohol results in a muddy, hard-to-strain mess, while too much produces weak, watery bitters.
For a standard batch, combine:
- 1 cup Everclear or 151 rum
- 1 tablespoon gentian root
- 1 tablespoon dried orange peel
- 1 teaspoon coriander seeds
- 1/2 teaspoon whole cloves
- 1/2 teaspoon cardamom seeds
- 1/4 teaspoon star anise
Pour the alcohol over everything and stir gently to ensure all botanicals are submerged. Any material above the alcohol line will mold instead of infusing.
Step 3: Steep and Agitate Daily
Seal your jar tightly and store it in a cool, dark place. You need to shake it gently once or twice every day throughout the infusion period. This agitation keeps the botanicals moving and ensures even extraction. Set a daily reminder on your phone if you need to — it genuinely makes a difference in the final product.
The minimum steeping time is two weeks, but three to four weeks produces better results. The alcohol continues pulling out bitter compounds and essential oils over time. After the first week, taste a tiny drop (diluted in water) to check your progress. If it tastes too weak, let it go longer. If it seems overwhelming, you can dilute with a bit more alcohol.
Step 4: Test for Balance
Before you strain everything, take a small sample and test it. Bitters should taste intensely bitter with underlying botanical notes. They should not be one-dimensionally harsh — there should be complexity underneath the bitterness. If your bitters taste too harsh, they need more time. If they taste flat and boring, you might need more bittering agents next time.
Add any sweetener now if desired. Simple syrup (1:1 sugar to water) works well, added a few drops at a time until balanced. This is entirely optional but many commercial bitters include some sweetness to round out the edges.
Step 5: Strain Through Coffee Filter
Pour your infused liquid through a coffee filter into a clean container. This is the most time-consuming step — it can take 2-4 hours for all the liquid to pass through. Do not rush it by squeezing the filter, as this clouds the final product. If your filter gets clogged, let it sit and drain as long as needed.
Once strained, your bitters should be clear and free of sediment. Any cloudiness indicates that you either rushed the straining or used inadequate filtering material.
Step 6: Bottle and Label
Using your funnel, transfer the strained bitters into amber dropper bottles. Label each bottle with the contents and the date you made them. Your homemade bitters will keep for at least one year, possibly longer, stored in a cool dark place. The high alcohol content acts as a natural preservative.
Advanced Techniques: The Three-Jar Method
Once you have mastered the basic single-jar method, you can experiment with more advanced techniques for precise flavor control. The three-jar tincture method, popularized by professional bitters makers, separates your ingredients into three categories and steep them independently before blending.
The first jar contains your base bittering agents — gentian root, cinchona bark, or quassia bark — in high-proof alcohol. This tincture provides the bitter foundation and typically needs the longest steeping time (3-4 weeks).
The second jar holds your highlight botanicals — the spices and aromatics that define your bitters’ character. For orange bitters, this would be dried orange peel and supporting spices. This jar needs 2-3 weeks of steeping.
The third jar contains your accent ingredients — vanilla, coffee, or other delicate flavors that can be over-extracted. This jar only needs 1-2 weeks.
By keeping them separate, you can test and adjust each component before blending. Start with a 1:1:1 ratio and adjust to taste. This method requires more patience and more jars, but gives you complete control over the final balance. Forum users who have tried both methods often prefer the three-jar approach for creating consistent, refined bitters.
Classic Cocktails to Make with Your Bitters
Your homemade bitters will shine in classic cocktails that were designed around these concentrated flavorings. Here are the essential drinks to try with your first batch.
The Sazerac cocktail is arguably the most iconic bitters drink, traditionally featuring Peychaud’s bitters (though you can substitute with your own creation). This New Orleans classic combines whiskey, absinthe rinse, sugar, and bitters for a sophisticated sip that showcases exactly what bitters bring to the party.
The Manhattan cocktail is another natural fit — the drink’s name itself comes from the Manhattan Club where it was supposedly invented in the 1870s. Whiskey, sweet vermouth, and bitters is a combination that works because of how the bitters cut through the sweetness and add aromatic complexity.
The Rob Roy is essentially a Manhattan made with Scotch whisky instead of American whiskey. It demonstrates how versatile bitters can be — the same basic formula transforms completely based on the spirit base.
Even a classic martini can benefit from a few drops of orange bitters, especially when made with gin. The citrus notes complement the botanicals in the gin beautifully. For a more spirit-forward experience, try adding a dash to your next Sidecar cocktail to see how bitters enhance even citrusy drinks.
Storage and Shelf Life
One of the great things about homemade bitters is their longevity. Because they are made with high-proof alcohol and strained free of organic material, homemade bitters keep for at least a year, often longer. The alcohol content acts as a natural preservative, preventing the growth of bacteria or mold that might affect other homemade infusions.
Store your bottles in a cool, dark place like a cabinet or pantry. Amber glass bottles offer the best protection by blocking light that can degrade the delicate botanical compounds over time. Avoid storing near the stove or in direct sunlight, as heat and light will cause the flavors to fade faster.
You do not need to refrigerate homemade bitters. Room temperature storage is actually preferred, as refrigeration can cause some of the aromatic compounds to precipitate out of solution. Simply keep them sealed when not in use and shake gently before each use to redistribute any settled material.
Troubleshooting Common Issues
Even with careful preparation, you might encounter some issues when making your own bitters. Here is how to address the most common problems.
If your bitters taste too bitter, you likely used too high a proportion of gentian root or let them steep too long. For future batches, reduce the gentian root to 1 teaspoon per cup of alcohol. You can also dilute strong bitters with a bit more high-proof alcohol to bring them into balance.
If your bitters taste too weak or watery, you did not steep long enough or used insufficient botanicals. Next time, extend the steeping period to four weeks minimum and ensure you are using the proper ratios. Remember that the bittering compounds extract slowly — two weeks is an absolute minimum.
Cloudy bitters result from improper straining or using plant material with residual moisture. The solution is simple: strain again through a fresh coffee filter and be patient. Do not squeeze the filter to speed things up. If cloudiness returns immediately, your botanicals may not have been fully dried.
Bitters that smell off or sour have likely been contaminated. This usually happens when botanicals were not fully submerged in alcohol during steeping, allowing mold to grow. Always ensure your alcohol level stays above all plant material, and discard any batch that shows signs of contamination.
Frequently Asked Questions
How are cocktail bitters made?
Cocktail bitters are made by steeping bittering agents like gentian root, along with herbs and spices, in high-proof alcohol for 2-4 weeks. The alcohol extracts the bitter compounds and aromatic oils from the botanicals. The mixture is then strained through a coffee filter and optionally sweetened before bottling.
Can you make cocktail bitters?
Yes, anyone can make cocktail bitters at home with basic equipment and ingredients. You need high-proof alcohol (like Everclear or 151 rum), bittering agents, and flavor botanicals. The process requires patience since extraction takes several weeks, but it is straightforward and produces professional-quality results.
Do bitters help gastritis?
While bitters have traditionally been used as digestifs and some people report feeling better after using them, there is limited scientific evidence that bitters help gastritis specifically. If you have digestive issues, consult a healthcare professional before using bitters for medicinal purposes.
What can I substitute for bitters in a cocktail?
If you need a bitters substitute, you can use a few drops of angostura bitters, or create a quick infusion with gentian root and high-proof alcohol. For non-alcoholic options, bitter herbs like wormwood tea or gentian root tea can provide similar bitter notes, though the flavor will differ from traditional bitters.
Conclusion
Making your own cocktail bitters at home is one of those projects that seems intimidating until you actually try it. Once you understand the basic principles — high-proof alcohol, bittering agents, patient extraction — you realize how accessible this craft actually is. The results will be far superior to anything you can buy, and you will have complete control over the flavor profile.
Start with a simple orange bitters recipe and then experiment with different botanicals to develop your own signature blend. Bitters also make excellent homemade gifts for the cocktail enthusiasts in your life. With a few decorated bottles and custom labels, your homemade bitters become something truly special to share with friends and family.
The most important thing is to not be afraid to experiment. Unlike baking, where precise measurements are critical, bitters making is more forgiving. You can always adjust future batches based on what you learn. The community of home bitters makers is active and helpful, so do not hesitate to seek out forums and recipes for inspiration. Your perfect bitters recipe is waiting to be discovered.