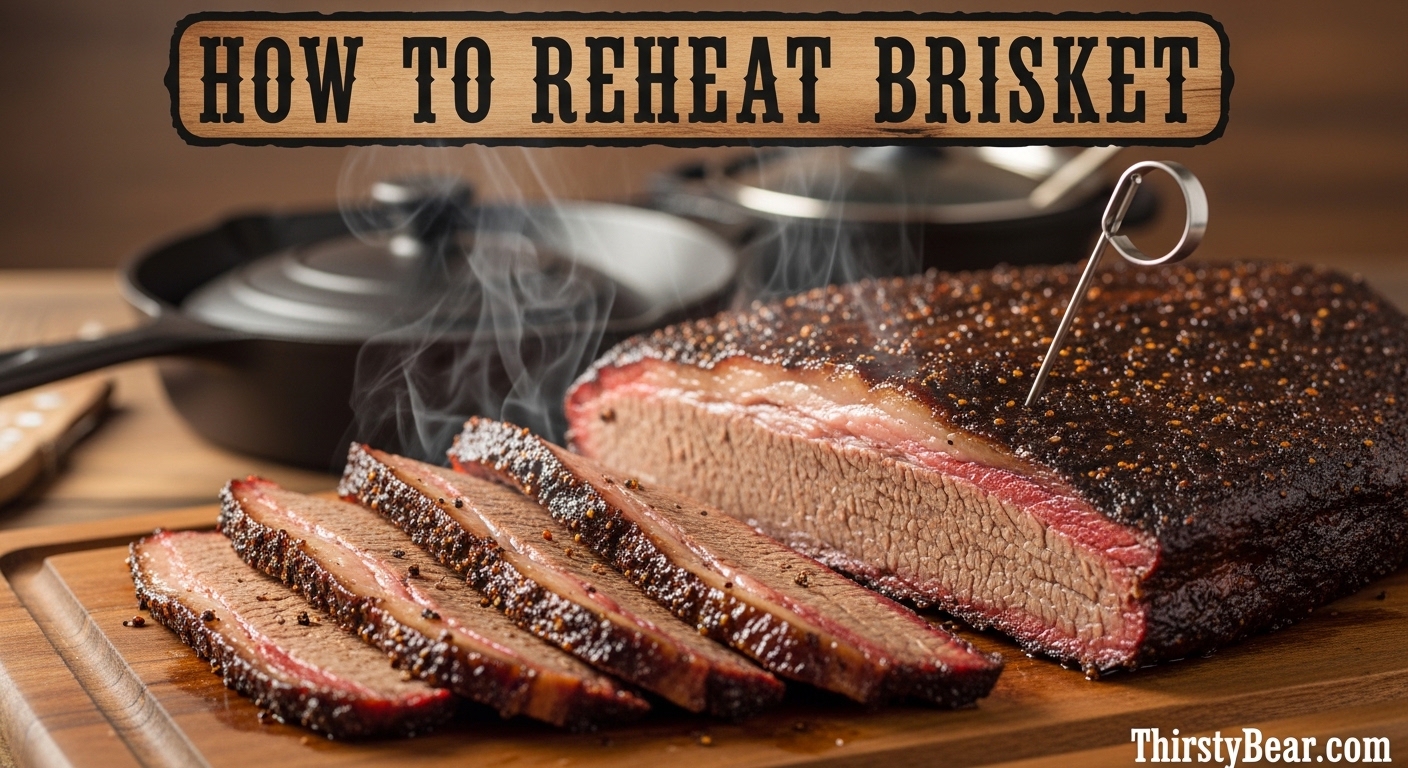
You’ve spent 12-16 hours smoking that perfect brisket. The bark is dark and crusty, the smoke ring is vibrant, and the meat is melt-in-your-mouth tender. Now you have leftovers, and you’re facing every pitmaster’s dilemma: how do you reheat brisket without turning it into shoe leather?
The best way to reheat brisket is in a 350°F oven, wrapped in foil with a splash of beef broth or beef drippings, for 20-30 minutes until it reaches an internal temperature of 140-165°F. This method gently warms the meat while the steam from the liquid keeps it juicy.
I’ve tested every reheating method over years of BBQ competitions and family gatherings. Let me walk you through exactly how to reheat brisket so it tastes just as good the second time around.
How to Reheat Brisket Without Drying It Out
The challenge with reheating brisket comes down to science. Brisket is a tough cut with lots of connective tissue that breaks down during low-and-slow cooking. When you apply high heat to leftover brisket, the proteins contract and squeeze out moisture. This is called protein seizure, and it’s what turns tender meat into tough, dry disappointment.
The key is gentle heat with moisture. You want to warm the meat without cooking it further, and you need to create a steam environment that prevents moisture loss. Every method in this guide follows these two principles.
Start Here: Whole Brisket or Sliced?
Before you choose a reheating method, you need to decide: are you reheating a whole brisket or already-sliced portions? This decision affects everything from cooking time to moisture retention.
Whole Brisket: Reheating a whole packer or large brisket piece takes longer but preserves more moisture. The meat acts as its own insulation, and you have more control over the final texture. This is ideal if you’re feeding a crowd or want to slice fresh after reheating.
Sliced Brisket: Pre-sliced brisket reheats faster but loses moisture more quickly. Each exposed surface is a potential point for evaporation. If your brisket is already sliced, you’ll need extra liquid and gentler heat to prevent drying out.
My recommendation: If you have the choice, reheat whole and slice after. I’ve found this preserves up to 30% more moisture compared to reheating pre-sliced meat. The only exception is when you’re using the stovetop method, which actually works better with individual slices.
How to Reheat Brisket in the Oven (Best All-Around Method)
The oven is the most versatile reheating method for brisket. It handles both whole and sliced brisket well, provides even heating, and creates that perfect steam environment when you use foil. This is my go-to method for everyday reheating.
Oven Method: Step-by-Step Instructions
Step 1: Preheat your oven to 350°F. This temperature strikes the perfect balance between fast reheating and gentle heat. Lower temperatures (225-250°F) work too but take much longer.
Step 2: Prepare your brisket. If it’s a whole piece, leave it intact. If it’s sliced, arrange the pieces in a single layer with some overlap. Don’t stack slices more than two layers deep or the bottom ones will steam while the top ones dry out.
Step 3: Add moisture. Place your brisket on a large piece of heavy-duty foil. Add 2-3 tablespoons of liquid per pound of meat. Beef broth, reserved drippings, or a mix of beef broth and beer work best. You can also use apple juice for a subtle sweetness.
Step 4: Create the foil packet. Wrap the brisket tightly, leaving a small opening at one corner. This creates a steam environment inside the packet while allowing excess pressure to escape. The steam is what keeps your brisket juicy.
Step 5: Reheat. Place the foil packet on a baking sheet (to catch any leaks) and put it in the oven. For whole brisket, plan on 30-45 minutes. For sliced brisket, check after 15-20 minutes.
Step 6: Check the temperature. Use a meat thermometer to check the internal temperature. You’re looking for 140-165°F. Once it reaches this range, remove it from the oven.
Step 7: Rest and serve. Let the brisket rest in the foil for 10 minutes before opening. This allows the juices to redistribute. Open the foil carefully—hot steam will escape. Slice against the grain and serve.
Temperature Guidelines for Oven Reheating
The temperature you choose affects both time and texture:
- 350°F: Fastest method, takes 20-30 minutes. Good balance of speed and moisture retention.
- 325°F: Middle ground, takes 30-40 minutes. Slightly gentler on the meat.
- 250°F: Low-and-slow approach, takes 60-90 minutes. Best for whole briskets where you want minimal texture change.
I generally use 350°F for sliced brisket and 325°F for whole briskets. The extra time at lower temperature helps whole briskets heat more evenly from edge to center.
Sous Vide: The Foolproof Method for Perfect Results
Sous vide is the ultimate reheating method for moisture retention. By sealing the brisket in a bag and cooking it in a precisely controlled water bath, you eliminate any chance of overheating or drying out. This method is foolproof but requires special equipment.
Sous Vide Method: Step-by-Step Instructions
Step 1: Set your sous vide water bath to 140-145°F. This temperature is hot enough to make the meat enjoyable to eat but won’t cook it further or cause moisture loss.
Step 2: Prepare the brisket. If whole, leave it intact. If sliced, you can vacuum seal portions or the entire amount. Try to arrange slices in a single layer in the bag.
Step 3: Add liquid. Before sealing, add 1-2 tablespoons of beef broth, drippings, or butter per pound of meat. This liquid will create a mini braising environment inside the bag.
Step 4: Vacuum seal the brisket. Remove as much air as possible to ensure good heat transfer. If you don’t have a vacuum sealer, use the water displacement method with a zip-top freezer bag.
Step 5: Cook in the water bath. For sliced brisket, 1-1.5 hours is plenty. For whole brisket, plan on 2-3 hours depending on thickness. The beauty of sous vide is that you can’t overcook it at this temperature—leaving it in an extra hour won’t hurt anything.
Step 6: Optional bark restoration. Sous vide reheated brisket will be incredibly tender but the bark will be soft. If you want to restore some crispiness, pat the brisket dry and sear it in a hot skillet for 1-2 minutes per side after reheating.
Why Sous Vide Works So Well
Sous vide reheating works because it maintains the meat at exactly the right temperature without exceeding it. There’s no hot air to dry out surfaces, no temperature fluctuations, and no moisture loss to the cooking environment. The meat essentially stays in its perfect state while warming up.
I’ve used this method for competition leftovers, and honestly, the reheated brisket is often indistinguishable from fresh. The only downside is the time investment and equipment requirement.
How to Reheat Brisket in a Slow Cooker (Super Juicy)
The slow cooker is the set-it-and-forget-it option for brisket reheating. It’s particularly good if you want to keep brisket warm for a party or if you prefer very tender, falling-apart texture. This method adds the most moisture of any approach.
Slow Cooker Method: Step-by-Step Instructions
Step 1: Prepare your slow cooker. Spray it with cooking spray or line it with a slow cooker liner for easy cleanup.
Step 2: Add liquid to the bottom. You want about 1/2 to 1 cup of liquid depending on your slow cooker size and how much brisket you’re reheating. Beef broth, beef drippings, or a mixture of beef broth and beer work great. Some people add a splash of apple cider vinegar for tenderness.
Step 3: Add the brisket. Place the brisket in the slow cooker. If it’s sliced, try to keep it in as close to a single layer as possible. If it’s whole, place it fat-side up.
Step 4: Set the temperature. Low setting is best for gentle reheating. High will work faster but increases the risk of drying out. Plan on 2-4 hours on low or 1-2 hours on high.
Step 5: Check occasionally. Unlike oven methods, you can check on slow cooker brisket without releasing much heat. Gently lift a piece after an hour to see how it’s progressing. You want it hot throughout but not falling apart unless that’s your preference.
Step 6: Serve or hold warm. One advantage of the slow cooker is that you can keep brisket on the warm setting for hours without it drying out. This makes it perfect for parties where people will be eating over an extended period.
Best Settings for Slow Cooker Reheating
The low setting is almost always better for brisket. It heats the meat gently and gives the liquid time to penetrate. The high setting works if you’re in a hurry, but check frequently—once the liquid starts to boil off, the meat can dry out quickly.
I’ve found that adding a bit more liquid than you think you need helps. The brisket will absorb some, and having extra liquid creates a self-basting environment. Plus, you end up with delicious leftover juices that are perfect for making au jus.
Stovetop/Skillet Method: Best for Slices
The stovetop method is perfect when you have pre-sliced brisket and want to reheat individual portions quickly. It’s also the best method for restoring bark—that crispy, seasoned exterior that makes brisket so special.
Stovetop Method: Step-by-Step Instructions
Step 1: Choose the right pan. A cast iron skillet or heavy-bottomed pan is ideal. You want something that holds heat well and can create a nice sear. Avoid non-stick if you want to restore bark—the surface doesn’t get hot enough.
Step 2: Preheat the pan. Heat it over medium heat for 2-3 minutes. You want it hot but not smoking. Add a small amount of oil, beef tallow, or bacon grease if the pan looks dry.
Step 3: Add liquid and brisket. Pour in just enough beef broth or drippings to coat the bottom of the pan—about 1/4 cup usually does it. Add your sliced brisket in a single layer. Don’t overcrowd the pan or the meat will steam instead of sear.
Step 4: Reheat gently. Cook for 2-3 minutes per side. The liquid should simmer gently, creating steam that heats the meat through. As the liquid reduces, the meat will start to sizzle and develop a nice crust.
Step 5: Add more liquid if needed. If the pan dries out before the brisket is heated through, add small splashes of broth. You want the meat to heat in steam first, then get a quick sear at the end.
Step 6: Check temperature and serve. The brisket should be hot throughout and have some crispy edges. Internal temperature should be at least 140°F. Serve immediately while the bark is still crispy.
Bark Restoration Tip
The stovetop method is unmatched for bark restoration. The combination of initial steaming followed by direct searing creates a crusty exterior that’s almost as good as fresh off the smoker. For even better bark, skip the liquid entirely for the last minute of cooking and let the meat sear directly in the fat that has rendered out.
I love this method for leftover brisket sandwiches. The crispy bark adds texture that you just can’t get from oven or slow cooker methods. Plus, you can reheat exactly as many slices as you need without heating up the whole oven.
Air Fryer Method: Crispy Bark in Less Time
The air fryer is a modern reheating option that’s gained popularity for good reason. It circulates hot air around the food, creating a crispy exterior while heating the inside relatively quickly. This method works best for individual slices rather than whole briskets.
Air Fryer Method: Step-by-Step Instructions
Step 1: Preheat your air fryer to 325°F. Some models don’t require preheating—if yours doesn’t, you can skip this step and add a minute or two to the cooking time.
Step 2: Prepare the brisket. Slice your cold brisket into portions about 1/2 to 3/4 inch thick. Thicker slices may not heat through before the exterior dries out.
Step 3: Add moisture. Lightly brush both sides of each slice with beef broth, melted butter, or a mix of broth and your favorite BBQ sauce. Don’t overdo it—you just want a light coating.
Step 4: Arrange in the air fryer. Place slices in a single layer in the basket. Don’t overlap them or the airflow will be blocked. Work in batches if necessary.
Step 5: Reheat. Cook for 3-5 minutes, then flip the slices and cook for another 2-3 minutes. Check the internal temperature—you want at least 140°F in the center.
Step 6: Serve immediately. Air fryer reheated brisket is best eaten right away while the exterior is still crispy. It tends to lose its crunch quickly as it sits.
What to Watch For
The air fryer is the fastest method but also the riskiest for drying out meat. Because it uses circulating hot air, moisture evaporates quickly. That’s why the light brushing of liquid is crucial. Don’t skip this step.
Also, keep a close eye on thin slices. They can go from perfectly heated to dried out in just a minute or two. Better to check early and often than to ruin good brisket.
Smoker Method: Re-Infusing Smoke Flavor
If you have access to a smoker, reheating brisket in it is a fantastic option. The gentle heat and smoke environment warms the meat while adding fresh flavor back into the exterior. This is my favorite method for special occasions when I want that just-smoked taste.
Smoker Method: Step-by-Step Instructions
Step 1: Fire up your smoker. Set it to 225-250°F using your favorite smoking wood. Hickory, oak, or pecan work well with beef. You don’t need heavy smoke—just a thin, blue stream.
Step 2: Prepare the brisket. Leave whole if possible. If sliced, wrap in foil with some beef broth to prevent drying. Whole briskets can go unwrapped or wrapped depending on your preference.
Step 3: Add moisture if unwrapped. If you’re placing the brisket directly on the grate, spritz it with beef broth, apple juice, or a mix of both every 30-45 minutes. This keeps the surface moist while creating a nice bark.
Step 4: Reheat. Place the brisket in the smoker. For whole briskets, plan on 2-3 hours. For foil-wrapped pieces, 1-1.5 hours should be sufficient. You’re aiming for an internal temperature of 140-165°F.
Step 5: Optional bark restoration. If you wrapped the brisket and want to restore the bark, unwrap it for the last 30 minutes of reheating. The direct smoke and air will crisp up the exterior nicely.
Step 6: Rest and serve. Let the brisket rest for 15-20 minutes before slicing. This is especially important for smoker-reheated meat as the exterior tends to hold more heat.
When to Use This Method
The smoker method is perfect when you’re already firing up the smoker for another cook. It’s also ideal for special occasions when you want that extra layer of flavor. The downside is the time commitment and fuel cost.
I use this method most often for holiday meals. There’s something magical about serving reheated brisket that tastes like it just came off the smoker, complete with fresh smoke flavor and a renewed bark.
Temperature Guidelines: The Sweet Zone for Juicy Brisket
Temperature control is the single most important factor in successful brisket reheating. Get the temperature wrong, and nothing else matters—the meat will dry out regardless of how much liquid you add.
Why High Heat Fails
When you apply high heat (above 350°F) to cold brisket, the outside heats much faster than the inside. By the time the center reaches a serving temperature, the exterior has been subjected to harsh heat that drives off moisture and creates tough, dry meat. This is especially problematic for sliced brisket with its increased surface area.
High heat also causes protein fibers to contract rapidly. This contraction squeezes out moisture like wringing a sponge. Once those juices leave the meat, there’s no getting them back.
The Temperature Sweet Zone
The ideal reheating temperature range is 225-350°F, with the specific temperature depending on your method:
- 225-250°F: Best for whole briskets in the oven or smoker. Takes longer but provides the most gentle heating.
- 300-325°F: Good middle ground for most reheating situations. Balances speed with moisture retention.
- 350°F: Fastest option that still preserves moisture well. Works great for foil-wrapped brisket with added liquid.
Regardless of your heating method, always aim for an internal temperature of 140-165°F. This is hot enough to enjoy but not so hot that you’re continuing to cook the meat. Going above 165°F starts to break down the texture further and can make the meat mushy.
Moisture Control: What Liquids Work Best
Liquid is your best friend when reheating brisket. It creates steam, adds flavor, and directly replaces any moisture lost during storage. But not all liquids are created equal. Let me break down your options.
Beef Broth and Au Jus
Beef broth is the most versatile option for reheating brisket. It adds savory flavor without overpowering the meat’s natural taste. Store-bought broth works fine, but reserved drippings mixed with a little broth are even better. This creates a natural au jus that enhances the brisket’s original flavors.
Beer and Cider Options
Beer adds depth and complexity to reheated brisket. Dark beers like stouts or porters work particularly well with beef. The alcohol evaporates during reheating, leaving behind rich malt flavors. Hard cider is another excellent option, adding sweetness that complements the smoke flavor.
When using beer or cider, mix it 50/50 with beef broth. This prevents the alcohol or sweetness from becoming overpowering while still getting those flavor benefits.
Apple Juice and Sweet Liquids
Apple juice is a classic BBQ mop liquid, and it works great for reheating too. The natural sugars caramelize slightly during reheating, adding a subtle sweetness and beautiful color. Other fruit juices like pineapple or orange juice work but use them sparingly—a little goes a long way.
Butter and Fat Additions
Adding fat is an excellent way to restore richness to leftover brisket. Butter, beef tallow, or bacon fat can be brushed onto the meat before reheating or added to your reheating liquid. As the fat melts, it penetrates the meat and replaces some of the rendered fat that was lost during the original cook.
I especially like this method for leaner flat cuts that have lost some of their marbling during storage. A tablespoon of butter per pound of meat makes a noticeable difference in mouthfeel.
Freezer to Fork: Reheating Frozen Brisket
Properly frozen brisket can last for months and still taste great when reheated. The key is proper freezing technique and adjusted reheating times.
Thawing Guidelines
The safest way to thaw frozen brisket is in the refrigerator. Allow 24 hours for every 5 pounds of meat. A whole frozen packer might take 2-3 days to thaw completely. Never thaw at room temperature, as this creates a danger zone for bacterial growth.
If you’re in a hurry, you can use the cold water method. Place the sealed brisket in a sink or container filled with cold water. Change the water every 30 minutes. This method takes about 30 minutes per pound.
Adjusted Reheating Times
Frozen brisket needs extra time to reheat, but don’t make the mistake of thinking you need to cook it longer. You still want to reach the same 140-165°F internal temperature. The difference is that frozen meat starts at a much lower temperature, so it takes longer to get there.
For oven reheating, add 50-75% more time if reheating from frozen. A sliced brisket that normally takes 20 minutes might take 30-35 minutes from frozen. Whole briskets could take an extra hour or more.
Safety Considerations
Never reheat frozen brisket in a slow cooker—it will spend too long in the bacterial danger zone. Always thaw first or use an oven method. Similarly, avoid microwave reheating of frozen brisket as it will heat unevenly and create food safety risks.
Common Reheating Mistakes (And How to Avoid Them)
After years of experimenting, I’ve identified the mistakes that most commonly lead to dry, tough reheated brisket. Avoid these and you’ll consistently get great results.
- Using High Heat: High heat is the enemy of tender brisket. Whether in the oven, on the grill, or in the microwave, high temperatures cause rapid moisture loss and protein contraction. Stick to the 225-350°F range.
- Skipping Moisture: Dry heat leads to dry meat. Always add some form of liquid when reheating. Even a small amount makes a huge difference. The liquid doesn’t just moisten the meat—it creates steam that transfers heat efficiently.
- Slicing Against the Grain Before Reheating: This one’s counterintuitive. You always slice brisket against the grain for serving, but if you’re reheating whole brisket, slice it AFTER reheating. Pre-sliced brisket has more surface area for moisture loss. The exception is when using methods specifically designed for slices, like the stovetop or air fryer.
- Overheating Past 165°F: There’s no reason to reheat brisket beyond 165°F. Going higher just continues to cook the meat and can make it mushy. Use a meat thermometer and stop heating once you reach the target temperature.
- Not Letting It Rest: Resting is just as important for reheated brisket as it is for fresh. Give the meat 10-15 minutes after reheating to allow juices to redistribute. Cutting into hot, freshly reheated brisket lets all that moisture run out onto the cutting board.
- Using the Microwave (Usually): I know it’s tempting for a quick meal, but the microwave almost always disappoints with brisket. It heats unevenly, creates hot and cold spots, and drives off moisture rapidly. If you must use it, use 50% power and check every 90 seconds.
Quick-Glance Method Comparison
Here’s a quick reference to help you choose the right method for your situation:
| Method | Best For | Temperature | Time Range | Texture Result |
|---|---|---|---|---|
| Oven (Foil Wrap) | All-around best | 325-350°F | 20-45 min | Moist, tender |
| Sous Vide | Maximum moisture | 140-145°F | 1-3 hours | Perfectly tender |
| Slow Cooker | Crowds, holding warm | Low setting | 2-4 hours | Very tender, soft |
| Stovetop | Slices, bark restoration | Medium heat | 5-10 min | Crispy exterior |
| Air Fryer | Quick portions | 325°F | 5-8 min | Crispy, fast |
| Smoker | Flavor restoration | 225-250°F | 1-3 hours | Fresh smoke flavor |
Frequently Asked Questions About Reheating Brisket
How do you reheat brisket without drying it out?
The key is gentle heat with added moisture. Wrap your brisket in foil with beef broth or drippings and reheat at 325-350°F until it reaches 140-165°F internally. The steam created inside the foil packet keeps the meat moist while gently warming it through.
Can you cook a brisket the day before and reheat it?
Absolutely! In fact, cooking brisket a day ahead often improves it. The flavors have time to develop, and the fat has time to set properly. Let the brisket cool completely, refrigerate it overnight, then reheat using the oven method at 325-350°F.
What temperature should you reheat brisket to?
Aim for an internal temperature of 140-165°F. This is hot enough to enjoy without continuing to cook the meat. Going above 165°F can make the texture mushy. Always use a meat thermometer to check rather than guessing by time.
How long does it take to reheat brisket at 250 degrees?
At 250°F, plan on approximately 45-60 minutes for sliced brisket and 2-3 hours for a whole brisket. The lower temperature takes longer but provides very gentle heating that minimizes texture changes. Always go by internal temperature rather than time.
Should I slice brisket before reheating?
It depends on your method. For oven, slow cooker, or smoker reheating, leave it whole and slice after. This preserves more moisture. For stovetop or air fryer methods, slice first as these work better with individual pieces. Generally, reheating whole and slicing after yields the best results.
Can you reheat brisket in the microwave?
You can, but it’s not recommended. Microwaves heat unevenly and tend to make brisket tough and rubbery. If you must use a microwave, use 50% power, add moisture, and heat in 90-second intervals. It’s better to plan ahead and use a gentler method.
Why is my reheated brisket tough?
Tough reheated brisket usually comes from using high heat or not adding moisture. High heat causes proteins to contract and squeeze out juices. Always use gentle heat (225-350°F) with added liquid. Also make sure you’re not overheating past 165°F, which can alter the texture.
Final Thoughts: The Brisket Reheat Rulebook
Learning how to reheat brisket properly is just as important as mastering the initial cook. After investing 12+ hours and significant money into a quality piece of meat, you owe it to yourself to enjoy those leftovers at their best.
Here’s my quick rulebook for success:
- Always add moisture: Broth, drippings, beer—something to create steam.
- Keep heat gentle: Stay in the 225-350°F range.
- Target 140-165°F: No hotter, no colder.
- Rest before serving: Let juices redistribute for 10-15 minutes.
- Match method to format: Whole briskets in the oven, slices on the stovetop.
Whether you’re reheating for a Tuesday night dinner or serving a crowd at a weekend party, these techniques will help you enjoy delicious, tender brisket every time. Now that you know how to reheat brisket without drying it out, you can cook with confidence knowing your leftovers will be just as impressive as the first serving.