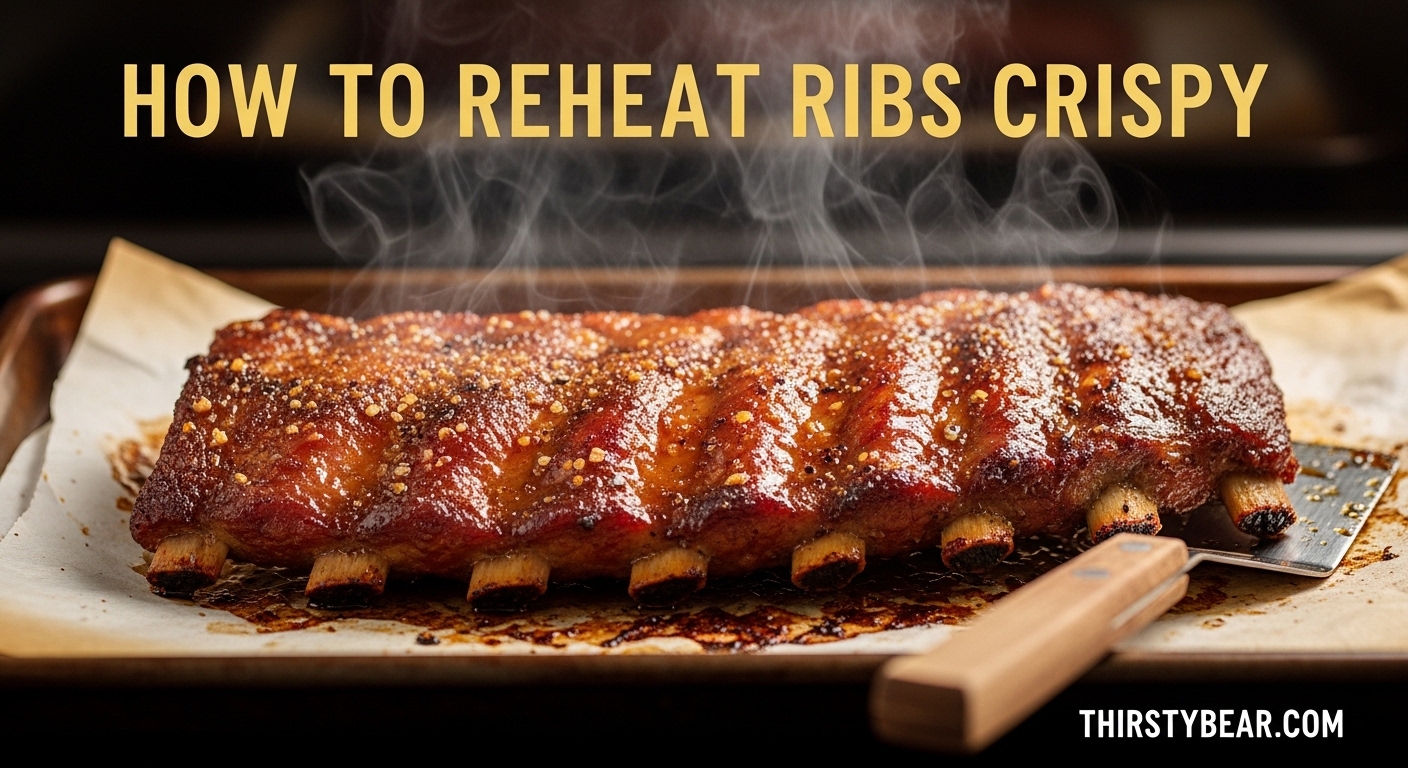
Nothing beats the satisfaction of leftover BBQ ribs, but reheating them without losing that perfect texture can be frustrating. You know the drill: dried-out meat, soggy bark, and that sad rubbery texture that makes you question why you bothered saving them in the first place.
After years of experimenting with leftover ribs from weekend smoke sessions, I’ve learned that the secret lies in a two-phase approach: gentle reheating to warm the meat without overcooking it, followed by high-heat finishing to restore that crispy, caramelized exterior we all crave.
This guide covers every method I’ve tested, from the reliable oven technique to the steam-then-fry method that completely changed how I reheat ribs. Whether you have an air fryer, grill, smoker, or just a stovetop, you’ll find a technique that works for your setup. These ribs pair perfectly with winter beers that pair perfectly with BBQ ribs for a complete meal experience.
How to Reheat Ribs Crispy?
The most effective way to reheat ribs crispy is to use a gentle heating method first (steaming, low oven, or covered grill) to bring the internal temperature up to 145-155degF without drying out the meat. Then, finish with high-heat searing (pan-fry, broiler, or direct grill heat) to restore the crispy bark and caramelized edges.
This two-stage approach works because it addresses the two main challenges of reheating ribs: moisture retention and bark restoration. The gentle phase warms the meat evenly, while the high-heat phase recreates that fresh-from-the-grill texture.
Oven Method: The Reliable Standard
The oven method is the most popular reheating technique for good reason: it’s consistent, handles large batches, and gives you excellent control over moisture retention. I’ve used this method countless times for feeding crowds after weekend BBQ sessions.
Step-by-Step Oven Reheating
Step 1: Remove ribs from the refrigerator and let them sit at room temperature for 20-30 minutes. This cold-to-room-temperature step prevents shock to the meat and promotes even heating.
Step 2: Preheat your oven to 250-275degF. This low-and-slow temperature range is critical: high heat will dry out the meat before the center warms through.
Step 3: Place ribs in a baking dish and add moisture. I use 2-3 tablespoons of beef broth, apple juice, or even water in the bottom of the pan. This creates steam that keeps the meat juicy during reheating.
Step 4: Cover the baking dish tightly with aluminum foil. This traps the steam and ensures even heating. Make sure the seal is tight: any escaping steam means drier ribs.
Step 5: Reheat for 30-45 minutes, depending on rib thickness and quantity. Full racks typically need 40-45 minutes, while individual cuts may be done in 25-30 minutes.
Step 6: Check internal temperature: you want 145-155degF in the thickest part of the meat. Use a meat thermometer for accuracy: this is the difference between perfectly reheated and overcooked ribs.
Step 7: Remove foil and brush with sauce if desired. Place under the broiler for 2-3 minutes to caramelize the sauce and add extra crispiness to the exterior. Watch closely to prevent burning.
Pro tip: For extra crispy results, finish reheated ribs on a hot grill for 2-3 minutes per side. The direct heat restores bark texture better than any oven-only method.
Steam-Then-Fry: The Secret to Crispy Ribs
This technique completely changed my reheating game. A chef friend turned me on to it, and it’s now my go-to method when I want that fresh-off-the-smoker texture. The steam phase gently warms the meat, while the frying phase recreates the crispy bark.
The Two-Phase Technique
Phase 1: Steam the ribs. Place ribs in a pan or skillet with a lid and add 14 cup of water or beer. Cover tightly and heat over medium-low for 8-10 minutes. The steam gently warms the ribs without toughening the meat.
Phase 2: Pan-fry for crispy bark. Remove ribs from the steaming pan and pat dry. Heat a dry cast-iron skillet or griddle over medium-high heat. Sear ribs for 1-2 minutes per side until the exterior is crispy and caramelized. For the best sear, check out grill pan deals for achieving crispy sear to upgrade your setup.
Why this works: The steam penetrates the meat, warming it throughout without overcooking. The pan-fry then recreates the Maillard reaction that gives bark its crispy, flavorful exterior. You get tender, juicy meat inside with that signature crunch outside.
Best for: Small batches (1-2 servings), when you have time to tend the stove, and when crispy bark is your top priority.
Grill Reheating Method
Grilling is my favorite way to reheat ribs when weather permits. You get fresh smoke flavor, excellent bark restoration, and that authentic BBQ taste. The key is using both indirect and direct heat zones.
Indirect-Then-Direct Method
Step 1: Set up your grill with two zones: indirect heat (no coals or burners underneath) and direct heat (high heat zone). For gas grills, leave one burner off and turn the others to medium-low.
Step 2: Place ribs on the indirect heat side, bone-side down. Close the lid and maintain a temperature of 250-275degF. Reheat for 20-30 minutes, adding wood chunks if you want extra smoke flavor.
Step 3: Check internal temperature: 145-155degF means they’re ready for the crisping phase.
Step 4: Move ribs to direct heat for 1-2 minutes per side. Watch closely: high heat can burn sauce quickly. This step restores the crispy bark and adds those coveted char marks.
Award-winning tip: Add a small aluminum foil pouch with soaked wood chips to the indirect heat side. As the ribs reheat, they absorb fresh smoke, actually improving on the original flavor.
Best for: Any rib type, especially when you want to add fresh smoke flavor. Ideal for summer months when grilling is enjoyable.
Air Fryer Method: Quick Bark Restoration
The air fryer has become a surprisingly effective tool for reheating ribs. Reddit’s BBQ community swears by it for bark restoration, and after testing, I agree: it’s the fastest way to get crispy results.
Air Fryer Technique
Step 1: Preheat air fryer to 370degF. This higher temperature is key: lower temps won’t crisp the bark effectively.
Step 2: Place ribs in the air fryer basket, single layer with slight spacing between pieces. Don’t overcrowd: proper airflow is essential for even crisping.
Step 3: Reheat for 8-12 minutes, flipping halfway through. Individual pieces take about 8 minutes; larger cuts may need the full 12.
Step 4: Check internal temperature: 145-155degF indicates they’re properly reheated.
Step 5: For extra crispiness, add 1-2 minutes at 400degF. Watch closely: sugar in rubs and sauces burns quickly at high heat.
Why BBQ enthusiasts love it: “Reheating in an air fryer for 10 minutes at 370degF works well. It resets the bark” reports one Reddit pitmaster. The circulating hot air recreates the bark texture better than most methods.
Best for: Small portions (1-3 servings), when speed is important, and for maximum bark restoration. Less ideal for large batches.
Smoker Reheating: Maximum Flavor
If you have access to a smoker, this method produces the most flavorful results. The ribs absorb fresh smoke while reheating, often tasting even better than the first time around.
Smoker Reheating Steps
Step 1: Fire your smoker to 225-250degF. Use mild fruit woods like apple or cherry: they complement pork without overpowering.
Step 2: Place ribs directly on the grate, bone-side down. No foil needed: the smoker’s gentle heat won’t dry them out.
Step 3: Reheat for 45-60 minutes, depending on rack size and thickness. The low temperature ensures even reheating without toughening.
Step 4: Check internal temperature: target 145-155degF in the thickest part of the meat.
Step 5: Optional: finish over direct heat or in a 400degF oven for 3-5 minutes to crisp the exterior. This step isn’t always necessary: smoker-reheated ribs often have excellent bark as-is.
Pro tip: Add a water pan to the smoker. The humidity prevents drying while the ribs reheat, ensuring moist, tender results.
Best for: When you have time (1+ hours), access to a smoker, and want maximum flavor. Ideal for周末 BBQ enthusiasts who plan ahead.
Sous Vide Method: Precision Reheating
This method comes from the serious BBQ community and delivers perfectly consistent results every time. It requires specialized equipment but guarantees moist, evenly reheated ribs.
Sous Vide Technique
Step 1: Set your sous vide to 160degF. This temperature is high enough to reheat thoroughly but low enough to prevent overcooking.
Step 2: Place ribs in a vacuum-seal bag or zip-top bag using the water displacement method. Remove as much air as possible to ensure proper heat transfer.
Step 3: Cook for 45-60 minutes. The exact time isn’t critical: the water bath maintains precise temperature, so ribs won’t overcook.
Step 4: Remove from bag and pat dry thoroughly. This step is essential: wet ribs won’t crisp properly.
Step 5: Finish with high-heat searing: grill, pan-fry, or broil for 1-2 minutes per side to restore bark texture. The sous vide method alone won’t create crispy bark, so this finishing step is mandatory.
Why it works: The water bath heats ribs edge-to-edge with zero temperature gradient. No part gets overcooked while waiting for the center to warm. Reddit users report “sous vide at 160degF for about 45 minutes works great if you have the setup.”
Best for: Precision-oriented cooks, those with sous vide equipment, and when consistency matters more than speed. Requires a searing finish for crispy bark.
Moisture Retention Secrets
Keeping ribs moist during reheating is half the battle. After testing dozens of techniques, these are the methods that consistently deliver juicy results.
Liquid Additions
Beef broth or stock: Adds depth while maintaining moisture. Richer than water, it complements the beefy flavor of spare ribs and beef ribs.
Apple juice or cider: Brightens flavor and pairs naturally with pork. The sugars help with caramelization during the crisping phase.
Beer: Adds malty complexity and works beautifully with BBQ flavors. Use a medium-bodied beer: anything too light won’t contribute flavor, anything too heavy may overpower.
Saved pan drippings: The gold standard for moisture. If you have drippings from the original cook, use them. They’re already perfectly seasoned with your rib flavors.
Temperature Control
Never reheat above 300degF during the initial phase. High heat drives moisture out of the meat before the center warms through, creating that dreaded dry, tough texture.
Aim for 145-155degF internal temperature. This range ensures the ribs are fully heated but not overcooked. Use a thermometer: guessing leads to dry ribs.
Remove from heat just before reaching target temperature. Carryover cooking will finish the job. Pulling at 140degF usually means hitting 150degF after resting.
Timing Guidelines
Don’t rush the reheating process. Most oven and grill methods need 30-45 minutes for thorough heating. Faster methods like air fryer trade some moisture for speed.
Let reheated ribs rest for 5 minutes before serving. This allows juices to redistribute, ensuring each bite is moist and tender.
Plan ahead: take ribs out 30 minutes before reheating. Room-temperature meat reheats more evenly than cold-from-the-fridge ribs.
These techniques make all the difference between dry, disappointing leftovers and ribs that taste freshly made. Pair your perfectly reheated ribs with a Manhattan cocktail recipe for pairing with ribs for a restaurant-quality meal at home.
Storage Guidelines for Best Results
Proper storage before reheating is just as important as the reheating method itself. Poor storage can ruin even the best reheating technique.
Refrigerator Storage
Store ribs in airtight containers or tightly wrapped in foil or plastic wrap. Remove as much air as possible to prevent oxidation and drying.
Consume within 3-4 days for best quality. After this timeframe, texture and flavor begin to decline noticeably.
Keep sauce on the side if possible. Sauced ribs don’t reheat as well: the sauce can make the bark soggy during storage. Add fresh sauce during reheating instead.
Freezer Storage
Wrap ribs tightly in plastic wrap, then foil. Double-wrapping prevents freezer burn and flavor loss.
Label with date and rib type. Frozen ribs look similar: labeling prevents mystery meat situations months later.
Freeze for up to 3 months. After this point, quality declines significantly. Plan your BBQ sessions accordingly to avoid waste.
Thaw overnight in the refrigerator before reheating. Never thaw at room temperature: this creates a food safety danger zone. For quick thawing, seal ribs in a watertight bag and submerge in cold water for 1-2 hours.
Can You Cook Ribs the Day Before?
Absolutely, and in fact, many competition BBQ teams cook ribs a day ahead intentionally. The flavors have time to meld and develop, often resulting in even better ribs the next day.
The key is proper storage and reheating. Chill quickly after cooking (don’t leave at room temperature for more than 2 hours), store properly, and reheat using the methods above. Your guests will never know they weren’t cooked fresh that day.
FAQs
What’s the best way to reheat ribs without drying them out?
The oven method at 250-275degF with tight foil wrapping is the most reliable way to reheat ribs without drying them out. The low temperature and trapped steam gently warm the meat, while adding 2-3 tablespoons of beef broth, apple juice, or water to the pan provides additional moisture. Reheat for 30-45 minutes until the internal temperature reaches 145-155degF, then finish under the broiler or on a hot grill for 2-3 minutes to restore crispy bark.
How to reheat leftover ribs in the oven?
Preheat your oven to 250-275degF and let ribs sit at room temperature for 20-30 minutes. Place ribs in a baking dish with 2-3 tablespoons of liquid (beef broth, apple juice, or water) and cover tightly with aluminum foil. Reheat for 30-45 minutes depending on quantity and thickness, checking that the internal temperature reaches 145-155degF. Remove foil, brush with sauce if desired, and place under the broiler for 2-3 minutes to caramelize and crisp the exterior.
How do you crisp up ribs?
To crisp up ribs after reheating, use high heat for a short time. Finish reheated ribs under the broiler for 2-3 minutes per side, sear in a hot cast-iron skillet for 1-2 minutes per side, or place over direct grill heat for 1-2 minutes per side. The steam-then-fry method is specifically designed for this: first steam ribs covered for 8-10 minutes to warm through, then pan-fry in a dry skillet over medium-high heat for 1-2 minutes per side to restore crispy bark and caramelized exterior.
Can you cook ribs the day before and reheat them?
Yes, you can absolutely cook ribs the day before and reheat them. In fact, many competition BBQ teams cook ribs ahead intentionally as flavors have time to develop. Cool ribs quickly after cooking (don’t leave at room temperature more than 2 hours), store in airtight containers or tightly wrapped, and refrigerate. Reheat using your preferred method the next day: oven at 250-275degF for 30-45 minutes works exceptionally well for day-old ribs.
What temperature should I reheat ribs at?
Reheat ribs at 250-275degF for oven and smoker methods. This low temperature range gently warms the meat without drying it out. For air fryers, use 370degF for 8-12 minutes to restore bark. When finishing for crispiness, use high heat (400degF broiler, medium-high stovetop, or direct grill heat) for just 1-3 minutes per side. Always target an internal temperature of 145-155degF for properly reheated ribs that are moist but not overcooked.
How long does it take to reheat ribs in the oven?
Oven reheating typically takes 30-45 minutes at 250-275degF. Individual cuts or smaller portions may be done in 25-30 minutes, while full racks often need the full 40-45 minutes. The exact time depends on rib thickness, quantity, and starting temperature. Always use a meat thermometer to check for doneness: reheated ribs should reach 145-155degF internally for optimal texture and food safety.
Is it better to reheat ribs whole or sliced?
Reheating ribs whole generally produces better results. Whole racks or large slabs retain moisture better and the bark stays intact more effectively. Sliced individual ribs lose moisture more quickly during reheating and can dry out at the edges. If ribs are already sliced, use methods with added moisture (oven with broth, steam-then-fry) and reduce reheating time by 5-10 minutes. For best results, store and reheat ribs whole, then slice immediately before serving.
Can you reheat ribs in an air fryer?
Yes, air fryers are excellent for reheating ribs, especially for restoring crispy bark. Preheat to 370degF and place ribs in a single layer without overcrowding. Reheat for 8-12 minutes, flipping halfway through. The circulating hot air effectively crisps the exterior while warming the meat throughout. Check that internal temperature reaches 145-155degF. For extra crispiness, add 1-2 minutes at 400degF but watch closely as sugars in rubs and sauces burn quickly at high heat.
Conclusion
Mastering how to reheat ribs crispy comes down to understanding the two-phase approach: gentle heating to warm the meat without drying, followed by high-heat finishing to restore that signature crispy bark. The oven method offers reliability for large batches, the steam-then-fry technique delivers unmatched crispiness, and the air fryer provides the quickest path to restored bark.
Choose your method based on equipment, time, and priorities: moisture preservation or bark restoration. For the best of both worlds, combine methods: reheat gently in the oven, then finish with high heat from the grill, broiler, or stovetop. With these techniques in your arsenal, leftover ribs will taste just as good as fresh from the smoker.