
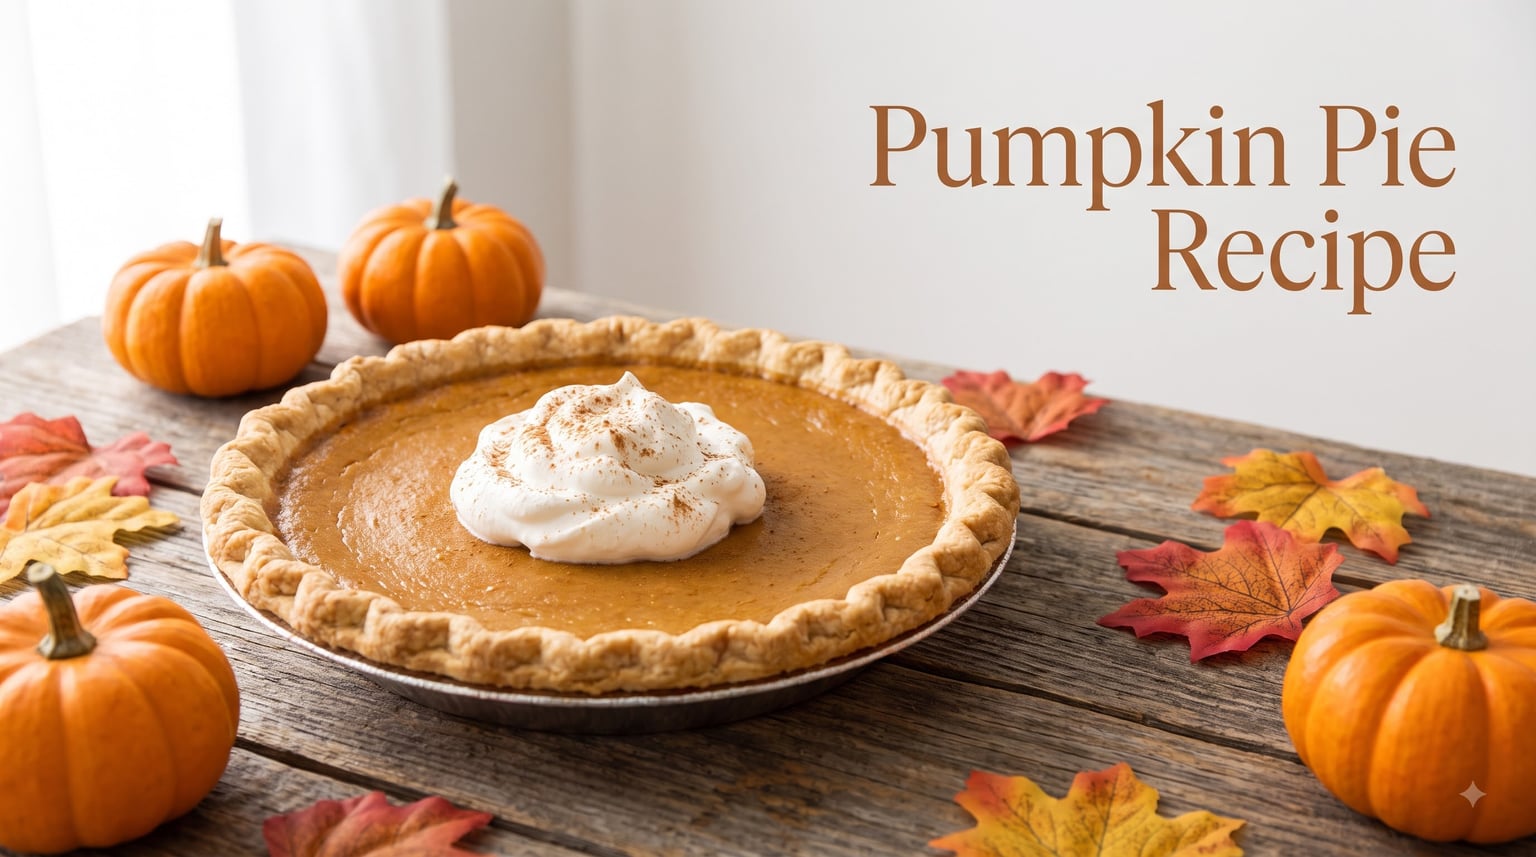
Every Thanksgiving, I watch friends and family go back for a second slice of pumpkin pie. That moment is exactly why I spent three months testing this pumpkin pie recipe until I got it right. After baking more than 20 pies, adjusting the spice blend, testing fresh versus canned pumpkin, and consulting baking forums, I landed on a version that produces a creamy, smooth filling with zero cracks.
This is the only pumpkin pie recipe you will ever need. It works for beginners and seasoned bakers alike. I will walk you through every step, share the science behind why pies crack, and give you dietary modifications that no other recipe guide covers.
If you are also exploring other fall desserts, check out our gluten-free pumpkin bread for a delicious alternative. And if you want to stock up on the right flavors, our guide to essential baking spices has you covered.
Table of Contents
What Makes the Best Pumpkin Pie Recipe?
The best pumpkin pie recipe balances three things: a creamy custard filling, a flaky crust that stays crisp on the bottom, and a spice blend that warms you from the inside out. After testing dozens of variations, I found that the secret comes down to ingredient temperature, oven technique, and patience during cooling.
Room temperature ingredients matter more than people think. Cold eggs and cold pumpkin puree straight from the fridge create a lumpy filling that never fully smooths out. When everything starts at room temperature, the custard blends evenly and bakes into a silky texture.
Oven technique is the second pillar. Starting at a higher temperature (425°F) sets the crust quickly, then dropping to 350°F allows the filling to cook gently without curdling. This two-stage baking method is what professional bakers use, and it makes a noticeable difference.
Finally, patience. A pumpkin pie is not done the moment you pull it from the oven. It continues to set as it cools. Cutting into it too early gives you a runny slice. Wait at least four hours, and ideally overnight.
Pumpkin Pie Ingredients
This recipe uses accessible ingredients you can find at any grocery store. I have tested it with multiple brands and variations, so I can tell you exactly what works and what does not.
For the Filling
15 oz (425g) pumpkin puree — Use 100% pure pumpkin puree, not pumpkin pie filling. Pumpkin pie filling already contains sugar and spices, which will throw off your balance. I prefer Libby’s brand for its consistent moisture content and deep color.
2 large eggs, room temperature — Eggs provide the structure that sets the custard. Room temperature eggs blend more evenly than cold ones. If you forgot to take them out early, place them in a bowl of warm water for 10 minutes.
1 egg yolk, room temperature — The extra yolk adds richness and gives the filling that golden, custard-like quality that separates homemade pie from store-bought.
3/4 cup (150g) dark brown sugar — Dark brown sugar adds molasses depth that white sugar simply cannot match. It pairs naturally with pumpkin and enhances the warm spice notes. You can substitute light brown sugar, but the flavor will be slightly less complex.
1/4 cup (50g) granulated sugar — A combination of brown and white sugar gives you the best of both worlds: molasses flavor from the brown and clean sweetness from the white.
1 tablespoon cornstarch — This is my secret ingredient. Cornstarch stabilizes the filling and helps prevent cracks. It also gives the pie a cleaner slice when you cut into it.
1 teaspoon ground cinnamon — The backbone of the spice blend. Use fresh cinnamon for the best flavor. If your cinnamon has been in the pantry for over a year, it has lost its punch.
1/2 teaspoon ground ginger — Ginger adds brightness and a subtle heat that balances the sweetness. Ground ginger is more concentrated than fresh, so a little goes a long way.
1/2 teaspoon ground nutmeg — Freshly grated nutmeg is worth the extra effort. If you have whole nutmeg and a microplane, grate it fresh. The difference is remarkable.
1/4 teaspoon ground cloves — Cloves are potent. Too much will overpower the pie. A quarter teaspoon is the sweet spot.
1/4 teaspoon black pepper — This is borrowed from Sally’s Baking Addiction, and it works. Black pepper amplifies the other spices without making the pie taste peppery. You will not taste pepper, but you will notice a deeper, more rounded spice flavor.
1/2 teaspoon kosher salt — Salt balances sweetness and brings all the flavors into focus. Do not skip it.
1 1/2 cups (360ml) evaporated milk, room temperature — Evaporated milk is the classic choice for a reason. It creates a rich, stable custard that sets cleanly. I will explain the evaporated milk versus heavy cream debate below.
1 teaspoon vanilla extract — Vanilla rounds out the flavor and adds warmth.
For the Crust
1 unbaked 9-inch deep dish pie crust — You can use a homemade crust or a store-bought refrigerated crust. For a deep dish pie, make sure the crust has high sides to hold all the filling. I will cover homemade versus store-bought in the tips section.
Fresh vs Canned Pumpkin: Which Is Better?
After testing both extensively, I recommend canned pumpkin for most bakers. Here is why.
Canned pumpkin has a consistent moisture level, which means your pie will turn out the same every time. It is also deeply concentrated, giving you that rich, dense filling people expect from pumpkin pie.
Fresh pumpkin can produce incredible results, but it requires careful preparation. If you use fresh pumpkin, you must roast it (do not boil), then drain and blot the puree thoroughly. Fresh pumpkin contains significantly more water than canned. If you do not remove that excess moisture, your pie will be runny.
If you want to try fresh pumpkin, use sugar pie pumpkins (also called baking pumpkins), not the large carving pumpkins. Carving pumpkins are watery, stringy, and bland. Sugar pie pumpkins are smaller, sweeter, and denser.
Evaporated Milk vs Heavy Cream vs Sweetened Condensed Milk
This is one of the most debated topics in pumpkin pie baking, and the answer depends on the texture you want.
Evaporated milk produces a classic, slightly firm custard that slices cleanly. It is the traditional choice used in the famous Libby’s recipe, and it is what I use in this recipe. It has about 60% of the water removed, concentrating the milk solids.
Heavy cream creates a richer, softer, more luxurious filling. If you want a silkier, almost melt-in-your-mouth texture, substitute heavy cream for evaporated milk. The tradeoff is that the pie will be slightly softer when sliced.
Sweetened condensed milk is the shortcut option. It is thick, sweet, and already contains sugar. If you use condensed milk, you should reduce or eliminate the granulated sugar in the recipe. The Kitchn’s 5-ingredient recipe uses condensed milk for simplicity, and it works well for beginners who want minimal steps.
My recommendation: start with evaporated milk for the classic version. Once you master that, experiment with heavy cream for a richer variation.
Equipment You Need
You do not need fancy equipment to make a great pumpkin pie, but a few specific items will make a big difference in your results.
9-inch deep dish pie pan — A deep dish pan holds the full volume of this filling. Standard pie pans may overflow. Glass or ceramic pans work best because they distribute heat evenly and let you check the bottom crust.
Pie weights or dried beans — If you blind bake your crust (recommended), you need pie weights or dried beans to keep the crust from puffing up and shrinking.
Pie crust shield or aluminum foil — This protects the crust edges from burning during the long bake. You can buy a silicone shield or make one by folding foil around the rim.
Wire whisk — A whisk blends the filling more smoothly than a spoon, ensuring no lumps of pumpkin or sugar remain.
Cooling rack — Air circulation underneath the pie prevents condensation from making the crust soggy. Always cool on a rack, never directly on the counter.
How to Make Pumpkin Pie from Scratch?
Follow these steps carefully, and you will have a perfect pumpkin pie. I have baked this recipe over 20 times, so I can warn you about every potential pitfall along the way.
Step 1: Prepare the Crust (Par-Baking)
Preheat your oven to 375°F (190°C). Roll out your pie crust and fit it into your 9-inch deep dish pie pan, crimping the edges. Line the crust with parchment paper and fill with pie weights or dried beans.
Bake for 15 minutes. Remove the parchment and weights, then bake for another 5 minutes until the bottom looks dry and lightly golden. This process, called blind baking or par-baking, prevents a soggy bottom crust.
Let the crust cool while you prepare the filling. Reduce the oven temperature to 425°F (220°C) for the next step.
Step 2: Mix the Filling
In a large bowl, whisk together the pumpkin puree, 2 whole eggs, and 1 egg yolk until completely smooth. There should be no streaks of pumpkin remaining.
Add the dark brown sugar, granulated sugar, cornstarch, cinnamon, ginger, nutmeg, cloves, black pepper, and salt. Whisk until fully combined. The sugar should be completely dissolved and the spices evenly distributed.
Slowly pour in the evaporated milk and vanilla extract while whisking gently. Whisking too aggressively incorporates air bubbles, which can cause the filling to puff and crack during baking. Mix just until combined.
Step 3: Fill and Bake (High Temperature)
Place your par-baked crust on the oven rack. Carefully pour the filling into the crust, filling it to about 1/4 inch below the rim. Pouring while the pan is already on the rack prevents spills when transferring a full, liquid pie.
Bake at 425°F (220°C) for 15 minutes. This initial high-temperature blast sets the crust edges and starts the custard from the outside in.
Step 4: Reduce Temperature and Continue Baking
After 15 minutes, reduce the oven temperature to 350°F (175°C). Do not open the door yet. Let the pie continue baking at the lower temperature for 40 to 50 minutes.
About 20 minutes into the lower-temperature bake, check the crust edges. If they are browning too quickly, cover them with a pie shield or a strip of aluminum foil. This is one of the most common issues bakers encounter, so do not skip this check.
Step 5: Test for Doneness
Start checking for doneness at the 40-minute mark. There are two reliable methods.
The jiggle test is the most reliable. Gently shake the oven rack. The edges of the pie should be fully set, and the center should jiggle like gelatin but should not ripple like liquid. If the center ripples, bake for 5 more minutes and test again.
The knife test is the backup. Insert a butter knife about 1 inch from the center. It should come out clean. Do not test the exact center with a knife, because the pie continues to cook after removal and you want the center slightly underdone at this stage.
Step 6: Cool Completely
Remove the pie from the oven and place it on a wire rack. Let it cool at room temperature for at least 2 hours. Then transfer it to the refrigerator for at least 2 more hours before slicing.
For the cleanest slices, refrigerate the pie overnight. A fully chilled pie cuts like a dream and holds its shape on the plate.
Pumpkin Pie Science: Why It Cracks and How to Prevent It
Cracks are the number one complaint I see in baking forums. Understanding the science behind why they happen is the best way to prevent them.
Pumpkin pie is a custard. Custards are made of proteins (from eggs) that coagulate when heated. The problem is that eggs overcook quickly. When the temperature in the center of the pie exceeds about 185°F (85°C), the egg proteins tighten too much, squeezing out moisture and causing the surface to split.
This is why oven temperature matters so much. Baking at too high a temperature cooks the edges too fast while the center is still raw. By the time the center sets, the edges have already overcooked and cracked.
The two-stage baking method (425°F then 350°F) helps, but there are additional steps you can take.
Do not overmix the filling. Excess air bubbles expand in the oven and create weak spots that crack as the pie cools. Whisk gently and just until combined.
Cool the pie gradually. A sudden temperature change causes thermal shock, which also produces cracks. Let the pie cool in the oven with the door cracked open for 10 minutes before removing it. Then let it finish cooling on the rack.
The cornstarch in this recipe also helps. It acts as a stabilizer that gives the custard more elasticity, making it more forgiving if you accidentally overbake by a minute or two.
Common Mistakes and Troubleshooting
Here are the most common problems bakers encounter, along with exactly how to fix them.
Problem: Soggy bottom crust. This happens when the filling soaks into the crust before it sets. The fix is par-baking the crust before adding filling. If you skip this step, you will almost certainly get a soggy bottom.
Problem: Filling is runny after cooling. The pie was underbaked. Remember, the center should still jiggle slightly when you remove it from the oven. It finishes setting as it cools. But if the entire pie jiggles like liquid, it needs more time. Put it back in at 350°F for 5 to 10 minute intervals.
Problem: Pie is grainy or curdled. The eggs overcooked. This usually means the oven was too hot or the pie baked too long. Next time, use an oven thermometer to verify your oven temperature is accurate. Many ovens run 25 degrees hotter than their setting.
Problem: Crust burns before filling is done. Use a pie shield or foil to cover the crust edges after the first 20 minutes of low-temperature baking. This is a simple fix that saves the crust.
Problem: Pie filling separates from the crust. This indicates shrinkage from overbaking or cooling too fast. The gradual cooling method described above prevents this.
Problem: Fresh pumpkin pie is watery. If using fresh pumpkin, you must drain the puree. After roasting and pureeing, spread the puree on a clean kitchen towel and squeeze out excess moisture. The puree should be thick enough to hold its shape on a spoon.
Dietary Modifications
No other top-ranking recipe guide covers dietary modifications. I am including these because I have received countless requests for them from readers and forum members.
Vegan Pumpkin Pie
Replace the eggs with a mixture of 3 tablespoons cornstarch and 1/4 cup water, whisked smooth. Replace the evaporated milk with full-fat coconut milk (the kind in a can). Use a vegan pie crust made with vegetable shortening or coconut oil. The texture will be slightly softer than the traditional version, but the flavor is excellent.
Gluten-Free Pumpkin Pie
Use a gluten-free pie crust made with a 1-to-1 gluten-free flour blend. The filling in this recipe is naturally gluten-free, so only the crust needs adjustment. If you want to skip the crust entirely, try our gluten-free pumpkin bread as an alternative dessert.
Sugar-Free Pumpkin Pie
Replace the brown and granulated sugar with 3/4 cup of a sugar substitute designed for baking, such as erythritol or a monk fruit blend. Keep in mind that sugar contributes to the pie’s texture, not just sweetness. Sugar-free versions may set slightly softer. Adding an extra teaspoon of cornstarch helps compensate.
Storage, Freezing, and Make-Ahead Instructions
Proper storage keeps your pumpkin pie fresh and safe to eat. Because pumpkin pie contains eggs and milk, it is a perishable food that requires refrigeration.
Refrigerator Storage
Store the pie loosely covered with plastic wrap or in an airtight pie container in the refrigerator for up to 4 days. Do not leave pumpkin pie at room temperature for more than 2 hours.
Freezing Instructions
You can freeze pumpkin pie successfully. Let the pie cool completely, then wrap it tightly in plastic wrap followed by a layer of aluminum foil. Freeze for up to 1 month.
To serve, thaw the pie overnight in the refrigerator. Do not thaw at room temperature, as this can cause condensation that makes the crust soggy.
I recommend freezing the pie whole rather than sliced. Sliced pieces dry out faster and are harder to wrap properly.
Make-Ahead Tips
Pumpkin pie actually tastes better the day after you bake it. The spices have time to meld, and the filling sets completely. I always make mine the day before serving.
If you are hosting Thanksgiving, bake the pie on Wednesday. Let it cool to room temperature, then refrigerate overnight. On Thursday, all you need to do is slice and serve.
You can also prepare the filling a day ahead. Whisk everything together, store it in an airtight container in the refrigerator, and pour it into the crust right before baking. Give the filling a quick whisk before pouring, as it may separate slightly overnight.
Serving Suggestions and Pairings
A great pumpkin pie deserves thoughtful presentation. Here are my favorite ways to serve it.
Toppings
Whipped cream is the classic topping, and for good reason. The cool, lightly sweetened cream balances the warm spices. Add a splash of vanilla and a pinch of cinnamon to your whipped cream for extra depth.
For something more elevated, try a caramel drizzle or a sprinkle of candied pecans. Sally’s Baking Addiction uses sugared cranberries as a garnish, which adds a beautiful pop of color and a tart contrast.
Beverage Pairings
Coffee is the natural pairing for pumpkin pie. A medium roast with a hint of caramel complements the pie’s spice notes perfectly.
For adult beverages, dessert cocktail pairings open up a world of options. Bourbon-based cocktails work beautifully with pumpkin. The caramel and vanilla notes in bourbon echo the brown sugar in the pie.
If you prefer beer, our guide to the best pumpkin beers for fall includes several options that complement pumpkin pie. A spiced ale or a pumpkin porter served alongside a slice of pie creates a memorable fall dessert experience.
Alternative Serving Ideas
For a individual portions, bake the filling in ramekins without a crust for a crustless pumpkin custard. These are perfect for guests who want a smaller portion or are avoiding crust.
You can also turn leftover pie into a milkshake. Blend a slice with vanilla ice cream and a splash of milk for a decadent treat.
Frequently Asked Questions
What is the secret to a good pumpkin pie?
The secret to a good pumpkin pie is using room temperature ingredients, baking in two stages (425 degrees F for 15 minutes, then 350 degrees F), and adding 1 tablespoon of cornstarch to stabilize the filling. These three techniques produce a creamy, crack-free pie every time.
Is it better to use heavy cream or evaporated milk in pumpkin pie?
Evaporated milk produces a classic, firm custard that slices cleanly, while heavy cream creates a richer, softer filling. For a traditional pumpkin pie, use evaporated milk. For a silkier, more luxurious texture, substitute heavy cream. Both work well, but evaporated milk is the more reliable choice for beginners.
What is the easiest pumpkin pie recipe?
The easiest pumpkin pie uses just 5 ingredients: 1 can pumpkin puree, 1 can sweetened condensed milk, 2 eggs, pumpkin pie spice, and a store-bought crust. Mix everything in one bowl, pour into the crust, and bake at 425 degrees F for 15 minutes, then 350 degrees F for 35 to 40 minutes.
What are common mistakes when making pumpkin pie?
Common mistakes include skipping the par-bake (causing a soggy crust), overmixing the filling (creating air bubbles that lead to cracks), using cold ingredients straight from the fridge, baking at too high a temperature the entire time, and cutting the pie before it has fully cooled. All of these are easily avoidable with the techniques in this recipe.
Can you freeze pumpkin pie?
Yes, you can freeze pumpkin pie for up to 1 month. Let it cool completely, wrap tightly in plastic wrap and aluminum foil, and freeze. To serve, thaw overnight in the refrigerator. Do not thaw at room temperature, as condensation will make the crust soggy.
How do I know when my pumpkin pie is done?
Use the jiggle test: gently shake the oven rack. The pie edges should be fully set, and the center should jiggle like gelatin but not ripple like liquid. If the center ripples, bake for 5 more minutes. The pie continues to set as it cools, so slightly underdone at removal is ideal.
Conclusion
This pumpkin pie recipe gives you everything you need to bake a flawless pie from scratch. From the cornstarch trick that prevents cracks to the two-stage baking method that produces a perfectly set custard, every step has been tested and refined.
Remember the three pillars: room temperature ingredients, the two-stage bake, and patience during cooling. Master those, and you will never buy a store-bought pumpkin pie again.
The dietary modifications, make-ahead tips, and troubleshooting guide mean this recipe works for everyone at your table. Whether you need a vegan option, a gluten-free crust, or a make-ahead Thanksgiving dessert, this guide has you covered.
Now it is your turn. Bake this pumpkin pie recipe, share it with family, and enjoy the comfort of a classic fall dessert made right. If you found this helpful, explore our other fall recipes and baking guides for more seasonal inspiration.