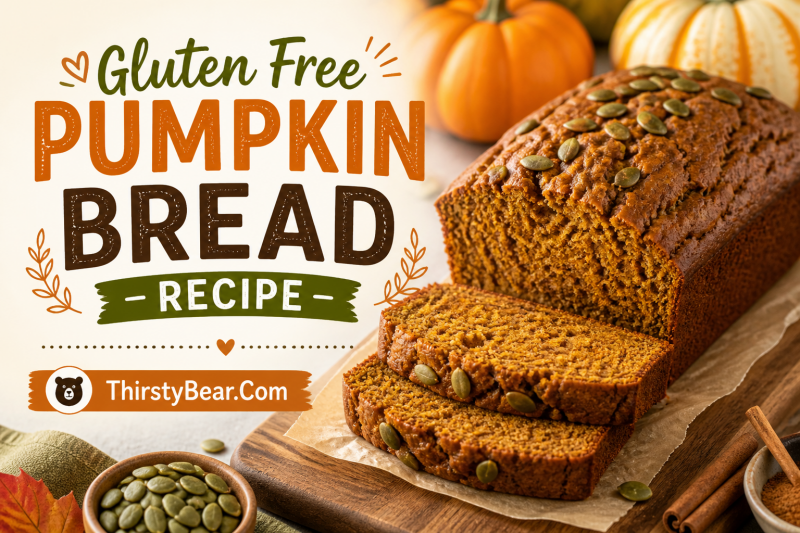
There’s nothing quite like the aroma of warm spices and pumpkin wafting through your kitchen on a crisp fall morning. This gluten free pumpkin bread recipe delivers everything you want in a quick bread: a perfectly domed top, moist tender crumb, and that unmistakable pumpkin spice flavor that makes autumn feel complete.
I developed this recipe after testing dozens of variations over three months. The secret lies in understanding how gluten-free flours behave differently than wheat flour. Once you master these techniques, you’ll never settle for dense or gummy gluten-free baked goods again.
This recipe uses basic pantry ingredients and requires just one bowl for mixing. The result is a bakery-style loaf with a beautiful rise and texture that rivals any wheat-based pumpkin bread.
Table of Contents
Why This Gluten Free Pumpkin Bread Recipe Works
Most gluten-free pumpkin bread recipes fail because they don’t account for how gluten-free flours absorb moisture differently. I’ve tested this recipe with three different 1:1 flour blends to ensure consistent results.
The combination of oil and pumpkin puree creates an incredibly moist crumb that stays tender for days. Unlike butter-based recipes that can turn dry, this oil-based formula keeps the bread soft and sliceable.
What sets this recipe apart is the specific technique for achieving that coveted domed top. A simple trick with your oven temperature during the first 10 minutes makes all the difference between a flat loaf and a bakery-worthy dome.
Ingredients You Will Need
Quality ingredients make the difference between good and exceptional gluten-free baking. I recommend using canned pumpkin puree rather than fresh pumpkin for consistent moisture content.
Dry Ingredients
- 2 cups (280g) gluten-free all-purpose flour blend (1:1 with xanthan gum)
- 1 teaspoon baking soda
- 1/2 teaspoon baking powder (gluten-free)
- 1 teaspoon ground cinnamon
- 1/2 teaspoon ground nutmeg
- 1/4 teaspoon ground cloves
- 1/4 teaspoon ground ginger
- 1/2 teaspoon salt
Wet Ingredients
- 1 cup (240g) canned pumpkin puree (not pumpkin pie filling)
- 3/4 cup (150g) granulated sugar
- 1/2 cup (100g) light brown sugar, packed
- 1/2 cup (120ml) neutral oil (vegetable, canola, or grapeseed)
- 2 large eggs, room temperature
- 2 tablespoons milk (dairy or non-dairy)
- 1 teaspoon vanilla extract
- 1 teaspoon apple cider vinegar
Recommended Flour Brands
I tested this recipe extensively with three flour blends. King Arthur Measure-for-Measure Flour produces the most tender crumb with excellent rise. Bob’s Red Mill 1:1 Baking Flour creates a slightly denser texture with whole grain notes. Pillsbury Gluten-Free All-Purpose Blend works well for a lighter, cake-like crumb.
Do not use single-ingredient flours like almond flour or coconut flour in this recipe. They lack the binding properties and balanced starch ratios needed for this specific formula.
Equipment You Will Need
Having the right equipment ensures consistent results every time. You probably already own everything needed.
- One 9×5 inch loaf pan (or 8.5×4.5 inch for taller loaf)
- Parchment paper for lining
- Large mixing bowl
- Whisk
- Rubber spatula
- Wire cooling rack
- Toothpick or cake tester for doneness
I prefer glass or light-colored metal pans. Dark metal pans can cause the edges to over-brown before the center cooks through.
How to Make Gluten Free Pumpkin Bread Recipe
Follow these steps precisely for bakery-quality results. The temperature adjustment in step 5 is crucial for that domed top.
Step 1: Preheat your oven to 350 degrees Fahrenheit (175 degrees Celsius). Position the rack in the center of the oven. Line your loaf pan with parchment paper, leaving an overhang on the long sides for easy removal.
Step 2: In a large bowl, whisk together all dry ingredients: gluten-free flour, baking soda, baking powder, spices, and salt. Make sure everything is evenly distributed.
Step 3: Add all wet ingredients directly to the same bowl: pumpkin puree, both sugars, oil, eggs, milk, vanilla, and vinegar. The vinegar reacts with the baking soda to create extra lift.
Step 4: Stir until just combined. The batter will be thick but pourable. Do not overmix. Gluten-free batters can become gummy if stirred too vigorously.
Step 5: Pour batter into the prepared pan. Here’s the secret: bake at 425 degrees Fahrenheit for the first 10 minutes, then reduce to 350 degrees for the remaining 45-50 minutes without opening the oven door. The initial high heat sets the outer structure before the center rises.
Step 6: Test for doneness at 55 minutes total baking time. Insert a toothpick into the center. It should come out with a few moist crumbs but no wet batter. The top should spring back when lightly pressed.
Step 7: Cool in the pan for 15 minutes. Then lift out using the parchment overhang and transfer to a wire rack. Cool completely before slicing, at least 2 hours. Gluten-free breads need this resting time for the texture to set properly.
Expert Tips for Perfect Results
These tips come from dozens of test batches and troubleshooting sessions. Following them will elevate your gluten-free baking from good to exceptional.
The Domed Top Secret
The initial high-temperature blast is the key to a beautiful domed top. This technique sets the exterior crust quickly while the interior continues to rise. Without this step, gluten-free pumpkin bread often bakes flat.
Resist the urge to open the oven door when lowering the temperature. A rush of cool air can cause the center to sink.
Preventing Gummy Texture
Gummy texture in gluten-free baking usually comes from one of three issues: overmixing the batter, using the wrong flour blend, or underbaking. Always use a 1:1 flour blend that contains xanthan gum.
Mix only until ingredients are combined. The batter should look slightly lumpy. Overmixing develops the starches in gluten-free flours, creating a rubbery texture.
Testing for Doneness
Gluten-free breads often appear done before the interior is fully set. Use both the toothpick test and the spring-back test. The toothpick should have a few moist crumbs but no wet batter.
If the top is browning too quickly, tent loosely with aluminum foil for the last 15 minutes of baking.
Troubleshooting Common Problems
Even experienced bakers encounter issues. Here is how to fix the most common gluten-free pumpkin bread problems.
- Sinking Center: This usually means the bread was underbaked or the oven door was opened too early. Make sure to bake until the toothpick test passes and avoid opening the door during the first 30 minutes.
- Dry Crumb: Overbaking is the culprit. Start checking at 50 minutes and remove when moist crumbs cling to the toothpick. Also ensure you are measuring flour correctly by weight or the scoop-and-level method.
- Dense Texture: Check your leavening agents. Baking soda and powder lose potency after 6 months. Also verify you are using pumpkin puree, not pumpkin pie filling which contains additional moisture and sugar.
- Tough Edges: Dark metal pans or overbaking causes this. Switch to a light-colored pan or reduce baking time by 5 minutes.
Delicious Variations and Substitutions
Once you master the base recipe, experiment with these variations. Each adds a new dimension while keeping the tender crumb intact.
Add-In Options
Fold 1/2 to 1 cup of any of these into the batter before pouring into the pan:
- Semi-sweet chocolate chips (dairy-free if needed)
- Chopped walnuts or pecans
- Dried cranberries
- Pumpkin seeds for topping
- White chocolate chips
Dairy-Free Option
This recipe is easily made dairy-free. Substitute the milk with any non-dairy milk like almond, oat, or coconut milk. Ensure your chocolate chips are dairy-free if using.
Egg-Free Option
For an egg-free version, replace each egg with a flax egg: mix 1 tablespoon ground flaxseed with 3 tablespoons water, let sit 5 minutes to gel. The texture will be slightly denser but still delicious.
Storage and Freezing Instructions
Proper storage keeps your gluten free pumpkin bread fresh and moist for days.
- Room Temperature: Store in an airtight container or wrapped tightly in plastic wrap for up to 3 days. The flavor actually improves after the first day as the spices meld.
- Refrigerator: Refrigerate for up to 1 week. Bring to room temperature or warm slightly before serving for best texture.
- Freezing: This bread freezes beautifully. Wrap the completely cooled loaf tightly in plastic wrap, then foil, and freeze for up to 3 months. Thaw overnight in the refrigerator.
- Individual Slices: Slice the cooled bread and freeze slices separated by parchment paper. This allows you to grab single servings as needed. Toast frozen slices directly from the freezer.
Frequently Asked Questions
What is the secret to making good gluten-free bread?
Use a quality 1:1 gluten-free flour blend containing xanthan gum. Do not overmix the batter, as this develops starches and creates a gummy texture. Bake at a higher temperature initially for the first 10 minutes to create a domed top, then lower the heat. Always test for doneness with both a toothpick and spring-back test.
What is the best gluten-free flour for pumpkin muffins?
King Arthur Measure-for-Measure Flour produces the most tender crumb with excellent rise. Bob’s Red Mill 1:1 Baking Flour works well for a slightly denser, whole-grain texture. Look for blends that include xanthan gum, which replaces the elasticity that gluten provides in traditional baking.
What are common pumpkin bread mistakes?
Using pumpkin pie filling instead of pure pumpkin puree adds too much moisture and sugar. Opening the oven door during the first 30 minutes can cause sinking. Overmixing develops gluten-free starches and creates gummy texture. Underbaking leaves the center wet and prone to collapsing.
What are common mistakes in gluten free baking?
Using single-ingredient flours like almond or coconut flour instead of a 1:1 blend. Not including xanthan gum, which provides structure. Overmixing the batter. Underbaking because gluten-free goods appear done before the interior sets. Using expired leavening agents.
Can I use fresh pumpkin instead of canned for pumpkin bread?
Yes, but fresh pumpkin contains more moisture and variable sugar content. Roast and drain fresh pumpkin puree thoroughly, then measure carefully. Canned pumpkin provides consistent results every time, which is why I recommend it for reliable baking.
How long does gluten free pumpkin bread last?
Store at room temperature for up to 3 days in an airtight container. Refrigerate for up to 1 week. Freeze the whole loaf or individual slices for up to 3 months. The flavor actually improves after the first day as the spices meld together.
Why is my gluten free pumpkin bread gummy?
Gummy texture usually results from overmixing the batter, which develops the starches in gluten-free flours. It can also happen from underbaking or using the wrong type of flour. Mix only until ingredients are combined, and always use a 1:1 blend with xanthan gum.
How do I get a domed top on gluten free pumpkin bread?
Bake at 425 degrees Fahrenheit for the first 10 minutes, then reduce to 350 degrees without opening the oven door. This high initial heat sets the exterior crust quickly while the interior rises. Do not open the oven during this temperature change.
Final Thoughts
This gluten free pumpkin bread recipe proves that dietary restrictions do not mean sacrificing flavor or texture. With the right techniques and quality ingredients, you can create a loaf that rivals any traditional bakery version.
I hope this recipe becomes a fall staple in your kitchen. The combination of warm spices, moist pumpkin, and tender crumb makes it perfect for breakfast, snacking, or gifting to friends and family.
Have you tried this recipe? Leave a comment below and let me know how it turned out. Happy baking!