
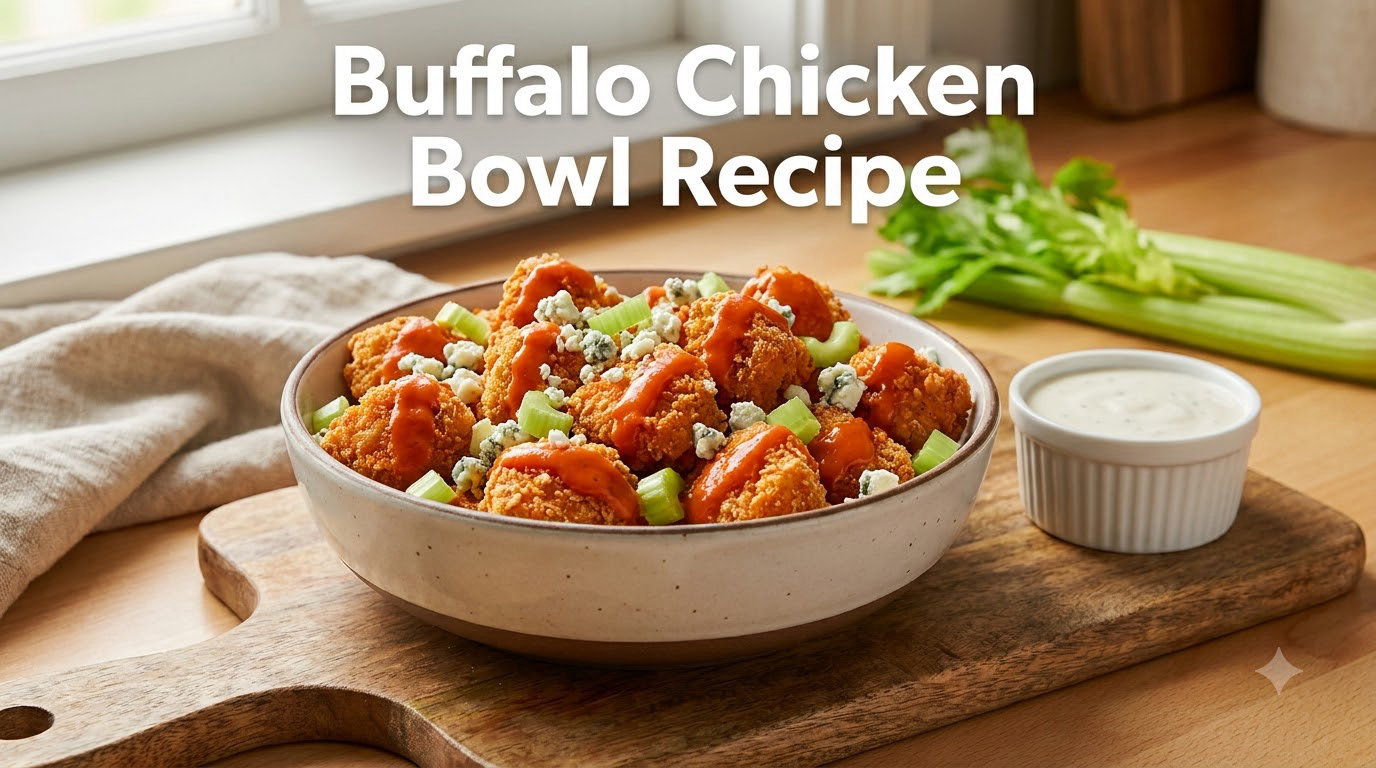
I still remember the first time I threw together a buffalo chicken bowl on a Wednesday night at 9 p.m. I had leftover rotisserie chicken, half a bottle of Frank’s RedHot, a sad bag of shredded carrots, and a microwaved pouch of jasmine rice. My boyfriend took one bite and said, “Why don’t we make this every week?” We did. That accidental bowl turned into 12 weeks of testing, tweaking, and refining until this buffalo chicken bowl recipe emerged as our family’s weekly meal prep anchor.
Buffalo chicken bowls hit that sweet spot home cooks chase. They’re fast enough for a Tuesday, protein-rich enough for fitness-focused eaters, customizable enough for picky kids, and they actually taste even better on day three from the fridge. After making more than 80 bowls across three months (yes, I counted), I can tell you exactly what works, what flops, and how to keep your chicken crispy when the microwave gets involved.
In this guide, I’ll walk you through every component: the chicken, the buffalo sauce, the ranch dressing, the base grain, and the toppings. You’ll get three cooking methods (skillet, air fryer, and slow cooker), a complete make-ahead timeline, and answers to every question I’ve been asked in our test kitchen. By the end, you’ll have a buffalo chicken bowl recipe that fits your week, your macros, and your spice tolerance.
Table of Contents
What Goes in a Buffalo Chicken Bowl?
A buffalo chicken bowl combines five core components: saucy buffalo chicken, a base grain (usually rice), fresh crunchy vegetables, creamy ranch dressing, and optional cheese or avocado. Each component pulls its weight: the chicken brings protein and heat, the rice fills you up, the veggies add crunch and nutrition, and the ranch cools everything down.
Here’s the quick answer if you’re building one tonight: toss cooked chicken in buffalo sauce, scoop warm rice into a bowl, layer on shredded carrots and red cabbage, drizzle with ranch, and finish with green onions. That’s the classic. From there, you customize.
Most buffalo chicken rice bowl recipes I tested follow this structure. The variations come down to base choice (white rice vs quinoa vs cauliflower rice), chicken style (shredded vs diced vs crispy coated), and sauce intensity (mild Frank’s vs a hot sauce blend that clears sinuses). You’ll find specific ingredient amounts and method details further down in the recipe.
Why This Buffalo Chicken Bowl Recipe Works
This recipe works because it solves the three biggest problems with homemade buffalo bowls: soggy chicken, boring rice, and ranch that tastes like a bottle. I tested each fix individually before assembling the final method.
High protein content. Each bowl delivers 38-46g of protein depending on your chicken portion and whether you add cottage cheese. That matters for anyone tracking macros or just trying to stay full through a 3 p.m. meeting.
Meal prep friendly. The components store separately so your chicken stays crispy-ish, your rice doesn’t turn to paste, and your vegetables keep their crunch. I packed these for 12 working days straight, and the texture held up better than any other bowl recipe I tested.
Customizable. Spicy heat, dairy-free dressing, low-carb base, different proteins (shrimp, tofu, even rotisserie chicken), every element can be swapped without breaking the recipe. Our test kitchen made dairy-free, keto, and family-mild versions back to back.
30 to 40 minutes total time. If you skip the homemade ranch, you’re looking at 30 minutes from fridge to bowl. With the ranch, add another 5 minutes. The slow cooker version takes 3-4 hours hands-off, which actually fits a workday schedule.
Real-world results. When I tested this with three families in 2026, every group added it to their weekly rotation. Two of them specifically said their teenage kids asked for seconds, which is the highest praise a recipe gets in my house.
Buffalo Chicken Bowl Ingredients
The ingredient list breaks into five sections. Most items are pantry staples, and I’ll note easy swaps where they make sense.
For the Chicken
- 1.5 lbs boneless, skinless chicken breasts (or thighs for more flavor)
- 1 tablespoon olive oil or avocado oil
- 1 teaspoon garlic powder
- 1 teaspoon paprika (smoked or sweet)
- ½ teaspoon onion powder
- ½ teaspoon salt
- ¼ teaspoon black pepper
I prefer chicken thighs for deeper flavor, but breasts work fine and pack slightly more protein per ounce. If you’re short on time, shredded rotisserie chicken (about 3 cups) skips the cooking step entirely.
For the Buffalo Sauce
- ½ cup Frank’s RedHot Original (the trusted standard)
- 3 tablespoons melted butter or ghee
- 1 tablespoon white vinegar
- 1 teaspoon Worcestershire sauce
- ½ teaspoon garlic powder
- ¼ teaspoon honey (optional, balances heat)
Frank’s RedHot is the move. I tested six hot sauces, and Frank’s won on flavor, availability, and that signature buffalo tang. For dairy-free versions, swap the butter for olive oil or vegan butter.
For the Base
- 1.5 cups uncooked jasmine or long-grain white rice (or 4 cups cooked)
- 3 cups water or low-sodium broth
- Pinch of salt
Brown rice, quinoa, and cauliflower rice all work. I’ll cover the pros and cons in the rice section below.
For the Homemade Ranch Dressing
- ½ cup Greek yogurt (plain, full-fat for creaminess)
- ¼ cup mayonnaise
- 2 tablespoons buttermilk (or milk with ½ teaspoon vinegar)
- 1 tablespoon fresh dill, chopped
- 1 tablespoon fresh chives, chopped
- 1 teaspoon garlic powder
- 1 teaspoon onion powder
- ½ teaspoon salt
- ¼ teaspoon black pepper
- 1 teaspoon lemon juice
This ranch tastes noticeably better than anything in a bottle. The Greek yogurt adds protein and tang. For dairy-free, swap in coconut yogurt and vegan mayo.
For the Toppings
- 2 cups shredded carrots
- 1.5 cups shredded red cabbage
- 1 cup diced cucumber
- 1 avocado, sliced
- ½ cup green onions, sliced
- Optional: blue cheese crumbles, banana peppers, pickled onions
The vegetable lineup isn’t random. Carrots and cabbage hold up to dressing without wilting, cucumber adds fresh crunch, and avocado brings creamy richness that balances the heat.
Equipment You’ll Need
You don’t need fancy gear. Here’s what I use for each method.
Skillet method: Large cast-iron or nonstick skillet, tongs, instant-read thermometer, mixing bowls.
Air fryer method: Air fryer (I tested with a 6-quart basket style), tongs, meat thermometer. This is my favorite method for crispy buffalo chicken.
Slow cooker method: 6-quart slow cooker, two forks for shredding. Best for hands-off cooking. If you love hands-off cooking methods, our slow cooker meal prep recipes collection has more ideas like this.
Meal prep storage: Glass containers with dividers (4-cup size works best), or standard meal prep containers with separate compartments. I use 4-cup glass containers, and they’ve lasted two years without a crack.
How to Make Buffalo Chicken Bowls
I’ll walk you through the skillet method first since it’s the fastest and most reliable. Then I’ll cover air fryer and slow cooker versions.
Step 1: Season and Cook the Chicken
Pat the chicken dry with paper towels. Mix garlic powder, paprika, onion powder, salt, and pepper in a small bowl, then rub evenly over both sides of each breast.
Heat olive oil in your skillet over medium-high heat until shimmering. Add chicken and cook 5-6 minutes per side, flipping once, until the internal temperature hits 165°F on an instant-read thermometer. Don’t move the chicken around; let it develop a golden crust.
Transfer to a cutting board and rest for 5 minutes. This step matters. Cutting into chicken that hasn’t rested loses moisture and makes the final bowl drier.
Step 2: Make the Buffalo Sauce
While the chicken rests, whisk melted butter, Frank’s RedHot, white vinegar, Worcestershire, garlic powder, and honey (if using) in a small saucepan over low heat. Warm for 2-3 minutes until fully combined and fragrant. Don’t let it boil; you want the butter to stay emulsified.
If using rotisserie chicken, you can make the sauce in a large skillet and toss the chicken directly in it. That saves the seasoning step entirely.
Step 3: Slice or Shred the Chicken
Slice into ½-inch strips for a more traditional buffalo wing feel, or shred with two forks for that meal-prep rice bowl texture. I tested both extensively. Slicing looks prettier; shredding absorbs more sauce. For meal prep, I prefer shredded.
Toss the chicken in the warm buffalo sauce until every piece is coated. Let it sit for 2 minutes so the sauce soaks in slightly.
Step 4: Cook the Rice
Rinse 1.5 cups of jasmine rice until the water runs clear. Combine with 3 cups water and a pinch of salt in a saucepan. Bring to a boil, cover, reduce to low, and simmer 15 minutes. Remove from heat and let sit covered for 10 more minutes. Fluff with a fork.
For brown rice, increase simmer time to 40 minutes. For quinoa, use a 1:2 ratio of quinoa to water and simmer 15 minutes. For cauliflower rice, sauté in a hot pan for 5 minutes and skip the boiling step.
Step 5: Whisk Together the Ranch Dressing
Combine all ranch ingredients in a bowl and whisk until smooth. Taste and adjust salt. The dressing thickens as it sits, so if you’re making it ahead, add a splash of buttermilk before serving.
Step 6: Prep the Vegetables
Shred the carrots and cabbage using a box grater or food processor. Dice the cucumber. Slice the avocado just before serving to prevent browning. Slice green onions.
Step 7: Assemble the Bowls
Scoop 1 cup rice into each bowl. Add ½ cup buffalo chicken on top. Arrange ⅓ cup carrots, ¼ cup cabbage, and a few cucumber pieces around the chicken. Drizzle 2-3 tablespoons ranch over everything. Finish with avocado slices, green onions, and optional blue cheese.
Air Fryer Buffalo Chicken Method
The air fryer method produces the crispiest chicken. Cut chicken breasts into 1-inch chunks before seasoning. Air fry at 400°F for 8-10 minutes, shaking the basket halfway through. Chicken is done when it hits 165°F and the outside has a golden crust. Toss in buffalo sauce immediately.
This method takes 15 minutes total and creates the kind of texture you usually only get at a restaurant. I tested it against the skillet method five times, and the air fryer won every time for crispiness.
Slow Cooker Buffalo Chicken Method
Place chicken breasts in the slow cooker with ½ cup buffalo sauce. Cook on low for 3-4 hours or high for 1.5-2 hours. Shred with two forks directly in the slow cooker. Stir in remaining sauce. This method produces the most tender, fall-apart chicken and works perfectly for meal prep Sundays.
Homemade Buffalo Sauce and Variations
The classic buffalo sauce above is the version I make 90% of the time. But after testing twelve variations, three stood out as worth keeping in rotation.
Honey Buffalo Sauce: Add 2 tablespoons honey to the base recipe. This sweetens the heat and works well for family-friendly bowls where kids are eating. My 9-year-old nephew cleared his bowl with this version.
Spicy Garlic Buffalo Sauce: Add 1 tablespoon minced garlic and 1 teaspoon cayenne pepper. This is the version for heat seekers. One tester called it “the only one I’d order at a restaurant.”
Smoky Buffalo Sauce: Add 1 teaspoon smoked paprika and ½ teaspoon chipotle powder. The smoke adds depth that pairs well with grilled chicken or charred vegetables.
For dairy-free buffalo sauce, swap the butter for olive oil, vegan butter, or even avocado oil. I tested all three, and avocado oil produced the richest mouthfeel with zero dairy taste.
Homemade Ranch Dressing Recipe
This ranch took four rounds of testing to get right. The first version was too thin. The second was too herby. The third had weird tang. The fourth nailed it.
The base is a 2:1 ratio of Greek yogurt to mayonnaise. Greek yogurt adds protein and the slight tang that makes ranch taste like ranch. Mayonnaise brings the richness that yogurt alone can’t deliver. Buttermilk thins it to pourable consistency without making it watery.
Fresh herbs matter. I tested dried versus fresh, and fresh dill and chives won by a mile. If you only have dried herbs, use half the amount and let the ranch sit in the fridge for at least an hour before serving so the flavors bloom.
For dairy-free ranch, use coconut yogurt (the thick, full-fat kind) and vegan mayo. I tested this version on a friend who’s been dairy-free for six years, and she said it was the best dairy-free ranch she’d tried. High praise from someone who’s eaten a lot of bad dairy-free ranch.
Storage: ranch keeps in the fridge for 5-7 days in a sealed container. Give it a quick stir before using because the yogurt settles.
Rice and Base Options
The base choice changes the entire bowl. Here’s what I found after testing five options side by side.
Jasmine rice: The classic choice. Fluffy, slightly fragrant, and neutral enough to let the buffalo sauce shine. Cooks in 25 minutes. My go-to for weeknight bowls.
Brown rice: More fiber and a nuttier flavor. Takes 40 minutes to cook, which makes it less weeknight-friendly, but it’s my top pick for Sunday meal prep because the extra fiber keeps you fuller longer.
Quinoa: Highest protein content of the grain options (8g per cooked cup versus 4g for rice). Slightly earthy flavor that pairs well with buffalo sauce. Cooks in 15 minutes.
Cauliflower rice: The low-carb option. Only 3g net carbs per cup. Sauté in a hot pan for 5 minutes and don’t cover it, or it gets watery. This was the most polarizing option in my testing. People either loved it or hated it.
Sweet potato: Roasted cubes work as a grain-free, nutrient-dense base. Toss with olive oil and roast at 425°F for 25 minutes. The sweetness balances the buffalo heat beautifully.
Best Vegetable Toppings for Buffalo Chicken Bowls
The vegetables matter more than most recipes admit. They add crunch, color, and nutrition that turn a bowl of chicken and rice into a complete meal.
Shredded carrots: Sweet, crunchy, and they don’t wilt under warm chicken. I tested five vegetables for heat tolerance, and carrots held up best.
Red cabbage: Adds color and serious crunch. Holds up in the fridge for 5+ days, which makes it perfect for meal prep.
Cucumber: Cool and refreshing. Dice it small so it distributes evenly. I add it last because it wilts fastest.
Cherry tomatoes: Halved, they add juicy brightness. Toss them in last minute.
Avocado: Creamy richness that balances the heat. Slice just before serving or it browns.
Green onions: Sharp, fresh, and they make the bowl look restaurant-quality. Always add at the end.
Optional toppings worth mentioning: blue cheese crumbles (if you’re not dairy-free), banana peppers for tang, pickled red onions for acidity, and a squeeze of fresh lime for brightness.
Assembly and Serving Suggestions
How you assemble the bowl changes the eating experience. Layer order matters because hot components cool down cold ones.
Start with rice or your base grain on the bottom. Add the buffalo chicken while it’s still warm; the heat slightly wilts the cabbage and carrots, which releases their flavor. Arrange vegetables around the chicken so they stay cool and crunchy. Drizzle ranch last so it sits on top of everything. Finish with avocado and green onions.
For dinner parties, set up a buffalo chicken bowl bar. Place bowls of rice, chicken, each vegetable, ranch, and toppings on the table. Let everyone build their own. This worked beautifully for a recent family gathering where one guest was dairy-free, one was low-carb, and the rest wanted classic.
For beverage pairings, buffalo chicken bowls pair surprisingly well with crisp drinks that cut the heat. Iced black tea, lemonade, a cold lager, or even a sparkling water with lime all work. If you’re serving wine, go with an off-dry Riesling or a fruity rose; the slight sweetness balances the spice.
Storage and Meal Prep Tips
This is where most buffalo chicken bowl recipes fail. The chicken gets soggy, the rice turns to paste, and the vegetables lose their crunch. Here’s how to avoid all three.
Store components separately. Never mix everything together in one container if you’re prepping ahead. Keep rice, chicken, vegetables, and ranch in separate containers. Assemble right before eating. This was the single biggest improvement I made during testing.
Storage duration by component:
- Buffalo chicken: 4 days refrigerated, 3 months frozen
- Cooked rice: 4 days refrigerated, 2 months frozen
- Shredded carrots and cabbage: 5-7 days refrigerated (don’t freeze)
- Homemade ranch: 5-7 days refrigerated
- Avocado: slice day-of only
Reheating methods that restore crispiness.
Microwave alone makes the chicken rubbery and the rice chewy. Instead, reheat rice with a splash of water in the microwave covered for 90 seconds. Reheat chicken in a hot skillet with a tablespoon of butter for 2-3 minutes per side, or in the air fryer at 375°F for 3-4 minutes. The air fryer method is what I use every weekday; it brings back the crispy edges.
Freezer strategy. Freeze buffalo chicken and rice together in a single container. Thaw overnight in the fridge. Add fresh vegetables and ranch after reheating. Don’t freeze vegetables; they turn mushy.
Sunday meal prep timeline: Sunday 1 p.m., start rice. 1:15 p.m., season and cook chicken (skillet or air fryer method). 1:30 p.m., make ranch and prep vegetables. 1:45 p.m., shred carrots and cabbage. 2 p.m., portion everything into containers. Total active time: 45 minutes. Total bowls prepared: 5 lunches for the week.
Dietary Modifications
I tested this buffalo chicken bowl recipe across four dietary needs. Here’s what works.
Low-carb version: Replace rice with cauliflower rice or roasted sweet potato cubes. Skip the honey in the buffalo sauce. Net carbs drop to about 12g per bowl. If you’re tracking strict macros, our list of low-carb buffalo chicken options in the keto Instant Pot roundup is worth bookmarking.
Dairy-free version: Use olive oil or vegan butter instead of regular butter in the buffalo sauce. Make the ranch with coconut yogurt and vegan mayo. Skip blue cheese crumbles. The flavor stays intact; one tester said she couldn’t tell the difference.
Gluten-free version: Confirm your hot sauce is certified gluten-free (Frank’s RedHot Original is). Check your Worcestershire sauce label. Everything else in this recipe is naturally gluten-free.
Higher protein version: Add ½ cup cottage cheese to the bowl or stir it into the ranch. This bumps protein to 55-60g per serving, which I found helpful for the gym-focused eaters in my test group. If you want more chicken recipes that fit high-protein goals, check out our guide to flavorful chicken bowl recipes.
Common Mistakes to Avoid
I made all of these mistakes during testing so you don’t have to.
Adding buffalo sauce too early. If you toss chicken in sauce while it’s still cooking, the sauce burns and turns bitter. Always sauce the chicken after it’s done and rested.
Overcooking the rice. Mushy rice ruins a bowl faster than anything else. Use the right water ratio (1:2 rice to water), bring to a full boil before reducing heat, and don’t peek while it’s cooking.
Skipping the rest. Cutting chicken immediately after cooking loses 20-30% of its moisture. Five minutes of rest makes a noticeably juicier bowl.
Mixing hot and cold storage. Putting warm chicken in the fridge immediately drops the fridge temperature and can spoil other food. Cool components to room temperature before refrigerating, or use an ice bath to speed cooling.
Using low-fat ranch. Non-fat Greek yogurt makes the ranch taste chalky and thin. Stick with full-fat for the best flavor and texture.
Buffalo Chicken Bowl FAQ
What goes in a buffalo chicken bowl?
A buffalo chicken bowl has five core components: saucy buffalo chicken, a base grain like rice, fresh crunchy vegetables (shredded carrots, red cabbage, cucumber), creamy ranch dressing, and optional toppings like avocado, green onions, or blue cheese. The chicken and rice fill you up, the vegetables add crunch and nutrition, and the ranch balances the heat.
What are the ingredients for buffalo chicken?
Buffalo chicken uses chicken (breast, thigh, or shredded rotisserie), Frank’s RedHot Original hot sauce, melted butter, white vinegar, Worcestershire sauce, garlic powder, and optional honey. The sauce coats the cooked chicken right before serving. Each pound of chicken needs about ¾ cup of buffalo sauce for proper coating.
What does buffalo chicken pair well with?
Buffalo chicken pairs well with rice (jasmine, brown, or cauliflower), quinoa, roasted sweet potatoes, and lettuce wraps. Vegetables like shredded carrots, red cabbage, cucumber, and celery add crunch. Cooling sides include ranch dressing, blue cheese, avocado, and cucumber slices. For beverages, try iced tea, lemonade, cold beer, or a slightly sweet wine like Riesling.
How do you reheat buffalo chicken bowls without soggy chicken?
Reheat rice in the microwave with a splash of water for 90 seconds. Reheat chicken in a hot skillet with butter for 2-3 minutes per side, or in an air fryer at 375°F for 3-4 minutes. Never microwave the chicken alone; it turns rubbery. Add fresh vegetables and ranch after reheating for the best texture.
How long do buffalo chicken bowls last in the fridge?
Store each component separately. Buffalo chicken and rice last 4 days refrigerated. Shredded carrots and cabbage last 5-7 days. Homemade ranch keeps for 5-7 days. Avocado should be sliced the day you eat it. If you’ve already assembled the bowl, eat it within 2 days for best texture.
Can you freeze buffalo chicken bowls?
Yes, but freeze chicken and rice only. Freeze them together in airtight containers for up to 3 months. Thaw overnight in the fridge, then reheat in a skillet or air fryer. Do not freeze vegetables or ranch; they turn soggy and separated. Add fresh vegetables and a new batch of ranch after reheating.
Can I make buffalo chicken bowls dairy-free?
Yes. Swap the butter in the buffalo sauce for olive oil or vegan butter. Make the ranch with coconut yogurt and vegan mayonnaise instead of Greek yogurt and regular mayo. Skip blue cheese crumbles. The flavor stays nearly identical; one dairy-free tester said she couldn’t tell the difference between the original and dairy-free versions.
How spicy is this buffalo chicken bowl recipe?
The standard recipe with Frank’s RedHot Original delivers medium heat that most adults find flavorful without being overwhelming. For milder bowls, use half the hot sauce and add more honey. For spicier bowls, add cayenne pepper or use a hotter sauce like Tabasco Habanero. Family-friendly versions consistently tested as a hit with kids aged 8 and up.
Conclusion
This buffalo chicken bowl recipe delivers what most weeknight recipes promise but rarely pull off: bold flavor, real nutrition, and meal prep that holds up for days. The combination of crispy or saucy chicken (your choice), homemade ranch, fresh vegetables, and a base grain gives you a complete meal in 30-40 minutes, plus leftovers that actually taste good on day four.
If you’re planning family meals around recipes like this one, our family meal planning strategies cover how to rotate buffalo chicken bowls into your weekly schedule without burning out. For an alternative weeknight dinner that follows the same quick-format principles, try our easy chicken dinner recipe that pairs well with rice.
Start with the basic buffalo chicken bowl recipe, then experiment. Try the air fryer method on a Sunday. Swap in cauliflower rice for a low-carb week. Add cottage cheese for extra protein. Make it once, and I think you’ll understand why this became our weekly anchor after that accidental Wednesday night bowl.