
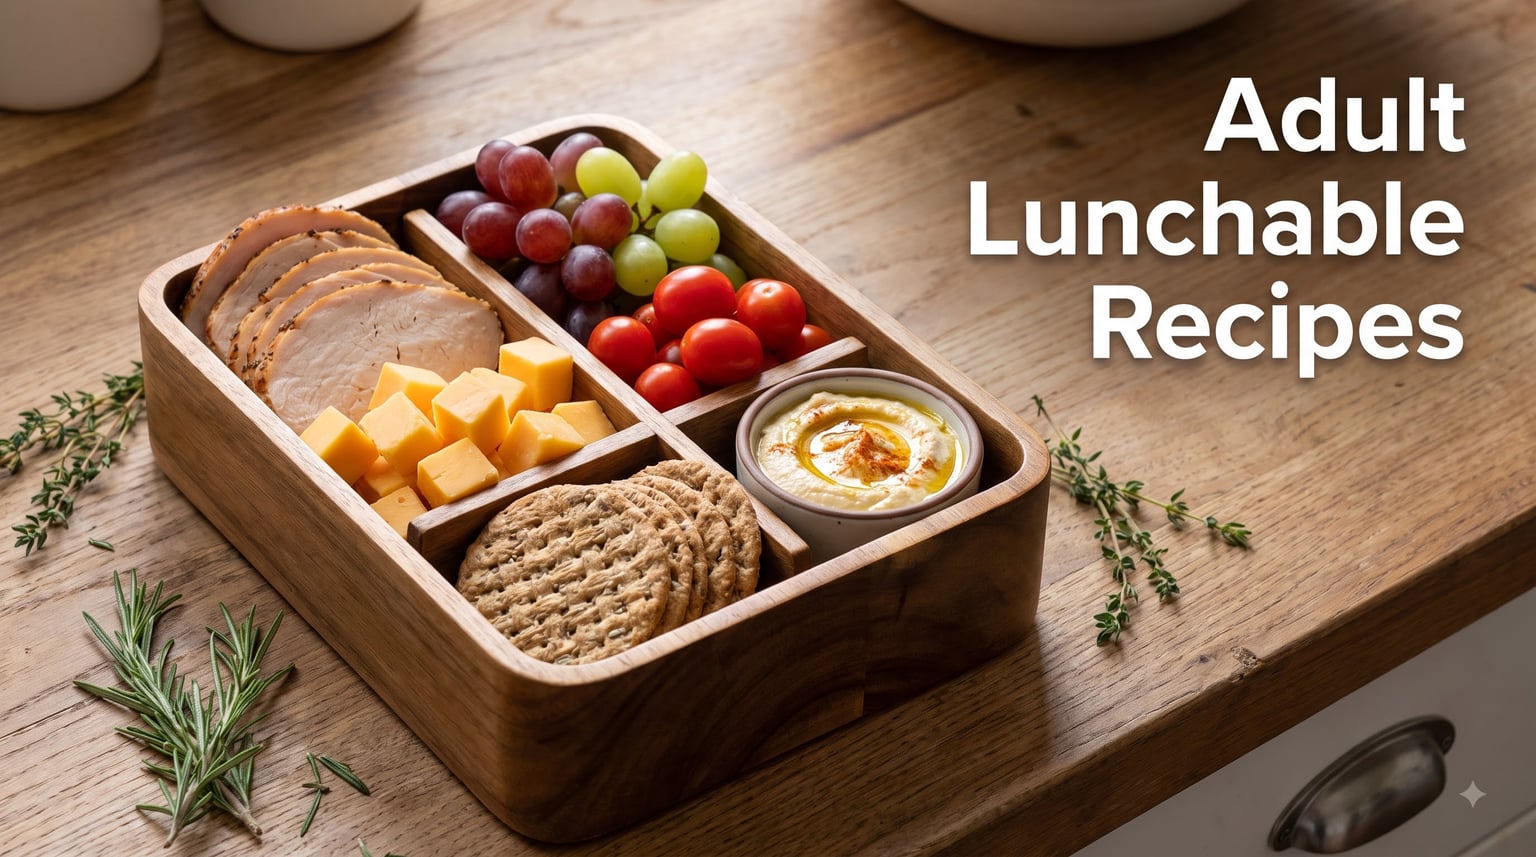
Adult lunchable recipes have taken over lunch breaks everywhere, and honestly, I get why. They are fast to assemble, endlessly customizable, and they turn a boring desk lunch into something you actually look forward to eating. Whether you are meal-prepping for the office or building a snack spread for a weekend hang, these upgraded bento boxes deliver real flavor without much effort.
I have spent the last year testing combinations, swapping ingredients, and figuring out what actually keeps well in a container for four hours. This guide pulls together everything I learned so you can skip the soggy cracker phase and go straight to lunchables that taste great. If you want broader meal-planning ideas, our balanced meal planning guide pairs well with what follows.
Think of adult lunchables as a charcuterie board scaled down to a single serving. You get protein, crunch, something fresh, and a dip to tie it all together. The best part is that once you understand the basic formula, you can mix and match ingredients based on what is in your fridge, what is on sale, or what you are craving that day.
Table of Contents
What Are Adult Lunchables?
Adult lunchables are upgraded, nutritionally-balanced versions of the childhood Lunchable kits you probably remember from school cafeterias. Instead of highly processed crackers and thin squares of cheese, the adult version features real protein, fresh produce, whole grains, and homemade or high-quality dips.
The concept is simple: arrange a few complementary components in a compartmentalized container so nothing touches or gets soggy. You eat it cold, with your hands, which makes it perfect for offices without microwaves, road trips, picnics, or those days when you just cannot face another sandwich.
What sets them apart from kid versions is quality and balance. A child’s Lunchable might be 90 percent refined carbs and sodium. A well-built adult lunchable includes lean protein for satiety, fiber from vegetables and whole grains, healthy fats from nuts or cheese, and enough variety that you feel satisfied instead of hungry an hour later.
Why Adult Lunchables Are Worth Making
The biggest reason I keep coming back to adult lunchable recipes is convenience. I can prep three or four boxes on Sunday, grab one on my way out the door each morning, and never think about lunch decisions again. That alone saves me serious mental energy during a busy week.
Cost is another major factor. A typical adult lunchable costs between three and five dollars per serving when you build it from grocery store ingredients. Compare that to a twelve-dollar takeout salad or a fifteen-dollar sandwich combo, and the savings add up fast. Over a month of workdays, you are easily keeping a hundred dollars or more in your pocket.
Nutritionally, you control every ingredient. No hidden sodium, no mystery sauces, no oversized portions. If you are tracking macros, managing blood sugar, or just trying to eat more vegetables, lunchables make it easy to hit your targets without complicated cooking. Many people on forums report success using them for portion control and weight management because the compartments create a natural visual boundary for how much you eat.
Finally, there is the fun factor. Eating a lunchable feels playful in a way that a regular meal does not. You get to assemble each bite, mix flavors, and dip things. That small bit of novelty makes a midday break genuinely more enjoyable.
The Adult Lunchable Formula: Four Essential Components
Every great adult lunchable follows a simple four-part formula. Once you internalize it, you can build endless variations without ever needing a formal recipe. Pick one item from each category and you have a complete, balanced meal.
1. Protein (The Foundation)
Protein is what makes a lunchable actually filling. Without it, you are just eating snacks and you will be hungry again by 2 p.m. Aim for roughly 20 to 30 grams of protein per box.
Best protein options: sliced turkey or chicken breast, salami, prosciutto, hard-boiled eggs, rotisserie chicken, tuna salad, chicken salad, cheese cubes or slices, hummus, edamame, roasted chickpeas, or marinated tofu. For a deeper dive on preparing proteins, check our protein preparation for lunchables guide using slow-cooked meats.
A favorite forum tip: shred a rotisserie chicken on Sunday and use it across three different lunchables throughout the week. It is one of the most affordable protein sources per gram you will find.
2. Carbohydrates (The Crunch)
Carbs give you energy and that satisfying crunch that makes lunchables fun. Choose fiber-rich options to keep blood sugar steady.
Best carb options: whole grain crackers, Triscuits, pita wedges, naan cut into strips, pretzels, bagel chips, rice crackers, crostini, tortilla chips, or a small roll. Aim for something sturdy enough to scoop dips without breaking.
Pre-portion your crackers into small separate containers or zip bags so they never touch moist ingredients. This single habit solves 90 percent of sogginess problems.
3. Fruits and Vegetables (The Fresh Factor)
Produce adds color, vitamins, hydration, and a refreshing crunch that balances richer proteins and cheeses. Try to include at least two different produce items per box.
Best produce options: grapes, berries, apple slices (toss in lemon juice to prevent browning), cherry tomatoes, cucumber slices, baby carrots, bell pepper strips, snap peas, celery sticks, olives, or dried fruit like apricots and cranberries.
4. Dips and Spreads (The Tie-Binder)
A dip transforms a pile of ingredients into an actual meal. It adds moisture, flavor, and something to look forward to. Pack dips in a separate small container or use a silicone muffin liner inside the main box.
Best dip options: hummus, tzatziki, guacamole, ranch, buffalo sauce, honey mustard, baba ganoush, tzatziki, pesto, fig jam, apple butter, or a fancy mustard like whole-grain Dijon.
How to Build Adult Lunchable Recipes Step by Step
Building adult lunchable recipes is a five-minute process once you have your ingredients prepped. Here is the exact step-by-step method I use every week.
Step 1: Prep your ingredients in batches. Slice cheeses, wash and cut vegetables, hard-boil eggs, and portion out dips on Sunday. Store each component in its own container in the fridge so assembly is just a grab-and-place operation.
Step 2: Choose your container. Use a container with at least four compartments, or use silicone muffin liners inside a flat container to create DIY sections. For our top picks, see our best storage containers for lunchables guide.
Step 3: Place protein first. Put your protein in the largest compartment since it is the anchor of the meal. Fold deli meats for visual appeal, or arrange cubes in a row.
Step 4: Add carbs next. Place crackers or bread items in a dry compartment, as far from any wet ingredients as possible. If your container does not have enough compartments, wrap crackers in a small piece of parchment paper.
Step 5: Fill remaining sections with produce and dip. Add your fruits and vegetables to fill gaps, then tuck a small dip container into the box. Snap the lid, and you are done.
Step 6: Store cold and pack an ice pack. Keep assembled lunchables in the fridge until you leave. Toss an ice pack in your bag to maintain a safe temperature until lunchtime.
10 Adult Lunchable Combinations Worth Trying
Here are ten tested combinations that cover different flavor profiles and dietary needs. Each one follows the four-component formula and takes under ten minutes to assemble.
1. Mediterranean Mezze Box: Hummus, cherry tomatoes, cucumber slices, kalamata olives, pita wedges, and feta cubes. Tzatziki on the side for extra dipping.
2. Classic Turkey and Cheddar: Sliced turkey, sharp cheddar cubes, whole grain crackers, red apple slices, and honey mustard for dipping. The nostalgic upgrade.
3. Charcuterie for One: Prosciutto, salami, brie, gouda, baguette slices, grapes, and fig jam. This is the one to serve when you want to feel fancy at your desk.
4. High-Protein Egg Box: Two hard-boiled eggs sprinkled with everything bagel seasoning, cheese cubes, Triscuits, baby carrots, and ranch dip. Easily hits 30 grams of protein.
5. Caprese Bistro Box: Fresh mozzarella balls, cherry tomatoes, basil leaves, balsamic glaze drizzle, crostini, and a handful of mixed nuts. Light, fresh, and full of summer flavor.
6. Southwest Chicken Box: Shredded rotisserie chicken, black bean dip, tortilla chips, bell pepper strips, corn salsa, and a lime wedge. Bold flavors that never get boring.
7. Vegetarian Power Box: Roasted chickpeas, hummus, pita, cucumber, baby peppers, and a handful of almonds. For more plant-based protein options, our casserole guide has ideas that transfer well to cold lunch format.
8. Tuna Crunch Box: Tuna salad, celery sticks, whole grain crackers, apple slices, and a small handful of trail mix. The celery and apple give crunch without carbs.
9. Breakfast-for-Lunch Box: Hard-boiled egg, breakfast sausage links, mini pancakes or a waffle cut into strips, maple yogurt dip, and fresh berries. Surprisingly satisfying at noon.
10. Sweet and Savory Snack Box: Cheese cubes, turkey pepperoni, dark chocolate squares, dried apricots, almonds, and whole grain crackers. Perfect for afternoon grazing.
Storage, Food Safety, and Meal Prep
Proper storage is the difference between a lunchable that delights and one that disappoints. Here is what I have learned about keeping everything fresh and safe.
How long do homemade lunchables keep? Assembled lunchables stay fresh in the fridge for three to four days. Deli meat versions are best within three days. If you prep for a full five-day workweek, build Monday through Wednesday boxes on Sunday, then assemble Thursday and Friday boxes mid-week.
Keep it cold. Food safety guidelines say perishable items should stay below 40 degrees Fahrenheit. Use at least one ice pack in your lunch bag, and if your office fridge is unreliable, use two. Do not leave lunchables at room temperature for more than two hours.
Separation is everything. The number one complaint in forums is soggy crackers. The fix is always the same: never let wet ingredients touch dry ones. Use silicone muffin liners, small lidded containers for dips, or parchment paper barriers between sections.
Meal prep strategy: Prep components separately on Sunday but assemble boxes the night before or morning of. This keeps everything crisper than building all five boxes at once. Store dips in their own small containers and add them at packing time.
For complementary cold options, our refreshing cold lunch options like chilled soups pair beautifully with a lighter lunchable on hot days.
Troubleshooting Common Adult Lunchable Problems
Even with a good system, things go wrong. Here are the most common complaints I hear and the fixes that actually work.
Problem: Soggy crackers. This is the universal enemy. The fix is total separation: keep crackers in their own sealed compartment, wrapped in parchment, or packed in a tiny zip bag inside the main container. Never place crackers directly next to fruit, dip, or moist vegetables.
Problem: Ingredients sliding and mixing. If your container has open compartments with no walls between them, use silicone muffin liners to create instant sections. They are cheap, reusable, and they solve the mixing problem completely.
Problem: Not filling enough. You are likely missing enough protein. Bump your protein portion to 25 to 30 grams, add a handful of nuts for healthy fats, and include a fiber-rich carb like whole grain crackers or chickpeas. Protein plus fat plus fiber is the satiety trifecta.
Problem: Boredom from eating the same thing. Rotate between three base proteins each week (turkey, chicken, eggs) and change your dip and produce weekly. Ten different combinations are listed above, so cycle through them.
Problem: No fridge at work. Invest in a good insulated lunch bag with two ice packs. Pre-chill everything overnight so it starts cold. Avoid highly perishable items like mayonnaise-based salads on fridge-less days and lean toward hard cheeses, cured meats, and whole fruits.
Pairing Adult Lunchables With Drinks
Since we are a food and drink site, we would be remiss not to talk about what to pour alongside your lunchable. The right beverage turns a quick lunch into a proper break.
Beer pairings: A charcuterie-style lunchable with prosciutto and aged cheese loves a crisp pilsner or a session IPA. The Mediterranean mezze box pairs beautifully with a wheat beer or a light sour. Hoppy beers overwhelm delicate flavors, so save the double IPAs for bolder boxes like the Southwest Chicken.
Wine pairings: The Caprese box and a glass of dry white like Pinot Grigio are a match made in heaven. Charcuterie boards call for a light red like Pinot Noir or a dry rose. The Classic Turkey and Cheddar works well with an unoaked Chardonnay.
Cocktail and non-alcoholic pairings: A gin and tonic cuts through rich cheeses beautifully. For alcohol-free options, sparkling water with citrus, iced tea, or kombucha all refresh without competing with your food flavors.
Frequently Asked Questions About Adult Lunchable Recipes
What are adult lunchables?
Adult lunchables are upgraded versions of childhood Lunchable kits, built with high-quality protein, fresh fruits and vegetables, whole grain crackers, and dips arranged in compartmentalized containers for a balanced, portable cold meal.
How do you make adult lunchables?
Pick one protein, one carb, one or two fresh produce items, and a dip. Arrange them in separate compartments of a container so nothing touches, then keep cold until eating. Assembly takes about five minutes once ingredients are prepped.
Are adult lunchables healthy?
Yes, when built with lean protein, whole grains, and fresh produce. Unlike kid versions loaded with sodium and refined carbs, adult lunchables give you full control over ingredients, portions, and nutritional balance.
What do you put in adult lunchables?
Common items include deli meats, hard-boiled eggs, cheese, hummus, whole grain crackers, cherry tomatoes, grapes, cucumbers, nuts, and dips like ranch, tzatziki, or honey mustard.
How long do homemade lunchables keep in the fridge?
Assembled lunchables stay fresh for three to four days refrigerated. Deli meat versions are best within three days. Always keep them below 40 degrees Fahrenheit and use an ice pack when transporting.
What are the best containers for adult lunchables?
Look for containers with at least four compartments and tight-sealing lids. Bento-style boxes and containers with removable dividers work best. Silicone muffin liners inside flat containers are a budget-friendly alternative.
Can you meal prep adult lunchables?
Yes. Prep individual components on Sunday and assemble boxes the night before for maximum freshness. Most combinations hold up for three to four days when properly stored.
What proteins work best in adult lunchables?
Sliced deli meats, hard-boiled eggs, rotisserie chicken, tuna or chicken salad, cheese cubes, hummus, roasted chickpeas, and edamame are all excellent cold protein options that travel well.
Conclusion
Adult lunchable recipes are proof that lunch does not have to be complicated to be satisfying. With a simple four-part formula, a few good containers, and a bit of Sunday prep, you can eat well all week for a fraction of what takeout costs.
Start with one of the ten combinations above, then tweak it based on what you like and what is seasonal. Once the formula clicks, you will never run out of ideas. Bookmark this page, grab your containers, and make this the week your lunch game levels up.