
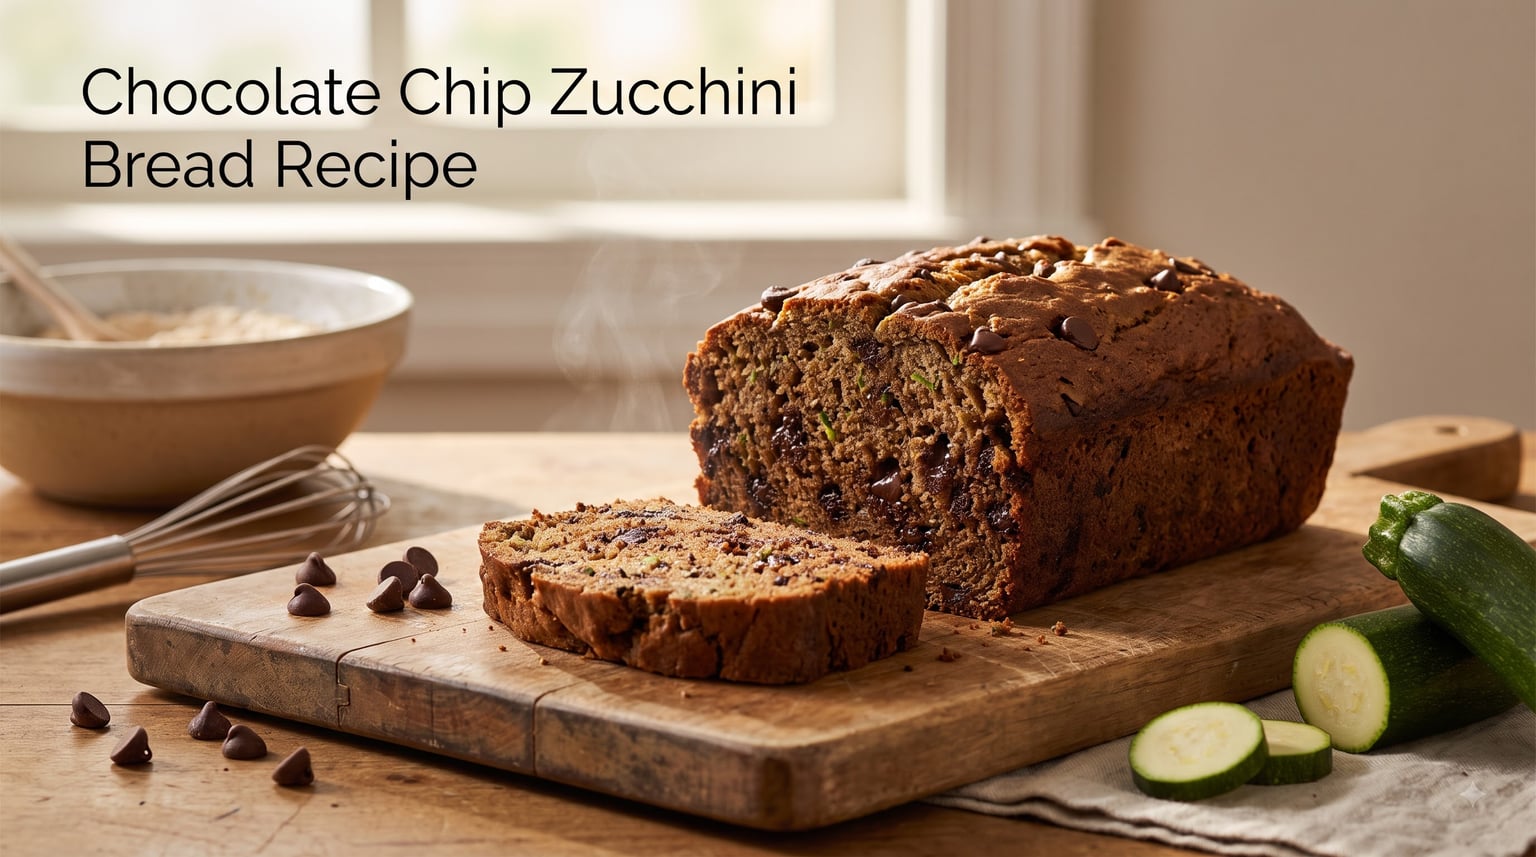
Every summer, I face the same problem: a mountain of garden zucchini taking over my kitchen counter. Over the years, I’ve tested dozens of recipes, but this chocolate chip zucchini bread recipe is the one my family requests on repeat. It’s incredibly moist, perfectly spiced, and loaded with chocolate chips in every bite.
The secret comes down to a few simple techniques I’ll walk you through. You don’t need to be an experienced baker to nail this loaf on your first try. Whether you’re drowning in summer squash or just craving a tender quick bread, this recipe delivers bakery-quality results from your home oven.
If you enjoy homemade breads, you might also love our easy beer bread recipe or our gluten-free pumpkin bread for another seasonal favorite. But first, let’s talk about why this zucchini loaf earns a permanent spot in your recipe rotation.
This chocolate chip zucchini bread recipe works for breakfast, afternoon snacks, and dessert. It freezes beautifully for meal prep, and you can convert it to muffins in a pinch. I’ll cover every detail: ingredients, step-by-step instructions, troubleshooting, storage, and variations.
Table of Contents
Ingredients You Need
One of the things I love most about this recipe is that it uses everyday pantry staples. Nothing fancy, no special trip to the store required. Here’s everything you need to make one 9×5-inch loaf.
Wet Ingredients
1 cup shredded zucchini (packed): This is roughly one medium zucchini. Don’t peel it. The skin adds moisture, nutrients, and a faint green fleck that disappears into the batter. Shred it on the medium holes of a box grater for the best texture.
1/2 cup vegetable oil (or melted coconut oil): Oil keeps this bread moist for days. Butter works too, but oil produces a softer crumb that stays tender longer. Coconut oil adds a subtle sweetness that pairs well with chocolate.
2 large eggs, at room temperature: Room-temperature eggs blend more evenly into the batter. Cold eggs can cause the oil to seize and create lumps. If you forget to take them out early, place them in a bowl of warm water for 10 minutes.
1/2 cup granulated sugar: White sugar gives the loaf structure and a clean sweetness that lets the chocolate shine.
1/4 cup packed brown sugar: Brown sugar adds moisture and a caramel-like depth. I use a mix of white and brown because together they produce the best texture and flavor complexity.
1 teaspoon vanilla extract: Always use pure vanilla extract, not imitation. The flavor difference is noticeable.
Dry Ingredients
1 1/2 cups all-purpose flour: Spoon the flour into your measuring cup and level it off with a knife. Scooping directly from the bag packs the flour down and can add up to 25% extra, which leads to dry, dense bread.
1 teaspoon ground cinnamon: Cinnamon is the backbone spice in zucchini bread. It warms the flavor without overpowering the chocolate. If you want to dig deeper into spice pairings, check out our essential baking spices guide.
1/2 teaspoon baking soda: This is your primary leavening agent. Baking soda reacts with the moisture in the zucchini to create lift and a tender crumb.
1/4 teaspoon baking powder: A small amount of baking powder adds a secondary boost of rise. I use both because together they produce the best height and even texture.
1/2 teaspoon kosher salt: Salt balances the sweetness and enhances the chocolate flavor. Don’t skip it. Kosher salt has larger crystals and a cleaner taste than table salt.
1/4 teaspoon ground nutmeg (optional): A pinch of nutmeg adds complexity. It’s optional but recommended if you want a more layered spice profile.
1 cup chocolate chips: Semi-sweet is my default, but the type you choose matters more than you might think.
Choosing Your Chocolate Chips
After testing this recipe with every type of chocolate chip I could find, here’s what I learned about how each variety changes the final loaf.
Mini semi-sweet chips distribute the most evenly throughout the batter. Because they’re small, you get chocolate in nearly every bite without heavy chips weighing down the crumb. This is my top recommendation and the choice most home bakers in baking communities prefer.
Regular semi-sweet chips are the classic choice and work perfectly fine. You’ll get pockets of melted chocolate rather than an even distribution. Some people prefer this because each bite is slightly different.
Dark chocolate chips create a more sophisticated, less sweet loaf. If you find most zucchini bread too sugary, dark chocolate (60% cacao or higher) is the way to go. Many experienced bakers consider this the grown-up version.
Chocolate chunks create dramatic melty pockets but tend to sink more than chips. If you use chunks, toss them in a teaspoon of flour before folding them in to help them stay suspended.
Equipment Needed
You don’t need specialty equipment for this recipe. Here’s what I use every time.
A 9×5-inch loaf pan is my standard. I’ve tested this recipe in both 8×4 and 9×5 pans, and the baking times differ significantly. More on that in the pan conversion section below.
A box grater is the easiest tool for shredding zucchini. The medium holes produce the ideal shred size. A food processor with a shredding disc works too and saves time if you’re making multiple loaves.
Two mixing bowls, one for wet and one for dry ingredients. A whisk for the dry bowl and a spatula or wooden spoon for folding everything together. Avoid using a hand mixer for the final combining step because overmixing develops gluten and creates a tough texture.
Parchment paper is my secret weapon. I line the pan with a parchment sling, leaving overhang on the long sides. When the bread is done, I simply lift it out by the paper. No sticking, no breaking, no fuss.
A cooling rack is essential. If you leave the bread in the pan too long, residual heat continues baking the bottom and sides, which can dry them out. Transfer to a rack within 10 minutes of removing from the oven.
How to Make Chocolate Chip Zucchini Bread
Now for the main event. This chocolate chip zucchini bread recipe comes together in about 15 minutes of active prep time, plus roughly 55 to 65 minutes of baking. Here’s exactly what to do at each stage.
Start by preheating your oven to 350 degrees Fahrenheit. Position the rack in the center of the oven. This ensures even heat distribution around the loaf pan.
Step 1: Prep the Zucchini
Wash your zucchini thoroughly. Trim off both ends. Do not peel it. The skin shreds easily and becomes invisible in the baked bread.
Grate the zucchini on the medium holes of a box grater. You want shreds that are roughly the size of matchsticks. If the shreds are too large, the texture will be noticeable in the finished bread. Too small, and you lose some of the moisture benefit.
Measure out one packed cup. This typically requires one medium zucchini, but sizes vary. If you end up with extra, save it for muffins or add it to the batter for an extra-moist loaf.
Here’s the big question every baker asks: should you squeeze the moisture out of the shredded zucchini? I’ll address this in detail in the tips section, but my recommendation is to leave it. The moisture is what makes this bread tender and soft.
Step 2: Mix the Dry Ingredients
In a medium bowl, whisk together the flour, cinnamon, baking soda, baking powder, salt, and nutmeg if using. Whisking does two things: it combines the ingredients evenly, and it aerates the flour for a lighter loaf.
Make sure there are no lumps of baking soda or baking powder. These are your leavening agents, and if they clump together, you’ll get pockets of bitter taste and uneven rising.
Set this bowl aside while you prepare the wet ingredients.
Step 3: Mix the Wet Ingredients
In a large bowl, whisk the eggs until they’re smooth and slightly frothy. This takes about 30 seconds of vigorous whisking. The eggs should be completely uniform with no visible egg white strands.
Add the vegetable oil, granulated sugar, brown sugar, and vanilla extract. Whisk until the sugars are mostly dissolved and the mixture looks smooth and glossy. This takes about 45 seconds.
The brown sugar may leave some small lumps. That’s fine. They’ll dissolve during baking.
Now fold in the shredded zucchini. Use a spatula to gently stir it through the wet mixture until evenly distributed. The batter will look loose and slightly separated at this point. That’s normal.
Step 4: Combine and Fold
Pour the dry ingredients into the wet mixture. Using your spatula, gently fold everything together. Stop folding the moment the flour disappears. You should still see a few lumps in the batter.
This is the most critical step in the entire recipe. Overmixing develops the gluten in the flour, which creates a dense, tough, rubbery texture. The batter should look slightly lumpy and imperfect. That’s exactly what you want.
Fold in the chocolate chips. Again, be gentle. Stir just until they’re distributed. If you’re adding chocolate chunks, toss them in a teaspoon of flour first to prevent sinking.
The finished batter will be thick and sticky. It should mound slightly on the spatula rather than pour off it.
Step 5: Bake
Line your loaf pan with parchment paper, leaving overhang on the long sides. If you don’t have parchment, grease the pan thoroughly with butter or oil and dust lightly with flour.
Pour the batter into the prepared pan and smooth the top with your spatula. The batter will fill the pan about two-thirds full, which leaves room for the bread to rise without overflowing.
If you want a bakery-style finish, sprinkle the top with a tablespoon of turbinado sugar before baking. This creates a crunchy, sparkly crust that adds texture and visual appeal. I always do this step because the contrast between the crunchy top and soft interior is fantastic.
Place the pan in the center of your preheated 350-degree oven. Bake for 55 to 65 minutes. Start checking at 50 minutes because every oven runs differently.
At around 45 minutes, if the top is browning too quickly, tent it loosely with aluminum foil. This protects the surface while allowing the center to finish cooking.
Step 6: Cool and Slice
When the bread is done, remove it from the oven and let it sit in the pan for 10 minutes. This resting period allows the structure to set up and makes the bread easier to handle.
After 10 minutes, use the parchment paper overhang to lift the bread out of the pan. Place it on a cooling rack and let it cool for at least another 30 minutes before slicing.
If you slice into it while it’s still warm, the crumb will be gummy and the bread will tear. Patience pays off here. A fully cooled loaf gives you clean, beautiful slices.
For the cleanest cuts, use a serrated bread knife and saw gently rather than pressing down. A sharp serrated blade slices through the chocolate chips without dragging them through the crumb.
How to Tell When Zucchini Bread Is Done
Knowing when your bread is fully baked is the single most important skill for this recipe. Underbaked zucchini bread sinks in the middle and has a raw, doughy center. Overbaked bread is dry and crumbly.
The toothpick test is the most reliable method. Insert a toothpick into the center of the loaf, pushing it all the way to the bottom of the pan. If it comes out clean or with just a few moist crumbs attached, the bread is done. If you see wet batter on the toothpick, bake for another 5 minutes and test again.
Don’t trust the toothpick test alone if you only check near the center surface. The center of the loaf is the last part to cook, and it sits at the deepest point. Always push the toothpick deep into the bread.
Visual cues also help. The top should be golden brown and slightly domed. The edges should pull away slightly from the sides of the pan. If the bread still looks wet or sunken in the center, it needs more time.
Another test is the spring-back method. Gently press the center of the loaf with your fingertip. If it springs back immediately, it’s done. If your finger leaves a permanent indent, bake for 5 to 10 more minutes.
An instant-read thermometer gives you the most precise result. The internal temperature in the center of the loaf should register 200 to 205 degrees Fahrenheit. This is the temperature at which the starches fully set and the structure is stable.
If the top is golden but the center isn’t done, tent with foil and continue baking. This prevents the crust from burning while the middle catches up.
Tips for the Best Chocolate Chip Zucchini Bread
These are the techniques I’ve learned through years of testing and from conversations with other home bakers. They make the difference between a good loaf and a truly great one.
Measure flour correctly. Spoon the flour into your measuring cup and level it with a knife. Never scoop the cup directly into the flour bag. Scooping compacts the flour and can add up to 25% more than intended, resulting in dry bread.
Use room-temperature ingredients. Eggs, and any dairy you might use, should be at room temperature. Cold ingredients don’t emulsify properly, which means the batter can separate and the texture suffers.
Don’t overmix the batter. Once you combine the wet and dry ingredients, fold gently and stop the moment the flour disappears. Overmixing develops gluten and creates a tough, dense crumb. A few lumps in the batter are perfectly fine.
Tent the bread if needed. Ovens vary, and some run hot. If the top of your loaf is browning too quickly, loosely tent it with aluminum foil after about 40 minutes of baking.
Let it cool completely before slicing. Warm quick bread has a fragile structure that tears easily. Cooling allows the crumb to set, giving you clean, even slices.
Use the parchment sling trick. Line your pan with parchment paper, leaving overhang on the long sides. When the bread is done, you can lift it straight out of the pan. No sticking, no breaking, no frustration.
Should You Squeeze Zucchini Moisture?
This is the most debated question in zucchini bread baking. The answer depends on your zucchini and your texture preference.
I recommend not squeezing. The moisture in the zucchini is what makes the bread tender, soft, and moist for days. When you squeeze it out, you’re removing the exact ingredient that gives zucchini bread its signature texture.
However, there are exceptions. If your zucchini is very large and watery, or if you thawed frozen zucchini, it can release so much liquid that the batter becomes too loose. In that case, give it a gentle squeeze with your hands or press it lightly in a clean kitchen towel.
If you do squeeze, expect a slightly denser, drier loaf. Some bakers prefer this because the bread has a more cake-like structure. There’s no wrong answer here. Test both ways and see which texture you prefer.
One thing everyone agrees on: never squeeze zucchini if you want the moistest possible bread. The more moisture you leave in, the softer the result.
Preventing Chocolate Chips from Sinking
Chocolate chips are heavier than batter, so they tend to sink to the bottom during baking. This creates a layer of chocolate at the base rather than an even distribution throughout.
The easiest fix is to toss the chocolate chips in a teaspoon of flour before folding them into the batter. The light coating of flour helps them grip the surrounding batter and stay suspended.
Mini chips sink less than full-size chips or chunks because they’re lighter relative to the batter density. If sinking is a consistent problem for you, switch to mini chips.
A thicker batter also holds chips better. If your batter seems too loose, it may be because your zucchini released a lot of liquid. Letting the batter rest for 5 minutes before folding in the chips lets the flour absorb excess moisture and thicken things up.
Troubleshooting Common Problems
Even experienced bakers run into issues. Here are the most common problems and exactly how to fix them.
1. Bread is too dry. This is the number one complaint. The most likely cause is too much flour. Measure by spooning into the cup and leveling with a knife. Other causes: overbaking, squeezing out too much zucchini moisture, or skipping the oil. Always check for doneness at the early end of the baking range.
2. Bread sinks in the middle. A sunken middle means the structure wasn’t fully set when you removed it from the oven. The bread needed more baking time. Always do the toothpick test at the center of the loaf, not near the edge. Opening the oven door too frequently during baking can also cause sinking because temperature fluctuations prevent proper rising.
3. Center is undercooked. If the outside looks done but the center is raw, your oven temperature may be off. Use an oven thermometer to verify accuracy. For now, tent the bread with foil and continue baking in 5-minute increments until the center tests done.
4. Bread is dense and heavy. Dense bread usually means the leavening agents weren’t effective. Check that your baking soda and baking powder are fresh. They lose potency after 6 months. Dense bread can also result from overmixing the batter or packing too much flour into the measuring cup.
5. Chocolate chips all sink to the bottom. Toss chips in flour before adding them to the batter. Use mini chips instead of full-size. Make sure your batter isn’t too thin.
6. Top browns too quickly. Tent the bread with aluminum foil after 40 minutes of baking. If this happens consistently, your oven may run hot. Check with an oven thermometer and adjust accordingly.
7. Bread falls apart when slicing. The bread was probably sliced while still warm. Let it cool completely on a rack for at least an hour. Use a serrated knife and saw gently instead of pressing down.
8. Zucchini texture is too noticeable. Shred the zucchini on the medium or fine holes of your grater. If shreds are too thick, the bread will have astringent, stringy bits. Very large zucchini can have tough seeds and fibrous flesh, so stick with small to medium squash.
Recipe Variations
This recipe is endlessly adaptable. Here are my favorite variations, all tested and approved.
Zucchini Bread Muffins
To convert this recipe to muffins, prepare the batter exactly as written. Line a 12-cup muffin tin with paper liners or grease thoroughly. Fill each cup about three-quarters full.
Bake at 350 degrees Fahrenheit for 18 to 24 minutes. Start checking at 18 minutes with the toothpick test. Muffins bake much faster than a full loaf because the batter is divided into small portions.
This variation is perfect for meal prep. Muffins are easy to grab for breakfast, pack in lunches, or freeze individually. My kids go through a batch in two days.
Pan Size Conversions
Different pan sizes require different baking times. Here’s what to expect when you switch pans.
For an 8×4-inch pan: The batter fills the pan more deeply, so the bread bakes taller but takes longer. Add 10 to 15 extra minutes to the baking time. Start checking at 60 minutes.
For a 9×5-inch pan (the standard for this recipe): Bake for 55 to 65 minutes. This is the sweet spot that most recipes assume.
For mini loaf pans (roughly 6×3 inches): Divide the batter among three or four mini pans. Bake for 30 to 35 minutes. These are perfect for gift-giving.
For a round cake pan (8 or 9 inches): Pour the batter in and bake for 30 to 35 minutes. This creates a flat, even layer that you can frost or dust with powdered sugar for a dessert presentation.
Regardless of pan size, always rely on the toothpick test rather than the clock. Visual doneness varies by pan depth and material.
Healthier Substitutions
If you want a lighter version, these swaps work well without ruining the texture.
Replace half the all-purpose flour with white whole wheat flour. This adds fiber and nutrients without making the bread heavy. Don’t replace all the flour with whole wheat or the loaf will be dense.
Swap the oil for an equal amount of plain Greek yogurt. This reduces fat and adds protein. The bread will be slightly less tender but still moist because the zucchini compensates.
Replace the granulated sugar with honey. Use 3/4 cup of honey for every 1 cup of sugar called for, and reduce another liquid by 1/4 cup to balance the added moisture. The bread will be slightly denser and have a floral sweetness.
Use coconut oil instead of vegetable oil for a dairy-free option. Coconut oil adds a subtle tropical flavor that pairs beautifully with chocolate and cinnamon.
Reduce the chocolate chips to 1/2 cup or use dark chocolate chips for less sugar. The bread will still be delicious but slightly less indulgent.
How to Store Zucchini Bread
Proper storage keeps this bread fresh and moist for days. Here’s exactly how to handle each method.
Counter Storage
Zucchini bread stays fresh at room temperature for 3 to 4 days when stored correctly. Let the bread cool completely first. Any residual warmth creates condensation inside the storage container, which leads to sogginess and mold.
Wrap the cooled loaf tightly in plastic wrap or store it in an airtight container. If you’ve already sliced into it, press a piece of plastic wrap directly against the cut surface to prevent it from drying out.
Keep the bread in a cool, dry spot away from direct sunlight. A bread box or pantry shelf works perfectly. Avoid the top of the refrigerator, where ambient heat from the compressor can warm the bread.
Refrigerator Storage
The refrigerator extends the shelf life to about a week, but it comes with a trade-off. Cold temperatures accelerate staling, which can make the bread feel dry and firm.
If you do refrigerate, wrap the bread very tightly in plastic wrap and then place it in an airtight bag or container. Double-wrapping minimizes moisture loss and prevents the bread from absorbing refrigerator odors.
Bring refrigerated bread to room temperature before serving, or warm individual slices in the toaster for 30 seconds. The warmth softens the crumb and brings back that fresh-baked texture.
Freezing Zucchini Bread
Freezing is my favorite storage method for this recipe. The bread freezes beautifully and keeps for up to 3 months with no loss of quality.
To freeze a whole loaf, let it cool completely. Wrap it tightly in two layers of plastic wrap, then wrap it again in aluminum foil or place it in a freezer bag. The multiple layers prevent freezer burn.
To freeze individual slices, cut the cooled bread into slices and place a small square of parchment paper between each slice. This prevents them from freezing together so you can grab exactly what you need. Wrap the stack or place it in a freezer bag.
Thaw frozen bread overnight on the counter. Individual slices thaw in about 30 minutes at room temperature. You can also toast frozen slices directly in a toaster for a quick warm snack.
If you want to freeze the batter instead of the baked bread, you can do that too. Pour the batter into a greased and lined loaf pan, wrap it tightly, and freeze for up to 2 months. Bake from frozen, adding about 15 extra minutes to the baking time.
Frequently Asked Questions
Do I have to peel zucchini to make zucchini bread?
No, you do not need to peel zucchini for zucchini bread. The skin shreds easily on a box grater and becomes invisible in the baked loaf. Leaving the skin on also adds moisture, fiber, and nutrients. Just wash the zucchini thoroughly before shredding.
Can I freeze chocolate chip zucchini bread?
Yes, chocolate chip zucchini bread freezes beautifully for up to 3 months. Let the bread cool completely, then wrap it tightly in two layers of plastic wrap and a layer of aluminum foil. You can also freeze individual slices with parchment paper between them for easy single servings.
How do you keep zucchini bread moist?
To keep zucchini bread moist, do not squeeze the moisture out of the shredded zucchini, use oil instead of butter, avoid overmixing the batter, and do not overbake. Check for doneness at the earliest baking time and store the cooled bread tightly wrapped at room temperature.
Why is my zucchini bread dry?
Zucchini bread turns out dry when there is too much flour, the zucchini moisture was squeezed out, the bread was overbaked, or the oil was reduced. Always measure flour by spooning into the cup and leveling with a knife, leave the zucchini moisture in, and check for doneness starting at the low end of the baking time range.
Can I use frozen zucchini for zucchini bread?
Yes, frozen zucchini works in zucchini bread. Thaw it completely first, then drain off the excess liquid. If the thawed zucchini is very watery, give it a gentle squeeze in a clean kitchen towel before adding it to the batter. Measure the same way you would fresh shredded zucchini.
How long does zucchini bread last?
Zucchini bread lasts 3 to 4 days at room temperature when stored tightly wrapped in an airtight container. In the refrigerator it keeps for about a week, though it may dry out slightly. Frozen zucchini bread stays good for up to 3 months.
Can I make zucchini bread muffins?
Yes, you can convert this recipe to muffins. Fill lined or greased muffin cups three-quarters full and bake at 350 degrees Fahrenheit for 18 to 24 minutes. Check with a toothpick at 18 minutes. This recipe makes about 12 standard muffins.
What makes zucchini bread dense?
Zucchini bread becomes dense from overmixing the batter, using expired baking soda or baking powder, packing too much flour into the measuring cup, or squeezing out too much zucchini moisture. Mix gently just until combined, use fresh leavening agents, and measure flour correctly to avoid a dense loaf.
How do I get zucchini bread to rise more?
To get more rise, use fresh baking soda and baking powder, bring eggs to room temperature before mixing, avoid overmixing which deflates air pockets, and do not open the oven door during the first 40 minutes of baking. Filling the pan only two-thirds full also allows room for proper rising.
Can I substitute chocolate chips in zucchini bread?
Yes, you can substitute chocolate chips with chopped dark chocolate, white chocolate chips, butterscotch chips, dried cranberries, chopped walnuts, or pecans. Use the same amount called for in the recipe. For chunks or large pieces, toss them in a teaspoon of flour before adding to prevent sinking.
Conclusion
This chocolate chip zucchini bread recipe is the one I turn to every summer when the garden overflows. It turns humble zucchini into something my whole family fights over, and it works just as well for breakfast as it does for dessert.
The keys to success are simple: measure your flour correctly, don’t overmix the batter, keep the zucchini moisture, and check for doneness early. Follow those four principles and you’ll get a moist, tender loaf every single time.
Don’t be afraid to experiment with the variations. Try muffins for meal prep, swap in dark chocolate for a more grown-up flavor, or freeze extra loaves for busy weeks. Once you master the base recipe, the possibilities are wide open.
If you want to expand your baking skills further, try our no-knead sourdough recipe next. Or browse all our recipes for more inspiration. Happy baking.