
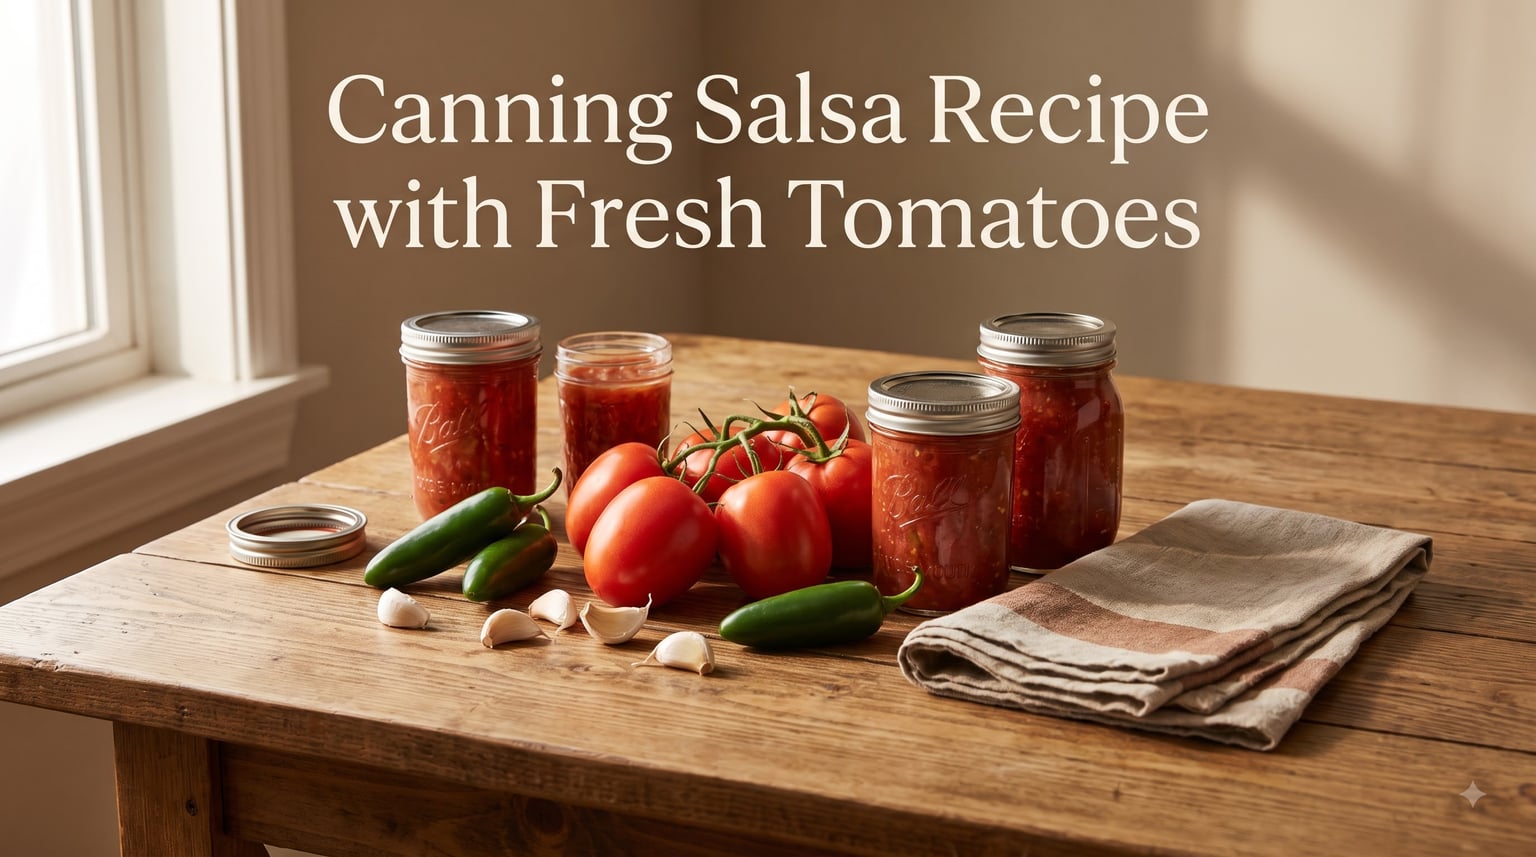
Every summer, my garden explodes with tomatoes. I’m talking 40 pounds in a single week, ripening faster than my family can eat them fresh. If you’ve ever stood in your kitchen staring at a mountain of Roma tomatoes wondering what to do, this canning salsa recipe with fresh tomatoes is your answer.
I’ve been canning salsa for over a decade, and after testing dozens of recipes, adjusting spice levels, and learning from a few spectacular failures, I’ve settled on a tested, safe method that produces shelf-stable salsa you’ll reach for all winter long. The kind friends ask about. The kind that disappears at potlucks.
This guide walks you through everything from choosing the right tomatoes to sealing your jars properly. I’ll cover the water bath canning method step by step, share safety information about pH and acidity levels, and help you avoid the common mistakes that ruin batches. I’ve also included an internal reference to canned ingredients and preservation recipes on our site for more food preservation ideas.
By the end, you’ll have a tested recipe that turns your summer harvest into jars of homemade salsa that store for up to 18 months. Let’s get canning.
Table of Contents
Best Tomatoes for Canning Salsa
The tomatoes you choose make or break your canned salsa. This is the single most important decision in the entire process.
Paste tomatoes, also called plum or Roma tomatoes, are the best choice for canning salsa. They have thicker flesh, fewer seeds, and less water content than slicing varieties. That means your salsa comes out thick and chunky instead of watery and runny.
Roma tomatoes are my go-to. They’re widely available, affordable, and reliable. San Marzano and Amish Paste varieties work beautifully too if you can find them at farmers markets or grow them yourself.
Slicing tomatoes like Beefsteak or Better Boy will work, but they require a different approach. Because they hold more water, you’ll need to drain them longer or simmer the salsa longer to reach the right consistency. The flavor is still good, but expect a thinner result.
Here’s a quick comparison I use when deciding:
Paste tomatoes (Roma, San Marzano, Amish Paste): Thick walls, low water, few seeds, meaty texture. Best for canning. Yields thick salsa with minimal draining.
Slicing tomatoes (Beefsteak, Better Boy, Early Girl): Juicy, high water content, more seeds. Workable but produce thinner salsa. Need extra simmering time.
A common question from beginners in canning forums: can you mix varieties? Absolutely. I often blend Romas with a few slicing tomatoes from my garden. Just keep the ratio at least 60 percent paste tomatoes for a good consistency.
Equipment Needed for Water Bath Canning Salsa
You don’t need a professional setup to start canning salsa. Here’s what’s essential versus what’s nice to have.
Essential equipment:
A water bath canner, which is simply a large pot with a rack and a tight-fitting lid. If you don’t have one, any large stockpot works as long as it’s deep enough to cover your jars with at least one inch of water and has a rack at the bottom to prevent jars from touching direct heat.
Mason jars in pint or half-pint sizes. Use only jars designed for canning, not recycled commercial jars. The two-piece lid system (flat lid plus screw band) is what creates the vacuum seal.
A jar lifter for safely removing hot jars from boiling water. This is non-negotiable for safety. Tongs slip and burn you.
A canning funnel for filling jars cleanly without spilling on the rim. Spillage on the rim prevents proper sealing.
A bubble remover or thin plastic spatula to release air bubbles after filling. A chopstick works fine as a substitute.
Nice-to-have equipment:
A food processor or blender for quick chopping. A mandoline slicer for uniform onion pieces. A magnetic lid wand for lifting sterilized lids from hot water. None of these are required, but they speed things up considerably.
One thing I learned the hard way: do not use metal utensils inside your jars. Metal can scratch the glass and cause invisible cracks that lead to breakage during processing.
Canning Salsa Recipe with Fresh Tomatoes: Ingredients
This recipe yields approximately 6 to 7 pint jars of salsa. It’s based on tested recipes from the National Center for Home Food Preservation, adjusted for flavor balance.
Ingredients:
10 cups peeled, cored, and chopped paste tomatoes (about 5 pounds of Romas)
5 cups chopped onions (about 3 medium onions)
2 to 3 cups seeded and chopped jalapeno peppers (2 cups for medium, 3 cups for hot)
1 cup chopped green bell pepper
6 cloves garlic, minced
2 cups bottled lemon juice (this is critical for safety, do not skip or reduce)
1 cup apple cider vinegar (5 percent acidity)
2 tablespoons canning salt or pickling salt (do not use table salt, it contains anti-caking agents that cloud the liquid)
1 tablespoon ground cumin
1 tablespoon dried oregano
1 tablespoon black pepper
1/4 cup chopped fresh cilantro (optional, added at the end of cooking)
Spice level customization guide:
For mild salsa, use 1 cup jalapenos with all seeds and membranes removed. For medium, use 2 cups with seeds removed from half the peppers. For hot, use 3 cups with all seeds left in. For very hot, replace some jalapenos with serrano peppers, which run about 3 times hotter.
Safe substitutions versus unsafe ones:
Safe: swapping apple cider vinegar for white vinegar (both at 5 percent acidity). Swapping dried oregano for dried Italian seasoning. Adding cumin or smoked paprika to taste.
Unsafe: reducing the amount of lemon juice or vinegar. Adding more onions or peppers than the recipe specifies. Using fresh lemon juice instead of bottled (fresh varies in acidity and may not provide safe pH). Adding oil, dairy, or extra fresh herbs beyond the small cilantro amount.
The reason these restrictions exist comes down to pH balance, which I’ll cover in the safety section. For now, trust that the acid quantities are calculated precisely for botulism prevention.
How to Peel Tomatoes for Salsa (Blanching Method)
Yes, you must peel tomatoes for canning salsa. I know it’s the step everyone wants to skip. I tried skipping it once, and I ended up with tough, rolled-up tomato skins floating in every jar. Not appetizing.
The blanching method is the fastest way to peel a large quantity of tomatoes. Here’s how I do it:
Step 1: Bring a large pot of water to a rolling boil. Fill a large bowl with ice water and set it next to your stove.
Step 2: Using a paring knife, score a small X on the bottom of each tomato. Just cut through the skin, not deep into the flesh.
Step 3: Drop 4 to 5 tomatoes into the boiling water. Leave them for 30 to 60 seconds. You’ll see the skins start to split and curl back at the X marks.
Step 4: Remove the tomatoes with a slotted spoon and immediately plunge them into the ice water. The cold shock stops the cooking and loosens the skins completely.
Step 5: Once cool enough to handle, grab a tomato and peel the skin starting from the X. It should slide right off in large pieces. Core the tomato, then chop it.
The entire process takes about 45 minutes for 5 pounds of tomatoes once you get a rhythm going. I listen to a podcast and power through it.
A tip from experienced canners on r/Canning: if you’re processing a very large batch, work in assembly-line fashion. Blanch a pot, shock a bowl, peel and chop while the next pot heats up. This cuts your total time nearly in half.
Do not leave tomatoes in boiling water longer than 60 seconds. They will start cooking and become mushy, which changes the texture of your finished salsa.
Step-by-Step Water Bath Canning Salsa Instructions
This is the main event. Follow these steps in order, and don’t skip any of them.
Step 1: Prep your ingredients.
Peel, core, and chop all tomatoes. Chop onions, jalapenos, bell peppers, and garlic. Have everything measured and ready before you turn on the stove. Mise en place matters here.
Step 2: Combine and cook the salsa.
In a large stainless steel or enamel pot, combine the chopped tomatoes, onions, jalapenos, bell pepper, garlic, bottled lemon juice, apple cider vinegar, canning salt, cumin, oregano, and black pepper. Bring the mixture to a boil over medium-high heat, then reduce to a simmer.
Cook uncovered for 20 to 30 minutes, stirring frequently to prevent sticking. The salsa should thicken slightly and the vegetables should soften. If you’re adding cilantro, stir it in during the last 5 minutes of cooking.
Step 3: Sterilize your jars and lids.
While the salsa cooks, wash your jars in hot soapy water and rinse thoroughly. Place them in your water bath canner filled with simmering water (about 180 degrees Fahrenheit) for at least 10 minutes to sterilize. Keep them hot until ready to fill.
Place the flat lids in a small saucepan of hot, not boiling, water. Let them sit for 5 minutes to soften the sealing compound.
Step 4: Fill the jars.
Remove one jar at a time from the hot water using your jar lifter. Empty the water inside. Place the jar on a towel-covered counter.
Using your canning funnel, ladle hot salsa into the jar, leaving 1/2 inch of headspace. Headspace is the empty space between the top of the food and the rim of the jar. Too little headspace and the jar may not seal. Too much and you waste jar space and risk an improper seal.
Run your bubble remover around the inside of the jar to release trapped air bubbles. Add more salsa if needed to maintain the 1/2 inch headspace.
Wipe the jar rim with a clean, damp paper towel. Any residue on the rim will prevent sealing. This step is more important than beginners realize.
Place a heated lid on the jar, centering it. Screw on the band until it is fingertip tight. Do not overtighten. Air needs to escape during processing for the vacuum seal to form.
Repeat with remaining jars.
Step 5: Process in the water bath.
Place filled jars on the rack inside your water bath canner. Ensure jars are not touching each other and are covered by at least 1 inch of water above their tops.
Bring the water to a rolling boil. Once boiling, start your processing timer. Process pint jars for 15 minutes at sea level (see altitude adjustments below).
Put the lid on the canner. Maintain a rolling boil for the entire processing time. If the water stops boiling, bring it back to a boil and add the lost time.
Step 6: Cool and check seals.
Turn off the heat and remove the canner lid. Wait 5 minutes, then use your jar lifter to remove jars one at a time without tilting them.
Place jars upright on a towel-covered counter. Do not tighten the bands. Leave them undisturbed for 12 to 24 hours.
After cooling, check each seal by pressing the center of the lid. It should be flat and firm, not flexing up and down. If a lid pops when pressed, the jar did not seal. Refrigerate unsealed jars and use within 2 weeks.
Remove the screw bands and gently try to lift each sealed lid with your fingertips. A properly sealed lid will hold firmly. Label sealed jars with the date and store them in a cool, dark place.
Processing Time and Altitude Adjustments
Altitude changes the boiling point of water, which means you need to process your salsa longer at higher elevations. This is not optional. Under-processing at altitude is a food safety risk.
Here are the processing times for pint jars of salsa in a water bath canner:
0 to 1,000 feet altitude: Process for 15 minutes.
1,001 to 3,000 feet altitude: Process for 20 minutes.
3,001 to 6,000 feet altitude: Process for 25 minutes.
Above 6,000 feet altitude: Process for 30 minutes.
If you live at altitude and don’t know your elevation, check your local government website or use an altitude finder tool. I can’t tell you how many canning forum posts I’ve read where people at 5,000 feet processed for 15 minutes and got lucky. Don’t gamble with food safety.
Processing times for half-pint jars are the same as pint jars for this recipe. The times are based on heat penetration, which depends on jar size and food density, not on how full your canner is.
Canning Salsa Safety: pH Levels and Acidity
This section answers a question I see constantly: do you have to add vinegar when canning salsa? The answer is yes, absolutely, and here is why.
Tomatoes sit right on the borderline between low-acid and high-acid foods. Their pH ranges from about 4.0 to 4.7. For safe water bath canning, food must be below pH 4.6 to prevent Clostridium botulinum spores from germinating and producing the toxin that causes botulism.
When you add onions, peppers, and garlic to tomatoes, you’re adding low-acid ingredients that raise the overall pH. Without added acid, your salsa could end up above the safe threshold. That’s why every tested recipe includes specific amounts of bottled lemon juice or vinegar.
Bottled lemon juice versus vinegar: Both work for acidification, but bottled lemon juice is standardized at a consistent acidity level. Fresh lemon juice varies in acidity depending on the fruit, so it is not considered safe for canning. Use bottled, period.
White vinegar at 5 percent acidity is also standardized and safe. Apple cider vinegar at 5 percent acidity works too and adds a milder flavor. Many people, including me, use a combination of bottled lemon juice and vinegar to balance the flavor while ensuring adequate acidification.
The amount of acid in tested recipes is calculated based on the total volume of low-acid ingredients. This is why you cannot freely increase the onions or peppers. More vegetables mean you need more acid to keep the pH safe. The tested ratios ensure the final product falls well below pH 4.6.
Can you can salsa without vinegar? Only if you use bottled lemon juice or bottled lime juice in the specified quantities. You cannot simply omit the acid. There is no tested recipe for salsa without added acid that is considered safe for water bath canning.
For pressure canning, the rules are different, but most tested salsa recipes still include added acid because pressure canning alone does not guarantee the pH drops to safe levels quickly enough.
Common Beginner Mistakes to Avoid
After years of canning and reading through thousands of forum posts, these are the mistakes I see most often.
Reducing the acid. This is the most dangerous mistake. People taste the recipe, find the vinegar or lemon juice too strong, and reduce it. Do not do this. The acid levels are calculated for safety, not just flavor. The vinegar taste mellows significantly after the salsa sits for a few weeks.
Adding extra vegetables. Tossing in a few extra onions or a handful of peppers seems harmless. It is not. Extra low-acid ingredients raise the pH and can push your salsa into the danger zone. Follow the recipe exactly.
Skipping the peel. Tomato skins toughen during processing and roll into unappetizing strips in finished jars. They also harbor bacteria that can interfere with sealing. Always peel.
Using fresh lemon or lime juice. Fresh citrus varies in acidity. Bottled juice is standardized. For safety, use bottled. The difference in flavor is negligible after cooking.
Overtightening the bands. Finger-tight means just that. If you crank the bands down, air cannot escape during processing and the seal will not form properly.
Reusing canning lids. The sealing compound on flat lids is designed for one use only. Once a lid has been processed, it should not be reused for canning. You can reuse jars and bands indefinitely as long as they are undamaged.
Not wiping the rim. A single drop of salsa on the jar rim can prevent the lid from sealing. Always wipe with a clean, damp towel before placing the lid.
Not adjusting for altitude. If you live above 1,000 feet and process for the sea-level time, your salsa may not be safe. Check your altitude and adjust accordingly.
How to Store and Serve Your Canned Salsa
Properly sealed and stored, homemade canned salsa lasts 12 to 18 months on your pantry shelf. The quality is best within the first year.
Store jars in a cool, dark, dry place. Avoid temperature extremes. A basement pantry or kitchen cabinet away from the stove works well. Direct sunlight fades the color and degrades the flavor over time.
The flavor mellowing period: This is something most beginners do not know. Freshly canned salsa tastes sharper and more acidic than it will after sitting. The flavors need 2 to 4 weeks to meld and mellow. I always tell first-timers to wait at least a month before opening their first jar. The difference is remarkable.
One of the most common complaints I hear is that canned salsa tastes too vinegary. Nine times out of ten, the person opened the jar too soon. Give it time.
Serving suggestions: Homemade salsa is incredibly versatile. Serve it with tortilla chips for an instant snack. Spoon it over tacos, burrito bowls, or scrambled eggs. Use it as a base for chili. Stir it into soups for depth. Mix it with sour cream for a quick dip.
Signs of spoilage: Before opening, check each jar. A bulging lid means gas has built up inside, which signals bacterial growth. Upon opening, look for mold, an off smell, or spurting liquid. If anything seems wrong, discard the contents. Do not taste test. When in doubt, throw it out.
Once opened, refrigerate the jar and use the salsa within 2 weeks. The seal is broken, and the salsa is no longer shelf-stable.
Troubleshooting: Why Your Canned Salsa Failed
Even experienced canners have failures. Here is how to diagnose the most common problems.
Jars did not seal. The most common cause is food residue on the rim. Always wipe thoroughly before placing the lid. Other causes include overtightened bands, cracked jar rims, or using lids past their expiration date. If a jar does not seal within 24 hours, refrigerate it and use it soon. You can reprocess unsealed jars with new lids within 24 hours, but the quality suffers.
Salsa is too watery. This happens most often with slicing tomatoes, which have high water content. To fix it, drain the chopped tomatoes for 30 minutes before cooking, or simmer the salsa longer to evaporate excess liquid. Some canners add a tablespoon of tomato paste per jar to thicken without affecting pH.
Siphoning, or liquid loss from jars during processing. This happens when jars are removed from the canner too quickly, when the temperature difference between the jars and the canner is too great, or when headspace is too small. Always let jars rest in the hot water for 5 minutes after turning off the heat before removing them. If liquid loss is significant (more than half the jar), the seal may still be good, but the food above the liquid line may discolor.
Floating tomato pieces or separated liquid. This is called fruit float and is purely cosmetic. It happens when the salsa is packed too hot or when the tomatoes were overripe. The salsa is still safe to eat. Just stir it when you open the jar.
Vinegar taste is overpowering. As mentioned in the storage section, this almost always resolves with time. If after 4 weeks the taste is still too sharp, try switching to apple cider vinegar or using a combination of vinegar and bottled lemon juice in your next batch.
Cloudy liquid in jars. This is usually caused by using table salt instead of canning salt. Table salt contains anti-caking agents that create cloudiness. It is harmless but unattractive. Switch to canning or pickling salt next time.
Frequently Asked Questions
Do you have to peel tomatoes for canning salsa?
Yes, you must peel tomatoes for canning salsa. Tomato skins toughen during processing, roll into unappetizing strips, and can harbor bacteria that interfere with sealing. The blanching method (scoring, boiling for 30 to 60 seconds, and shocking in ice water) makes peeling quick and easy.
Do you have to add vinegar when canning salsa?
Yes, you must add an acidifier when canning salsa. Bottled lemon juice, bottled lime juice, or vinegar at 5 percent acidity are all acceptable. The acid ensures the pH stays below 4.6 to prevent botulism. You cannot safely can salsa without added acid in a water bath canner.
What are some common mistakes when canning salsa?
The most common mistakes are reducing the required acid, adding extra vegetables beyond recipe ratios, skipping the tomato peel, using fresh lemon juice instead of bottled, overtightening jar bands, and failing to adjust processing time for altitude. Each of these can lead to seal failures or unsafe food.
How long to process salsa in water bath?
Process pint jars of salsa for 15 minutes at 0 to 1,000 feet altitude. Add 5 minutes for each elevation tier: 20 minutes at 1,001 to 3,000 feet, 25 minutes at 3,001 to 6,000 feet, and 30 minutes above 6,000 feet. Always start timing when the water reaches a rolling boil.
Can you use fresh lime juice instead of vinegar for canning salsa?
You can use bottled lime juice instead of vinegar because it is standardized for acidity. However, you cannot use fresh-squeezed lime juice because its acidity level varies. Bottled citrus juices provide consistent acidification required for safe canning.
What are the best tomatoes for canning salsa?
Paste tomatoes like Roma, San Marzano, and Amish Paste are the best choices because they have thick flesh, low water content, and few seeds. Slicing tomatoes like Beefsteak will work but produce thinner, wetter salsa. Use at least 60 percent paste tomatoes for best results.
How to make salsa spicier for canning?
Increase the amount of jalapeno peppers or substitute some with serrano peppers, which are roughly three times hotter. For mild salsa use 1 cup of seeded jalapenos, for medium use 2 cups, and for hot use 3 cups with seeds. Never increase the total vegetable content beyond tested recipe limits without adding corresponding acid.
Can you add fresh cilantro to canned salsa?
Yes, in small amounts. Add up to 1/4 cup of chopped fresh cilantro during the last 5 minutes of cooking. Large quantities of fresh herbs are considered low-acid additions that can affect pH balance, so keep the amount modest and within tested recipe guidelines.
How long does homemade canned salsa last?
Properly sealed and stored in a cool, dark place, homemade canned salsa lasts 12 to 18 months. For best quality, consume within the first year. Once opened, refrigerate and use within 2 weeks. Always check for signs of spoilage before eating.
Wrapping Up Your Canning Salsa Journey
Making a canning salsa recipe with fresh tomatoes is one of the most rewarding projects you can tackle in your kitchen. You take summer’s best produce and preserve it for months of enjoyment. There is something deeply satisfying about lining up sealed jars of homemade salsa on your pantry shelf.
The keys to success come down to a few principles I’ve repeated throughout this guide. Use paste tomatoes for the best texture. Follow tested recipes exactly, especially the acid quantities. Peel your tomatoes. Adjust processing time for altitude. And let your finished salsa rest for at least a few weeks before opening that first jar.
Start with one batch of 6 to 7 pints. Once you’re comfortable with the process, scale up to use your full tomato harvest. Your future self, reaching for a jar of garden-fresh salsa in the middle of January, will thank you. For more recipes using preserved and canned ingredients, explore our other food preservation guides.