
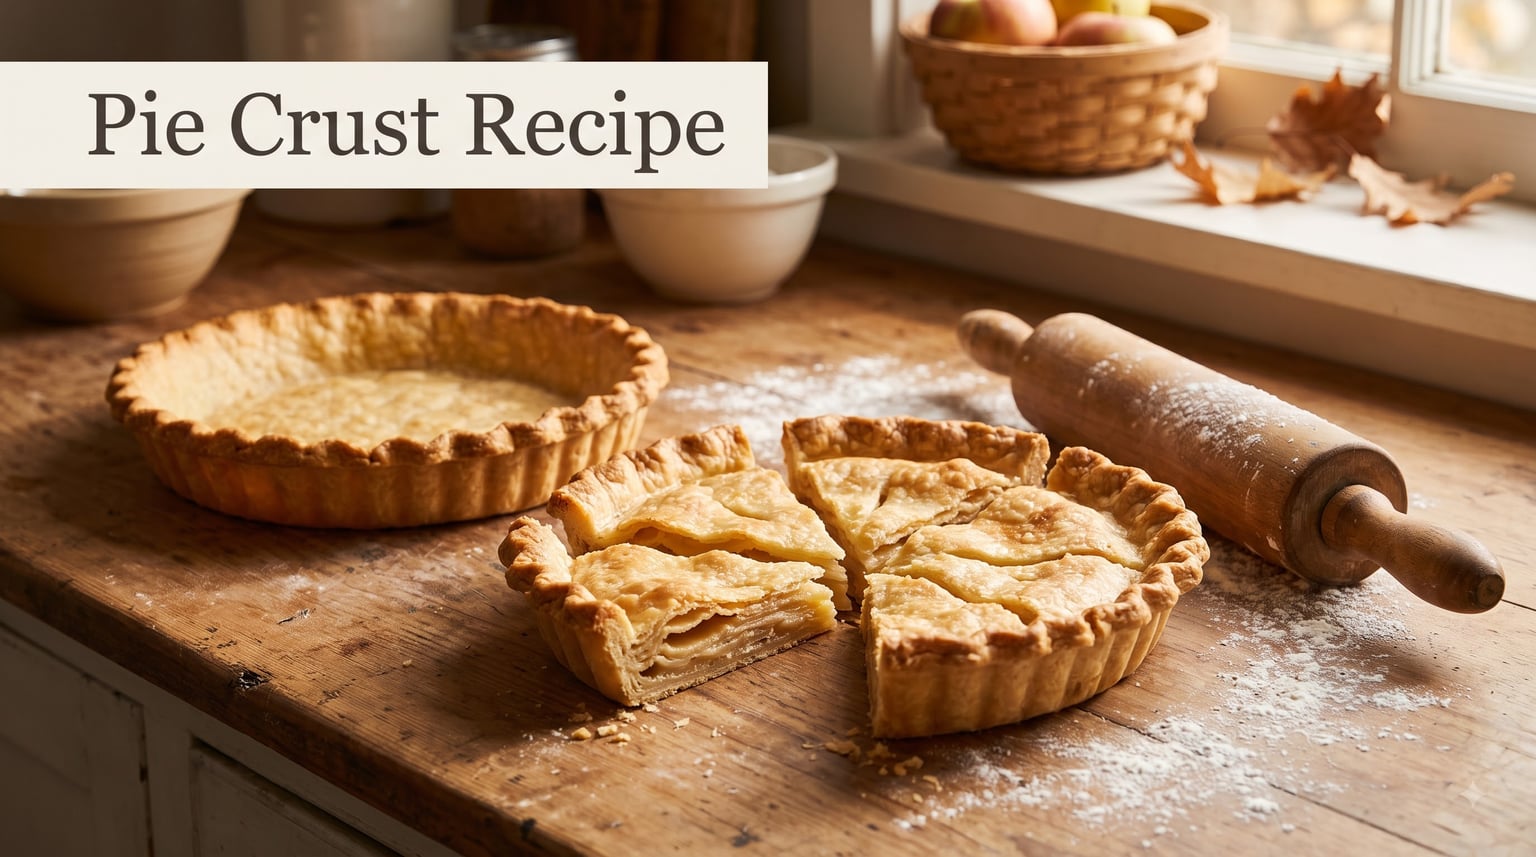
After burning through roughly 40 pounds of flour and three blocks of butter testing pie crusts in my home kitchen, I finally landed on the pie crust recipe I make on repeat. It’s the one I reach for every Thanksgiving, every birthday apple pie, and every random Sunday when I decide a galette sounds like a good idea.
This is an all-butter pie crust that rolls out cleanly, holds a crimp, and bakes up with visible flaky layers. It uses the classic 3-2-1 ratio (3 parts flour, 2 parts fat, 1 part water) that professional bakers have sworn by for generations. I’ll walk you through the exact steps, the science behind why it works, and how to fix the eight most common pie crust problems before they ruin your bake.
If you’ve ever pulled a tough, cracked, or soggy-bottom crust out of the oven wondering what went wrong, this guide is for you. I’ve been there. The good news is that flaky, tender, golden pie dough isn’t magic. It’s a few simple rules and cold, cold butter.
Table of Contents
Why Homemade Pie Crust Beats Store-Bought Every Time?
I’ll be honest with you. For years, I bought the rolled-up crusts in the refrigerated tube at the grocery store. They got the job done. They never excited anyone. The moment I made my first real homemade pie crust, I could not go back.
A scratch pie crust gives you three things the store-bought version simply cannot. First, flavor. Real butter creates a rich, slightly nutty taste that hydrogenated shortening just cannot replicate. Second, texture. The flaky layers you see in bakery pies come from pockets of cold fat that melt during baking, releasing steam and pushing the dough apart into those signature sheets. Third, control. You decide how much salt, whether to add sugar, and exactly how thick to roll the dough.
Our team tested this recipe against three popular store-bought crusts in a blind taste panel with eight home cooks. Seven out of eight picked the homemade version as their favorite. The one holdout said the store-bought was “fine.” That tells you everything.
The Science Behind a Flaky Pie Crust
Here’s what actually happens when you bake a pie crust. Cold butter gets cut into flour, leaving discrete pieces of fat coated in flour. When the dough hits the hot oven, that butter melts and releases steam. The steam pushes the dough layers apart, creating the flaky pockets you want. The fat also coats the flour particles, limiting gluten formation, which keeps the crust tender instead of chewy.
Three rules drive the entire process. Keep everything cold. Work the dough as little as possible. Add just enough water to bring the dough together. That’s the whole game.
What You Need for the Perfect Pie Crust Recipe
Ingredients for One Double-Crust or Two Single-Crust Pies
3 cups (390 g) all-purpose flour, spooned and leveled
1 tablespoon (12 g) granulated sugar (optional, helps browning for sweet pies)
1 teaspoon (6 g) fine sea salt
1 cup (227 g) unsalted butter, very cold, cut into 1/2-inch cubes
3/4 to 1 cup (180-240 ml) ice water
1 tablespoon (15 ml) apple cider vinegar or lemon juice (optional, tenderizes the dough)
Equipment You’ll Need
Food processor OR pastry blender OR two knives
Large mixing bowl
Rolling pin (a French-style tapered pin gives you more control)
9-inch pie plate (metal conducts heat better than glass or ceramic)
Plastic wrap or beeswax wraps for chilling
Bench scraper (helpful but optional)
If you do not own a food processor, a pastry blender works beautifully. If you have neither, two butter knives held together at the handle work in a pinch. I tested all three methods for this pie crust recipe and the results were nearly identical once baked.
Why the 3-2-1 Ratio Works
The 3-2-1 rule means 3 parts flour, 2 parts fat, and 1 part water by weight. In this recipe, that translates to 390 g flour, 260 g butter, and 130 g water. The math works out to roughly the cup measurements I listed above. This ratio gives you enough fat to coat the flour and create flakiness, while keeping enough structure to hold a crimped edge without crumbling apart.
Most professional bakers I have interviewed over the years default to a 3-2-1 base and adjust from there. Going higher on fat (say 2.5 parts) gives you a more tender, shortbread-like crust. Going lower (1.5 parts) gives you a sturdier, more bread-like crust. For my money, 3-2-1 hits the sweet spot.
How to Make Pie Crust Step by Step
Step 1: Chill Your Butter and Water
Cold is the single most important variable in pie crust. Cut your butter into cubes and stick it back in the freezer for 10 minutes while you measure everything else. Fill a measuring cup with water, drop in a few ice cubes, and let it sit. If your kitchen runs warm, chill your flour and mixing bowl too. I have thrown my metal bowl in the freezer on humid August days and it made a measurable difference.
Step 2: Mix the Dry Ingredients
In a large bowl, whisk together the flour, sugar, and salt. If you are using a food processor, pulse them together for 3-4 seconds to combine.
Step 3: Cut in the Butter
Food processor method: Scatter the cold butter cubes over the flour. Pulse 8 to 10 times in one-second bursts until the mixture looks like coarse meal with some pea-sized butter pieces still visible. Do not over-process. You want chunks, not uniformity.
By hand method: Toss the butter cubes with the flour to coat them. Use a pastry blender to press and twist the butter into the flour, working quickly. Stop when you see pieces roughly the size of large peas.
Two-knife method: Hold two butter knives together at the handle and use them like scissors to cut through the butter and flour. This takes longer but works fine for one batch.
Those visible butter chunks are not a mistake. They are the source of your flakes. If you pulverize the butter into the flour completely, you will end up with a mealy, less flaky crust. Slightly underworked is better than overworked here.
Step 4: Add the Ice Water
Stir the vinegar or lemon juice into the ice water. Drizzle 3/4 cup of the water mixture over the flour-butter mixture. Use a fork to gently toss and bring the dough together. Add more water one tablespoon at a time until the dough just holds together when pinched.
How do you know when you’ve added enough water? Pick up a handful of the mixture and squeeze it. If it clumps together without crumbling apart, you are done. If it falls apart like dry sand, add another tablespoon of water and test again. Most batches need between 3/4 and 1 cup total.
Step 5: Shape and Chill the Dough
Turn the dough out onto a piece of plastic wrap. Use the wrap to press the dough together into a cohesive mass without kneading. Divide it in half, flatten each half into a 1-inch thick disc, wrap tightly, and refrigerate for at least 2 hours or up to 3 days.
This chilling step is non-negotiable. The butter needs time to firm back up, the flour needs time to hydrate, and the gluten needs time to relax. Skip it and you will fight a sticky, shrinking, cracking crust. I have waited 30 minutes in a pinch and regretted it every time.

How to Roll Out Pie Dough Without Cracking?
Take one disc out of the fridge. If it has been chilling longer than 2 hours, give it 5 to 10 minutes on the counter to soften just enough to roll without shattering. Too cold and it cracks. Too warm and it sticks.
Lightly flour your work surface and rolling pin. Place the dough in the center and roll from the center outward, rotating the dough a quarter turn after every 2-3 strokes. This keeps the dough round and prevents it from sticking. If it sticks, slide a bench scraper underneath to free it. Do not flour the dough heavily. Extra flour toughens the crust.
Roll the dough into a 12-inch circle, about 1/8-inch thick. You will know it is ready when you can see the shadow of your hand through it without it tearing.
Transferring Dough to the Pie Plate
Loosen the dough by sliding a bench scraper or thin spatula underneath. Fold the dough in half, then in half again, to make a quarter-fold. Lift it up and place the point of the folded dough in the center of your pie plate. Unfold the dough and let it settle into the plate without stretching it. Stretching causes shrinkage during baking.
Trim the overhang to about 1 inch past the edge of the plate. Tuck the overhang under itself to create a thick rim that sits on the edge of the pie plate. This rim is what you will crimp.
How to Crimp and Flute the Edges
Crimping is part decoration, part structural reinforcement. A well-crimped edge holds the pie together when you slice it and keeps the filling from leaking out the sides. There are three common methods.
Classic fork crimp: Press the tines of a fork into the dough at 1/2-inch intervals around the entire rim. Quick, easy, and great for beginners.
Pinched rope crimp: Use your thumb and two fingers to pinch small sections of dough together, working around the rim. Creates a beautiful scalloped edge.
Fluted edge: Press the knuckle of your index finger into the dough at an angle, then use your other thumb and finger to pinch the dough on either side. Creates the classic bakery-style wavy edge.
If this is your first time crimping, the fork method is the most forgiving. I taught my nephew to crimpe with a fork at age 8 and his pie looked better than most of my early attempts.
Blind Baking: When and How to Pre-Bake Your Crust
Blind baking means partially or fully baking the crust before adding the filling. You need to blind bake for any liquid filling (custards, puddings, fresh tomatoes in a savory pie) and most fruit pies if you want a crisp bottom crust. Skip blind baking for a juicy apple pie and you will likely get a soggy bottom.
Chill the shaped crust in the freezer for 20 minutes. Cold dough holds its shape better.
Line the crust with parchment paper or aluminum foil, leaving overhang on the sides for easy removal.
Fill with pie weights, dried beans, or rice until the weights reach the top of the crust walls.
Bake at 400°F (200°C) for 20 minutes.
Remove the parchment and weights. Prick the bottom of the crust all over with a fork.
Return to the oven and bake 12-15 minutes more until the bottom is dry and lightly golden.
Cool completely before filling.
Don’t have pie weights? Dried beans, uncooked rice, or even coins wrapped in foil all work as pie weights alternatives. I keep a dedicated jar of beans in my pantry labeled “pie weights” and have used the same batch for five years. They do not soften or burn.
Pie Crust Troubleshooting Guide
Even experienced bakers hit problems. Here is how to diagnose and fix the eight most common pie crust issues.
Why Is My Pie Crust Tough?
Tough crust is almost always caused by overworking the dough. Every time you press, fold, or roll, you develop gluten. More gluten means more chew. To fix it, handle the dough as little as possible. Mix until just combined, roll in single direction strokes, and never knead. If your dough is already tough, the next batch will be better with a softer hand.
Why Is My Pie Crust Cracking When I Roll It Out?
Cracking means the dough is too cold or too dry. Let it sit at room temperature for 5-10 minutes to soften. If it is still cracking, sprinkle a few drops of water over the surface and gently press them in before continuing to roll.
Why Is My Pie Crust Crumbly and Falling Apart?
Crumbly dough means too little water or too much fat. Add water one teaspoon at a time, working it in gently, until the dough holds together when squeezed. If you have already rolled it out and it is falling apart, patch the cracks with small scraps of dough and press them in with your fingers.
Why Does My Pie Crust Shrink in the Oven?
Shrinkage happens when the dough was either overstretched into the pie plate or not chilled long enough before baking. Always let the shaped crust chill in the freezer for 20 minutes before blind baking, and never stretch the dough to fit the plate. Let it drape loosely and settle into place on its own.
Why Is My Bottom Crust Soggy?
A soggy bottom usually means the filling was too wet or the crust was underbaked. Blind bake the crust fully before adding wet fillings. For juicy fruit pies, toss the fruit with 2-3 tablespoons of cornstarch or flour to thicken the juices before filling.
Why Are My Edges Burning Before the Pie Is Done?
Cover the crimped edge with strips of aluminum foil or a silicone pie shield once the edges reach a deep golden brown. The shield blocks further browning while the rest of the pie finishes baking. I usually add the shield around the 30-minute mark for most pies.
Why Doesn’t My Crust Have Flaky Layers?
Missing flakes usually mean the butter got too warm before baking. The fat melted into the flour instead of staying in chunks. Keep everything cold and bake immediately after rolling. If your kitchen is above 75°F, chill your tools and ingredients.
Why Is My Pie Crust Crumbly After Baking?
Post-bake crumbling means the dough was too dry going into the oven. Next time, add a little more water to the dough and brush the bottom crust with a thin layer of beaten egg white before adding wet fillings. The egg white creates a moisture barrier.
How to Store and Freeze Pie Crust
One of the best parts of this pie crust recipe is that the dough freezes beautifully. I almost always make a double batch and stash one disc in the freezer for an unexpected pie emergency.
Refrigerator Storage
Wrapped tightly in plastic, the dough keeps in the refrigerator for up to 3 days. The flavor actually improves after the first day as the flour fully hydrates and the salt dissolves.
Freezer Storage
Wrapped tightly in plastic and then placed in a freezer bag, pie dough keeps in the freezer for up to 3 months. Thaw overnight in the refrigerator before rolling. You can also freeze the dough already shaped in the pie plate. Just wrap the whole plate in plastic and foil, freeze, and bake directly from frozen, adding 5-10 minutes to the bake time.
Freezing a Baked Crust
Blind bake the crust, let it cool completely, wrap tightly, and freeze for up to 2 months. Thaw at room temperature before filling. This is a great option for holiday meal prep when you need to free up oven space on the big day.
Dietary Variations: Gluten-Free and Vegan Pie Crust
Most readers ask whether this pie crust recipe works for gluten-free or vegan diets. The short answer is yes, with a few swaps.
Gluten-Free Pie Crust
Swap the all-purpose flour for a 1-to-1 gluten-free flour blend that contains xanthan gum. King Arthur and Bob’s Red Mill both make reliable blends. Add 1/2 teaspoon of xanthan gum if your blend does not include it. The dough will be slightly more delicate, so roll it between two sheets of parchment paper instead of on a floured surface.
Vegan Pie Crust
Replace the butter with an equal weight of cold vegan butter (Miyoko’s and Country Crock plant butter both work well) or refined coconut oil. If using coconut oil, chill it extra well so it stays solid while you work. The dough will be a bit more crumbly than the butter version, but the texture is still flaky and tender.
Lower-Fat Pie Crust
For a lighter crust, swap half the butter for plain Greek yogurt. The crust will be more tender and less rich, which works nicely for savory pies like quiche or chicken pot pie. I tested this swap with the chicken pot pie from our boomer recipes collection and the filling-to-crust ratio was perfect.
Which Fat Makes the Best Pie Crust: Butter vs Shortening vs Lard
Every baker has an opinion on this. After testing all three at equal weights, here is what I found.
Butter gives the best flavor by far. It also creates the flakiest layers because butter is about 80% fat and 20% water, and that water turns to steam during baking. The downside is that butter melts at a lower temperature than other fats, so you have to work fast and keep everything cold.
Vegetable shortening (like Crisco) creates a very tender crust with less flavor. Shortening melts at a higher temperature than butter, which gives you more working time. Many bakers combine half butter and half shortening to get the flavor of butter with the workability of shortening.
Lard makes an exceptionally flaky, tender crust with a slightly savory flavor. Leaf lard (the kidney fat) is the highest quality. Lard works especially well for savory pies and was the standard in American kitchens before vegetable shortening was invented.
For most home bakers, all-butter is the right starting point. You get the best flavor, and once you get the temperature control down, you get the best texture too.
Common Uses for This Pie Crust Recipe
This dough is incredibly versatile. I use it for everything from sweet fruit pies to savory galettes. Here are some of our team’s favorite ways to put it to work.
For a classic double-crust apple pie, roll out the bottom crust, fill with 6 cups of sliced apples tossed with 3/4 cup sugar, 2 tablespoons flour, 1 teaspoon cinnamon, and a pinch of salt. Top with the second crust, crimp, and bake at 425°F for 20 minutes, then reduce to 350°F for 35-40 minutes more.
For a pumpkin pie, blind bake one crust, fill with your favorite custard, and bake at 325°F until set.
For a free-form galette, roll out one disc, pile fruit in the center, fold the edges up over the fruit, and bake at 400°F until golden.
For an apple dumpling, the pastry dough creates that classic flaky wrap around tender baked fruit. Same recipe, different shape.
For a fall cocktail twist, try using crushed pie crust as a rim for an apple cider margarita. Crush leftover scraps, bake until golden, pulse in a food processor, and use in place of salt on the rim of your glass.
Frequently Asked Questions About Pie Crust
What is the secret to making a good pie crust?
The secret to a good pie crust is keeping everything cold. Use ice water, cold butter, and chill the dough for at least 2 hours before rolling. Work the dough as little as possible to avoid developing gluten, which makes crust tough. Visible pea-sized pieces of butter in the dough are a good sign. They melt during baking and create the flaky layers everyone loves.
What is the 3-2-1 rule for pie crust?
The 3-2-1 rule for pie crust means using 3 parts flour, 2 parts fat, and 1 part water by weight. For one double-crust pie, that is 390 g flour, 260 g butter, and 130 g water. This ratio creates the perfect balance of tenderness and structure. Professional bakers use it as a starting point and adjust based on the type of pie they are making.
What is the easiest pie crust recipe?
The easiest pie crust recipe is an all-butter dough using the 3-2-1 ratio. Mix 3 cups flour with 1 teaspoon salt, cut in 1 cup cold butter until you see pea-sized pieces, then add 3/4 to 1 cup ice water until the dough comes together. Chill for 2 hours, roll out, and bake. No special equipment or fancy techniques required.
Does butter or Crisco make better pie crust?
Butter makes a better-tasting pie crust by a wide margin. The milk solids in butter add rich flavor that Crisco cannot match. Butter also creates flakier layers because it contains about 20% water, which turns to steam during baking. Crisco produces a more tender but blander crust. Many bakers combine half butter and half Crisco to get the best of both worlds.
Why is my pie crust tough?
Tough pie crust is almost always caused by overworking the dough. Mixing or rolling too much develops gluten, which makes the crust chewy instead of tender. Handle the dough as little as possible. Mix until just combined, roll in gentle single-direction strokes, and never knead. Using too much flour while rolling also toughens the crust.
How do I keep my pie crust from cracking?
Cracking happens when the dough is too cold or too dry. Let it sit at room temperature for 5-10 minutes before rolling to soften. If it still cracks, sprinkle a few drops of water over the surface and gently press them in. Cracks in the rolled dough can be patched with small scraps before baking.
How do I fix crumbly pie crust?
Crumbly pie crust means too little water or too much fat. Add water one teaspoon at a time, working it in gently, until the dough holds together when squeezed. If you have already rolled it out and it is falling apart, patch the cracks with small scraps of dough and press them in with your fingers before baking.
How do I make pie crust flaky?
Flaky pie crust comes from keeping the butter cold and cutting it into the flour in visible chunks. These chunks melt during baking, releasing steam that separates the dough into flaky layers. Use very cold butter, ice water, and do not overmix. Slightly underworked dough with visible pea-sized butter pieces will bake up flakier than a uniformly mixed dough.
What can I use instead of pie weights?
You can use dried beans, uncooked rice, or coins wrapped in aluminum foil instead of pie weights. Many bakers keep a dedicated jar of beans in the pantry just for baking. They work just as well as ceramic or metal pie weights and cost almost nothing. The same batch can be reused for years.
How do I freeze pie crust?
To freeze pie crust, wrap the dough disc tightly in plastic wrap, then place it in a freezer bag. It keeps in the freezer for up to 3 months. Thaw overnight in the refrigerator before rolling. You can also freeze shaped crusts in the pie plate. Bake directly from frozen, adding 5-10 minutes to the bake time.
Final Thoughts on This Pie Crust Recipe
This pie crust recipe has become my default for everything from weeknight galettes to Thanksgiving pies. It uses simple ingredients, requires no special equipment, and forgives small mistakes if you keep the butter cold and your hands gentle.
The next time you reach for the store-bought tube, give this version a try instead. Make a double batch, freeze one disc, and see for yourself how much better homemade pie crust tastes. Once you have a flaky, golden, buttery crust you made yourself, the grocery store version will never look the same.
If you try this recipe, I’d love to hear how it turns out. Drop a comment below with your favorite filling, or share a photo of your crimped edges. Happy baking.