
I still remember the first time my grandmother handed me a spoon of her banana pudding at her kitchen table in Charleston. The wafers had gone completely soft, the cream tasted faintly of lemon, and the bananas had mellowed into something almost honeyed. That was forty years ago, and I have spent most of my adult life trying to recreate that exact bowl.
After testing more than thirty versions of this banana pudding recipe across three summers, I finally settled on one I trust. It is creamy without being heavy, sweet without being cloying, and it travels beautifully to every potluck, picnic, and family dinner I bring it to. This guide walks you through every step, every ingredient, and every trick I have learned so you can skip the trial and error and go straight to a perfect dessert.
You will learn the ingredient science behind why certain puddings turn out runny, the history of this Southern classic, the layering technique that keeps wafers from going soggy, and how to make it work for any dietary need. By the end, you will have a banana pudding recipe you can call your own.
Table of Contents
What Is Banana Pudding and Why It Endures?
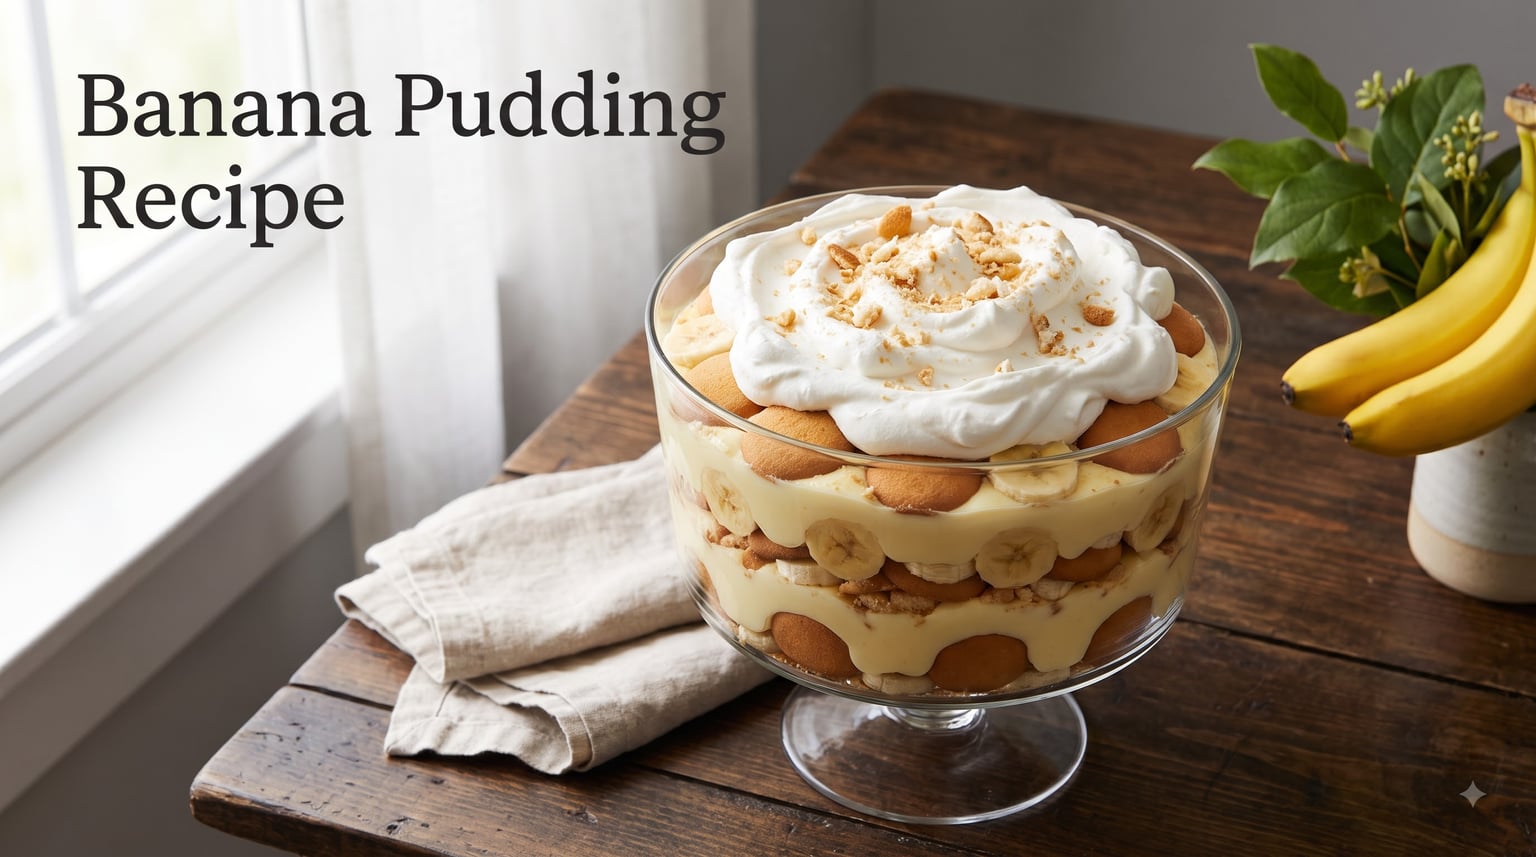
Banana pudding is a classic American dessert made by layering vanilla wafers, fresh banana slices, and a creamy vanilla pudding, then topping it all with whipped cream or meringue. At its heart, it is a humble trifle-style dessert that traces its roots to the late 1800s, when the first banana shipments arrived in American ports and recipes using the new fruit started appearing in regional cookbooks.
The dish became a fixture of Southern cuisine after Nabisco introduced Vanilla Wafers in 1898. Before that, recipes used sponge cake or ladyfingers. Once the wafers hit store shelves, the modern banana pudding took shape as we know it today, featuring alternating layers of cookies, fruit, and a custard or pudding base.
What makes this dessert so enduring is the contrast of textures. The wafers soften just enough to soak up the pudding without dissolving. The bananas release their sweetness as they rest. The cream sets up around everything, locking the layers into a sliceable, scoopable final dish. If you love classic vintage desserts like this one, you can find more inspiration in our roundup of other vintage dessert recipes.
Banana pudding also became famous through Magnolia Bakery in New York City, whose version became a cult favorite in the 1990s and pulled the dessert into the national spotlight. Today, it shows up at every kind of gathering, from Fourth of July cookouts to Sunday dinners, and it remains one of the most-requested potluck desserts in the South.
Banana Pudding Recipe Ingredients You Need
Here is everything you need to make a 9×13 inch pan or a 3-quart trifle dish of banana pudding. I have included notes on each ingredient so you understand why it matters and what to substitute if needed.
Pudding Base
1 (14 oz) can sweetened condensed milk — This is the magic ingredient. It adds sweetness, body, and a subtle caramel flavor that granulated sugar cannot match. Do not use evaporated milk; it is not the same product.
1 (5 oz) box instant vanilla pudding mix — Use a name brand like Jell-O or store brand equivalent. Do not use cook-and-serve, which requires heat and a different thickening ratio.
1 1/2 cups cold whole milk or 2% milk — Cold is critical. Cold milk helps the instant pudding set quickly and prevents lumps.
1 (8 oz) block cream cheese, softened — Leave this on the counter for at least an hour. Cold cream cheese is the number one reason home cooks end up with lumps in their pudding.
1 teaspoon pure vanilla extract — Use real vanilla, not imitation. The flavor difference is unmistakable in a dessert this simple.
For Layering
4 to 5 ripe but firm bananas — Look for yellow bananas with just a few small brown freckles. Overripe bananas turn to mush and brown too quickly.
1 (12 oz) box Vanilla Wafers (Nilla Wafers) — The classic choice. I have tried Pepperidge Farm Chessmen and shortbread cookies, but Nilla Wafers win for that authentic Southern flavor.
Topping
2 cups heavy whipping cream — Cold, straight from the fridge. Whip it just before assembling for the best volume.
3 tablespoons powdered sugar — Adjust to taste. Powdered sugar dissolves easily and adds a touch of sweetness without graininess.
1/2 teaspoon vanilla extract — Optional but recommended for depth.
If you would like to simplify, you can swap the homemade whipped cream for an 8 oz tub of Cool Whip, thawed in the refrigerator overnight. Many Southern cooks use Cool Whip because it holds its shape longer for make-ahead desserts.
Equipment That Makes Banana Pudding Easier
You do not need much, but a few pieces of equipment make the process smoother. A 3-quart trifle dish is the traditional serving vessel because it shows off the layers. If you do not have one, a 9×13 inch glass baking dish works perfectly.
A stand mixer with a whisk attachment or a handheld electric mixer is essential for whipping cream to stiff peaks. A large mixing bowl with high sides is helpful for whipping without splattering. A rubber spatula makes folding the whipped cream into the pudding base much easier than a wooden spoon.
For slicing bananas evenly, a sharp paring knife beats a serrated knife every time. Aim for slices about 1/4 inch thick. Thinner slices break down too quickly; thicker slices feel awkward in a bite.
How to Make Banana Pudding Step by Step
This recipe takes about 25 minutes of active work and at least 4 hours of chilling time. I usually make it the morning of the day I plan to serve it, so the flavors have time to meld.
Step 1: Whip the Cream
Pour the cold heavy cream into a chilled mixing bowl. Add the powdered sugar and vanilla. Beat on medium-high speed until stiff peaks form, about 2 to 3 minutes. Do not overbeat, or you will end up with butter. Set the whipped cream aside in the refrigerator while you prepare the rest.
Step 2: Beat the Cream Cheese
In a separate large bowl, beat the softened cream cheese with an electric mixer on medium speed until completely smooth and fluffy, about 2 minutes. This step is what most home cooks skip, and it is the reason for those annoying lumps in the final pudding. Take the time to do it right.
Step 3: Combine the Pudding Base
Add the sweetened condensed milk to the cream cheese and beat until smooth. Sprinkle the instant vanilla pudding mix over the top and pour in the cold milk. Beat on low speed for 2 minutes, scraping down the sides of the bowl halfway through. The mixture will thicken noticeably as the instant pudding activates.
Step 4: Fold in the Whipped Cream
Remove about one-third of the whipped cream and set it aside for the topping. Gently fold the remaining whipped cream into the pudding base using a rubber spatula. Cut down through the center, sweep along the bottom, and fold the mixture over itself. Stop as soon as no white streaks remain. Overmixing will deflate the cream and leave you with a thinner pudding.
Step 5: Slice the Bananas
Peel the bananas and slice them into 1/4 inch rounds. Work quickly so they do not have time to brown while you assemble the rest.
Step 6: Layer the Dessert
Arrange a single layer of vanilla wafers on the bottom of your trifle dish or baking pan, breaking cookies to fill any gaps. Top with one-third of the banana slices. Spread one-third of the pudding mixture over the bananas and smooth the top. Repeat the layers twice more, ending with pudding on top.
Step 7: Top and Chill
Spoon the reserved whipped cream over the top and spread it to the edges. Crush a few extra vanilla wafers and sprinkle them over the cream for texture. Cover loosely with plastic wrap and refrigerate for at least 4 hours, ideally overnight. The wait is what turns good banana pudding into great banana pudding.
The Secret to the Best Banana Pudding
After dozens of test batches, I have identified five things that separate a forgettable banana pudding from one that disappears before you set the serving spoon down.
First, use barely ripe bananas. Yellow with a few freckles is perfect. Bright green bananas lack flavor, and bananas with extensive browning turn to mush and make the pudding taste fermented.
Second, keep everything cold. Cold milk, cold cream, cold cream cheese. Cold ingredients help the instant pudding set properly and keep the whipped cream stable. If your kitchen is hot, chill your mixing bowl in the freezer for 10 minutes before whipping.
Third, beat the cream cheese alone first. I cannot stress this enough. This single step eliminates the lumps that ruin so many homemade banana puddings.
Fourth, fold gently. The whipped cream is what gives this dessert its airy, melt-in-your-mouth texture. Stirring it in like a cake batter will knock out all the air you just whipped in.
Fifth, let it rest. An overnight chill in the refrigerator allows the wafers to soften just enough, the bananas to release their sweetness, and the flavors to marry. Do not skip this step.
How to Keep Bananas from Turning Brown
Bananas start oxidizing the moment you slice them, and there is no way to stop the process entirely. You can, however, slow it down significantly. The trick is to minimize air contact and use acidic ingredients.
Brush the sliced bananas with a thin layer of lemon juice, pineapple juice, or orange juice before layering them. The acid slows down the enzymatic browning reaction without changing the flavor noticeably. I use about 1 tablespoon of fresh lemon juice mixed with 2 tablespoons of water for a mild treatment.
Another approach is to layer the bananas close together with no gaps between slices. When the pudding covers them, they have less exposure to air. This is why a thicker pudding layer on top helps preserve the dessert’s appearance.
Finally, do not slice the bananas until you are ready to assemble. Even 15 minutes of sitting on a cutting board can cause noticeable browning at the edges. If you are preparing this for a party, slice them last.
For longer storage, submerging sliced bananas in a 50/50 mix of water and pineapple juice in the refrigerator keeps them pale for up to 24 hours. Drain them well before layering.
Banana Pudding Variations Worth Trying
Once you master the classic version, you can experiment with these popular variations. Each has its own devotees, and I have tested them all to help you decide which fits your taste.
Magnolia Bakery Style
This version skips the cream cheese entirely and relies on a combination of instant pudding, sweetened condensed milk, and freshly whipped heavy cream. The result is lighter and more mousse-like. The original Magnolia Bakery recipe uses a 1:1 ratio of heavy cream to whole milk in the pudding base and calls for layering the cookies whole rather than breaking them. Visit our fruit-based recipes collection for more inspiration.
Old-Fashioned From Scratch
The traditional Southern version uses a cooked custard made from egg yolks, sugar, milk, and cornstarch. It is more labor-intensive but produces a richer, more complex pudding. Skip the cream cheese and use the cooked custard as your base. This version has a yellow tint and a deeper vanilla flavor that many Southern grandmothers swear by.
Cream Cheese Banana Pudding
This is the version I have shared above. The cream cheese adds tang, structure, and a slight cheesecake-like richness. It is the most popular variation on Pinterest and the version most home cooks prefer because it holds up best for potlucks.
Dairy-Free Banana Pudding
Substitute the cream cheese with a vegan block-style cream cheese (Kite Hill and Miyoko’s both work well). Use coconut cream in place of heavy cream, and a plant-based instant vanilla pudding. The flavor will be slightly different but still delicious. Make sure your vanilla wafers are dairy-free, as some brands contain milkfat.
Individual Servings
Layer the pudding in small mason jars or stemless wine glasses for single-serving portions. This is my go-to for dinner parties because every guest gets a perfect ratio of wafers, bananas, and pudding in every spoonful. Use 8 oz jars and plan on 1 banana per 4 servings.
Tropical Twist
Add a layer of thinly sliced mango or toasted coconut between the bananas and pudding for a tropical variation. For more tropical dessert inspiration, check out our list of other tropical fruit dessert recipes.
Make-Ahead and Storage Instructions
Banana pudding is one of the best make-ahead desserts because the texture actually improves as it sits. The wafers soften, the bananas mellow, and the flavors meld into something more cohesive than the just-assembled version.
For best results, make this dessert the night before you plan to serve it. Cover tightly with plastic wrap and refrigerate for 8 to 12 hours. The pudding will keep for up to 3 days in the refrigerator, but the bananas will start to brown and the wafers will become very soft after 48 hours.
Do not freeze banana pudding. The cream and bananas both break down when thawed, leaving you with a watery, separated texture. The wafers also become unpleasantly mushy after freezing.
If you need to make components ahead separately, you can whip the cream and prepare the pudding base up to 24 hours in advance. Store them in separate airtight containers in the refrigerator. Slice the bananas and assemble the layers no more than 1 hour before serving for the best appearance.
Troubleshooting Common Banana Pudding Problems
Even experienced cooks run into issues with banana pudding. Here are the most common problems and how to fix them.
The pudding is runny. This usually means the instant pudding did not activate properly. Either the milk was not cold enough, or the mixture was not beaten long enough. Add an extra 1/2 cup of instant vanilla pudding mix and beat for another 2 minutes. Refrigerate for at least 4 hours to allow it to set.
The wafers are too soggy. You waited too long to serve it, or you used too much pudding in the bottom layer. The crystals in the wafers dissolve as they absorb moisture. Aim to serve within 24 hours of assembly, and use thicker cookies if you need the dessert to last longer.
The cream cheese is lumpy. Cold cream cheese is the culprit. Let it sit at room temperature for 1 to 2 hours before beating. If you forgot to take it out early, cut it into small cubes and microwave it on low power for 15 seconds. Do not melt it, just soften it.
The bananas turned brown. Either you used overly ripe bananas, or you sliced them too early. Treat them with lemon juice next time and slice them just before assembling.
The whipped cream deflated. You either overbeated it or overfolded it. Stop the mixer as soon as stiff peaks form, and fold gently with a spatula using a cutting motion rather than stirring.
The dessert tastes too sweet. Reduce the sweetened condensed milk to 10 oz and add 1/4 cup of plain Greek yogurt to balance the sweetness with tang. You can also use less sugar in the whipped cream topping.
Serving Suggestions and Pairings
Banana pudding is rich enough to stand on its own, but a few small touches make it feel special. Garnish the top with extra vanilla wafer crumbs, a single banana slice, or a sprinkle of freshly grated nutmeg just before serving.
For drink pairings, a glass of cold milk is the classic choice. A cup of strong coffee or espresso balances the sweetness beautifully. If you are serving this for adults, a dessert wine like Moscato or a bourbon-based cocktail complements the vanilla and caramel notes. For more pairing inspiration, explore our guide to dessert pairing ideas.
This dessert travels well in a chilled cooler and is one of the best options for potlucks, picnics, and barbecues. Bring it in the trifle dish and a long-handled spoon so guests can see the layers as they serve themselves.
Frequently Asked Questions
What are the ingredients for banana pudding?
The classic banana pudding recipe uses instant vanilla pudding mix, sweetened condensed milk, cold whole milk, cream cheese, vanilla extract, ripe bananas, vanilla wafers, and heavy cream for the topping. Some versions skip the cream cheese for a lighter Magnolia Bakery-style pudding, while old-fashioned Southern recipes use a cooked custard instead of instant pudding.
What are the four ingredients in a banana pudding recipe?
A simplified 4-ingredient banana pudding uses instant vanilla pudding mix, sweetened condensed milk, vanilla wafers, and bananas. For the topping, you can use Cool Whip instead of whipping fresh cream. This shortcut version is popular for fast potluck desserts but is less rich than cream cheese versions.
What is the secret to a rich banana pudding?
The secret to a rich banana pudding is using full-fat cream cheese beaten smooth before combining with sweetened condensed milk and instant vanilla pudding. Fold in freshly whipped heavy cream gently at the end, and chill the dessert overnight so the wafers soften and the flavors meld. Use cold ingredients throughout for the best texture.
What is a 3 ingredient banana dessert?
A 3-ingredient banana dessert can be made with instant vanilla pudding, whipped topping, and sliced bananas layered with vanilla wafers. Another option is sliced bananas dipped in Greek yogurt and frozen, then rolled in crushed graham crackers. Both are quick alternatives when you do not have time for a full banana pudding recipe.
How do you keep bananas from turning brown in banana pudding?
Brush sliced bananas with a mixture of 1 tablespoon lemon juice and 2 tablespoons water before layering. Cover the bananas completely with the pudding so they have minimal air exposure. Use barely ripe bananas with just a few freckles, and slice them right before you assemble the dessert.
How long does banana pudding last in the fridge?
Banana pudding lasts up to 3 days in the refrigerator when stored in an airtight container. The texture is best within the first 24 hours, before the wafers become too soft. After 48 hours, the bananas will start to brown and release liquid, which can make the pudding watery. Do not freeze banana pudding, as the cream and bananas do not thaw well.
Can you make banana pudding the night before?
Yes, banana pudding is an excellent make-ahead dessert and is actually better when made the night before. The overnight rest allows the wafers to soften perfectly, the bananas to mellow, and the flavors to meld together. Cover with plastic wrap and refrigerate for 8 to 12 hours before serving for the best results.
What is the difference between banana pudding and banana cream pie?
Banana pudding is a layered no-bake dessert served in a trifle dish or bowl, with vanilla wafers acting as the cookie layer. Banana cream pie is a baked pie with a pastry crust filled with cooked custard and topped with fresh bananas. Both use similar ingredients, but banana pudding is spoon-served while banana cream pie is sliced like a traditional pie.
Why is my banana pudding runny?
Runny banana pudding usually means the instant pudding did not set properly. Use cold whole milk rather than skim, beat the pudding mixture for a full 2 minutes, and refrigerate for at least 4 hours. If the pudding is still loose after chilling, fold in an additional 1/2 cup of instant vanilla pudding mix and chill for another hour.
What can I use instead of vanilla wafers in banana pudding?
You can substitute vanilla wafers with shortbread cookies, Pepperidge Farm Chessmen, Biscoff cookies, graham crackers, or even sliced pound cake. Each option gives a slightly different flavor profile. Shortbread adds richness, while graham crackers provide a honeyed flavor. Adjust chilling time based on how quickly the substitute absorbs moisture.
Can you freeze banana pudding?
Freezing banana pudding is not recommended. The whipped cream separates when thawed, the bananas become mushy, and the vanilla wafers turn unpleasantly soft. If you must freeze it, leave off the whipped cream topping, freeze the pudding base for up to 1 month, then thaw in the refrigerator and add fresh toppings before serving.
Final Thoughts on the Best Banana Pudding Recipe
This banana pudding recipe is the one I bring to every family gathering, every church potluck, and every summer cookout. It has never let me down, and I have received more recipe requests for it than for any other dessert I make. The combination of cream cheese, sweetened condensed milk, and freshly whipped cream creates a base that is rich without being heavy, while the barely ripe bananas and softened vanilla wafers deliver that classic Southern texture everyone remembers from childhood.
The beauty of this banana pudding recipe is its flexibility. You can make it the night before, swap in homemade custard for a more traditional version, divide it into individual jars for parties, or adapt it for dairy-free guests. Each variation holds its own, and once you understand the basic structure, you can adjust the recipe to fit any occasion or dietary need.
If you try this recipe, start with the cream cheese version I have shared here. It is the most forgiving for first-timers and the most crowd-pleasing for veteran banana pudding fans. Use cold ingredients, beat the cream cheese smooth, fold the whipped cream gently, and give the dessert time to rest in the refrigerator. Those four steps will give you a result that tastes like it came from a real Southern kitchen.
I would love to hear how your banana pudding turns out. Drop a comment below with your favorite variation, your go-to occasion for bringing it, and any tips you have picked up along the way. Cooking is a conversation, and the best banana pudding recipe is the one you keep refining.