
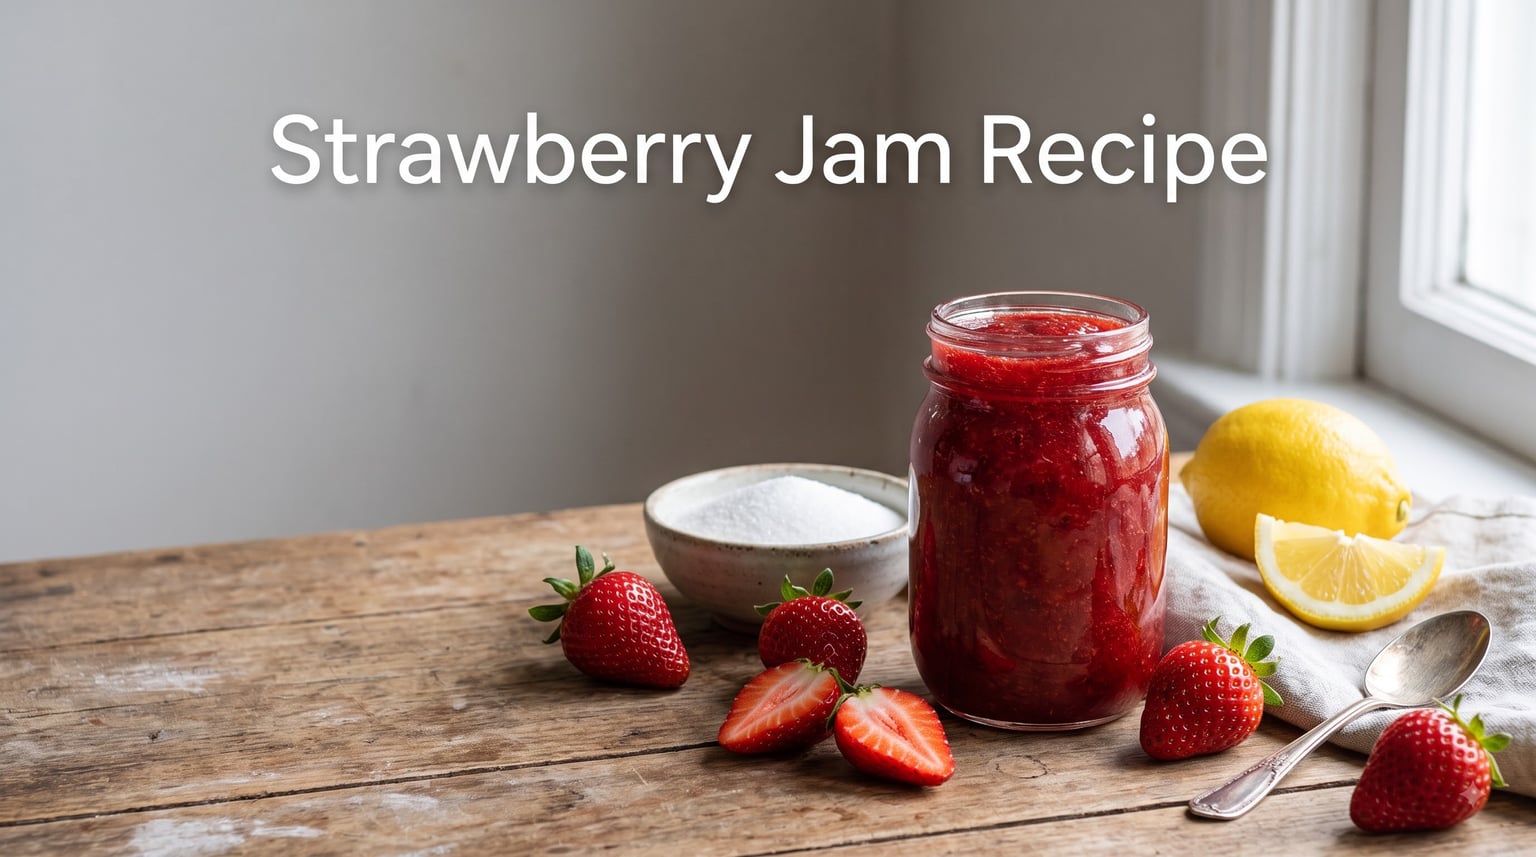
There is nothing quite like opening a jar of homemade strawberry jam in the middle of winter and smelling summer again. That sweet, fruity aroma hitting warm toast is one of life’s simplest pleasures, and once you make it yourself, you will never go back to store-bought.
I have been making strawberry jam for over a decade, testing everything from traditional pectin-based recipes to old-fashioned maceration methods passed down through my grandmother’s handwritten notes. Through plenty of failed batches (runny jam, burnt bottoms, jars that refused to seal), I have dialed in a strawberry jam recipe that works every single time.
This guide covers everything you need to know about how to make strawberry jam from scratch. You will learn the exact ingredients, equipment, step-by-step cooking process, how to test for the perfect set, storage methods, troubleshooting tips, and flavor variations. Whether you are a complete beginner or an experienced preserver looking to refine your technique, this recipe has you covered.
If you love making your own spreads, you might also enjoy our whipped honey recipe for another homemade breakfast treat.
Table of Contents
What You Need: Ingredients for Strawberry Jam
The beauty of a great strawberry jam recipe is its simplicity. You only need three core ingredients, and each one plays a specific role in the final product.
Core Ingredients
2 pounds (about 4 cups) fresh strawberries, hulled and crushed — This is roughly 4 to 5 standard baskets of strawberries. Use ripe, fragrant berries for the best flavor. Slightly overripe strawberries actually make better jam because they have concentrated sugars and deeper flavor.
4 cups (800g) granulated sugar — Traditional recipes use equal parts sugar to fruit by volume. Sugar does more than sweeten. It preserves the jam, helps it set, and prevents spoilage. I will cover lower-sugar options later in this guide.
3 tablespoons fresh lemon juice — Lemon juice provides acid, which is essential for two reasons. It helps activate pectin (both natural and added) so your jam sets properly, and it balances the sweetness while brightening the strawberry flavor. Use fresh lemon juice for refrigerator and freezer jam. If you plan to water-bath can your jam, use bottled lemon juice because it has a standardized acidity level for safety.
Optional Ingredients
1 package (1.75 oz) powdered fruit pectin — Use this if you want a faster set, a firmer texture, or a shorter cooking time. I prefer the no-pectin method for a softer, more natural set, but both work beautifully.
1 to 2 tablespoons kirsch or crème de cassis — A splash of fruit brandy added at the end of cooking deepens the berry flavor without making the jam taste alcoholic. This is a trick I picked up from French jam-making traditions.
1 teaspoon unsalted butter — Adding a small piece of butter during cooking helps reduce foam. It is an old baker’s trick that many home canners in online forums swear by.
Equipment You Will Need
You do not need fancy equipment to make great jam, but having the right tools makes the process smoother and safer. Here is what I use every time.
Essential Equipment
Heavy-bottomed saucepan or Dutch oven (6 to 8 quart) — A thick bottom prevents scorching, which is the number one enemy of good jam. Stainless steel or enameled cast iron works best. Avoid aluminum because it can react with the acid in lemon juice and give your jam a metallic taste.
Potato masher or fork — For crushing the strawberries to your desired consistency. Some people prefer chunky jam with visible fruit pieces, while others like a smoother texture.
Candy or instant-read thermometer — This takes the guesswork out of knowing when your jam is done. Strawberry jam sets at 220 degrees F (104 degrees C), and a thermometer is the most reliable way to hit that temperature.
Ladle and wide-mouth funnel — For transferring hot jam into jars without making a mess. A funnel keeps the jar rims clean, which is critical for proper sealing.
4 to 5 half-pint (8 oz) Mason jars with lids and rings — Standard canning jars are ideal. If you are only making refrigerator jam, any clean glass jars with tight-fitting lids will work.
If You Plan to Water-Bath Can
Water bath canner or large stockpot with a rack — The rack keeps jars off the bottom of the pot so water circulates evenly.
Jar lifter — For safely removing hot jars from boiling water without burning yourself.
Magnetic lid lifter — For placing sterilized lids on jars without touching them.
How to Make Strawberry Jam: Step by Step
Here is the complete strawberry jam recipe, broken into clear steps. Follow these instructions carefully for your first batch, and you will have perfect jam every time.
Step 1: Prepare Your Strawberries
Wash the strawberries gently under cold water before hulling them. Hulling means removing the green leafy tops and the small white core beneath each stem. You can use a paring knife, a strawberry huller, or even a plastic straw pushed through the bottom of the berry.
Once hulled, place the strawberries in your saucepan and crush them with a potato masher. Leave some pieces intact if you prefer a chunkier texture. You should end up with about 4 cups of crushed berries.
Step 2: Combine and Macerate
Add the granulated sugar and lemon juice to the crushed strawberries. Stir well to combine, then let the mixture sit for 30 to 60 minutes at room temperature. This process, called maceration, draws out the natural juices from the berries and dissolves the sugar gradually.
Maceration is an optional step, but I highly recommend it. It improves flavor development and gives you a smoother, more even cook. Many experienced jam-makers in online canning communities consider maceration the secret to a superior-tasting jam.
Step 3: Cook the Jam
Place the saucepan over medium-low heat and stir gently until all the sugar has completely dissolved. This usually takes about 5 minutes. Do not rush this step. If the sugar has not fully dissolved before the mixture boils, your jam may crystallize during storage.
Once the sugar is dissolved, increase the heat to medium-high and bring the mixture to a full rolling boil. A rolling boil means the mixture bubbles vigorously and continues to boil even when you stir it. This is different from a gentle simmer.
Step 4: Maintain the Boil
Keep the jam at a rolling boil, stirring frequently to prevent scorching on the bottom of the pan. If you are using the no-pectin method, you will need to boil for 20 to 35 minutes. If you are using powdered pectin, follow the package instructions, which typically call for 1 to 2 minutes of hard boiling after adding the pectin.
During boiling, foam will form on the surface. This foam is harmless but makes your jam look cloudy. Skim it off with a spoon and discard it, or add a small piece of butter to reduce foaming naturally.
Step 5: Test for Set
Start testing for set after about 15 minutes of boiling if using the no-pectin method. There are three reliable ways to test whether your jam has reached the gel point, which I cover in detail in the next section.
The most accurate method is temperature. Your jam is done when it reaches 220 degrees F (104 degrees C) on a candy thermometer.
Step 6: Jar the Jam
Once the jam has set, remove the saucepan from heat. Let it rest for 5 minutes. This resting period helps the fruit distribute evenly through the jars instead of floating to the top.
Ladle the hot jam into sterilized jars, leaving about 1/4 inch of headspace at the top. Wipe the rims clean with a damp cloth. Place the lids on top and screw on the rings until fingertip-tight.
Step 7: Process or Cool
If you are making refrigerator jam, let the jars cool to room temperature, then refrigerate. The jam will thicken as it cools.
If you are water-bath canning, process the jars in boiling water for 10 minutes (adjusting for altitude if you live above 1,000 feet). Remove the jars and let them cool undisturbed for 12 to 24 hours. You should hear the satisfying pop of the lids sealing within the first hour.
How to Tell When Your Jam Is Set
Knowing when jam is done is the skill that separates beginners from experienced preservers. Overcook it and you get a stiff, rubbery spread. Undercook it and you end up with strawberry syrup. Here are the three methods I rely on, listed from most to least accurate.
Method 1: Temperature Test (Most Reliable)
Strawberry jam reaches its gel point at 220 degrees F (104 degrees C) at sea level. Clip a candy thermometer to the side of your saucepan and watch the temperature closely during the final 10 minutes of cooking.
If you live at high altitude, subtract 2 degrees F for every 1,000 feet of elevation. So at 5,000 feet, your gel point would be around 210 degrees F.
Method 2: Frozen Plate Test (Most Traditional)
Before you start cooking, place 2 or 3 small plates in the freezer. When you think the jam might be ready, spoon a small amount onto one of the cold plates. Let it sit for 30 seconds, then push the jam with your finger.
If the jam wrinkles and holds its shape, it is done. If it runs back together and stays liquid, cook for another 2 to 3 minutes and test again with a fresh plate.
This method has been used for generations and is considered the gold standard by most home preservers I have talked to in canning forums.
Method 3: Spoon or Sheet Test (Quickest)
Dip a cold metal spoon into the boiling jam and lift it horizontally. Watch how the jam falls off the spoon. In the early stages of cooking, it will drip rapidly in single drops.
As the jam approaches the set point, the drops will slow down and two drops will merge into a single sheet that hangs from the edge of the spoon. When you see this sheeting effect, your jam is nearly ready.
Pectin vs No-Pectin: Which Method Is Better
This is one of the most debated topics in the jam-making world, and you will see strong opinions on both sides. The truth is that both methods produce excellent jam, but they result in different textures and flavors.
The No-Pectin Method
Making strawberry jam without added pectin means you rely on the natural pectin in the strawberries themselves. Strawberries are naturally low in pectin compared to fruits like apples or citrus, so the jam requires longer cooking to reach the set point.
This longer cooking time concentrates the flavors and produces a deeper, richer taste. The texture is softer and more spoonable, which many people prefer for spreading on warm toast or spooning over yogurt and ice cream. The trade-off is that it takes more time and attention.
The Pectin Method
Adding powdered pectin dramatically shortens the cooking time. You can have finished jam in about 10 minutes of boiling instead of 30. The texture is firmer and more gel-like, similar to what you find in commercial jams.
Pectin also gives you more consistent results, which is ideal for beginners who are nervous about whether their jam will set. The flavor is slightly fresher because the fruit is cooked for less time, but some people find the texture too stiff.
My Recommendation
For your very first batch, use pectin. It removes the anxiety of wondering whether the jam will set. Once you are comfortable with the process, try the no-pectin method for a more traditional, full-flavored jam. Both belong in every home cook’s repertoire.
Strawberry Jam Recipe Variations and Flavor Additions
Once you have mastered the basic strawberry jam recipe, the fun really begins. Here are some of my favorite variations that elevate homemade jam to something special.
Alcohol-Infused Jam
Stir in 1 to 2 tablespoons of kirsch (cherry brandy) or crème de cassis (black currant liqueur) right after removing the jam from heat. These spirits deepen the berry flavor without making the jam taste alcoholic. This technique comes from French pastry tradition and adds sophistication to a simple spread.
Vanilla Bean Jam
Split a vanilla bean lengthwise and scrape the seeds into the strawberry mixture before cooking. Toss the whole pod in too. Remove the pod before jarring. Vanilla adds warmth and complexity that pairs beautifully with strawberries.
Herb-Infused Jam
Add a sprig of fresh thyme, basil, or a small pinch of culinary lavender to the jam while it cooks. Remove the herbs before jarring. Basil and strawberry is a surprisingly perfect combination that works wonderfully on a cheese board. For more pairing ideas, check out our guide on wine and cheese pairings with jam.
Low-Sugar Strawberry Jam
You can reduce the sugar to 2 cups (400g) per 2 pounds of strawberries, but there are trade-offs. Lower sugar means a longer shelf life concern, a softer set, and less preservation. You will need to use commercial low-sugar pectin (regular pectin requires a specific sugar ratio to set properly). Low-sugar jam is best stored in the refrigerator or freezer rather than canned.
Using Frozen Strawberries
Frozen strawberries work well for jam, and they let you make it year-round. Thaw the berries first, then proceed with the recipe as written. Frozen berries release more liquid than fresh ones, so expect the cooking time to be 5 to 10 minutes longer to reach the set point.
Small Batch Strawberry Jam
Want to make just one jar? Scale the recipe down to 1 pound of strawberries, 2 cups of sugar, and 1.5 tablespoons of lemon juice. Small batches cook faster (often in 15 minutes or less) and are perfect for beginners. They also let you experiment with flavors without committing to a large quantity.
Troubleshooting Common Strawberry Jam Problems
Even experienced jam-makers run into issues. Here are the most common problems and exactly how to fix them, based on questions I see constantly in online canning and cooking forums.
Problem: Jam Did Not Set (Too Runny)
This is the number one complaint among home preservers. The most likely cause is undercooking. The jam simply did not reach the gel point of 220 degrees F.
The fix: Pour the jam back into your saucepan and bring it to a rolling boil again. Cook for another 5 to 10 minutes, testing for set with the frozen plate method. If it still will not set after additional cooking, you can add 1 teaspoon of powdered pectin dissolved in 1 tablespoon of water and boil for 2 more minutes.
Problem: Jam Is Too Stiff or Rubber
Overcooking is the culprit here. Once jam passes the gel point, it continues to firm up as it cools, and overcooked jam becomes stiff, dark, and unappealing.
The fix: Unfortunately, you cannot undo overcooked jam. For future batches, start testing for set earlier and trust the frozen plate test over the clock. Remember that jam thickens significantly as it cools in the jar.
Problem: Jam Crystallized or Became Sugary
This happens when the sugar did not fully dissolve before boiling began. Undissolved sugar crystals act as seeds that cause more crystals to form during storage.
The fix: Always cook over low heat first, stirring constantly, until every grain of sugar is dissolved. You can test this by rubbing a small amount of the mixture between your fingers. If it feels gritty, keep stirring. Once it feels smooth, increase the heat.
Problem: Foam Will Not Go Away
Foam is natural and harmless, but excessive foam can be frustrating. Many forum users recommend adding a tiny piece of butter (about 1/2 teaspoon) to the boiling jam to break the foam.
The fix: Skim foam with a slotted spoon during cooking. If foam persists, add the butter trick and skim one final time before jarring.
Problem: Jam Darkened Too Much
Excessive darkening usually means the jam cooked too long at too high a temperature, or the pan scorched on the bottom. Caramelized sugar turns jam brown and gives it a bitter edge.
The fix: Cook at a steady medium-high heat, not a violent boil. Stir frequently, especially during the last 10 minutes. Use a heavy-bottomed pan to distribute heat evenly and prevent hot spots.
Problem: Jam Molded During Storage
Mold means the jam was not properly sealed or was stored too long. This is primarily a concern with canned jam. Refrigerator jam should be consumed within 3 weeks.
The fix: If canned jam develops mold, discard the entire jar. Mold can penetrate deeper than what you see on the surface. For future batches, ensure jars are properly sterilized, lids are new, and processing times are followed exactly.
How to Store Strawberry Jam
Proper storage is what turns a pot of fresh jam into a pantry staple. Here are the three main storage methods, each with different timelines and safety considerations.
Refrigerator Storage
Refrigerator jam is the simplest option and the one I recommend for beginners. Let the jam cool to room temperature in sealed jars, then transfer directly to the refrigerator. Refrigerator jam lasts 2 to 3 weeks.
This method requires no special equipment and carries zero food safety risk. It is perfect for small batches that you plan to eat quickly.
Freezer Storage
Freezer jam (also called freezer preserves) lasts 6 to 12 months in the freezer. Use freezer-safe plastic containers or glass jars specifically designed for freezing. Leave 1/2 inch of headspace to allow for expansion.
Thaw frozen jam in the refrigerator overnight. Once thawed, consume within 3 weeks. The texture of freezer jam is softer and fresher-tasting than cooked jam because some recipes skip the stovetop entirely.
Water-Bath Canning
Canning makes your jam shelf-stable at room temperature for 12 to 18 months. This is the method to use when you have a large strawberry haul or want to give jam as gifts.
For safe water-bath canning of strawberry jam, you must follow specific guidelines. Use sterilized jars, new lids, and process in boiling water for 10 minutes (15 minutes if you live above 3,000 feet, 20 minutes above 6,000 feet). Store sealed jars in a cool, dark pantry.
Important safety note: Always use bottled lemon juice (not fresh) when canning, because bottled juice has a standardized 5 percent acidity level. This ensures the pH is low enough to prevent bacterial growth in sealed jars.
Before opening a canned jar, check the seal. The lid should be firmly depressed and should not flex when you press the center. If a lid pops, the jar did not seal properly and should be refrigerated and consumed immediately or discarded.
Delicious Ways to Use Strawberry Jam
Once you have a jar of homemade jam, the possibilities go far beyond toast. Here are some of my favorite ways to use it.
Breakworthy Spreads
Spread it on warm buttered toast, scones, biscuits, or English muffins. Swirl it into plain yogurt or oatmeal. Layer it into a peanut butter and jelly sandwich for the best PB and J you have ever had.
Dessert Toppings
Spoon warm jam over vanilla ice cream, cheesecake, or panna cotta. Use it as a filling for thumbprint cookies, sandwich cookies, or layer cakes. Melt it slightly and brush over fresh fruit tarts for a glossy glaze.
Savory Pairings
Pair strawberry jam with soft cheeses like brie or goat cheese on a crackers platter. It also works beautifully as a glaze for roasted meats. For a full savory application, try our cooking with jam and marmalade recipes for dinner ideas.
Creative Drinks
Stir a spoonful of strawberry jam into sparkling water or lemonade for a quick fruit soda. Bartenders use jam as a sweetener for cocktails. For more ideas, check out our drinks using strawberry jam for non-alcoholic options.
Pro Tips for the Best Strawberry Jam
These are the hard-won lessons from years of jam-making and hundreds of conversations with fellow preservers. Follow these tips and your jam will stand out.
Choose the Right Strawberries
The best jam comes from the best strawberries. Shop at farmers markets during peak season (late spring through early summer in most regions). Look for berries that are fragrant, deeply colored, and slightly soft. Avoid berries with white shoulders or green tips, as they are underripe and lack flavor.
Overripe strawberries are actually ideal for jam. They have the most concentrated flavor and natural sugars. Save your prettiest berries for eating fresh and use the slightly bruised ones for preserving.
Weigh, Do Not Just Measure
If you have a kitchen scale, weigh your ingredients. Equal parts sugar and strawberries by weight (not volume) produces the most consistent results. If you do not have a scale, use the cup measurements in the recipe above and follow them exactly.
Do Not Double the Recipe
This is a mistake I see constantly. Doubling a jam recipe in one pot does not work well because the larger volume of liquid takes longer to reduce. This means the fruit overcooks before the jam reaches the set point. Make multiple small batches instead of one large one.
Sterilize Everything
Whether you are canning or making refrigerator jam, start with clean jars. Wash jars and lids in hot soapy water, then sterilize by boiling them for 10 minutes. Keep them hot until you are ready to fill them. Pouring hot jam into cold jars can cause the glass to crack.
Trust Your Senses
Good jam smells incredible while it cooks. It goes from a fresh, raw berry aroma to a deep, caramelized fruit fragrance. When the smell fills your kitchen and the color darkens to a rich ruby red, you are close to done. Combine this instinct with the temperature and frozen plate tests for foolproof results.
Frequently Asked Questions
Is strawberry jam better with or without pectin?
Both methods produce excellent jam, but they yield different textures. Without pectin, the jam cooks longer, producing a deeper, richer flavor and a softer, more spreadable consistency. With pectin, the jam sets faster and firmer, which is ideal for beginners. I recommend starting with pectin for consistency, then trying the no-pectin method once you are comfortable with the process.
What is the best homemade strawberry jam recipe?
The best strawberry jam recipe uses 2 pounds of fresh hulled strawberries, 4 cups of granulated sugar, and 3 tablespoons of lemon juice. Cook the mixture to 220 degrees F, test for set with the frozen plate method, and jar immediately. This simple three-ingredient approach produces consistently delicious results.
How to make jam the old fashioned way?
Old-fashioned jam is made without added pectin. Hull and crush the strawberries, mix with sugar, and let them macerate for an hour. Cook slowly to dissolve the sugar, then boil until the mixture reaches 220 degrees F or passes the frozen plate test. This traditional method takes longer but produces a richer, more complex flavor.
What is the difference between strawberry jam and strawberry preserves?
Jam is made from crushed or mashed fruit that is cooked until it forms a smooth or slightly chunky spread. Preserves contain larger pieces of whole or halved fruit suspended in a syrup or soft gel. Jam is more spreadable, while preserves have a chunkier, more textured bite. Both use the same basic ingredients of fruit, sugar, and acid.
What are the common mistakes in making jams?
The most common mistakes are undercooking (resulting in runny jam), not dissolving sugar fully before boiling (causing crystallization), using aluminum pans (creating a metallic taste), doubling recipes in one pot (uneven cooking), and skipping the set test. Other frequent errors include not sterilizing jars properly, using underripe fruit, and not leaving proper headspace when jarring.
What’s the secret to a good jam?
The secret to great jam is using ripe, in-season strawberries with the best possible flavor. Macerating the fruit in sugar before cooking deepens the taste. Cooking to the precise gel point of 220 degrees F ensures the perfect texture. Adding a splash of lemon juice brightens everything, and a small amount of butter reduces foam for a clear, beautiful finish.
How do you know when strawberry jam is set?
Strawberry jam is set when it reaches 220 degrees F on a candy thermometer. You can also use the frozen plate test: spoon a small amount of jam onto a chilled plate, wait 30 seconds, then push it with your finger. If it wrinkles and holds its shape, it is done. If it runs back together, cook for a few more minutes and test again.
Why add lemon juice to strawberry jam?
Lemon juice serves two essential purposes. First, the acid helps activate pectin so the jam sets properly. Strawberries are naturally low in acid and pectin, so the added lemon juice is what makes the gel possible. Second, lemon juice brightens and balances the sweetness, making the strawberry flavor taste fresher and more vibrant. Use bottled lemon juice if canning for standardized acidity.
Can I use frozen strawberries for jam?
Yes, frozen strawberries work well for jam. Thaw them completely first, then proceed with your recipe as written. Frozen berries release more liquid than fresh ones, so expect the cooking time to be 5 to 10 minutes longer to reach the gel point. Frozen strawberries are a great option for making jam year-round when fresh berries are out of season.
How long does homemade strawberry jam last?
Refrigerator jam lasts 2 to 3 weeks. Freezer jam lasts 6 to 12 months. Properly canned jam in sealed jars is shelf-stable for 12 to 18 months in a cool, dark pantry. Once you open a canned jar, refrigerate it and consume within 3 weeks. Always check for mold, off smells, or broken seals before eating stored jam.
Conclusion
Making strawberry jam at home is one of the most rewarding things you can do in the kitchen. With just three basic ingredients, some patience, and the right technique, you can create a spread that tastes better than anything you will find on a store shelf.
The key takeaways from this strawberry jam recipe are simple. Use ripe, in-season strawberries. Dissolve the sugar fully before boiling. Cook to 220 degrees F or use the frozen plate test for doneness. Sterilize your jars. And do not be afraid of a failed batch, because even runny jam tastes incredible over ice cream.
Start with a small batch if you are nervous, use pectin for your first attempt, and work your way up to the traditional no-pectin method. Once you taste the difference between homemade and commercial jam, you will be hooked for life.
Happy preserving, and enjoy your homemade strawberry jam.