
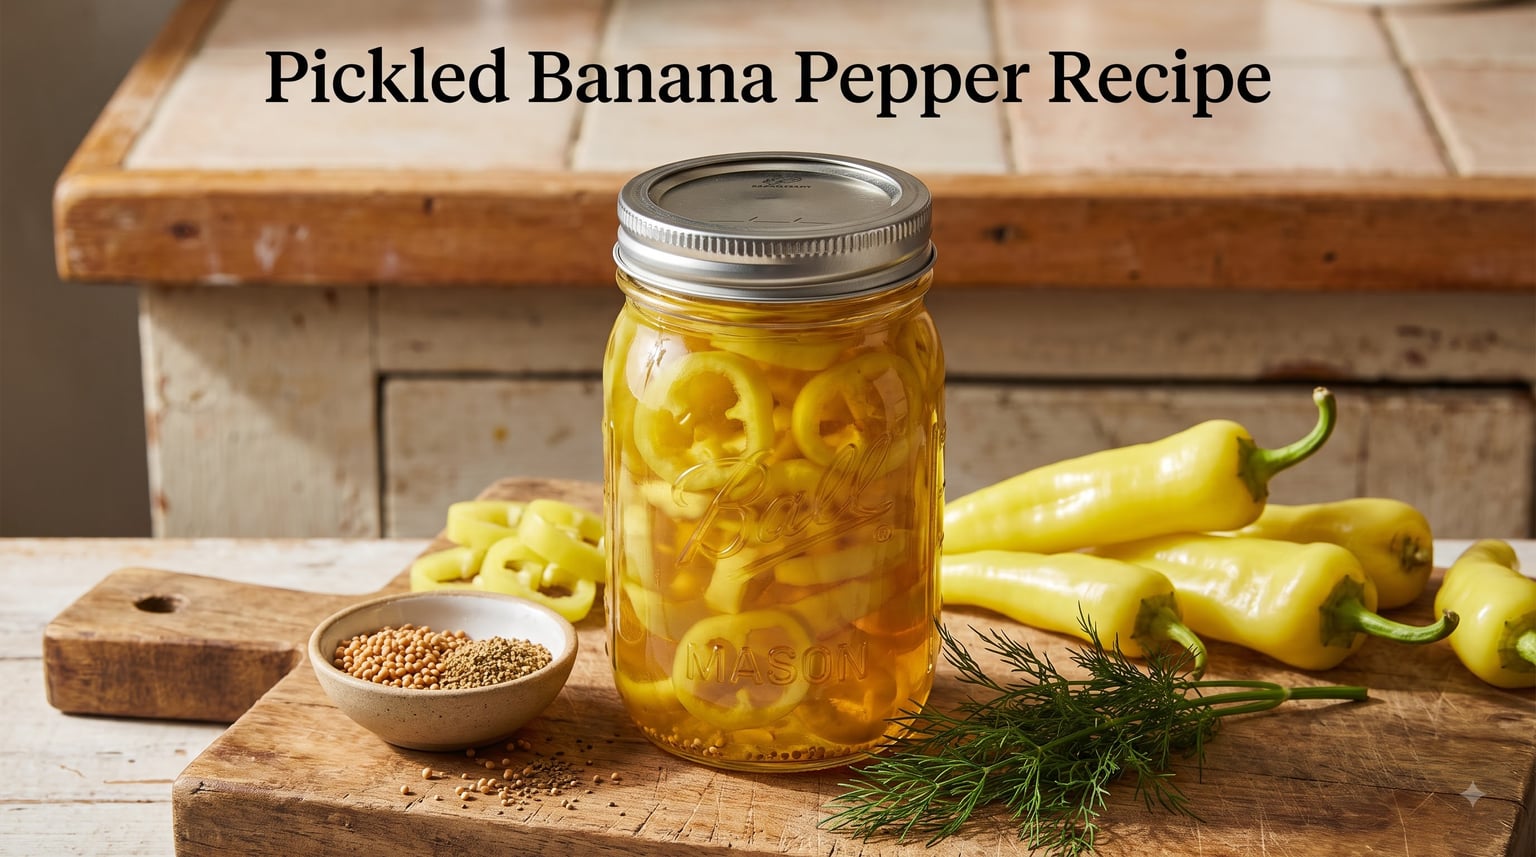
Every summer, I end up with more banana peppers than I know what to do with. Whether from the garden or a great farmers market haul, the answer is always the same: my go-to pickled banana pepper recipe. It takes about 20 minutes of active work, and the results last for months in the fridge.
This is the recipe I’ve refined over several batches after dealing with mushy peppers, cloudy brine, and flavors that were either too vinegary or completely flat. I pulled tips from canning forums, tested different vinegars side by side, and landed on a method that delivers crunchy, tangy peppers every single time.
Here is everything you need to make quick refrigerator pickled banana peppers at home, including a complete troubleshooting guide, vinegar comparison, and creative serving ideas that go way beyond sandwiches.
Table of Contents
What You Need: Ingredients and Equipment
The beauty of this pickled banana pepper recipe is its simplicity. You likely have most of these ingredients in your pantry already.
Ingredients
For the peppers:
1 pound banana peppers (about 10 to 12 medium peppers)
2 cloves garlic, thinly sliced
For the brine:
2 cups white distilled vinegar (5% acidity)
1 cup water
1 tablespoon kosher salt (avoid iodized table salt, it clouds the brine)
1 tablespoon sugar
1 teaspoon mustard seed
1 teaspoon celery seed
1/2 teaspoon black peppercorns (optional)
You can substitute Hungarian wax peppers if banana peppers are unavailable. They have a similar flavor profile with slightly more heat. If you want sweeter pickled peppers, increase the sugar to 2 tablespoons for a bread-and-butter style result.
Equipment
Cutting board and sharp knife
Medium saucepan
2 to 3 clean pint-sized mason jars with lids
Funnel (optional but helpful)
Tongs or a slotted spoon
For refrigerator pickling, you do not need special canning equipment. Any clean glass jar with a tight-fitting lid works. Just wash jars thoroughly in hot soapy water and rinse well before using.
How to Make Pickled Banana Peppers (Step by Step)?
Follow these steps for crunchy, tangy homemade pickled banana peppers. The entire process takes about 30 minutes from start to finish.
Step 1: Wash and Slice the Peppers
Rinse your banana peppers under cold water and pat them dry. Cut off the stems and slice the peppers into rings about 1/4 inch thick. For milder pickled peppers, scrape out the seeds and membranes. Leave the seeds in if you want more kick.
I recommend wearing gloves while handling a large batch. The capsaicin in the seeds can irritate your skin, and it is surprisingly difficult to wash off.
Step 2: Pack the Jars
Divide the sliced garlic evenly between your clean mason jars. Pack the pepper rings tightly into the jars, leaving about 1/2 inch of space at the top. If you are adding peppercorns or other whole spices, tuck them in between the pepper layers now.
Pack the peppers firmly but do not crush them. You want them snug enough that they will not float when the hot brine goes in, but loose enough for the liquid to surround every ring.
Step 3: Make the Brine
Combine the vinegar, water, salt, sugar, mustard seed, and celery seed in a medium saucepan. Bring the mixture to a rolling boil over medium-high heat, stirring until the salt and sugar fully dissolve. This usually takes about 3 to 4 minutes.
Once the brine reaches a rolling boil, remove it from the heat. Let it cool for about 1 minute so it is still very hot but not at a violent boil. This helps preserve the crunch of the peppers rather than cooking them soft.
Step 4: Pour the Brine Over the Peppers
Using a funnel if you have one, carefully pour the hot brine over the peppers in each jar. Make sure the liquid completely covers the peppers. If the peppers float above the liquid line, press them down gently with a clean spoon and top off with more brine.
Leave about 1/4 inch of headspace at the top of each jar. This allows room for the liquid to expand and contract as it cools. Tap the jars gently on the counter to release any trapped air bubbles.
Step 5: Seal and Cool
Wipe the rims of the jars with a clean, damp cloth to remove any drips. Place the lids on the jars and screw them on finger-tight. Let the jars sit on the counter at room temperature until they are completely cool, which takes about 1 to 2 hours.
Once cool, transfer the jars to the refrigerator. The peppers need at least 24 hours to absorb the brine flavors, but they taste best after 48 hours. They will continue to develop flavor over the first week.
Step 6: Taste and Adjust
After 48 hours, open a jar and taste a pepper ring. If the flavor is too vinegary for your liking, let them sit a few more days. The vinegar mellows as the peppers absorb the brine. If they are not salty enough, a small pinch of salt added to the jar can help, but this is rarely necessary with the ratios above.
Choosing the Right Vinegar
The vinegar you choose has the biggest impact on flavor. I tested four common vinegars side by side, and each one creates a noticeably different result.
White distilled vinegar is the classic choice for pickled banana peppers. It has a sharp, clean acidity that lets the pepper flavor shine through. This is what most deli-style pickled peppers use, and it gives that bright, tangy bite you expect on a sandwich.
Apple cider vinegar adds a fruity, slightly sweet undertone. It produces a mellower pickle with a warm amber color. Many home cooks prefer a 50/50 blend of white and apple cider vinegar for a balanced flavor that has both brightness and depth.
Champagne vinegar is more delicate and refined. It creates a lighter, more elegant pickle that works beautifully on antipasto plates and charcuterie boards. The downside is that it costs more and has a subtler tang.
Rice vinegar is the mildest option. It produces a gentle, slightly sweet pickle that pairs well with Asian-inspired dishes. If you find regular pickled peppers too acidic, rice vinegar is worth trying.
No matter which vinegar you choose, make sure it has 5% acidity. This is the standard strength needed for safe pickling and proper preservation. Anything weaker may not keep your peppers safely preserved.
Flavor Variations to Try
Once you master the base recipe, the fun begins. Here are some of my favorite flavor combinations that go beyond the standard mustard and celery seed blend.
Garlic dill: Add a fresh dill sprig and an extra clove of garlic per jar. This gives the peppers a dill pickle character that works perfectly on burgers and hot dogs.
Spicy kick: Toss in a dried Thai chili or a few red pepper flakes. This is a popular move on canning forums where users add heat to mild banana peppers for a sweet-and-spicy profile.
Italian style: Add a sprig of fresh oregano, a bay leaf, and a pinch of red pepper flakes. This combination mirrors the pickled peppers you find in Italian delis and works great on pizzas and subs.
Bread and butter style: Increase the sugar to 1/3 cup and add 1/2 teaspoon of turmeric for that golden color. The result is sweet, tangy, and visually striking.
Smoky: Add a half teaspoon of smoked paprika to the brine. This pairs surprisingly well with grilled foods and gives the peppers a distinctive depth.
How to Keep Pickled Banana Peppers Crisp?
Nothing is more disappointing than biting into a mushy pickled pepper. This is the single most common complaint I found across pickling forums. The good news is that a few simple techniques make a huge difference.
First, always use the freshest peppers you can find. Peppers that have been sitting in the fridge for a week are already losing their firmness. Garden-fresh or farmers market peppers picked within a day or two will hold their crunch much better.
Second, do not overcook the peppers. Pouring hot brine over raw peppers in the jar is gentler than boiling the peppers directly in the brine. The brief heat exposure softens them slightly without turning them mushy.
Third, add a crispness agent if you want extra insurance. Many experienced canners swear by adding a grape leaf, a horseradish leaf, or a pinch of food-grade calcium chloride (Pick Crisp) to each jar. These contain tannins and calcium that help maintain the pepper’s cellular structure.
Finally, refrigerator pickles will always be crunchier than water bath canned peppers. The high-heat processing required for shelf-stable canning inevitably softens the peppers somewhat. If texture is your top priority, stick with the refrigerator method.
Storage and Shelf Life
Refrigerator pickled banana peppers are the easiest and safest method for home cooks. They will last 2 to 3 months in the refrigerator when stored in a clean jar with a tight-fitting lid. Always use a clean utensil when removing peppers from the jar to avoid introducing bacteria.
For shelf-stable storage, you need to follow proper water bath canning procedures. Use only tested recipes that meet USDA canning guidelines for acid ratios. The brine must maintain a specific vinegar-to-water ratio to ensure safety at room temperature. Process pint jars in a boiling water bath for 10 minutes, adjusting for altitude if you live above 1,000 feet.
Properly canned jars are shelf-stable for up to 12 months in a cool, dark pantry. Once opened, transfer any leftovers to the refrigerator and use within 2 months.
To tell if your pickled peppers have gone bad, look for these warning signs: a bulging lid, visible mold, an off smell, gas bubbles when the jar is opened, or a dramatic change in texture. When in doubt, throw it out. Food safety is not worth the risk.
Troubleshooting Common Problems
Even experienced picklers run into issues. Here are the most common problems and how to fix them.
My peppers are mushy. This usually means the peppers were overripe, the brine was too hot for too long, or they were processed in a water bath. Start with firmer peppers, let the brine cool for a minute before pouring, and stick with the refrigerator method for maximum crunch.
My brine is cloudy. Cloudiness can come from using iodized table salt, from starch in the peppers, or from using hard water. Switch to kosher salt or pickling salt, use filtered water if your tap water is hard, and make sure your jars are scrupulously clean. If the brine smells fine and there is no mold, cloudy brine is usually just a cosmetic issue for refrigerator pickles.
The peppers float above the brine. This is normal for the first day. Gently press the peppers down with a clean spoon. If they still will not stay submerged, add a small weight or top off with additional vinegar to ensure everything is covered.
The flavor is too vinegary. Give it more time. The vinegar mellows significantly over the first week as it penetrates the peppers. If it is still too sharp after a week, try reducing the vinegar-to-water ratio in your next batch to 1.5:1 instead of 2:1.
The peppers are too spicy or too mild. Heat level depends entirely on the seeds and membranes. Remove all seeds for the mildest result, or leave them in for full heat. Banana peppers typically range from 0 to 500 Scoville units, so they are naturally mild. Adding a hotter pepper like a Thai chili gives you control over the final heat level.
What to Do With Pickled Banana Peppers
Once you have a jar of homemade pickled banana peppers in the fridge, you will find excuses to add them to everything. Here are some of the best ways to use them.
Sandwiches and subs are the classic application. Layer them on Italian subs, Cuban sandwiches, or turkey clubs for a tangy crunch that cuts through rich meats and cheeses.
Pizza is another natural pairing. Scatter pepper rings over your pizza after baking, or tuck them under the cheese before it goes in the oven. They work particularly well on white pizzas and pepperoni pies.
Salads and antipasto plates benefit from the bright acidity. Toss a handful into potato salad, pasta salad, or a simple green salad. They also make a colorful addition to any charcuterie board.
For drinks, skewer pickled pepper rings on a cocktail pick and drop them into a Bloody Mary or a dirty martini. The briny tang is a natural fit for savory cocktails.
If you are hosting, serve them alongside grilled sausages and a cold wheat beer. The tangy, mildly spicy peppers cut through rich, savory flavors perfectly. For more on pairing options, check out our guide to wheat beer styles that complement pickled and tangy foods.
Get creative and add them to tacos, nachos, deviled eggs, or even chopped finely into a relish for hot dogs. Once you start, you will find dozens of uses.
Frequently Asked Questions
How do you keep banana peppers crisp when pickling?
To keep banana peppers crisp, use the freshest peppers possible, pour hot (not boiling) brine over raw peppers instead of cooking them in the brine, and store them in the refrigerator rather than water bath canning. Adding a grape leaf or a pinch of food-grade calcium chloride to each jar also helps maintain crunch.
What is the best recipe for pickling banana peppers?
The best pickled banana pepper recipe uses a 2:1 ratio of white distilled vinegar to water, kosher salt, a tablespoon of sugar, mustard seed, and celery seed. Slice fresh banana peppers into rings, pack them in clean jars with garlic, and pour hot brine over the top. Refrigerate for 48 hours before eating.
How long are homemade pickled banana peppers good for?
Refrigerator pickled banana peppers last 2 to 3 months when stored in a clean jar with a tight-fitting lid. Water bath canned peppers are shelf-stable for up to 12 months in a cool, dark pantry. Once a canned jar is opened, it should be refrigerated and used within 2 months.
What are pickled banana peppers good for?
Pickled banana peppers are versatile toppings for sandwiches, pizza, salads, burgers, tacos, and charcuterie boards. They make excellent garnishes for Bloody Marys and dirty martinis. You can also chop them into relishes, potato salad, pasta salad, deviled eggs, and antipasto plates.
Conclusion
This pickled banana pepper recipe is one of the easiest ways to preserve a pepper harvest and stock your fridge with a versatile, tangy condiment. With just a handful of ingredients and about 30 minutes of work, you will have jars of crunchy, flavorful peppers that elevate sandwiches, pizzas, salads, and snacks for months.
The key takeaways: use fresh peppers, stick with a 2:1 vinegar-to-water ratio, pour hot brine over raw peppers for maximum crunch, and refrigerate rather than canning if texture is your priority. Experiment with the flavor variations to find your favorite combination.
Grab a pound of banana peppers, a couple of clean jars, and give this recipe a try. Once you taste homemade pickled peppers, you will never go back to store-bought.