
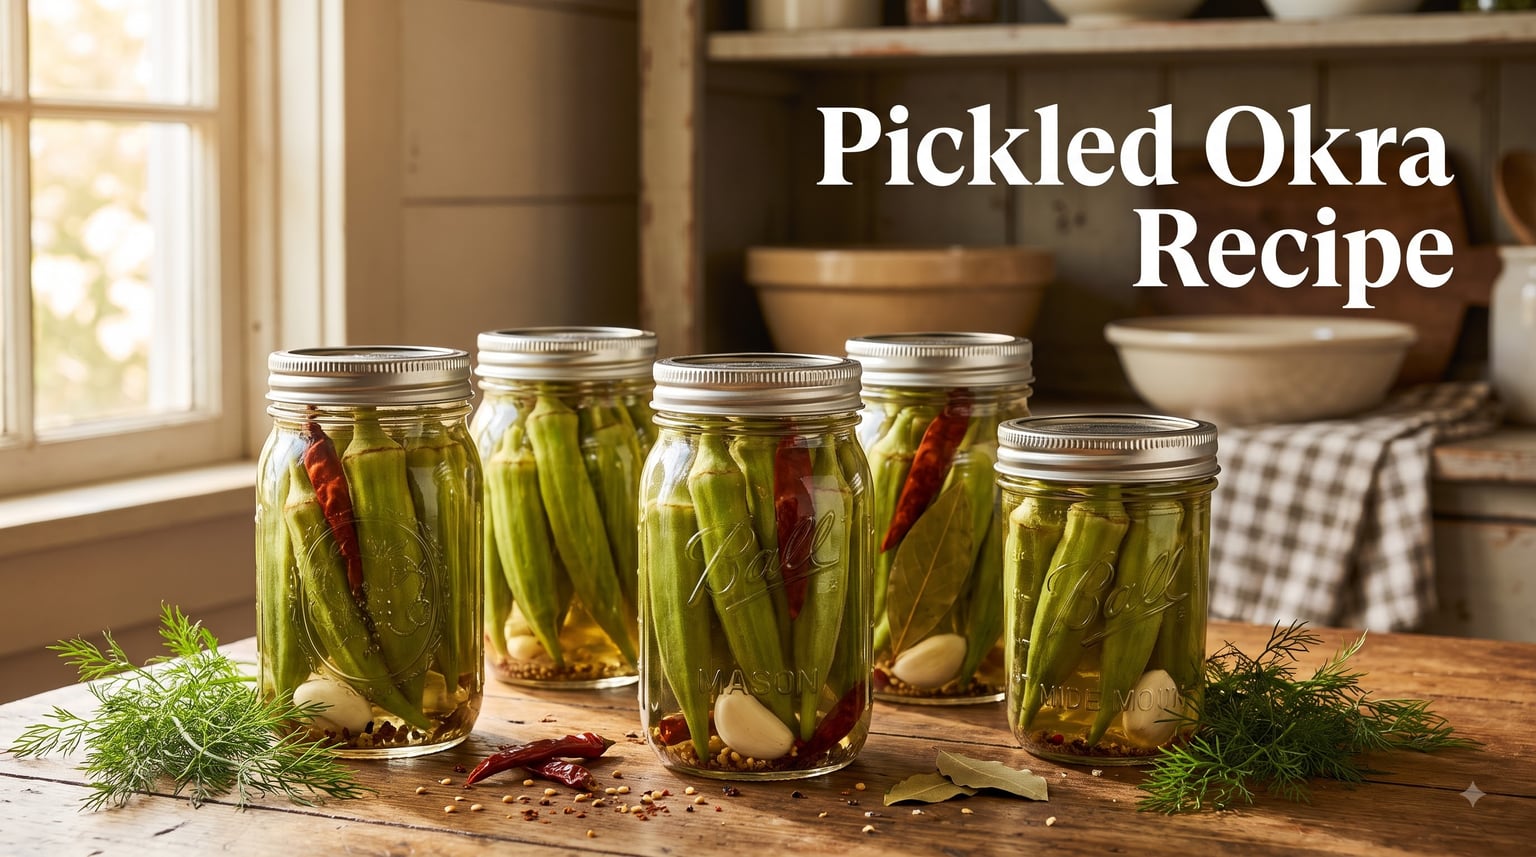
Pickled okra is one of those Southern pantry staples I underestimated for years. I grew up near the Gulf Coast where baskets of fresh okra hit every farmer’s market in July, and I have finally landed on a pickled okra recipe that delivers a snappy crunch, a bright dill-garlic backbone, and just enough heat to keep things interesting.
In this guide, I will walk you through both the water-bath canning method and a quick refrigerator version. You will learn how to pick the right pods, build a safe 5% acidity brine, process jars at your exact altitude, and avoid the slimy texture that scares off first-time picklers. If you love classic Southern okra dishes or you just want a killer Bloody Mary garnish, this recipe is for you.
Table of Contents
Recipe Snapshot: What You’re Making?
This is a small-batch recipe I have tested four times in the last two summers. It yields 4 to 5 pint jars and takes about 45 minutes of active work, plus passive processing time.
Prep time: 25 minutes
Processing time: 10 to 25 minutes (depending on altitude)
Total time: 1 hour plus 24-hour rest
Yield: 4 to 5 pint jars (about 3 pounds of okra)
Difficulty: Beginner to intermediate
Method: Water-bath canning (or refrigerator shortcut)
The flavor profile is salty, tangy, garlicky, and gently spicy. You can dial the heat up or down with the dried chiles. Choose the water-bath route if you want shelf-stable jars that last over a year, or skip the canning entirely if you want quick pickled okra ready in 48 hours.
Ingredients for Pickled Okra
The ingredient list is short and forgiving. Use the freshest okra you can find, and stick with 5% acidity vinegar for food safety. Do not reduce the vinegar or swap it for lower-acid options without adjusting the recipe.
For the Okra and Jars
3 pounds fresh okra, small to medium pods (3 to 4 inches long)
8 to 10 cloves garlic, peeled and lightly smashed
4 to 6 small dried red chile peppers (like de arbol chiles)
8 teaspoons dill seed (or 4 heads fresh dill)
4 teaspoons yellow mustard seed
2 teaspoons whole black peppercorns
4 to 5 bay leaves
For the Brine
4 cups water
2 cups distilled white vinegar (5% acidity)
1/2 cup apple cider vinegar (5% acidity) for depth, optional
1/3 cup canning or pickling salt (NOT iodized table salt)
Okra selection is the single biggest factor in crunch. Pick pods that are bright green, firm, and no longer than your thumb. Oversized okra gets woody and fibrous. If a pod snaps rather than bends, it is too tough to pickle well.
Canning salt matters too. Iodized table salt contains anti-caking agents that cloud the brine and can leave sediment. Pickling salt dissolves cleanly and keeps the liquid crystal clear.
Equipment You’ll Need
You probably own most of this gear already. I have flagged the few specialty items that can scare off beginners.
Water bath canner OR a large stockpot with a lid and a wire rack
4 to 5 pint-sized mason jars, new lids, and reusable bands
Jar lifter and lid wand (a magnetic tool beats fishing lids out of hot water)
Bubble remover or a thin plastic knife
Wide-mouth funnel for clean jar filling
Clean kitchen towels and a cooling rack
Skip the funnel, and you will chase brine drips across your counter. Skip the jar lifter, and you will burn your fingers. Both tools pay for themselves the first time you use them.
How to Make Pickled Okra: Step-by-Step
Pickled okra needs your full attention for the first 30 minutes. Get everything staged before you boil the brine. I run my dishwasher on a sanitize cycle with the jars inside, which doubles as a sterilization step.
Step 1: Prep the Okra
Wash the pods in cool water and dry them thoroughly. Trim the stems, leaving about 1/4 inch on each pod so the brine can fully penetrate. Do not cut into the pods. Whole pods stay crunchy and avoid the slimy texture people associate with cut okra.
Step 2: Sterilize the Jars
Place clean pint jars on a rack in your water bath canner. Cover with water and bring to a simmer for 10 minutes. Keep jars hot until you fill them. Cold jars plus boiling brine can crack the glass.
Step 3: Build the Brine
Combine the water, both vinegars, and pickling salt in a non-reactive saucepan. Bring to a boil, stirring until the salt dissolves. Reduce heat and keep the brine at a low simmer.
Step 4: Pack the Jars
Place 1 to 2 garlic cloves, 1 dried chile, 1 bay leaf, 2 teaspoons dill seed, 1 teaspoon mustard seed, and 1/2 teaspoon peppercorns in each hot jar. Pack the okra pods in tightly, stem-end up. You want them standing as vertical as possible so they look as good as they taste.
Pour the hot brine over the okra, leaving 1/2 inch headspace at the top. Slide the bubble remover down the sides of the jar to release trapped air. Top up with more brine if needed to maintain that headspace.
Step 5: Seal the Jars
Wipe the rim of each jar with a clean, damp cloth. Place a new lid on top and screw a band down until fingertip tight. Do not crank the band. Air needs to escape during processing for a proper vacuum seal.
Step 6: Process in the Water Bath
Lower the jars into the simmering water bath using your jar lifter. Make sure the water covers the lids by at least 1 to 2 inches. Bring the water back to a rolling boil and start your timer. See the altitude adjustment section below for exact processing times.
Step 7: Cool and Test the Seals
When the timer ends, pull the jars out and set them on a towel-covered cooling rack. Leave 1 to 2 inches of space between jars. Do not press on the lids. After 12 to 24 hours, press the center of each lid. If it does not flex, the seal is good. Any jar that does not seal should go into the fridge and be eaten within 2 months.
Refrigerator Pickled Okra (No Canning Required)
Not ready to commit to canning? The refrigerator method works beautifully and takes about 15 minutes of prep. You will get crisp, tangy pickled okra in 48 hours.
Use the same ingredients, just halve the brine (2 cups water, 1 cup vinegar, 3 tablespoons salt).
Pack hot sterilized jars and pour the boiling brine over the okra.
Let jars cool to room temperature, then refrigerate.
Wait 48 hours before opening. The pickles will keep for 2 to 3 months refrigerated.
Quality drops slightly after 8 weeks, so I like to make smaller batches and rotate them. The bonus is no water bath to babysit and no altitude math to worry about.
Altitude Adjustments for Water Bath Processing
Boiling water gets cooler at higher elevations, so you need to process longer to ensure safe acidity penetration. Use this chart for your specific location.
0 to 1,000 ft: 10 minutes
1,001 to 3,000 ft: 15 minutes
3,001 to 6,000 ft: 20 minutes
6,001 ft and above: 25 minutes
At sea level I process my jars for 10 minutes, and at my brother’s place in Denver (5,280 ft) I push that to 20 minutes. The National Center for Home Food Preservation publishes these guidelines, and they are the standard I trust.
Storage, Shelf Life, and Safety
Properly sealed jars of pickled okra are shelf-stable for 12 to 18 months in a cool, dark pantry. Once opened, store the jar in the fridge and eat within 2 months for the best crunch. Refrigerator pickles keep 2 to 3 months unopened, then 1 to 2 months after opening.
Safety comes down to three rules. Use 5% acidity vinegar every time. Maintain the 1/2 inch headspace. And process jars at the correct time for your altitude. Skipping any of these steps can create conditions for botulism growth, which is why I am bullish about following the numbers exactly.
Inspect every jar before opening. If the lid is unsealed, the brine is cloudy, the pod is strangely colored, or anything smells off, toss the whole jar. No homemade pickle is worth the risk.
Variations and Serving Ideas
Once you have the base recipe down, you can riff on it all year. Here are the three variations I rotate through most often.
Spicy Pickled Okra
Double the dried chiles per jar and add 1/4 teaspoon of red pepper flakes to the brine. The heat builds gradually and pairs well with rich, fatty foods like smoked brisket or pulled pork sandwiches.
Sweet Pickled Okra
Swap the white vinegar for apple cider vinegar and add 2 tablespoons of sugar to the brine. The result is a bread-and-butter style pickle that plays nicely on a Southern dinner plate next to cornbread and beans.
Herb-Forward Pickled Okra
Use fresh dill heads instead of dill seed, add 1 teaspoon of coriander seed per jar, and skip the chiles. This is my go-to for a milder pickle that lets the okra flavor shine through.
How to Serve Pickled Okra
Pickled okra is most famous as a Bloody Mary garnish, and for good reason. The long pod acts as a stir stick and the brine seasons the cocktail. Try it with our favorite Bloody Mary recipe for the full experience.
Beyond cocktails, I love it stacked on charcuterie boards, served alongside Southern barbecue, chopped into potato salad, or eaten straight from the jar with a slice of sharp cheddar. It also makes a fantastic homemade gift. Tie a ribbon around the lid and add a handwritten tag with the date and ingredients.
Troubleshooting Common Problems
Even seasoned canners hit snags. Here are the five issues I hear about most, and how to fix them.
Why Is My Pickled Okra Slimy?
Sliminess comes from cutting into the pods or using overripe okra. Slice the stem end off only, leave the pod whole, and pick smaller, tender pods. Vinegar actually reduces okra’s natural mucilage, so snap-test your pods before pickling.
Why Are My Pickles Soft?
Soft pickles usually mean overcooking or under-acidified brine. Stick to 5% acidity vinegar, keep the brine at a rolling boil during processing, and use pickling salt. Skip the iodized table salt.
Why Did a Jar Fail to Seal?
Most seal failures come from jar rim residue or overtightened bands. Always wipe the rim with a clean damp cloth before applying the lid. Use new lids every time. Reusable bands just need to be fingertip tight, not cranked down.
Can I Use Frozen Okra?
Fresh is best for crunch, but you can pickle frozen okra if you thaw it completely in the fridge first and pat the pods dry. Expect slightly softer texture, and use it within 6 months of freezing for best results.
Should I Worry About Bitterness?
Bitterness usually means your brine reduced too much during boiling or you used too much mustard seed. Measure precisely and keep the brine at a gentle simmer rather than a hard boil.
Frequently Asked Questions
What is the best way to pickle okra?
The best way to pickle okra is the water-bath canning method using small whole pods, 5% acidity vinegar, and a hot brine with garlic, dill, and dried chiles. Pack the okra stem-up in sterilized pint jars, cover with brine, and process for 10 to 25 minutes depending on your altitude.
Can you pickle okra without canning it?
Yes. Use the refrigerator method: pack hot sterilized jars with okra and spices, pour boiling 5% acidity brine over the pods, cool to room temperature, then refrigerate. The pickles are ready in 48 hours and keep for 2 to 3 months in the fridge.
What kind of vinegar do you use to pickle okra?
Use distilled white vinegar with 5% acidity for safe canning. You can blend in apple cider vinegar (also 5% acidity) for added flavor, but never substitute lower-acid vinegars like rice vinegar or homemade fruit vinegars without adjusting the recipe.
What makes pickled okra crisp?
Pickled okra stays crisp when you pick small, fresh pods, leave them whole, use pickling salt, and pour the brine over the okra while it’s boiling hot. Adding a grape leaf or horseradish leaf to each jar can also help maintain crunch.
How long does homemade pickled okra last?
Properly sealed water-bath canned jars last 12 to 18 months in a cool, dark pantry. Once opened, keep the jar in the fridge and eat within 2 months. Refrigerator pickles keep 2 to 3 months unopened and 1 to 2 months after opening.
Final Thoughts
This pickled okra recipe is the one I keep coming back to because it balances safety, crunch, and flavor without requiring fancy equipment. Start with the freshest pods you can find, stick to 5% acidity vinegar, and process at the correct time for your altitude. From there, you can riff on the spices and build out your own signature jar. If you make a batch, drop a jar into a Bloody Mary and let me know how it turns out.