
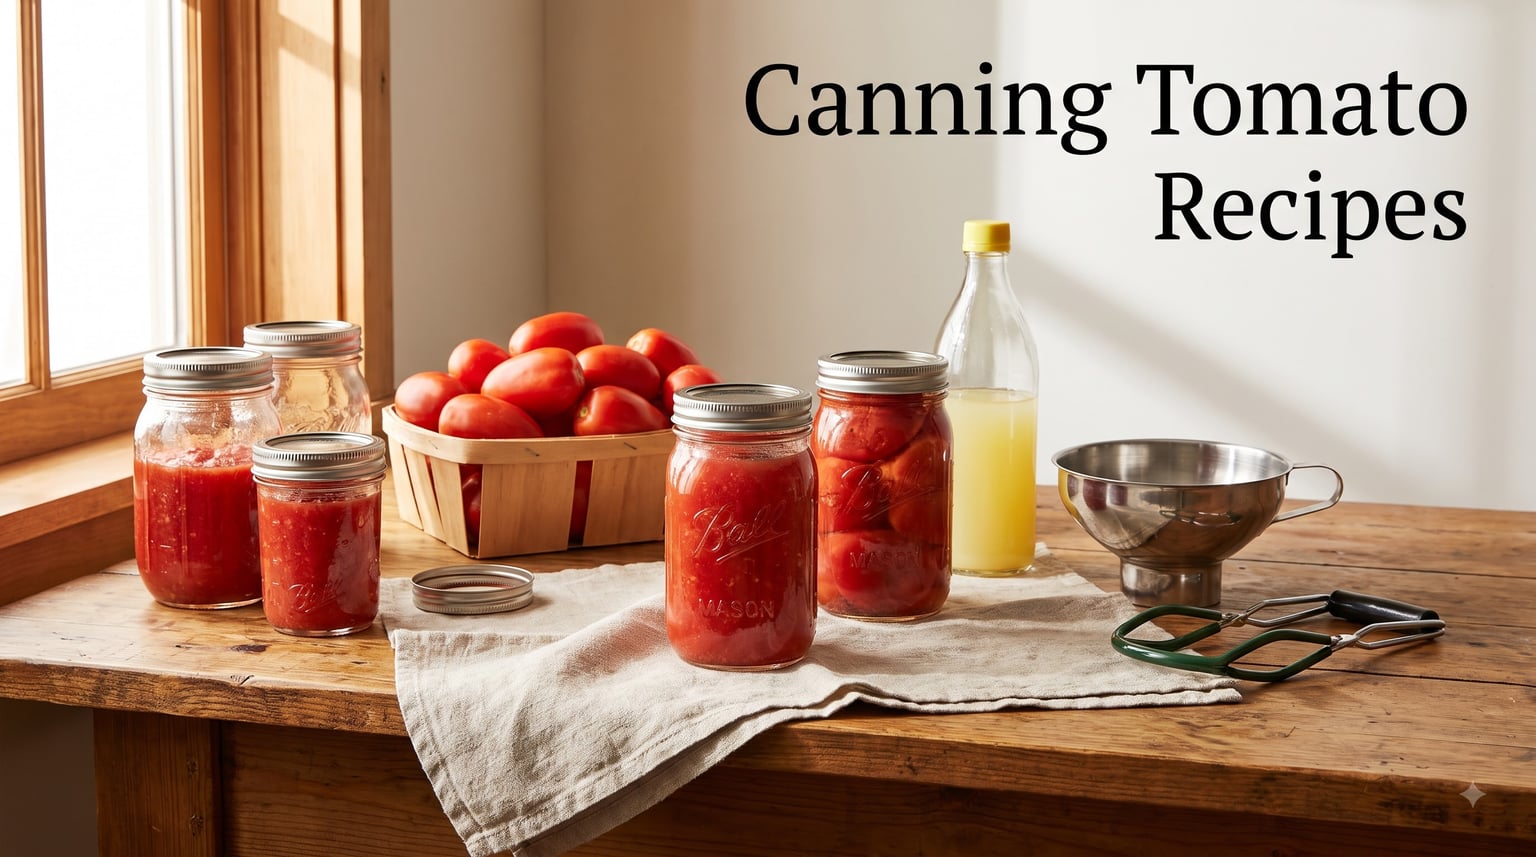
Last August, I came home from the farmer’s market with 38 pounds of roma tomatoes and a panic attack. I had never canned anything in my life, and I had six hours before those beauties started going soft.
That was my introduction to canning tomato recipes, and four years later, my pantry holds 60+ jars of summer flavor every winter. This guide is the resource I wish I had on that first overwhelming day.
Inside, you’ll find 13 tested canning tomato recipes that work for beginners and experienced preservers alike. Every recipe here follows USDA and National Center for Home Food Preservation guidelines, includes altitude adjustments, and uses ingredients you can actually find at the grocery store.
Whether you have a backyard garden overflowing with produce or just bought a flat from the farmer’s market, this is your year-round tomato playbook.
Table of Contents
Why Home Canning Tomatoes Is Worth Your Time This Season?
A single can of store-bought diced tomatoes costs between $1.50 and $3.00. Canning your own costs roughly $0.40 per jar once you own the equipment, and the flavor difference is not even close.
Home canning tomatoes preserves them at peak ripeness, when natural sugars and acidity are at their best. Commercial tomatoes get picked green and ripen in trucks. Your homegrown or local tomatoes ripen on the vine until the day you process them.
I tested this side by side last fall with my cooking group. Eight of us made the same marinara recipe, four from canned store tomatoes and four from home-canned romas. Every single taster picked the home-canned version as more flavorful.
Beyond flavor, canning gives you control. No calcium chloride, no mystery preservatives, no BPA-lined cans if you switch to glass jars. You decide exactly what goes into your food.
For families focused on emergency preparedness or budget cooking, home canned tomatoes also solve the pantry-staple problem. A single 20-pound box of tomatoes yields about 7 quart jars, which covers a month of pasta nights and chili dinners.
Tomato Canning Safety: The Acidification Rule You Cannot Skip
This section matters more than any recipe below. Skip acidification and you risk botulism, a rare but deadly form of food poisoning that thrives in low-acid environments.
Modern tomato varieties are less acidic than their ancestors. The USDA now requires added acid for all water-bath canned tomato products, regardless of the variety you use.
What counts as proper acidification? You have two safe options:
Bottled lemon juice: 2 tablespoons per quart jar, 1 tablespoon per pint jar. Always use bottled because fresh lemons vary in acidity.
Citric acid powder: 1/2 teaspoon per quart jar, 1/4 teaspoon per pint jar. Available in the canning section of most grocery stores or online.
Forum veterans on Reddit’s r/Canning repeat this advice constantly: never substitute fresh lemon juice for bottled. The acid content of fresh lemons swings wildly between 4% and 8% depending on the fruit, and under-acidified jars have caused documented botulism cases.
Other non-negotiable safety rules:
Never use tomatoes from dead or frost-killed vines. The pH shifts as the plant dies and acid levels become unpredictable.
Discard any tomato with visible mold, soft spots, or insect damage. Toss it in the compost, not the canner.
Never add low-acid ingredients (onions, peppers, garlic, herbs) to plain tomatoes without following a tested recipe. These additions can push pH into the danger zone.
Pressure canning is required for any recipe that includes meat, dairy, or thickeners like flour.
I keep a printed copy of the National Center for Home Food Preservation’s tomato guidelines on my kitchen wall. It removes the guesswork.
Essential Equipment for Canning Tomatoes at Home
You do not need every gadget on the market. Here is the actual equipment list I use every August and September.
The must-haves:
Water bath canner with rack: A large stockpot works in a pinch if it is tall enough for 1 to 2 inches of water above the jar lids. The Ball brand starter kit runs about $35 and lasts decades.
Mason jars (pints and quarts): Buy new lids every year. Rings and jars reuse indefinitely if they are not chipped or cracked. I use mostly pints because they fit one recipe portion perfectly.
Jar lifter and bubble remover: The lifter is a non-negotiable safety tool. Bubble remover or a plastic knife removes trapped air that causes siphoning.
Wide-mouth funnel: Keeps your jar rims clean, which is critical for proper sealing.
Headspace tool or clean ruler: Headspace measurement must be exact. Too little causes boil-over, too much prevents sealing.
Nice-to-have upgrades:
Cherry tomato press: If you process lots of sauce, this separates skins and seeds in 10 minutes versus 45.
Food mill: Older but effective for smooth sauces and pastes.
Inkbird temperature controller: Not for canning, but useful if you ferment tomatoes separately.
Total startup cost runs $80 to $120 if you buy everything new. I spread that cost across my first two seasons and it has already paid for itself many times over.
Best Tomato Varieties for Canning and What to Avoid
Not every tomato belongs in a canning jar. Variety choice affects flavor, texture, and how much work you do during prep.
Top performers for canning:
Roma and paste tomatoes: Thick walls, fewer seeds, low water content. My go-to for sauce, paste, and crushed tomatoes. A 25-pound box yields 9 to 10 pints of sauce.
San Marzano: The Italian classic. Sweeter than romas, perfect for whole canning and pizza sauce.
Amish Paste: Large meaty fruits that cook down fast into silky sauce.
Cherry tomatoes: Excellent for whole canning in vinegar pickling brine, less ideal for peeled canning because skinning them is tedious work.
Green tomatoes: Unripe red varieties picked at season’s end. Great for pickles, relishes, and chow-chow.
Varieties to avoid or use with caution:
Beefsteak and large heirlooms: High water content means longer cook-down times for sauce. They shine for fresh eating and gazpacho instead.
Any tomato from frost-killed vines: Acid content shifts as the plant dies. Compost these.
Overripe or split tomatoes: If they have been sitting for days and feel mushy, the bacteria count is too high for safe canning.
You can mix varieties in a single batch as long as they are all high-acid and ripe. I often combine romas with a few slicers to stretch a small harvest.
How to Can Tomatoes Step by Step Using a Water Bath
This is the foundational technique every other recipe in this guide builds on. Master it once and every tomato recipe below becomes a variation.
Step 1: Prepare your workspace and jars. Wash jars in hot soapy water or run them through a dishwasher cycle. Keep them hot in your canner or a low oven (200°F) until ready to fill. Place new lids in a small pot of simmering water, not boiling, to soften the sealing compound.
Step 2: Blanch and peel the tomatoes. Bring a large pot of water to a rolling boil. Drop tomatoes in batches for 30 to 60 seconds until the skins crack. Transfer immediately to an ice bath. Skins slip off easily with a paring knife.
Step 3: Trim and cut. Cut out the core and any green shoulders. Leave tomatoes whole, halve them, or chop depending on your recipe.
Step 4: Pack the jars. Add bottled lemon juice or citric acid to each jar first. Pack tomatoes in tightly, pressing down to remove air pockets. Add 1/2 teaspoon canning salt per quart if desired (optional for flavor, not safety).
Step 5: Add liquid and measure headspace. Pour boiling water or tomato juice over the tomatoes to cover, leaving 1/2 inch headspace for quarts and 1/2 inch for pints. Remove trapped air bubbles with a plastic knife or bubble remover.
Step 6: Wipe rims and apply lids. Dip a clean paper towel in white vinegar and wipe each jar rim. Any food residue prevents a tight seal. Center the lid on the jar and screw the band on fingertip-tight only.
Step 7: Process in water bath. Lower jars onto the canner rack. Cover with 1 to 2 inches of water above the lids. Bring to a rolling boil, then start your processing timer. Pints need 40 minutes, quarts need 45 minutes at sea level.
Step 8: Cool and test seals. Turn off heat, remove lid, and let jars sit 5 minutes. Lift jars out with your jar lifter and place on a folded towel. Do not touch for 12 to 24 hours. You will hear the satisfying ping of lids sealing as they cool.
Step 9: Check seals and store. Press each lid center. If it does not flex, the jar is sealed. Remove the bands, wash jar exteriors with warm soapy water to prevent sticky residue and mold, label with the date, and store in a cool dark place.
This base method is safe for any high-acid tomato recipe. Variations below adjust the prep and ingredients but follow the same processing fundamentals.
Basic Canning Tomato Recipes: Whole, Crushed, and Diced
These three recipes form the foundation of a home-canned tomato pantry. Pick one or all three based on your harvest.
Recipe 1: Whole or Halved Tomatoes
Ingredients per quart jar:
2 to 2.5 pounds of roma or paste tomatoes
2 tablespoons bottled lemon juice OR 1/2 teaspoon citric acid
1/2 teaspoon canning salt (optional)
Boiling water to cover
Pack peeled whole or halved tomatoes into hot jars. Add lemon juice and salt. Cover with boiling water, leaving 1/2 inch headspace. Process pints 40 minutes, quarts 45 minutes at sea level.
Recipe 2: Crushed Tomatoes
Ingredients per quart jar:
3 pounds of roma tomatoes, peeled and cored
2 tablespoons bottled lemon juice OR 1/2 teaspoon citric acid
1/2 teaspoon canning salt (optional)
Working in batches, crush tomatoes by hand or pulse in a food processor for a chunkier texture. Bring crushed tomatoes to a simmer in a large pot for 5 minutes. Pack hot into jars, add lemon juice, and process pints 35 minutes, quarts 40 minutes.
Recipe 3: Diced Tomatoes
Ingredients per quart jar:
2.5 pounds roma tomatoes, peeled, cored, and diced into 1/2 inch cubes
2 tablespoons bottled lemon juice OR 1/2 teaspoon citric acid
1/2 teaspoon canning salt (optional)
Dice tomatoes directly into the hot jars, pressing gently to remove air. Add lemon juice, cover with their own released juices or boiling water. Process pints 40 minutes, quarts 45 minutes.
I keep a 50/50 mix of diced and crushed on my shelf because most recipes call for one or the other.
Canning Tomato Sauce, Salsa, and Soup Variations
Once you have the basics down, these value-added recipes stretch your harvest into complete meal starters.
Recipe 4: Plain Tomato Sauce
Cook 10 pounds of cored, chopped roma tomatoes down to half their volume, about 45 minutes of simmering. Press through a food mill to remove seeds. Return to pot and add 2 tablespoons bottled lemon juice per quart jar before canning. Process pints 35 minutes, quarts 40 minutes.
Recipe 5: Marinara Sauce with Herbs
Follow the plain sauce recipe, but during the simmer add 1 cup chopped onion, 4 cloves minced garlic, 1/4 cup chopped fresh basil, 2 teaspoons dried oregano, and 1 teaspoon salt per 10 pounds of tomatoes. The added vegetables require strict adherence to tested ratios. Add 2 tablespoons bottled lemon juice per quart. Process pints 35 minutes, quarts 40 minutes.
Recipe 6: Canning Salsa
Use only tested salsa recipes from the National Center for Home Food Preservation. The classic “pico de gallo” style salsa includes 6 cups diced tomatoes, 2 cups diced onions, 2 cups diced peppers, 1 cup vinegar (5% acidity), and 1 tablespoon canning salt. Process pints 15 minutes, quarts 20 minutes at sea level.
Recipe 7: Tomato Soup Base
Combine 8 cups tomato sauce, 2 cups cream or milk (added at serving time only), and seasonings at the time of use. For canning safety, can only the seasoned tomato base without dairy. Process pints 35 minutes.
Recipe 8: Pizza Sauce
Reduce tomato sauce by half for a thicker consistency. Add 1 tablespoon olive oil, 1 teaspoon dried oregano, 1 teaspoon dried basil, and 1/2 teaspoon garlic powder per quart before canning. Process 35 minutes for pints, 40 for quarts.
Note that any recipe with low-acid additions like onions, peppers, or garlic requires more careful pH testing. Stick to tested ratios.
Cherry Tomato and Green Tomato Canning Recipes
These specialty recipes use tomatoes that often go to waste in home gardens.
Recipe 9: Pickled Cherry Tomatoes
Ingredients per pint jar:
1.5 cups whole cherry tomatoes, pricked with a fork
1/2 cup white vinegar (5% acidity)
1/2 cup water
1 tablespoon sugar
1 teaspoon canning salt
2 cloves garlic, 1/2 teaspoon dill seed, 1/4 teaspoon red pepper flakes
Bring brine to a boil. Pack tomatoes into hot jars, pour hot brine over them, leaving 1/2 inch headspace. Process 10 minutes at sea level. These are excellent on salads and charcuterie boards.
Recipe 10: Green Tomato Pickles
Slice 4 pounds of firm green tomatoes into 1/4 inch rounds. Combine with 2 sliced onions, 1/4 cup pickling salt, and let stand overnight in the refrigerator. Drain and rinse. Pack into jars with a hot brine of 3 cups vinegar, 1 cup sugar, 2 tablespoons mustard seed, and 1 teaspoon turmeric. Process 10 minutes for pints.
Recipe 11: Green Tomato Relish
Run 6 cups green tomatoes, 2 cups onions, and 2 red bell peppers through a food grinder. Add 1/2 cup sugar, 1/2 cup vinegar, 1 tablespoon salt, 1 teaspoon celery seed, 1/2 teaspoon mustard seed. Simmer 30 minutes. Pack into half-pint jars, process 10 minutes.
Cherry tomatoes are famously tedious to peel, which is why pickling them whole is the go-to method for most home canners.
Processing Times and Altitude Adjustment Chart for Tomatoes
Processing times in this guide assume sea level (0 to 1,000 feet elevation). At higher altitudes, water boils at a lower temperature, so you need to add time to compensate.
Altitude Adjustment for Water Bath Canning:
0 to 1,000 feet: Use the time listed in each recipe
1,001 to 3,000 feet: Add 5 minutes
3,001 to 6,000 feet: Add 10 minutes
Above 6,000 feet: Add 15 minutes
I live at 4,200 feet in Colorado, so I add 10 minutes to every recipe in this guide. If you are unsure of your elevation, search “[your zip code] elevation” online.
Pressure Canning Times for Tomato Products with Added Vegetables:
Pints at 11 PSI: 20 minutes (weighted gauge) or 15 minutes (dial gauge)
Quarts at 11 PSI: 25 minutes (weighted gauge) or 20 minutes (dial gauge)
If your recipe includes meat, dairy, or thickeners, switch to pressure canning regardless of altitude.
Tomato Canning Troubleshooting: Fixing Common Problems
Even experienced canners hit snags. Here are the most common issues and how to fix them.
Liquid loss during processing (siphoning): Caused by packing food too loosely, cooling jars too quickly, or altitude swings. Prevent by removing air bubbles before processing, tightening bands properly, and letting jars cool undisturbed.
Jars not sealing: Usually a rim cleaning issue. Wipe rims with vinegar-dampened paper towel before applying lids. If a jar does not seal, refrigerate it and use within 2 weeks.
Cloudy liquid in jars: Often harmless mineral deposits from hard water. If the jar sealed properly and smells normal, the contents are safe. Toss if there is any off smell, fuzz, or unusual color.
Tomatoes floating at the top: Cosmetic only. Caused by overripe fruit with high water content. The jar is safe if it sealed.
Bands rusting in storage: Remove bands after jars cool to prevent rust and to monitor seal integrity. Stash bands separately and reapply only when using the jar.
How to spot a bad jar: Press the lid. If it flexes or springs, the seal is broken. Look for leaks, cloudy liquid with fizz, off smells, or visible mold. When in doubt, throw it out. No recipe is worth the risk.
Storage, Shelf Life, and Using Your Canned Tomatoes
Properly canned tomatoes keep 12 to 18 months in a cool, dark pantry. After that, the quality declines but the food is generally still safe if the seal held.
Store jars between 50°F and 70°F. Avoid attics, garages, or anywhere with temperature swings. Sunlight degrades the color and nutrients over time.
For related canning methods and preservation recipes, check out our canned apple pie filling guide. If you want to expand into pickling, our water bath canning recipes page walks through kosher dill pickles using the same basic water bath method.
Best ways to use your canned tomatoes:
Strain juice from crushed tomatoes for our tomato juice applications in cocktails
Use leftover juice in our Bloody Molly recipe for a smoky variation
Blend whole canned tomatoes with cucumbers and peppers for our cold soup recipes
A pantry with 20 jars of tomato products covers nearly every weeknight dinner. Pasta, chili, curry, soup, stew, shakshuka, and pizza all start the same way.
Frequently Asked Questions About Canning Tomato Recipes
What can I make with tomatoes for canning?
You can can tomatoes whole, diced, crushed, or as sauce, juice, salsa, soup base, ketchup, barbecue sauce, tomato jam, pizza sauce, and pasta sauce. The most beginner-friendly options are whole and crushed tomatoes, which use minimal added ingredients and have clear USDA-approved processing times.
What are common mistakes when canning tomatoes?
The most common mistakes include skipping required acidification, using fresh lemon juice instead of bottled, canning tomatoes from frost-killed vines, adding untested amounts of low-acid ingredients like onions or garlic, not wiping jar rims before sealing, and not adjusting processing times for altitude above 1,000 feet.
What is the best way to can tomatoes for beginners?
Start with whole or crushed roma tomatoes using a water bath canner. Use bottled lemon juice for acidification, follow USDA processing times for your altitude, and can in small batches of 4 to 6 jars to avoid feeling overwhelmed. Stick to tested recipes without added vegetables until you have a few successful batches behind you.
Can raw tomatoes be canned?
Yes, raw pack tomatoes can be canned by filling jars with raw peeled tomatoes and adding boiling water or tomato juice before water bath processing. The heat of the processing step cooks the tomatoes inside the jar. Hot pack, where tomatoes are briefly simmered before filling jars, generally produces better texture and less siphoning.
What tomatoes should not be canned?
Do not can tomatoes from dead or frost-killed vines, any fruit with mold or rot, overripe tomatoes that have been sitting for days, or any tomato with visible insect damage. These have unpredictable pH levels or high bacterial counts that make safe canning impossible. Compost these tomatoes instead.
How to can tomatoes the old fashioned way?
Old-fashioned tomato canning uses the same water bath method as modern canning, with one main difference: tomatoes were often canned without added acid when older varieties were reliably high-acid. Today’s hybrid varieties require added bottled lemon juice or citric acid regardless of the tomato type. The basic steps of blanching, peeling, packing, and water bath processing remain unchanged.
What can I do with an overabundance of tomatoes?
With an overabundance of tomatoes, prioritize canning in this order: 1) Can crushed or diced tomatoes as your base recipe, 2) Make plain tomato sauce, 3) Use any extras for salsa if you have peppers and onions, 4) Make pizza sauce by reducing sauce further, 5) Process the ripest tomatoes into tomato jam or paste as a final use. A 25-pound box yields roughly 7 quart jars of crushed tomatoes.
How many jars does 25 lbs of tomatoes make?
A 25-pound box of roma tomatoes yields about 7 to 9 quart jars of crushed tomatoes or 9 to 11 pint jars. For whole tomatoes, expect 6 to 8 quart jars. For reduced sauce, expect 4 to 5 quart jars because cooking reduces volume significantly. These numbers assume you remove cores and damaged spots before canning.
How many years are homemade canned tomatoes good for?
Homemade canned tomatoes are best used within 12 to 18 months for peak quality. They remain safe to eat indefinitely as long as the seal holds and storage conditions are cool and dark. After 2 years, color, flavor, and nutrient content decline, but the food does not become unsafe if the seal is intact.
Final Thoughts on Building a Year-Round Tomato Pantry
Starting a home canning tomato recipes practice changed how I cook. Instead of buying flavorless winter tomatoes, I crack open a jar of August every time I want pasta sauce or chili base.
If you are new to this, start small. Pick one recipe, process 4 to 6 jars, and build from there. By next summer you will have a stocked pantry and the confidence to try variations.
The most important thing is to follow tested recipes from trusted sources. The National Center for Home Food Preservation and Ball Canning publish free guides with safety ratios for every common recipe. Bookmark their sites and check them before any new canning project.
Welcome to the preserving life. Your future self, eating home-canned tomatoes in February, will thank you.