
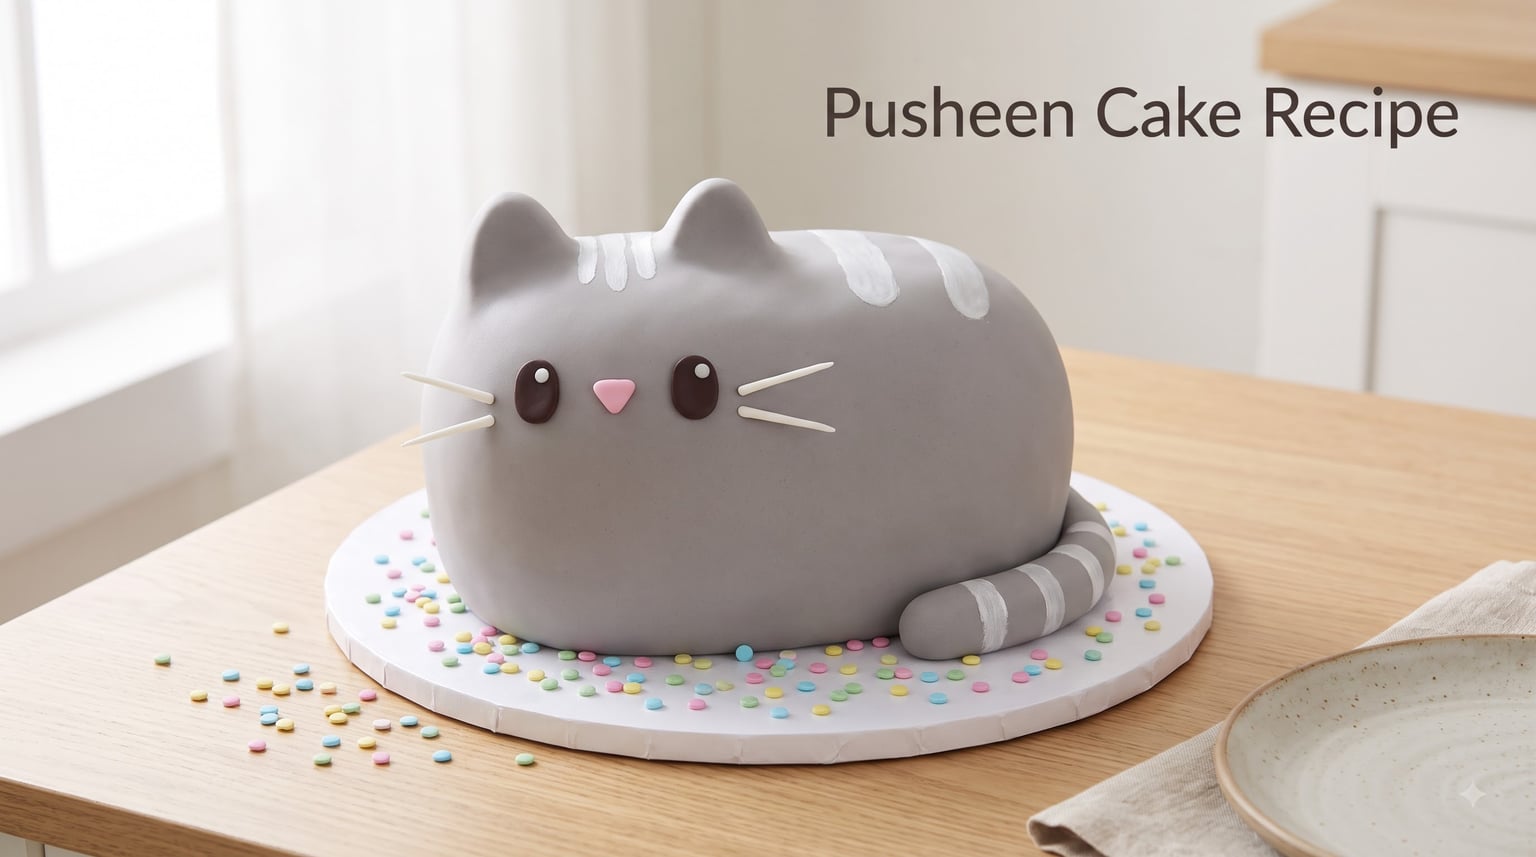
Making a Pusheen cake recipe from scratch feels intimidating until you break it into clear, manageable steps. I baked my first Pusheen cat cake for my niece’s birthday last spring, and after a few trial runs I landed on a method that delivers the signature grey body, expressive eyes, and rounded ears without needing a pastry degree.
This complete guide walks you through everything from the ingredients list to the final whisker placement. I’ll share the tools that actually matter, the carving technique that saves time, and the decorating tips that make the finished cake look professional. Whether you’re planning a Pusheen themed birthday cake for a child or surprising a friend who loves the chubby grey tabby, you’ll find clear answers here.
If you enjoy baking projects like this, you might like exploring our other easy dessert recipes for more inspiration. Let’s get started.
Table of Contents
What Ingredients Do You Need for a Pusheen Cake Recipe
Gathering ingredients before you start saves time and stress. I separate mine into three groups: cake, frosting, and decoration.
Vanilla Cake Ingredients
4 cups all-purpose flour
3 cups granulated sugar
1 tablespoon baking powder
1 teaspoon salt
1 cup unsalted butter, softened
2 cups whole milk
6 large eggs
2 tablespoons vanilla extract
Italian Meringue Buttercream Ingredients
1.5 cups egg whites (about 12)
3 cups granulated sugar
1.5 cups water
2 pounds unsalted butter, softened and cubed
2 tablespoons vanilla extract
Rose gel food coloring (for pink interior option)
Decoration Ingredients
6 lbs grey fondant (pre-tinted or mix white with black food coloring)
1 lb white fondant
1 lb black fondant
Brown and black food coloring for eyes
Pink food coloring for inner ears
Edible glue or piping gel
Total time for shopping and measuring runs about 45 minutes. Having the right baking tools and ingredients ready makes the entire Pusheen cake recipe smoother.
Tools and Equipment You’ll Need
The right tools cut your decoration time in half. I learned this the hard way after struggling with a butter knife instead of a bench scraper on my first attempt.
9-inch round cake pans (two or three)
Stand mixer with paddle and whisk attachments
Cake board, 14-inch round
Serrated knife or bread knife for carving
Pusheen cake template (printed on paper or cardstock)
Toothpicks or bamboo skewers
Fondant rolling pin (large, non-stick)
CMC powder (helps fondant figures hold shape)
Circle cutters and scalloped cutters
Sieve (for dusting cornstarch on fondant)
Clear piping gel
Food-grade alcohol (for attaching decorations)
Optional but helpful: a turntable for smooth frosting application and small silicone shaping tools for facial details.
How to Bake the Cake Layers for Your Pusheen Cat Cake?
Your cake layers need to be sturdy enough to carve without crumbling. A basic vanilla butter cake works well, and you can tint the batter pink for a fun surprise inside.
Step 1: Mix the Batter
Preheat your oven to 350°F.
Grease and flour your cake pans thoroughly.
Cream butter and sugar in your stand mixer until fluffy, about 4 minutes.
Add eggs one at a time, then vanilla extract.
Alternate adding dry ingredients and milk, starting and ending with flour.
Mix until just combined to keep the cake tender.
Step 2: Bake and Cool
Pour batter evenly into prepared pans.
Bake for 30 to 35 minutes, checking with a toothpick at the 30-minute mark.
Cool in pans for 10 minutes, then turn out onto wire racks.
Cool completely before carving. Warm cake crumbles.
Cooling takes roughly 1.5 hours if you bake in the morning. Many beginner bakers recommend our easy baking recipes for beginners as warmups before tackling novelty cakes like Pusheen.
How to Carve a Cake into Pusheen’s Oval Shape
Carving is the step that turns plain round layers into the recognizable Pusheen cat cake form. The shape is an oval, slightly wider at the bottom and tapering toward the head.
Step 1: Prepare Your Template
Print or draw a Pusheen silhouette on paper, roughly 11 inches long and 8 inches wide. Cut it out and use it as a guide. You can find free Pusheen cake templates online by searching “Pusheen cat silhouette printable.”
Step 2: Carve the Layers
Place your template on top of a cooled cake layer.
Cut around the template with a serrated knife using gentle sawing motions.
Save scraps for cake pops or snacking while you work.
Repeat with remaining layers so each oval matches.
Level each layer by trimming the domed tops so they stack flat.
Step 3: Stack for Stability
Place the largest layer on your cake board first.
Insert four trimmed wooden dowels through the center for support (this is optional for smaller cakes).
Spread simple syrup over each layer before adding the next to lock in moisture.
Total carving time is roughly 25 minutes once your template is ready.
Step by Step: Assembling and Filling the Pusheen Birthday Cake
Assembly brings the carved layers into one solid cake. Italian meringue buttercream gives the cleanest lines for stacking and works between layers and as the crumb coat.
Step 1: Apply a Crumb Coat
Spread a thin layer of buttercream over the entire stacked cake.
This locks in crumbs so the final coat stays clean.
Chill the cake for 30 minutes before the next step.
Step 2: Final Frosting Layer
Apply a thicker buttercream layer over the chilled crumb coat.
Smooth with a bench scraper, rotating your turntable as you work.
Sharpen the edges with a small spatula so the oval shape stays defined.
Refrigerate the cake for 1 hour until the buttercream firms up.
A smooth buttercream base makes the fondant application much easier later.
Fondant Pusheen Cake Decorations: Eyes, Ears, Stripes, and Whiskers
This is where the Pusheen cake recipe comes alive. Fondant decoration takes patience but produces the cleanest, most “Pusheen accurate” look. If you’re new to this technique, you can also pair your cake project with themed snacks like our fun character-themed baking ideas to get comfortable with character work.
Step 1: Cover the Cake with Grey Fondant
Roll out your grey fondant to about 1/4 inch thickness on a cornstarch-dusted surface.
Lift the fondant using your rolling pin and drape it over the chilled cake.
Smooth from the top down, pushing air bubbles out toward the base.
Trim excess fondant at the bottom with a pizza cutter.
Smooth seams with a fondant smoother dipped in cornstarch.
Step 2: Make Pusheen’s Tail
Shape a small piece of grey fondant into a curved tail shape, about 4 inches long.
Add the lighter grey underside by attaching a thin strip of white-tinted fondant.
Set aside to firm up before attaching.
Step 3: Create the Ears
Cut two triangular fondant shapes, roughly 2 inches each.
Add small pink fondant triangles on the inner ear section.
Use CMC powder mixed into the fondant so the ears hold their shape during transport.
Step 4: Add the Eyes
Roll two white fondant circles, about 1.5 inches wide, for the outer eye.
Add smaller brown circles for the iris, then tiny black pupils.
Dot white highlights with icing for that signature Pusheen sparkle.
Step 5: Stripes and Whiskers
Cut thin grey fondant strips and place them along the back to mimic Pusheen’s tabby stripes.
Add darker grey stripes near the head area.
For whiskers, pipe thin white lines using royal icing or attach pre-shaped fondant strings.
Step 6: Attach Everything
Use clear piping gel or edible glue to attach ears, eyes, mouth, and tail.
Allow pieces to dry briefly before moving the cake.
Finish with a tiny pink nose and a small curved mouth line.
The decoration step takes roughly 90 minutes once your fondant is prepared. It is the most time-consuming part of any Pusheen cake recipe, but the results are worth it.
How to Make a Pusheen Cake with Buttercream Instead of Fondant?
Some bakers skip fondant entirely, and that’s a valid choice. Buttercream tastes better in many cases and is more forgiving for first-timers.
Quick Buttercream Method
Tint your buttercream grey using black gel food coloring, a small amount at a time.
Frost the entire cake with grey buttercream, smoothing as you go.
Pipe white features like eyes, cheeks, and whiskers using a small round piping tip.
Add pink piped accents for inner ears and nose.
Use black piping gel or melted chocolate in a piping bag for pupils and mouth details.
Buttercream decorations need refrigeration to hold shape. The look is softer and more whimsical than fondant, and most kids actually prefer the taste. If you’re baking for a birthday celebration, pair the cake with some themed birthday celebration ideas for grown-ups at the party.
Pusheen Cake Decorating Tips and Troubleshooting Common Issues
I’ve made enough mistakes to know what can go wrong. These tips address the most common Pusheen cake recipe pain points so you can skip the frustration.
Top 8 Tips for Success
Chill your cake thoroughly before applying fondant. Cold cake resists tearing.
Knead fondant until soft and pliable. Cracked fondant usually means it’s too dry.
Use gel food coloring, not liquid. Liquid dye changes fondant consistency.
Apply fondant in a room that’s not too humid. Humidity makes fondant sticky.
Build the tail separately and attach with a toothpick for stability.
Make features slightly oversized first, then trim. Smaller features get lost.
Smooth seams with a damp (not wet) brush for a clean look.
Rotate the cake often while smoothing to catch uneven spots.
Common Issues and Fixes
Issue: Fondant tearing during application.
Fix: Patch with a small piece of fondant and smooth the seam with a damp brush.
Issue: Grey color too dark or too light.
Fix: Start with white fondant and add black gel coloring one drop at a time until you reach Pusheen’s signature soft grey.
Issue: Features sliding off the cake.
Fix: Use piping gel as glue and let each piece set for 5 minutes before adding nearby decorations.
Issue: Cake too soft to carve.
Fix: Refrigerate layers for 1 hour before carving. Cold cake cuts cleanly without crumbling.
How to Store, Transport, and Serve Your Pusheen Cake
Proper storage keeps your cake looking fresh for serving day. I usually bake mine one to two days ahead and store based on the decoration type.
Storage Guidelines
Fondant-decorated cake: Store at room temperature in a cake box for up to 2 days.
Buttercream cake: Refrigerate in an airtight container for up to 3 days.
Always bring refrigerated cake to room temperature 1 hour before serving for best flavor.
Transportation Tips
Place the cake on a non-slip mat inside a flat-bottomed box.
Drive slowly and avoid sudden stops.
Keep the car cool. Heat melts fondant and buttercream quickly.
Bring extra decorations in case anything gets jostled loose in transit.
Serving Size
A cake made with three 9-inch round layers serves roughly 18 to 24 people, depending on slice size. For a small gathering, halve the recipe or use two layers.
Frequently Asked Questions About Pusheen Cake Recipes
How long does it take to make a Pusheen cake from scratch?
The total project time for a Pusheen cake recipe runs roughly 6 to 8 hours spread across two days. Day one covers baking and chilling the layers (about 3 hours including cooling). Day two includes carving, crumb coating, fondant application, and decoration (about 4 to 5 hours). Many bakers spread the work over two days to avoid rushing the decorating step.
Can I make a Pusheen cake without fondant?
Yes, you can decorate a Pusheen cat cake entirely with buttercream. Tint your icing grey using black gel food coloring, then pipe on white and pink details for eyes, ears, and whiskers. The finished cake has a softer, painterly look that many kids prefer for taste. Buttercream decorations do require refrigeration to hold their shape.
What type of cake works best for carving into a Pusheen shape?
A sturdy vanilla butter cake or pound cake works best for carving a Pusheen shaped cake. These dense cakes hold their shape without crumbling when you trim the edges. Light sponge cakes are too delicate and tend to fall apart during carving. For best results, chill your cake layers for at least 1 hour before carving.
How do I get the right grey color for Pusheen’s body?
Start with white fondant and knead in black gel food coloring one drop at a time. Pusheen’s signature color is a soft, warm grey rather than a dark blue-grey. Test the color on a small piece of fondant before covering your entire Pusheen cake recipe, since gel coloring darkens as you knead it in.
Can I make a Pusheen cake ahead of time?
Yes, this Pusheen birthday cake can be made 1 to 2 days ahead. Bake and carve the layers up to 2 days in advance and store them wrapped in plastic wrap at room temperature. Apply buttercream and fondant the day before serving. Once fully decorated, store the cake in a cool, dry place away from direct sunlight until party time.
How do I store and transport a Pusheen cake safely?
Store fondant-decorated Pusheen cakes at room temperature in a cake box for up to 2 days. Refrigerate buttercream versions in an airtight container. For transport, place the cake on a non-slip mat inside a flat-bottomed box, keep your car cool, and avoid sudden stops. Always transport on a flat surface like a car floor rather than a seat.
Final Thoughts on This Pusheen Cake Recipe
A homemade Pusheen cake recipe delivers something no bakery cake can match: a personal touch built specifically for someone you care about. With clear ingredients, a printable template, and the decorating tips above, you can produce a finished cake that captures Pusheen’s iconic look without professional training.
Start with a simple version if this is your first attempt. Bake the layers, frost them with grey buttercream, and add piped features. Once you’re comfortable, level up to fondant for that smooth, polished finish. Either way, your Pusheen fan is going to love the result.
Ready for more themed baking inspiration? Explore our classic dessert recipes or check out other novelty cake projects for your next celebration.