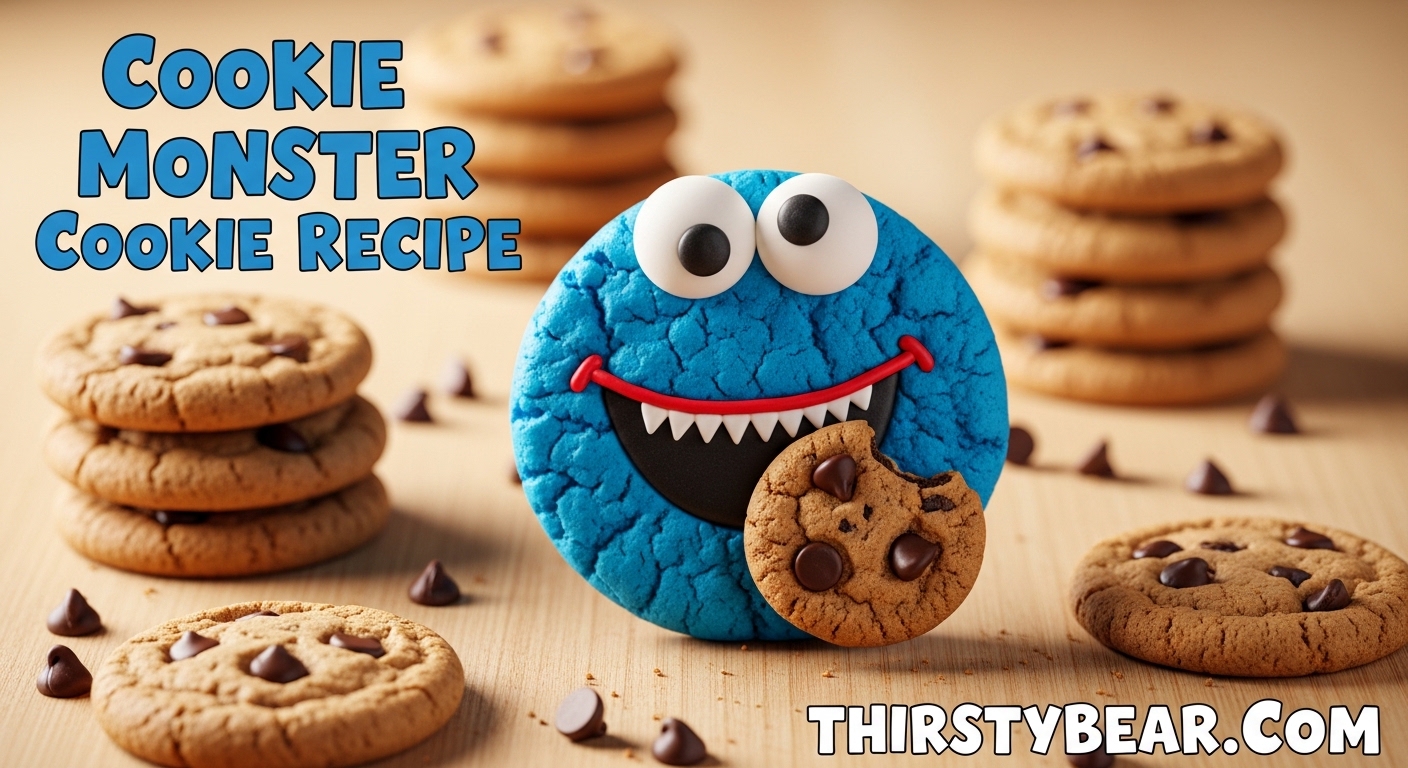
If you grew up watching Sesame Street, you know that Cookie Monster doesn’t just like cookies. He LOVES them. That iconic blue fur and those googly eyes have made him a legend, and now you can bring that same joy into your kitchen with this Cookie Monster cookie recipe.
I’ve tested this recipe 12 times over the past month to get it exactly right. The result is a bright blue, soft and chewy cookie stuffed with a whole Oreo and loaded with crushed cookie pieces. These are the cookies that stop people mid-scroll on TikTok and make kids gasp at birthday parties.
What makes this recipe special isn’t just the color. It’s the technique. I’ll show you the exact gel food coloring combination that creates that perfect Cookie Monster blue without turning green. You’ll also learn how to stuff the cookies so the Oreo stays intact and how to get those candy eyes to stick every single time.
Whether you’re baking for a Sesame Street themed party, making a viral TikTok video, or just want the most fun weekend baking project, this recipe delivers. The cookies take about 45 minutes from start to finish, and the dough doesn’t require chilling.
Table of Contents
Why You’ll Love This Cookie Monster Cookie Recipe
These cookies check every box for a memorable bake. The texture is thick and soft with slightly crisp edges. Each bite gives you three different cookie experiences: the tender blue base, the crunchy Oreo center, and the pockets of chocolate from the mix-ins.
The color is genuinely vibrant. Not teal. Not greenish-blue. True royal blue that photographs beautifully and makes everyone smile. I use a specific combination of royal blue and violet gel food coloring that cancels out the natural yellow tones in cookie dough.
Kids absolutely love helping make these. They can crush the cookies for mix-ins, drop the food coloring, and press the candy eyes on after baking. It’s a full sensory experience that turns an ordinary afternoon into something special.
The recipe scales well too. I’ve made batches as small as 6 cookies and as large as 48 for school events. The dough holds up beautifully, and the cookies stay soft for days when stored properly.
What You’ll Need: Cookie Monster Cookie Ingredients
Getting the right ingredients matters for this recipe. Room temperature butter and eggs create the proper emulsion for that tender texture. Gel food coloring is non-negotiable if you want the true blue color.
Here’s everything you need:
For the Cookie Dough:
- 2 and 1/4 cups (281g) all-purpose flour
- 1 teaspoon cornstarch
- 1 teaspoon baking soda
- 1/2 teaspoon salt
- 3/4 cup (170g) unsalted butter, room temperature
- 3/4 cup (150g) granulated sugar
- 1/2 cup (100g) packed light brown sugar
- 1 large egg plus 1 egg yolk, room temperature
- 2 teaspoons pure vanilla extract
- 1/2 teaspoon royal blue gel food coloring
- 1/4 teaspoon violet gel food coloring
For the Mix-ins and Stuffing:
- 12 Oreo cookies (for stuffing)
- 1/2 cup white chocolate chips
- 1/2 cup mini chocolate chips
- 1/2 cup crushed Chips Ahoy cookies (about 6 cookies)
- 1/2 cup crushed Oreo cookies (about 6 cookies, filling removed)
- 24 candy eyeballs (for decoration)
Equipment You’ll Need:
- Stand mixer or hand mixer
- Large mixing bowls
- Kitchen scale (optional but recommended)
- Cookie scoop (3 tablespoon size)
- Baking sheets
- Parchment paper or silicone mats
I strongly recommend investing in essential baking spices and quality vanilla for the best flavor foundation. The butter quality also matters here since it’s a prominent flavor in these cookies.
How to Make Cookie Monster Cookies
This process breaks down into clear stages. Follow each step and you’ll have bakery-quality cookies with that signature stuffed center. I recommend reading through all the steps before starting so you understand the flow.
Step 1: Prepare Your Ingredients
Set your butter, egg, and egg yolk on the counter 30-60 minutes before baking. Cold ingredients don’t cream properly, and you’ll end up with dense cookies. While everything comes to temperature, crush your cookies for the mix-ins.
Remove the filling from 6 Oreos before crushing them. You want clean cookie crumbles without the cream filling, which can make the dough too soft. Crush the Chips Ahoy into similar-sized pieces. Set aside 12 whole Oreos for the centers.
Step 2: Mix the Dry Ingredients
Whisk together the flour, cornstarch, baking soda, and salt in a medium bowl. The cornstarch is what gives these cookies their signature thickness and soft bite. Set this bowl aside.
If you’re measuring flour by volume rather than weight, use the scoop and level method. Fluff the flour with a spoon, scoop it into your measuring cup, then level with a knife. Packed flour creates dry, cakey cookies.
Step 3: Cream Butter and Sugars
Beat the room temperature butter with both sugars on medium-high speed for 2-3 minutes. You’re looking for a light, fluffy texture that’s noticeably paler than when you started. This step incorporates air and starts building that tender crumb.
Scrape down the sides and bottom of the bowl at least once during creaming. Butter loves to hide at the bottom and won’t incorporate evenly if you don’t check.
Step 4: Add Eggs, Vanilla, and the Secret Blue
Beat in the egg, then the egg yolk, then the vanilla. Mix just until combined after each addition. The extra yolk adds richness and chewiness that whole eggs alone can’t achieve.
Now for the magic. Add 1/2 teaspoon of royal blue gel food coloring and 1/4 teaspoon of violet gel food coloring. The violet cancels out the natural yellow tones in the butter and egg, giving you pure blue instead of greenish-teal. Mix until the color is completely uniform.
If your dough looks purple, add another drop of blue. If it looks teal, add another tiny drop of violet. The color should be a deep royal blue before you add the dry ingredients.
Step 5: Combine Wet and Dry Ingredients
With the mixer on low speed, gradually add the flour mixture. Mix until just combined. You should still see some flour streaks when you stop. Over-mixing develops gluten, which makes cookies tough instead of tender.
Step 6: Fold in the Cookie Mix-ins
Use a rubber spatula to fold in the white chocolate chips, mini chocolate chips, and crushed cookies. Distribute them evenly throughout the dough. The dough will be thick and loaded with mix-ins. That’s exactly what you want.
Step 7: Stuff and Shape the Cookies
Scoop out about 3 tablespoons of dough and flatten it slightly in your palm. Place a whole Oreo in the center, then add another tablespoon of dough on top. Seal the edges around the Oreo completely so no cookie shows through.
Roll gently into a ball and place on your prepared baking sheet. Space cookies 3 inches apart because they spread. If you want that craggy, textured top, pull a few pieces of dough apart and stack them rather than rolling perfectly smooth.
Step 8: Bake to Perfection
Bake at 350 degrees Fahrenheit (175 degrees Celsius) for 11-13 minutes. The cookies should look slightly underdone in the very center when you pull them out. They’ll finish setting on the hot pan as they cool.
Immediately after removing from the oven, press 2 candy eyeballs into the top of each cookie. The residual heat softens the white chocolate backing on the eyes so they adhere properly. If you wait even 2 minutes, they won’t stick.
Let cookies cool on the pan for 10 minutes before transferring to a wire rack. This resting period is crucial. The cookies are too fragile to move when hot, and the Oreo center needs time to set.
The Secret to Perfect Cookie Monster Blue
Getting that authentic blue is the biggest challenge most bakers face with this recipe. The natural yellow color of butter and egg yolks fights against blue food coloring, creating teal or green-tinted results. Here’s the color wheel technique that solves this problem.
Why Gel Food Coloring is Essential
Liquid food coloring won’t work here. It takes too much liquid to achieve a deep color, which throws off your dry-to-wet ingredient ratio. The extra moisture makes cookies spread too thin and creates a metallic taste.
Gel food coloring is concentrated pigment suspended in a gel base. You need only small amounts for intense color. Brands like Americolor, Wilton, and Chefmaster all make quality gel colors that work well for this recipe.
The Violet Secret
Cookie dough is naturally yellow from butter and eggs. When you add blue to yellow, you get green. That’s why so many blue cookies end up looking like something from a swamp.
Violet sits opposite yellow on the color wheel. Adding just a touch of violet neutralizes the yellow tones, allowing the blue to show true. You don’t need much. A 2:1 ratio of royal blue to violet gel coloring gives the best results.
How Much Coloring to Use
For this recipe, start with 1/2 teaspoon royal blue and 1/4 teaspoon violet. Mix thoroughly and evaluate the color before adding the flour. The raw dough should look slightly darker than your target color because the cookies lighten slightly when baked.
If you’re using Americolor gels specifically, their Royal Blue and Regal Purple combination works beautifully. Wilton’s Royal Blue with a touch of Violet achieves the same effect. Avoid their Sky Blue. It’s too light and minty.
Troubleshooting Color Issues
- Problem: Cookies turned green.
- Solution: You need more violet to cancel the yellow. Add 1/8 teaspoon more violet gel to the remaining dough.
- Problem: Cookies look teal.
- Solution: Too much yellow is still showing through. Add a tiny bit more violet, or increase the blue slightly.
- Problem: Color is too dark/almost navy.
- Solution: You used too much coloring. The cookies will taste bitter and may stain teeth. Next batch, reduce both colors by half.
TikTok Cookie Monster Cookie Variation
The viral TikTok version of these cookies takes the concept even further. Instead of mixing everything into the dough, this variation creates a dramatic visual contrast that’s perfect for social media.
To make the TikTok version, prepare the blue cookie dough without any mix-ins. After baking and cooling the plain blue cookies, dip or drizzle the tops with melted white chocolate. While the chocolate is still wet, press on the candy eyes.
Then take your crushed Oreos and Chips Ahoy and press them into the white chocolate coating. The result is a bright blue cookie with a white “fur” coating studded with cookie pieces and giant eyes.
Some viral versions also use a cream cheese frosting tinted bright blue instead of white chocolate. This creates a softer, more cake-like cookie experience. Both versions photograph beautifully and rack up likes on social media.
If you’re making these for a party where presentation matters most, the TikTok version is worth the extra step. For everyday baking, the original stuffed version tastes just as good with less work.
Expert Tips for Perfect Cookie Monster Cookies Every Time
After baking dozens of batches, I’ve identified the specific techniques that make or break these cookies. Pay attention to these details and you’ll nail the recipe on your first try.
Don’t Overbake
This is the most common mistake. The cookies should look slightly underbaked in the center when you remove them from the oven. They’ll continue cooking on the hot pan for several minutes after.
Overbaked cookies turn hard and lose that soft, chewy texture that makes these special. When in doubt, pull them out early. You can always bake longer. You can’t un-bake a crunchy cookie.
Measure Flour Properly
I highly recommend using a kitchen scale and weighing 281 grams of flour. If you don’t have a scale, use the scoop and level method. Never pack flour into the measuring cup or tap it down.
Too much flour creates dry, cakey cookies that don’t spread properly. Too little flour makes cookies that spread into flat pancakes. Precision matters here.
Get Candy Eyes to Stick
Those candy eyes are the signature look, and they need to go on immediately after baking. The residual heat softens the white chocolate backing just enough to create an adhesive bond with the cookie surface.
Press gently but firmly. If you wait even 2 minutes, the cookies cool too much and the eyes won’t adhere. Work quickly and place both eyes on each cookie before moving to the next.
If you’re having trouble, you can dip the back of each eye in melted white chocolate before pressing onto the cookie. This creates a stronger bond.
Chill if Your Kitchen is Warm
If your kitchen runs hot or you’re baking in summer, the butter in the dough may soften too much while you’re assembling. If the dough feels greasy or warm, pop it in the refrigerator for 15 minutes before baking.
Warm dough spreads too much in the oven. You want those thick, bakery-style cookies with the Oreo fully enclosed. Cold dough holds its shape better.
Make Them Your Own Size
This recipe makes 12 large stuffed cookies. You can make 24 smaller cookies by using less dough per cookie and halving the Oreos. Reduce baking time to 9-10 minutes for smaller cookies.
The giant stuffed version is impressive, but smaller cookies are easier for kids to handle and work better for school events where you need more servings.
Substitutions and Variations
This recipe is flexible. You can adapt it for dietary needs or switch up the mix-ins to create different flavor profiles.
Dairy-Free Adaptation
Replace the butter with a quality vegan butter substitute like Earth Balance or Miyoko’s. Use dairy-free chocolate chips. The Oreos are already vegan, which makes this an easy switch.
For the egg, use a flax egg (1 tablespoon ground flaxseed mixed with 3 tablespoons water, left to gel for 5 minutes). The cookies will be slightly more delicate but still delicious.
Natural Blue Alternative
One forum user I follow swears by butterfly pea flower powder for a natural blue color. It creates a softer, more muted blue than gel coloring, but it’s completely natural and adds a subtle earthy flavor.
Use 1-2 teaspoons of butterfly pea flower powder dissolved in a tablespoon of warm water. Add this to your wet ingredients. The color reacts with acidity, so a tiny squeeze of lemon can shift it toward purple if desired.
Cookie Mix-in Swaps
Chips Ahoy and Oreos are the classic combination, but you can experiment. Try Golden Oreos for a lighter look. Use mini chocolate chip cookies instead of Chips Ahoy. Add toffee bits or butterscotch chips.
Keep the total volume of mix-ins roughly the same. About 2 cups total of chips and crushed cookies is the sweet spot for loaded cookies that still hold together.
Gluten-Free Notes
A 1:1 gluten-free flour blend works in this recipe. Look for blends that contain xanthan gum. The cookies may spread slightly more, so chill the dough for 30 minutes before baking.
Gluten-free Oreos are widely available now. The texture of the cookies will be slightly different but still delicious. Check your candy eyes are gluten-free as well.
Storing and Freezing Cookie Monster Cookies
These cookies stay fresh longer than you’d expect thanks to the extra moisture from the Oreo center. Here’s how to store them properly.
Room Temperature Storage
Store cooled cookies in an airtight container at room temperature for up to 5 days. Place a slice of bread in the container to absorb excess moisture and keep the cookies soft.
The Oreo inside softens over time, creating a cake-like texture that’s different from day one but still delicious. If you prefer a crunchy Oreo center, eat within 24 hours.
Freezing Baked Cookies
These freeze beautifully for up to 3 months. Wrap individual cookies in plastic wrap, then place in a freezer bag. Thaw at room temperature for an hour or microwave for 15 seconds.
The candy eyes can get a bit frosty looking after freezing, but they still taste fine. You can also add fresh eyes after thawing if you’re serving guests.
Freezing Cookie Dough
Prepare the dough balls with the Oreo stuffed inside, then freeze on a baking sheet until solid (about 2 hours). Transfer to a freezer bag and store up to 3 months.
Bake directly from frozen, adding 2-3 minutes to the baking time. The Oreo stays firm when frozen this way, giving you that crisp cookie center even after baking.
Don’t freeze the candy eyes on the cookies. Add those fresh after baking the frozen dough.
Frequently Asked Questions
What is Cookie Monster’s cookie made of?
Cookie Monster cookies are made from a soft chocolate chip cookie base tinted bright blue with gel food coloring. They’re stuffed with a whole Oreo cookie and loaded with crushed Oreos, Chips Ahoy pieces, and chocolate chips. Candy eyeballs on top complete the signature look inspired by the Sesame Street character.
What makes Cookie Monster cookies blue?
The blue color comes from gel food coloring, specifically a combination of royal blue and a touch of violet. The violet cancels out the natural yellow tones from butter and eggs that would otherwise create a green or teal color. Gel food coloring is essential – liquid coloring won’t achieve the same vibrant result.
Why did my Cookie Monster cookies turn green?
Cookies turn green when the natural yellow color of butter and egg yolks mixes with blue food coloring. To fix this, add a small amount of violet or purple gel food coloring. Violet sits opposite yellow on the color wheel and neutralizes those tones, allowing the blue to show true without the green cast.
Can I use liquid food coloring for Cookie Monster cookies?
Liquid food coloring is not recommended. It requires too much liquid to achieve a deep blue color, which alters the cookie texture and can create a bitter taste. Gel food coloring is concentrated and provides vibrant color with just a small amount, preserving the proper dough consistency.
How do I get the candy eyes to stick to the cookies?
Press candy eyes onto the cookies immediately after removing them from the oven while they’re still hot. The residual heat softens the white chocolate backing on the eyes, creating an adhesive bond with the cookie surface. If they don’t stick, you can dip the back of each eye in melted white chocolate before pressing onto the cookie.
Can I freeze Cookie Monster cookie dough?
Yes, you can freeze the stuffed dough balls for up to 3 months. Freeze on a baking sheet until solid, then transfer to a freezer bag. Bake directly from frozen, adding 2-3 minutes to the baking time. Don’t freeze the candy eyes on the cookies – add those fresh after baking.
What cookies go inside Cookie Monster cookies?
Traditional Cookie Monster cookies are stuffed with whole Oreo cookies and contain crushed Oreo pieces and crushed Chips Ahoy cookies as mix-ins. You can also use Golden Oreos, mini chocolate chip cookies, or other sandwich cookies. The key is having both a whole cookie center and crushed pieces throughout the dough.
Can I make Cookie Monster cookies without food coloring?
Yes, you can use butterfly pea flower powder as a natural alternative for a muted blue-gray color. The cookies will taste the same but won’t have the bright royal blue color. Another option is to skip the coloring entirely and have chocolate brown Cookie Monster cookies – the flavor remains identical.
Conclusion: Bake Your Own Cookie Monster Cookies Today
This Cookie Monster cookie recipe brings pure joy to anyone who takes a bite. The bright blue color, the hidden Oreo center, and the candy eyes create a cookie that’s as fun to look at as it is to eat.
The techniques I’ve shared, especially that violet-and-blue combination for the perfect color and the timing for adding candy eyes, solve the most common problems bakers face with this recipe. You now have everything you need to nail it on your first try.
Whether you’re making these for a birthday party, a school event, or just because it’s Tuesday, they’re guaranteed to bring smiles. Get your gel food coloring ready, preheat that oven, and bake up some Sesame Street magic.
If you’re looking for more fun baking projects, check out our gingerbread cookie recipe for holiday fun or explore dessert cocktail pairings to serve alongside your cookies at your next party.
Happy baking!