There is something magical about a glass of thick, creamy homemade eggnog on a cold December evening. The rich aroma of freshly grated nutmeg drifting through the kitchen while our team whips up a batch brings back memories of holiday gatherings stretching back generations. We have perfected this classic eggnog recipe over many winters, and today we are sharing everything we know so you can make it at home.
This classic eggnog recipe gives you two options in one: a beautifully spiked version for adult gatherings and a equally delicious virgin version that the whole family can enjoy. Whether you are a seasoned home bartender or making eggnog for the first time, our step-by-step instructions will guide you to perfect results.
Table of Contents
Why Make This Classic Eggnog Recipe
Store-bought eggnog cannot compare to the fresh, rich flavor of homemade. When we make this recipe at home, we control every ingredient that goes into the glass. No artificial flavors, no stabilizers, no overly sweet aftermath that leaves you reaching for water.
The texture is what really sets homemade apart. Our recipe produces that signature thick and creamy consistency that coats the inside of a glass. The process involves tempering egg yolks with hot milk, cooking a gentle custard, and folding in whipped egg whites for an airy texture that store-bought versions simply cannot replicate.
We also appreciate being able to customize the sweetness and spice levels to match our own preferences. Some years we go heavier on the cinnamon; other years we let the nutmeg take center stage. With homemade, every batch is an opportunity to craft exactly what you want.
What You Need: Ingredients
Before we begin, let us walk through everything you need for this classic eggnog recipe. We recommend measuring everything out before you start cooking so the process goes smoothly.
- 6 large egg yolks
- 3/4 cup granulated sugar, divided
- 2 cups whole milk
- 1 cup heavy cream
- 1/2 teaspoon freshly ground nutmeg (plus more for garnish)
- 1/4 teaspoon ground cinnamon
- 1/8 teaspoon salt
- 1 teaspoon pure vanilla extract
- 3 tablespoons bourbon or dark rum (for spiked version)
- 6 large egg whites (for added richness and texture)
For the spiked version, we prefer bourbon and dark rum in equal parts, though you can use one or the other exclusively. Brandy also works wonderfully if that is what you have on hand. Each spirit brings a slightly different warmth: bourbon adds vanilla and caramel notes, rum brings tropical sweetness, and brandy contributes its own fruity complexity.
Equipment You Will Need
Having the right equipment makes this recipe much easier to execute successfully. You do not need anything specialized, but a few key tools will make a significant difference in your results.
- Stand mixer or electric hand mixer
- Medium saucepan
- Fine mesh strainer
- Wooden spoon or silicone spatula
- Airtight containers for storage
- Glass jars or bottles for serving
The stand mixer is particularly important for whipping the egg whites to soft peaks. While you can technically use a hand mixer, a stand mixer lets you walk away and monitor the custard on the stove without juggling equipment.
Step-by-Step Instructions
Now comes the heart of this classic eggnog recipe. We break this down into clear steps so you can follow along easily, even if you have never made homemade eggnog before.
Step 1: Whisk the Egg Yolks
In a medium bowl, whisk together the 6 egg yolks and 1/2 cup of sugar until the mixture turns pale yellow and falls in ribbons from the whisk when lifted. This step incorporates air and begins dissolving the sugar, which is essential for achieving that smooth, rich base we are looking for.
Step 2: Heat the Milk and Cream
In a medium saucepan, combine the remaining 1/4 cup sugar, whole milk, heavy cream, nutmeg, cinnamon, and salt. Heat over medium heat, stirring occasionally, until the mixture begins to steam and small bubbles form around the edges of the pan. Do not let it boil.
Step 3: Temper the Eggs
This is the most critical step in the entire recipe. Tempering prevents the eggs from scrambling while gradually raising their temperature to a safe level. Pour about 1/2 cup of the hot milk mixture into the egg yolk mixture while whisking constantly. Continue adding the hot liquid in slow, steady streams while whisking vigorously. We aim for about 1 to 2 minutes to add all the hot liquid safely.
Step 4: Cook the Custard
Pour the tempered egg mixture back into the saucepan and cook over medium-low heat, stirring constantly with a wooden spoon. Continue cooking until the mixture reaches 160 degrees Fahrenheit and coats the back of the spoon. You want it thick enough to leave a trail when you drag your finger through it on the spoon. This usually takes 5 to 7 minutes of careful attention.
Step 5: Strain and Cool
Remove the saucepan from heat and pour the custard through a fine mesh strainer into a clean bowl. This removes any bits of cooked egg that may have formed. Stir in the vanilla extract. Let the mixture cool to room temperature, then cover and refrigerate for at least 4 hours or overnight. The custard will thicken considerably as it chills.
Step 6: Whip the Egg Whites
When you are ready to serve, remove the chilled custard from the refrigerator. In a clean stand mixer bowl, beat the 6 egg whites until soft peaks form. Soft peaks hold their shape briefly before the tip curls over when you lift the beater. Be careful not to overbeat or the whites will become dry and grainy.
Step 7: Fold Everything Together
Gently fold about one-third of the whipped egg whites into the chilled custard to lighten it. Once incorporated, fold in the remaining egg whites in two additions. The folding motion should be gentle and sweeping, preserving as much air as possible. Stop folding when just combined; overworking will deflate the mixture.
Step 8: Add the Spirit (Spiked Version)
If making the spiked version, stir in 3 tablespoons of bourbon or dark rum now. We find that adding the alcohol at this stage rather than earlier preserves its distinct flavors. The spirit also acts as a preservative, extending the shelf life of your eggnog.
Step 9: Serve and Garnish
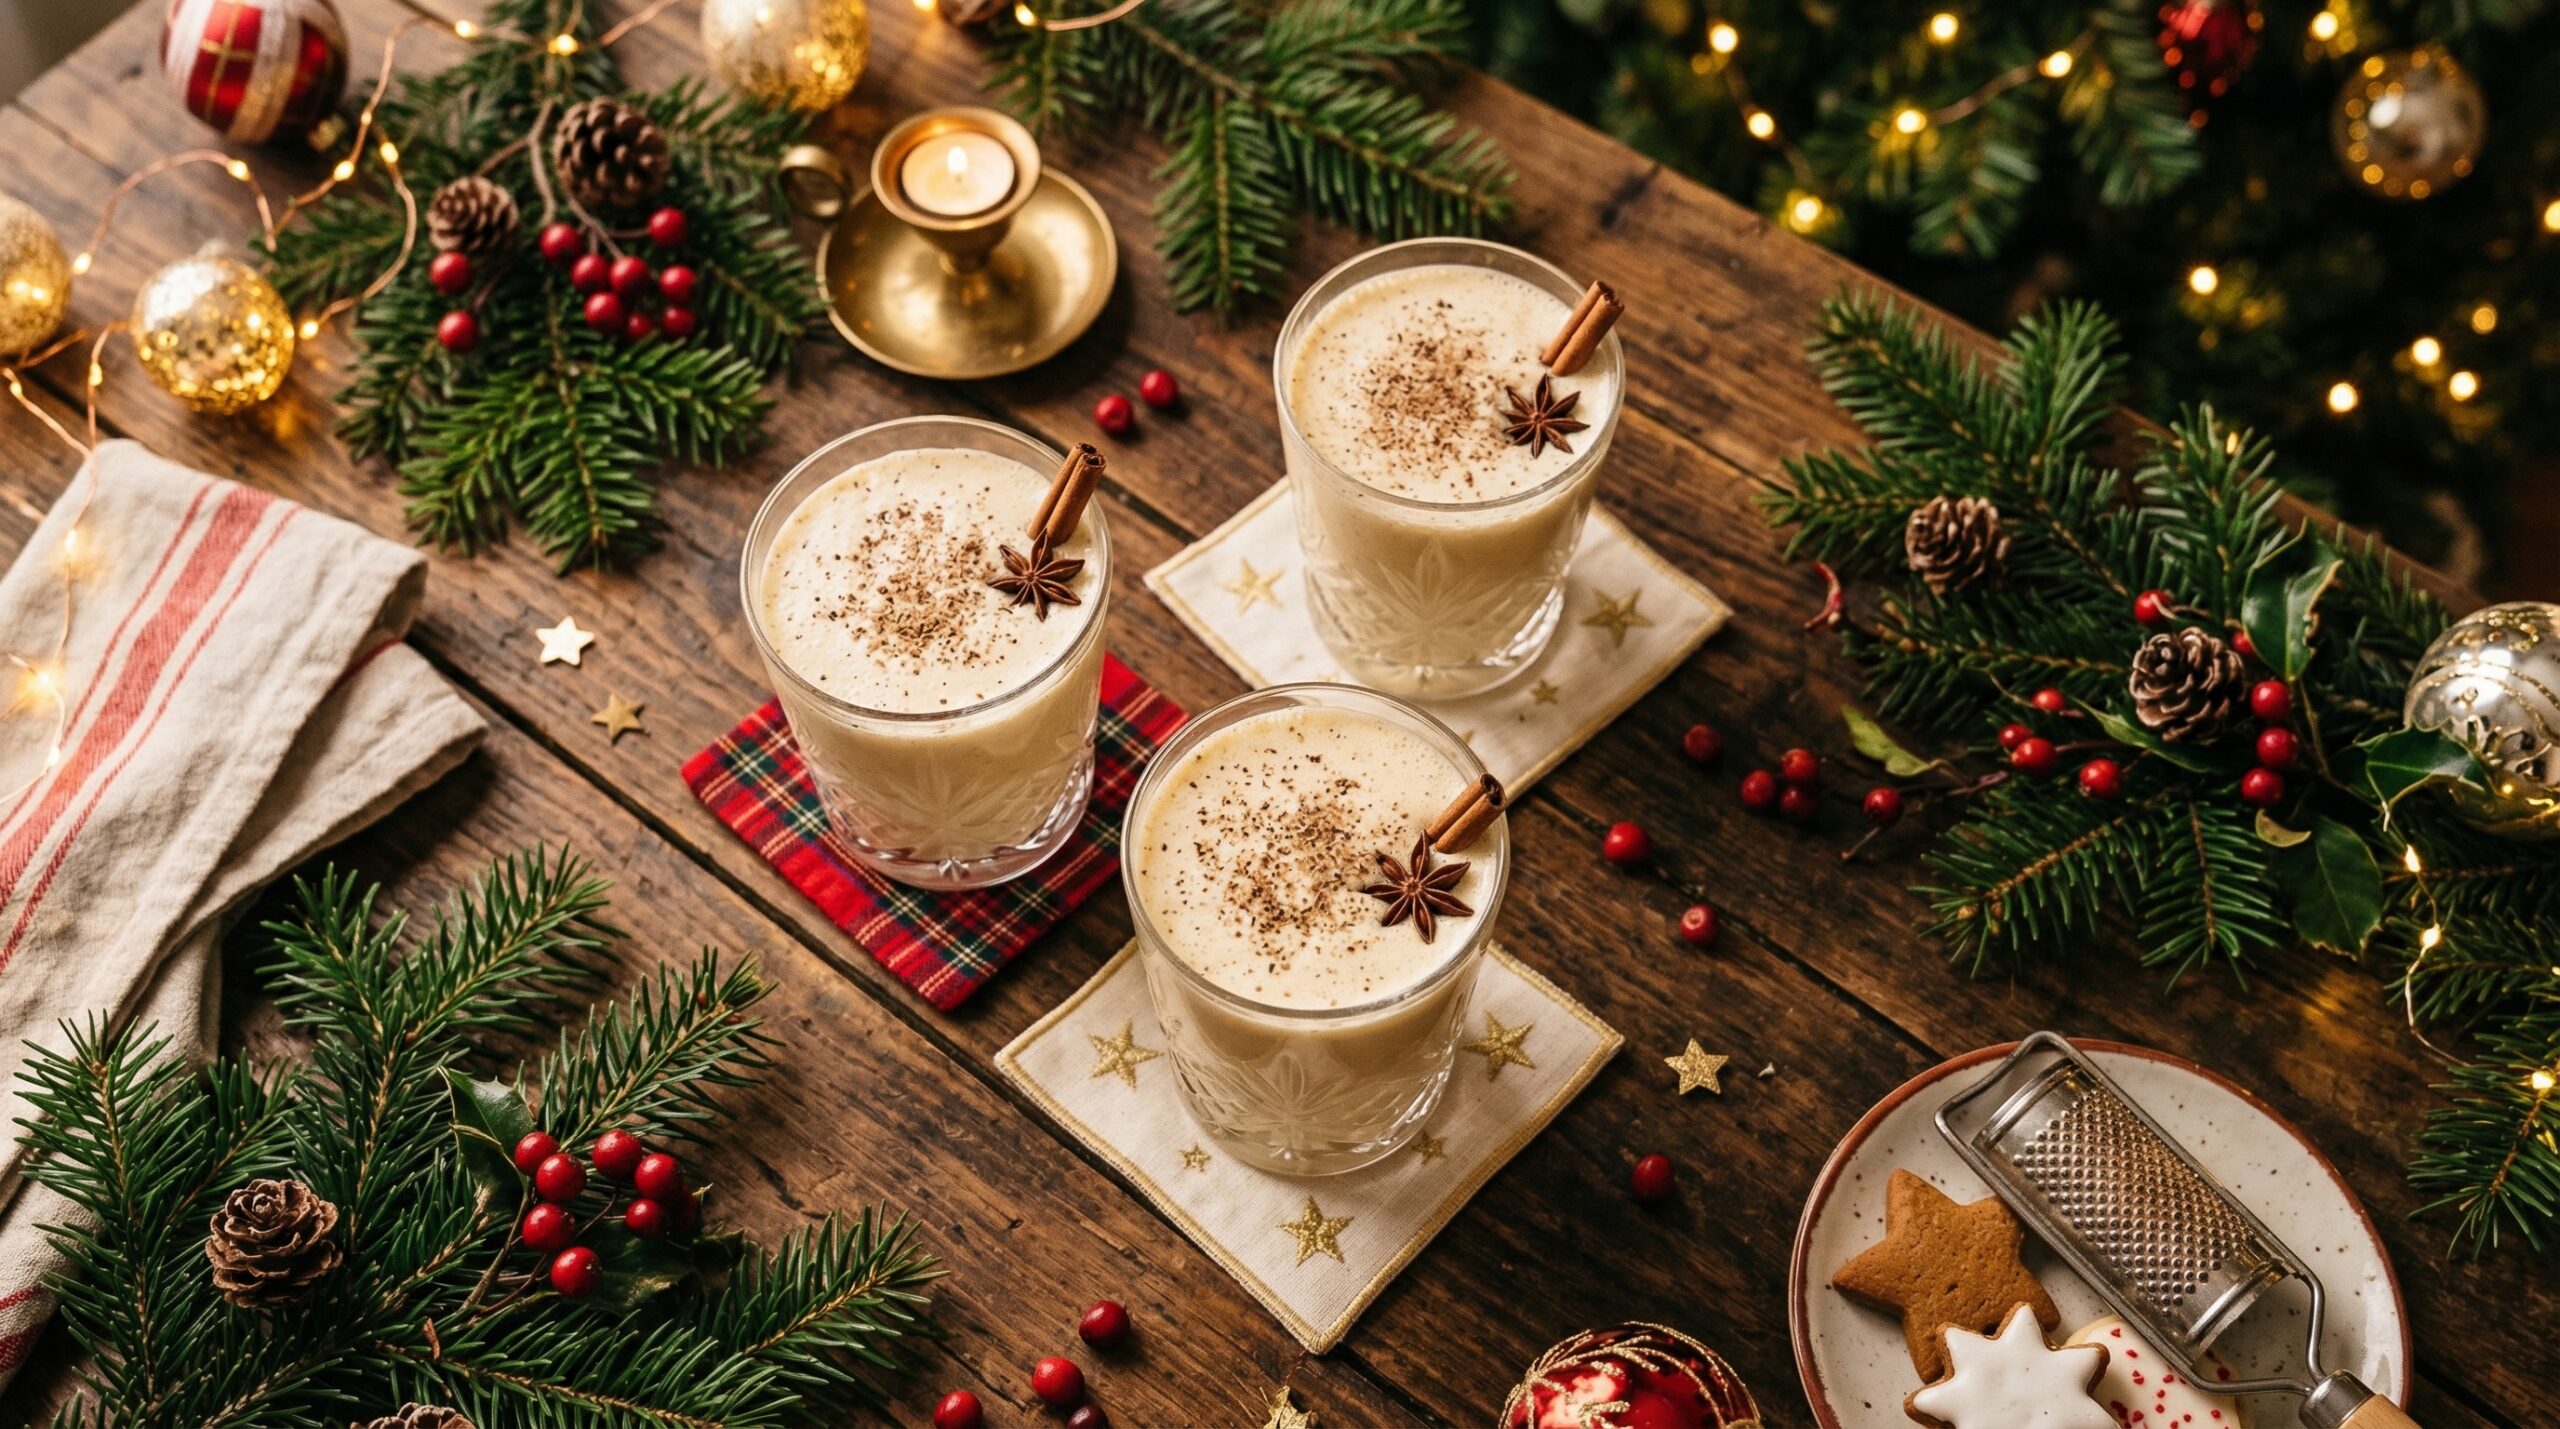
Pour the eggnog into glasses and garnish each with a generous grating of fresh nutmeg. The aroma of freshly grated nutmeg makes all the difference here; pre-ground nutmeg from a jar loses much of its character. Serve immediately while the egg whites are still adding that delightful airy texture.
The Virgin Version: No Alcohol, All Flavor
For the virgin version of this classic eggnog recipe, simply omit the bourbon or rum entirely. To compensate for the depth that alcohol provides, we add an extra 1/2 teaspoon of vanilla extract and increase the freshly grated nutmeg to 3/4 teaspoon. The result is a just as satisfying drink that families with children can enjoy together.
Our team has found that the virgin version is especially popular at family gatherings where there are kids running around. They feel included when they have their own special glass that looks just like the adult version. We sometimes add a small pinch of ground cinnamon to the top for visual appeal.
Understanding Raw Egg Safety
We would be doing you a disservice if we did not address the raw egg safety question directly. Homemade eggnog made with traditional methods contains raw egg yolks, which carry a small risk of salmonella contamination. This is a real concern, especially for pregnant women, young children, elderly individuals, or anyone with a compromised immune system.
Our recipe addresses this risk in two ways. First, the cooking process heats the eggs to 160 degrees Fahrenheit, which destroys any potential salmonella bacteria. Second, we use a fine mesh strainer to catch any cooked egg bits that might affect texture.
If you are still concerned about raw eggs, you can use pasteurized eggs from the grocery store. These have been heat-treated to eliminate salmonella while maintaining their functional properties. Some stores also sell egg white products that have already been pasteurized.
Another approach is to use the entire egg (yolks and whites) in the cooking stage. Some home cooks we know heat the milk mixture to a boil, slowly pour in beaten whole eggs while whisking, and continue cooking until everything reaches a safe temperature. This eliminates any raw egg concern entirely.
Storage and Shelf Life
One of the most common questions we hear is about how long homemade eggnog lasts. The answer depends on whether you have added alcohol to your batch.
Spiked eggnog with bourbon or rum will keep in the refrigerator for up to 2 weeks when stored in an airtight container. The alcohol acts as a natural preservative, much like it does in aged cocktails. Many enthusiasts actually prefer aging their eggnog for several weeks to develop more complex flavors. If you choose to age your eggnog, stir it once a day and keep it tightly sealed.
Virgin eggnog without alcohol should be consumed within 3 to 4 days for optimal freshness and safety. Without the preservative effect of alcohol, bacteria can grow more quickly. Always trust your senses: if the eggnog smells off or tastes sour, discard it immediately.
Signs that your eggnog has gone bad include a sour smell, curdled appearance, or any mold growing on the surface. When in doubt, throw it out. The risk of foodborne illness is not worth saving a few dollars worth of ingredients.
We do not recommend freezing eggnog, as the texture of the egg proteins and cream breaks down significantly upon thawing. The result is typically grainy and separated, which nobody wants in their holiday drink.
Troubleshooting Common Problems
Even with clear instructions, sometimes eggnog does not turn out as expected. Here are the most common issues our team has encountered and how to fix them.
Eggnog Is Too Thin
If your eggnog turned out thinner than expected, it likely did not cook long enough to develop a proper custard base. The ratio of eggs to dairy also matters significantly. Make sure you are using the full 6 egg yolks specified in our recipe. You can also try folding in an extra egg white or two to add body.
Eggnog Is Too Thick
Overly thick eggnog usually results from cooking at too high a temperature or for too long. Start with less chilling time and add milk or cream to thin it to your preferred consistency. Some people actually prefer their eggnog extremely thick, so adjust to your own taste.
Eggnog Tastes Too Eggy
Some people find homemade eggnog has an overpowering egg flavor that is not pleasant. This usually means the eggs were cooked at too high a temperature or not enough sugar and spices were used. Make sure your custard reaches exactly 160 degrees but no higher. The sugar and spices mask the eggy flavor, so do not be shy with the nutmeg and vanilla.
Egg Whites Will Not Whip
If your egg whites refuse to whip to soft peaks, check a few things. Any trace of fat in the bowl or beaters will prevent whipping. Make sure your bowl and beaters are completely clean and dry. Even a drop of yolk in your whites will ruin the whipping ability. Also ensure your eggs are fresh; older eggs whip better but must be very clean.
Variations to Try
Once you have mastered the base classic eggnog recipe, there are many directions you can take it. Our team has experimented with several variations over the years.
Maple eggnog replaces half the granulated sugar with pure maple syrup for a Vermont-style twist. This adds a beautiful amber color and distinct maple flavor that pairs especially well with bourbon.
For a chocolate version, add 2 tablespoons of Dutch-process cocoa powder to the milk mixture while heating. Some of us add a shot of chocolate liqueur as well for a truly indulgent holiday treat.
Coconut eggnog uses coconut milk in place of regular milk for a dairy-free alternative that still delivers rich, tropical flavor. This variation has become popular among our friends who avoid dairy.
Spiced eggnog adds cardamom, ginger, and allspice to the traditional nutmeg and cinnamon. This version reminds some of our team members of chai latte flavors and works wonderfully with rum.
The Tradition of Aging Eggnog
Enthusiasts have long practiced aging homemade eggnog for weeks or even months before serving. The practice dates back to colonial America when aged eggnog was considered a mark of hospitality and good taste. The alcohol preserves the drink while the flavors meld and deepen over time.
To age eggnog, prepare the spiked version and transfer it to a clean glass jar or ceramic crock. Seal tightly and store in the refrigerator. Open the container once a day to give it a gentle stir, then reseal. Most enthusiasts find that 2 to 3 weeks produces the best results, though some prefer waiting a full month.
The aging process transforms the texture as well as the flavor. The egg proteins settle and the mixture becomes smoother and more integrated. Some compare it to how a cocktail opens up after sitting for a few minutes, except the transformation is more dramatic over weeks.
FAQs
How long can homemade eggnog be stored in the refrigerator?
Homemade eggnog with alcohol will keep for up to 2 weeks in the refrigerator. Without alcohol, consume within 3-4 days for best freshness and food safety.
What is the very best alcohol to put in eggnog?
Bourbon is the most popular choice, but dark rum and brandy both work beautifully. Many enthusiasts prefer a blend of bourbon and rum for complex flavor. Use about 2-4 tablespoons per serving.
How to make eggnog safely with raw eggs?
Use pasteurized eggs from the store, or heat your eggs to 160°F during cooking to kill salmonella. The tempering and cooking process in this recipe safely heats the eggs to a safe temperature.
Is homemade eggnog worth it?
Absolutely. Homemade eggnog has a fresh, rich flavor that store-bought versions cannot match. You control the ingredients, sweetness level, and alcohol content. The process takes about 30 minutes plus chilling time.
What is the difference between spiked and virgin eggnog?
Spiked eggnog contains alcohol (typically bourbon, rum, or brandy) which adds flavor and acts as a preservative. Virgin eggnog omits the alcohol but adds extra vanilla and nutmeg to compensate for the missing depth.
Final Thoughts on This Classic Eggnog Recipe
Making homemade eggnog is one of those holiday traditions that connects us to generations past while allowing us to create something entirely our own. We encourage you to try both the spiked and virgin versions to discover which you prefer. Our team is split fairly evenly on the question, with some of us appreciating the warmth that bourbon adds and others loving the pure, unadulterated creaminess of the virgin version.
The process might seem intimidating at first, but we promise it becomes much easier after your first batch. The tempering technique alone is worth mastering, as it opens the door to countless other custards and sauces in your cooking repertoire.
Whether you serve this classic eggnog recipe at a holiday party, give it as a homemade gift in decorative bottles, or enjoy a quiet glass by the fire, we hope it brings some extra warmth to your season. From our kitchen to yours, happy holidays and enjoy every sip.