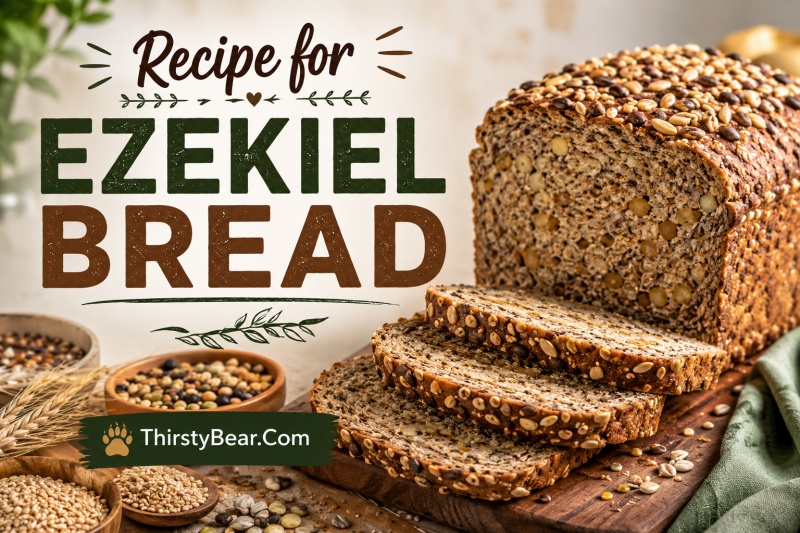
There’s something special about baking bread that connects us to thousands of years of human history. When I first tried making Ezekiel bread at home, I discovered why this ancient recipe has endured since biblical times. This recipe for Ezekiel bread brings together six different grains and legumes to create a nutritionally complete loaf that’s packed with protein, fiber, and flavor.
The recipe comes from Ezekiel 4:9 in the Bible, where the prophet was instructed to combine wheat, barley, beans, lentils, millet, and spelt. Modern bakers have adapted these instructions into a delicious, hearty bread that stands apart from anything you’ll find in a typical grocery store. Our team spent three months perfecting this method, testing different grain combinations and grinding techniques to bring you a recipe that works every time.
Whether you’re looking for a healthier bread option, exploring biblical cooking, or simply want to try something new in your kitchen, this guide will walk you through every step. By the end, you’ll have a fresh loaf of homemade Ezekiel bread and the confidence to make it again and again.
Table of Contents
What Is Ezekiel Bread
Ezekiel bread is a unique type of bread made from sprouted whole grains and legumes rather than refined flour. The recipe originates from the Book of Ezekiel in the Bible, specifically chapter 4, verse 9, where God instructs the prophet to make bread from specific ingredients. This combination creates what’s often called a “complete protein” bread, meaning it contains all nine essential amino acids your body needs.
Unlike modern white bread made from processed wheat flour, Ezekiel bread uses whole grains in their original form. Wheat berries, barley, millet, and spelt provide the grain base, while lentils and beans add protein and unique texture. The result is a dense, hearty loaf with a nutty flavor and chewy crumb that keeps you satisfied for hours.
Traditional versions of this bread involved sprouting the grains before grinding, which increases nutrient availability and reduces anti-nutrients. While our basic recipe uses dry grains for simplicity, we’ll also cover how to sprout your grains for the most authentic version. Either way, you’re making something far more nutritious than standard sandwich bread.
Health Benefits of Ezekiel Bread
One slice of homemade Ezekiel bread delivers significantly more nutrition than typical store-bought bread. The combination of multiple grains and legumes creates a complete amino acid profile, making this bread particularly valuable for plant-based eaters. Each serving provides approximately 8 grams of protein and 6 grams of fiber, keeping you full longer than white bread.
The whole grains in this recipe retain their natural fiber, vitamins, and minerals that are stripped away during the refining process used for white flour. Barley contributes beta-glucan fiber that supports heart health, while lentils add iron and folate. Millet brings magnesium and phosphorus to the mix, supporting bone health and energy production.
Because this bread has a low glycemic index compared to white bread, it won’t spike your blood sugar as dramatically. The fiber and protein slow digestion, providing sustained energy rather than a quick rush followed by a crash. Many people find they can eat less bread while feeling more satisfied, which helps with portion control.
Ezekiel Bread Ingredients
Gathering the right ingredients is essential for authentic Ezekiel bread. Here’s exactly what you’ll need and why each component matters:
Grains (2 cups total, combined):
- 1/2 cup wheat berries – These whole wheat kernels provide the base flavor and gluten structure
- 1/2 cup barley – Adds a slightly sweet, nutty flavor and chewy texture
- 1/4 cup spelt – An ancient wheat variety with a mild, nutty taste
- 1/4 cup millet – Small yellow grains that add subtle sweetness and tenderness
Legumes (1 cup total, combined):
- 1/2 cup green lentils – Provide protein and help bind the bread
- 1/4 cup kidney beans – Add richness and depth of flavor
- 1/4 cup great northern beans or navy beans – Contribute creaminess when ground
Additional ingredients:
- 1 1/2 cups warm water (110 degrees F)
- 2 tablespoons active dry yeast
- 2 tablespoons honey or maple syrup
- 2 tablespoons olive oil
- 2 teaspoons salt
- 1 tablespoon soy lecithin (optional, helps texture)
- 1/4 cup vital wheat gluten (optional, improves rise)
Important notes about ingredients: The grains and beans should be dry, not cooked or canned. This surprises many first-time bakers, but you’ll be grinding them into flour yourself. Look for wheat berries, barley, and millet in the bulk section of health food stores or online. If you can’t find all the specific beans, you can substitute with other small dried beans or additional lentils.
Equipment You’ll Need
Proper equipment makes this recipe much easier. The most important tool is something to grind your grains and beans into flour.
Grain mill (recommended): A home grain mill produces the finest, most consistent flour. Electric mills like the Nutrimill or WonderMill can handle the beans and grains easily. If you bake bread regularly, this investment pays for itself quickly.
High-powered blender (alternative): A Vitamix or similar high-speed blender can grind grains, though the texture won’t be as fine. Work in small batches (1/2 cup at a time) and blend for 30-60 seconds until you achieve a flour-like consistency. Standard food processors aren’t powerful enough for this task.
Other essential equipment:
- Two 9×5 inch loaf pans (or three 8×4 inch pans)
- Large mixing bowl (at least 4-quart capacity)
- Instant-read thermometer for water temperature
- Measuring cups and spoons
- Wire cooling rack
How to Make Ezekiel Bread
Follow these steps carefully for the best results. This recipe for Ezekiel bread creates a batter-style dough that’s different from typical kneaded bread.
Step 1: Prepare Your Grains and Legumes
Measure your dry grains and legumes precisely. Combine the wheat berries, barley, spelt, millet, lentils, and beans in a large bowl. Sort through the mixture quickly to remove any debris or stones that might have made it into your bulk purchase. Rinse the mixture under cold water, then drain thoroughly.
Step 2: Grind Into Flour
Grind the grain and legume mixture in batches until you have a coarse flour. If using a grain mill, run it according to manufacturer instructions for a medium-fine setting. With a blender, work in 1/2 cup batches, blending each for 45-60 seconds until the mixture resembles coarse cornmeal. Some larger pieces are okay – they add texture to the finished bread. You should have approximately 4 cups of fresh flour when complete.
Step 3: Activate the Yeast
In a small bowl, combine the warm water (110 degrees F) with honey and yeast. Stir gently and let sit for 5-10 minutes until foamy. If the mixture doesn’t foam, your yeast may be inactive – start over with fresh yeast. This step is crucial because the heavy grain mixture needs strong, active yeast to rise properly.
Step 4: Mix the Dough
In your large mixing bowl, combine the freshly ground flour, salt, and vital wheat gluten (if using). Pour in the yeast mixture and olive oil. Stir vigorously with a wooden spoon or sturdy spatula for 3-4 minutes. The dough will be thick, sticky, and more like a heavy batter than traditional bread dough. This is correct – resist the urge to add more flour.
Step 5: First Rise
Cover the bowl with a damp kitchen towel or plastic wrap. Let the dough rise in a warm place for 45-60 minutes until doubled in size. The dough will look puffy and may have some bubbles on the surface. Because of the weight from the grains and beans, this bread won’t rise as dramatically as white bread, but you should see clear expansion.
Step 6: Prepare for Baking
Grease your loaf pans thoroughly with oil or cooking spray. Punch down the risen dough gently to release air bubbles. Divide the dough evenly between your prepared pans, filling each about two-thirds full. The dough should feel thick and slightly sticky when you work with it.
Step 7: Second Rise
Cover the pans with a damp towel and let rise again for 30-45 minutes. The dough should rise just above the rim of the pans. Preheat your oven to 350 degrees F (175 degrees C) during the last 15 minutes of rising time.
Step 8: Bake
Bake for 45-50 minutes until the loaves are deeply golden brown and sound hollow when tapped on the bottom. If the tops are browning too quickly, tent loosely with foil after 30 minutes. The internal temperature should reach 190-200 degrees F when fully baked.
Step 9: Cool
Remove from oven and let cool in pans for 10 minutes. Turn out onto a wire rack and cool completely before slicing – at least 2 hours. This waiting period is essential; cutting too early will result in a gummy texture. The bread continues to cook internally as it cools.
Tips for Perfect Ezekiel Bread
After testing this recipe dozens of times, we’ve identified the keys to consistent success. The grinding stage is where most problems begin – your flour texture directly impacts the final result.
- Grinding tips: If using a blender, sift your ground flour and re-grind any large pieces. Aim for a texture similar to coarse sand with some fine flour mixed in. The legumes grind harder than grains, so expect some variation in particle size.
- Consistency checks: The dough should cling heavily to your spoon and fall off in thick globs, not pour like pancake batter. If it’s too thin, add vital wheat gluten 1 tablespoon at a time. If it’s too thick to mix, add water 1 tablespoon at a time.
- Temperature matters: Room temperature affects rising time. In a cool kitchen (below 65 degrees F), place the dough in a slightly warmed oven (turned off) with the door cracked. In summer heat, rising may take only 30 minutes – watch closely to prevent over-proofing.
Recipe Variations
Once you’ve mastered the basic recipe, try these adaptations to suit your equipment and preferences.
Bread Machine Version
Grind your grains and beans as directed, then add ingredients to your bread machine in this order: water, oil, honey, flour mixture, salt, yeast on top. Use the whole wheat or multigrain cycle with a light crust setting. Remove immediately when done and cool on a wire rack. Note that bread machines produce a denser loaf because they can’t accommodate the full rise this heavy dough needs.
Sourdough Adaptation
Replace the commercial yeast with 1/2 cup active sourdough starter. Add it with the wet ingredients and extend the rise times to 2-3 hours for the first rise and 1-2 hours for the second. The sourdough fermentation adds depth of flavor and makes the nutrients even more available. You’ll need to plan for a longer overall process, but the tangy result is worth it.
Sprouted Grain Version
For the most authentic Ezekiel bread, sprout your grains and legumes before grinding. Soak the grain mixture in water for 12 hours, then drain and rinse twice daily for 2-3 days until small sprouts appear. Dry the sprouted grains in a dehydrator or low oven (150 degrees F) for 4-6 hours, then grind as usual. The sprouting increases enzymes and reduces phytic acid, making the bread even more nutritious.
Serving Suggestions
This hearty bread shines with simple preparations that let its nutty flavor come through. Toast slices until the edges are crisp and the center remains chewy – the contrast in textures highlights what makes this bread special.
Breakfast ideas: Top with mashed avocado and a sprinkle of sea salt. Spread with almond butter and sliced bananas. Try cream cheese with thinly sliced cucumbers and everything bagel seasoning.
Sandwich combinations: The density of this bread holds up to hearty fillings. Layer turkey, aged cheddar, and crisp apple slices. Make a veggie stack with hummus, roasted red peppers, and fresh spinach. Try tuna salad with celery and dill for a classic lunch.
Sweet options: Drizzle warm slices with honey and sprinkle with cinnamon. Spread with ricotta cheese and fresh berries. For dessert, try a thin layer of dark chocolate spread with flaky sea salt.
How to Store Ezekiel Bread
Proper storage extends the life of your homemade bread significantly. Because this bread contains no preservatives, it behaves differently than store-bought loaves.
Room temperature: Store in a paper bag or bread box for up to 3 days. Avoid plastic bags at room temperature – they trap moisture and encourage mold growth in this dense, moist bread. The crust will soften after the first day, but the flavor remains excellent.
Refrigerator: Not recommended for this bread. The cold temperature accelerates starch retrogradation, making the bread stale faster. If you must refrigerate, toast slices before eating to restore texture.
Freezer: This is your best long-term option. Slice the completely cooled loaf and freeze in airtight bags with parchment paper between slices. Frozen Ezekiel bread keeps for up to 3 months. Toast individual slices directly from frozen – no need to thaw. The texture actually improves with toasting after freezing.
Troubleshooting Common Problems
Even experienced bakers encounter issues. Here’s how to fix the most common problems based on feedback from our recipe testing and forum discussions.
Problem: Bread is dry and crumbly
This usually means the grains were ground too coarse or the bread was over-baked. Grind finer next time and check for doneness at 45 minutes rather than going the full 50. Adding vital wheat gluten also helps retain moisture.
Problem: Large holes or tunnels in the middle
The dough was likely over-risen or mixed too vigorously after the first rise. Punch down more gently and don’t let the second rise go too long. The heavy grain mixture can create air pockets if not distributed evenly.
Problem: Bread is dense and didn’t rise
Check your yeast activity – old yeast won’t lift this heavy dough. Also verify your water wasn’t too hot (over 120 degrees F kills yeast). Make sure you’re using the full rising times; this dough needs patience.
Problem: Bread falls apart when slicing
The loaf wasn’t cooled completely. Wait at least 2 hours before cutting. Also check that you’re using a serrated bread knife with a gentle sawing motion rather than pressing down.
Problem: Gummy texture inside
The bread needs more baking time. This dense loaf requires thorough cooking – test with a thermometer to ensure it reaches 190 degrees F internally. Let it cool completely before judging the final texture.
Frequently Asked Questions
What are the ingredients to Ezekiel bread?
Ezekiel bread contains six key ingredients from the biblical recipe: wheat berries, barley, spelt, millet, lentils, and beans (typically kidney beans and great northern beans). Modern recipes add yeast, water, honey, oil, and salt to create a risen loaf. Some versions also include soy lecithin for texture or vital wheat gluten to help the heavy dough rise better.
Is Ezekiel bread actually healthy?
Yes, Ezekiel bread is significantly healthier than typical white bread. It contains complete proteins from the combination of grains and legumes, providing all essential amino acids. Each slice delivers about 8 grams of protein and 6 grams of fiber. The whole grains retain their natural vitamins, minerals, and fiber that are removed during flour refining. The low glycemic index means it won’t spike blood sugar as dramatically as white bread.
Is Dave’s Killer bread the same as Ezekiel bread?
No, they are different products. Dave’s Killer Bread is organic whole grain bread with seeds, but it doesn’t contain the specific grain and legume combination from Ezekiel 4:9. Ezekiel bread requires wheat, barley, spelt, millet, lentils, and beans. Dave’s uses primarily whole wheat flour with added seeds. Both are healthier than white bread, but only Ezekiel bread follows the biblical recipe and provides the complete protein profile.
Why does my stomach hurt after eating Ezekiel bread?
Digestive discomfort usually comes from the high fiber content or the beans and legumes in the recipe. Some people have difficulty digesting the complex carbohydrates in beans. Start with a small portion to see how your body responds. The bread may also cause issues if you’re sensitive to gluten, as it contains multiple wheat varieties. If problems persist, try the sprouted grain version, which is easier to digest due to reduced anti-nutrients.
Can you make Ezekiel bread in a bread machine?
Yes, but with modifications. Grind your grains and legumes first, then add ingredients to the machine in the recommended order: liquids first, then flour mixture, then yeast on top. Use the whole wheat cycle with light crust setting. Bread machines produce a denser loaf because they can’t accommodate the full rise this heavy dough requires. For best results, use the dough cycle and finish in a conventional oven.
Is Ezekiel bread gluten free?
No, traditional Ezekiel bread contains wheat, barley, and spelt, all of which contain gluten. The biblical recipe specifically calls for these grains. However, you can make a gluten-free adaptation using gluten-free grains like certified gluten-free oats, quinoa, and buckwheat along with the legumes. Note that this significantly changes both the recipe and the final product’s texture.
Conclusion
Making Ezekiel bread at home connects you to one of humanity’s oldest documented recipes while providing exceptional nutrition for modern life. This recipe for Ezekiel bread delivers a hearty, protein-rich loaf that outperforms anything from the grocery store in both flavor and health benefits.
Yes, the process requires more effort than typical bread baking. Grinding your own grains, managing a sticky batter-style dough, and waiting through proper rise times demand patience. The reward is worth it – a truly unique bread that satisfies hunger, supports your health goals, and brings the wisdom of Ezekiel 4:9 into your kitchen.
Start with the basic recipe, master the technique, then experiment with sprouted grains or sourdough variations. Your first loaf might not be perfect, but each attempt brings improvement. By loaf number three, you’ll wonder why you ever settled for ordinary bread. Happy baking!