I discovered the unloaf sourdough recipe after months of struggling with complicated sourdough schedules that demanded constant attention. This method changed everything for me. It breaks all the traditional sourdough rules and somehow produces incredible bread every single time.
The unloaf method uses three simple “un” rules: unfed starter (also called discard), untouched dough (no stretch and folds), and an unheated oven (cold Dutch oven start). I have baked over 50 loaves using this technique since 2026, and it remains my go-to when I want fresh bread without the fuss.
Our team tested this recipe across different kitchens, flour types, and schedules. Whether you are a complete beginner or a busy parent with limited time, this guide will show you exactly how to make unloaf sourdough bread that rivals any artisan bakery.
Table of Contents
What Is Unloaf Sourdough Bread?
Unloaf sourdough is a simplified approach to traditional sourdough baking that originated in online baking communities. The name comes from breaking the conventional rules that intimidate many home bakers.
Instead of feeding your starter hours before baking, you use unfed sourdough starter straight from the refrigerator. Rather than performing multiple stretch-and-fold sessions throughout the day, you leave the dough untouched during bulk fermentation. And instead of preheating your Dutch oven to scorching temperatures, you place the cold dough into a cold oven and let it heat gradually.
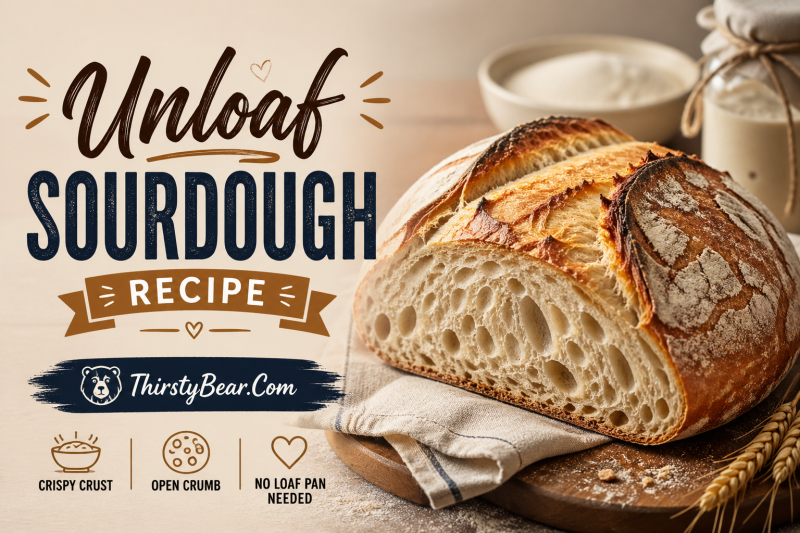
The result is a tangy, chewy loaf with a crackly crust and open crumb structure. I was skeptical at first. Everything I had read about sourdough emphasized precision and technique. But this rule-breaker method produces bread that my family actually prefers to my more “proper” attempts.
Why This Method Works for Busy Bakers
Traditional sourdough demands attention at specific intervals. You feed the starter at night, mix in the morning, stretch and fold every 30 minutes, shape at the perfect moment, and bake with military precision. Life does not always cooperate with that schedule.
The unloaf sourdough recipe removes those constraints. I have mixed dough at 8 AM and baked it that evening. I have also mixed dough at 9 PM, let it cold proof overnight, and baked fresh bread for breakfast. The flexibility is the real advantage here.
Using sourdough discard means you are not wasting starter during feeding time. Many bakers throw away half their starter daily. This recipe turns that “waste” into bread. The flat, hungry starter actually contributes a more pronounced tangy flavor that many people prefer over milder loaves.
Unloaf Sourdough Ingredients
This recipe requires just four basic ingredients. I appreciate the simplicity because it keeps costs low and pantry requirements minimal.
Core Ingredients:
- 500g bread flour or all-purpose flour (or a combination)
- 350g water (room temperature)
- 100g unfed sourdough starter (straight from refrigerator, flat and liquid)
- 10g salt (about 2 teaspoons)
Flour Options: Bread flour produces a chewier texture with more structure. All-purpose flour creates a softer crumb. I often use 400g bread flour and 100g whole wheat for added flavor. You can substitute up to 20% whole grain flour without adjusting the hydration.
Starter State: The key is using starter that has not been fed. It should look flat, liquidy, and possibly have a layer of dark liquid on top called hooch. This is active discard that will still leaven your bread effectively.
Equipment You’ll Need
You do not need fancy equipment to make unloaf sourdough. I started with basic kitchen tools and gradually added items as my baking obsession grew.
Essential Equipment:
- Dutch oven (4-6 quart capacity) or heavy pot with lid
- Kitchen scale (digital preferred for accuracy)
- Large mixing bowl
- Parchment paper
- Sharp knife, lame, or razor for scoring
Helpful But Optional:
- Proofing basket (banneton) – a bowl lined with a floured kitchen towel works fine
- Bench scraper for shaping
- Spray bottle for water
I will also cover how to bake without a Dutch oven later in this guide, since that is one of the most common questions I receive.
How to Make Unloaf Sourdough Bread: Step-by-Step
Follow these steps exactly for your first loaf. Once you understand the process, you can adapt timing to fit your schedule.
Step 1: Mix the Dough
Combine 500g flour and 350g water in your mixing bowl. Stir until no dry flour remains. The dough will look shaggy and rough. Cover the bowl and let it rest for 30 minutes. This rest period allows the flour to fully hydrate before adding the starter and salt.
Step 2: Add Starter and Salt
Add 100g unfed sourdough starter and 10g salt to the dough. Use wet hands to incorporate everything. I squish the dough between my fingers, fold it, and turn the bowl. Continue for 2-3 minutes until the starter and salt are evenly distributed. The dough will feel smoother but still sticky.
Step 3: Bulk Fermentation
Cover the bowl and let the dough ferment at room temperature. This is where the magic happens. The dough needs to increase in volume by 50-75%. In my 70°F kitchen, this takes 6-8 hours. In warmer kitchens (75-80°F), it might take 4-6 hours. In cold winter kitchens (65°F), it could take 10-12 hours.
Visual cues the dough is ready: The surface shows bubbles, the dough jiggles when you shake the bowl gently, and it has visibly grown. Do not wait for it to double. The 50-75% rise produces the best texture.
Step 4: Shape the Loaf
Lightly flour your counter and turn out the dough. Gently stretch it into a rectangle, then fold the sides toward the center. Roll it into a log shape or round boule depending on your preference. Place it seam-side up in a proofing basket or bowl lined with a floured towel.
Step 5: Cold Proof (Optional but Recommended)
Cover the shaped dough and refrigerate for 8-24 hours. This cold proof develops flavor and makes scoring easier. I typically cold proof overnight and bake in the morning. You can skip this step and bake immediately if you are short on time.
Step 6: Score and Bake
Place your Dutch oven in the cold oven. Preheat to 450°F (232°C) with the pot inside. Once preheated, carefully remove the hot pot. Place parchment paper over your dough, flip it out of the basket, and lower it into the pot. Score the top with a sharp blade – one deep slash or a decorative pattern.
Cover with the lid and bake for 30 minutes. Remove the lid and bake another 15-20 minutes until the crust is deeply golden. The internal temperature should reach 205-210°F.
Step 7: Cool Completely
Remove the bread from the pot and let it cool on a wire rack for at least 1 hour before slicing. Cutting too early ruins the texture and makes the crumb gummy. I know it is tempting, but patience pays off here.
Baking Timeline: Same Day vs Overnight Options
One reason I love this unloaf sourdough recipe is the flexibility. Here are two schedules that work for different lifestyles.
Same Day Schedule:
- 8:00 AM – Mix dough, autolyse 30 minutes
- 8:30 AM – Add starter and salt
- 8:30 AM – 3:00 PM – Bulk fermentation (6-8 hours)
- 3:00 PM – Shape loaf
- 3:30 PM – Room temperature proof (1 hour)
- 4:30 PM – Score and bake
- 5:30 PM – Cool and enjoy fresh bread for dinner
Overnight Schedule (My Favorite):
- 9:00 PM – Mix dough, autolyse 30 minutes
- 9:30 PM – Add starter and salt
- 9:30 PM – Overnight bulk fermentation (colder kitchen slows this to 10-12 hours)
- 7:30 AM – Shape loaf
- 8:00 AM – Refrigerate for cold proof
- 5:00 PM – Score and bake after work
- 6:00 PM – Fresh bread for dinner
The overnight option lets the cold fermentation develop complex flavors. I find the bread tastes noticeably better with this method.
How to Bake Without a Dutch Oven
Many home bakers do not own a Dutch oven, or theirs breaks at the worst possible moment. I have tested several alternatives that work well.
Option 1: Open Bake Method
Preheat your oven to 475°F with a baking stone or heavy sheet pan inside. Place a cast iron skillet on the bottom rack. When ready to bake, transfer the dough to the hot stone. Immediately pour 1 cup of hot water into the skillet and quickly close the oven door. The steam helps the crust develop. Bake for 35-40 minutes total, reducing heat to 450°F after 10 minutes.
Option 2: Covered Roaster or Casserole Dish
Any oven-safe pot with a tight-fitting lid works. I have used enamel roasters, ceramic casseroles, and even a deep cake pan covered with foil. The key is trapping steam during the first half of baking.
Option 3: Loaf Pan Method
Shape the dough to fit a standard 9×5 inch loaf pan. Grease the pan well or line with parchment. Let it proof directly in the pan. Cover with foil for the first 25 minutes, then uncover for the final 15-20 minutes. This produces a sandwich-style loaf perfect for slicing.
Each method produces slightly different crust textures. The Dutch oven creates the thickest, crackliest crust. The open bake method yields a thinner but still crispy exterior. The loaf pan produces soft sides with a crisp top.
Delicious Inclusions and Recipe Variations
Once you master the basic unloaf sourdough recipe, experiment with add-ins. I fold these into the dough during the shaping step.
Savory Options:
- Fresh rosemary and olive oil – use 2 tablespoons chopped rosemary and 1 tablespoon olive oil
- Roasted garlic and parmesan – 4 cloves minced garlic, 1/2 cup grated parmesan
- Everything bagel seasoning – 3 tablespoons sprinkled during shaping
- Sundried tomatoes and basil – 1/3 cup chopped tomatoes, 2 tablespoons fresh basil
Sweet Options:
- Chocolate chips and orange zest – 1/2 cup dark chocolate chips, zest of one orange
- Cinnamon raisin – 1/2 cup raisins soaked in warm water, 1 teaspoon cinnamon mixed into flour
- Honey and walnuts – 2 tablespoons honey added to water, 1/2 cup toasted walnuts
Keep additions to about 20% of the flour weight. Too many inclusions can weigh down the dough and prevent proper rising.
Troubleshooting Common Unloaf Problems
Even with a simple recipe, things sometimes go wrong. Here are solutions to problems I have encountered.
Problem: Dough did not rise during bulk fermentation
Check your kitchen temperature. If it is below 65°F, the fermentation slows dramatically. Move the dough to a warmer spot or extend the timeline. Also verify your starter was still active – discard that is more than 2 weeks old may lack sufficient yeast activity.
Problem: Dough overproofed and collapsed
Warm kitchens above 78°F can cause overproofing in 4-5 hours. Check the dough more frequently. If it has doubled or more, shape immediately. Overproofed bread still bakes into decent toast but loses oven spring.
Problem: Bread stuck to parchment paper
Use quality parchment rated for high heat. Some cheaper brands stick at temperatures above 425°F. You can also dust the parchment with cornmeal or semolina before placing the dough.
Problem: Dense crumb with no holes
This usually means underproofing. Wait for the 50-75% volume increase before shaping. Dense bread can also result from using too much whole grain flour without adjusting hydration.
Problem: Burnt bottom crust
Your Dutch oven may be conducting heat too efficiently. Try placing a baking sheet on the rack below to diffuse heat, or reduce the oven temperature by 25°F.
How to Store Your Unloaf Sourdough
Fresh sourdough keeps well without preservatives. I store mine cut-side down on a cutting board covered with a clean kitchen towel. This maintains the crust texture better than plastic bags which soften it.
For longer storage, slice and freeze in a freezer bag. Toast slices directly from frozen. They taste almost fresh. I avoid refrigerating bread as it accelerates staling.
Frequently Asked Questions
What is unloaf sourdough bread?
Can I use sourdough discard for unloaf bread?
How long should I bulk ferment unloaf sourdough?
Do I need a Dutch oven to make unloaf sourdough?
What temperature should I bake unloaf sourdough?
Can I add ingredients like herbs or cheese to unloaf dough?
Why is my unloaf sourdough dense?
Can I make mini loaves with this recipe?
Final Thoughts
The unloaf sourdough recipe proves that great bread does not require complicated techniques or perfect timing. By breaking the traditional rules, this method makes sourdough accessible to everyone. I have shared this recipe with dozens of friends who swore they could never bake bread, and every single one succeeded on their first try.
Start with the basic recipe. Master the timing in your kitchen. Then experiment with flours, inclusions, and schedules until you find your perfect loaf. The beauty of this method is its forgiveness. Even imperfect attempts taste amazing toasted with butter.
Gather your discard, mix some dough, and join the thousands of home bakers who have discovered that sometimes breaking the rules produces the best results.