
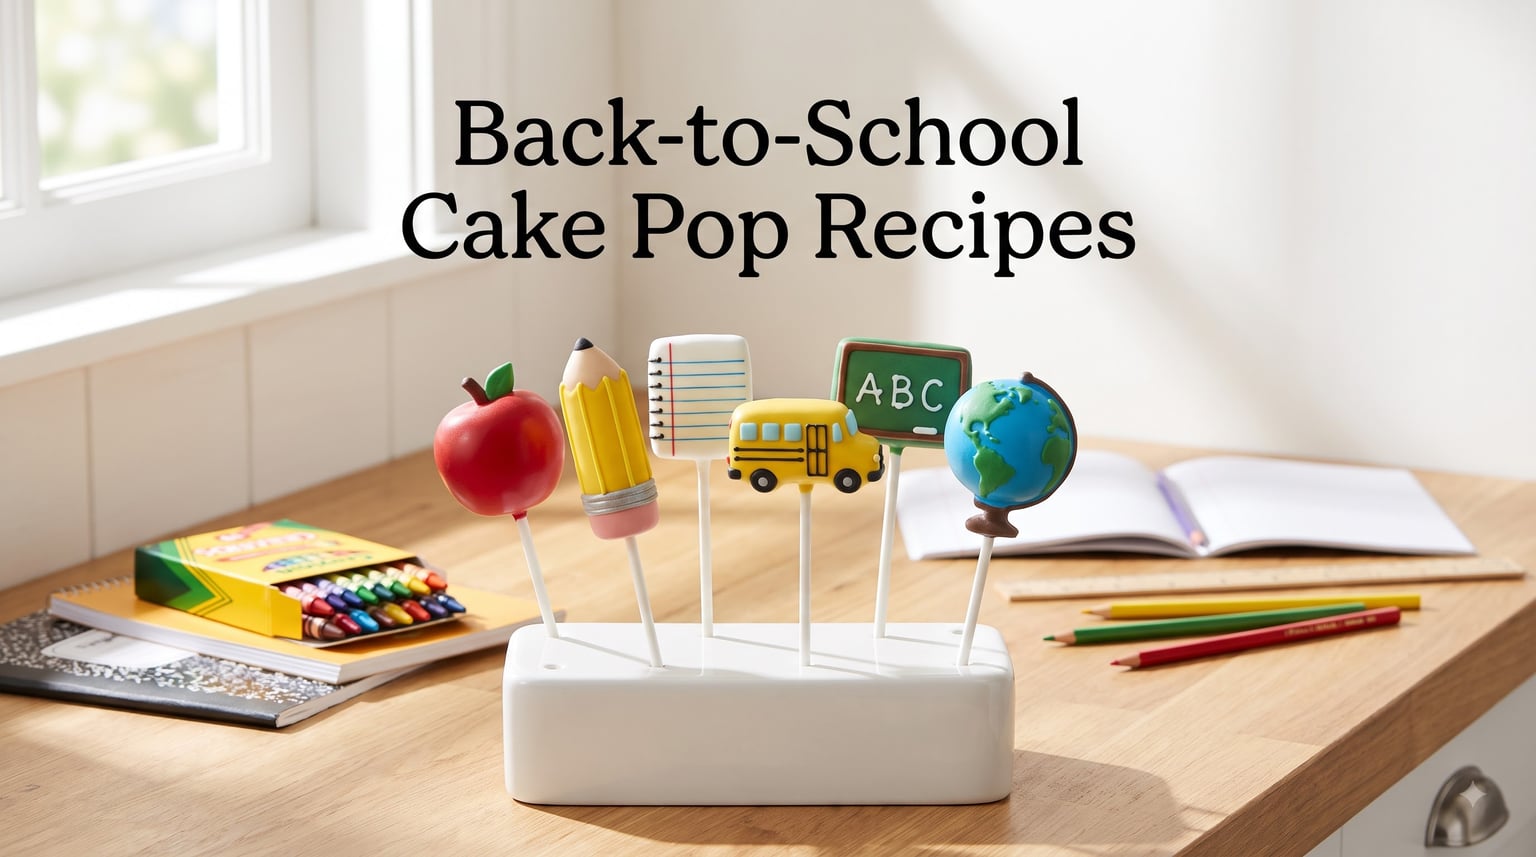
The first week of school rolls around every August, and my kitchen counter always turns into a small cake pop factory. My twins beg for something special in their lunchboxes on day one, and teachers love a homemade treat that isn’t another store-bought cookie platter. After three years of testing, I have a collection of back to school cake pop recipes that are forgiving for beginners, fun to decorate with kids, and shaped like the cutest apples, pencils, notebooks, and yellow school buses you’ve ever seen.
If you’re hunting for an easy cake pop recipe that actually works on the first try, this guide walks you through everything: the perfect cake-to-frosting ratio, foolproof dipping, six themed designs, and storage tricks I picked up the hard way. I’ve also pulled in tips from r/Baking and Bakerella fans to make sure your pops stay on the stick and your chocolate doesn’t crack.
These creative cookie recipes pair perfectly with cake pops if you want a full themed dessert table for a classroom party or teacher appreciation week.
Table of Contents
What You’ll Need: Ingredients and Tools
Gathering everything before you start saves about 20 minutes of mid-recipe scrambling. I learned this the messy way when green candy melts dripped onto my phone during a 9 PM cake pop crisis.
Core Ingredients (Makes 24 Cake Pops)
One 9×13 inch baked cake (from-scratch or box mix, cooled completely). Half a cup of frosting (cream cheese, buttercream, or store-bought). One 12-ounce bag of candy melts in your chosen color. Two tablespoons of shortening or coconut oil for thinning the coating. Two teaspoons of sprinkles or nonpareils per color.
Equipment Checklist
Lollipop sticks (4-inch or 6-inch work best). A styrofoam block or cardboard box for drying. Two tall, narrow cups for dipping. A cookie scoop (1.5 tablespoon size). A silicone mat or parchment paper. A piping bag for drizzling details. Microwave-safe bowls.
Quick confession: I used chopsticks for my first batch of dipping. They worked, but proper lollipop sticks give cleaner results and stay put way better. You can find cake pop sticks and candy melts at any craft store, or grab a bundle online with the styrofoam block included.
How to Make the Basic Cake Pop Base
This base recipe is the foundation for every back to school cake pop design below. Once you nail the ratio and rolling technique, the decorating is where the real fun starts.
Step 1: Bake and Cool the Cake Completely
Bake your cake a day ahead if you can. Warm cake crumbles into mush when mixed with frosting and the balls won’t hold their shape. I bake mine the night before, wrap it in plastic once cool, and leave it on the counter overnight.
Box mix fans, you have company. Most r/Baking bakers prefer box cake mix for cake pops because the texture is more uniform, and the pops hold together better. From-scratch works beautifully too; just make sure it’s a tight-crumb cake (avoid angel food or chiffon styles).
Step 2: Crumble and Mix with Frosting
Crumble the cooled cake into a large bowl using your hands or a fork. You’re aiming for fine, sand-like crumbs with no large chunks. Stir in the frosting gradually; 3 tablespoons at a time.
The magic ratio is roughly 3 parts cake to 1 part frosting by volume. Too much frosting makes greasy, heavy cake pops that slide off sticks. Too little and they crack apart when dipped. The dough should hold together when pressed firmly, like damp sand that keeps its shape.
Step 3: Roll and Chill
Use a 1.5 tablespoon cookie scoop to portion uniform balls. Roll each one between your palms until smooth. Place on a parchment-lined tray.
Chill the rolled balls for at least 1 hour in the fridge, or 20 minutes in the freezer. Cold cake balls dip much more cleanly because they don’t melt the candy coating on contact. This is the single biggest trick that separates beginner cake pops from bakery-quality ones.
Step 4: Prep the Sticks
Dip each lollipop stick about half an inch into melted candy coating (or melted chocolate). Insert into a cake ball, going about halfway through. This little chocolate “glue” is what keeps your pops on the stick during the full dip. Skip it and you’ll watch your pop slide right off into the bowl of coating.
Return the stick-inserted balls to the fridge for another 10 minutes while you melt your coating candy.
Back-to-School Cake Pop Designs You Can Make
This is the part my kids lose their minds over. Below are six back to school cake pop designs that look impressive but use the same base recipe and basic decorating skills.
Apple Cake Pops
Shape the cake mixture into slightly flattened spheres (apples aren’t perfectly round). Dip in red candy melts thinned with 1 teaspoon of coconut oil per cup of melts. While the coating is still wet, press a tiny pretzel stick into the top center for the stem. Add a small green leaf sprinkle next to the stem for that finishing touch.
For extra realism, dust a tiny bit of brown edible powder on the stem end. I started doing this after my daughter complained that “apples don’t have pink dots on them.” Kids notice everything.
Pencil Cake Pops
Roll the cake mixture into short cylinders about 2 inches long. Dip one end (about a quarter inch) in pink candy melts for the eraser. Once dry, dip the rest of the pop in yellow candy melts. While the yellow is still wet, lay a thin strip of black candy clay or piped black icing down the middle for the pencil line.
For the pencil tip, dip one end in tan or brown candy melts. Use a toothpick to draw the dark point shape with melted chocolate. It’s like edible arts and crafts, and my kids decorate an entire batch themselves every year.
Notebook Cake Pops
Press the cake mixture into a small rectangle (about 1.5 x 2 inches) using a silicone mold or by hand. Dip in white candy melts. Once set, use a black edible marker or thin black icing to draw three horizontal lines on the front. Add a red strip down the left side for the notebook spine. A tiny yellow sprinkle in the corner makes the perfect apple logo.
School Bus Cake Pops
Shape the cake mixture into rounded rectangles. Dip in yellow candy melts. Use black icing to pipe four small circles along the bottom (wheels) and a rectangle for windows. Add tiny dots of black icing for passengers in the windows. A small white square near the front completes the headlight look.
My husband dubbed these “the ones that took all night” because the detail work is genuinely fiddly. Worth it though. They steal the show at bake sales.
Chalkboard Cake Pops
Roll into balls and dip in dark green candy melts. Once dry, use a white edible marker to write math equations, “ABC,” or tiny chalk doodles. Dust a corner with edible white powder for that authentic chalk smudge look. Teachers lose their minds over these.
Globe Cake Pops
Dip in blue candy melts. While still wet, add green sprinkles in continent shapes (don’t overthink the geography; wobbly continents look charmingly handmade). A thin drizzle of white icing creates cloud accents.
Pair themed cake pops with party planning supplies for an outdoor back-to-school celebration and you’ve got yourself a full event.
Decorating Techniques for Picture-Perfect Cake Pops
The difference between “homemade looking” and “I bought these at a fancy bakery” comes down to three decorating techniques.
Smooth Dipping Method
Melt candy melts in 30-second microwave bursts, stirring between each. They should pour like warm honey, not thick frosting. If clumpy, add 1 teaspoon of coconut oil or paramount crystals per cup of melts until silky.
Hold the dipped cake pop over the cup and tap your wrist gently twice. Don’t shake it. The first tap lets excess coating drip off; the second tap rotates the pop and smooths the surface. Then slowly lift and let any remaining drips fall.
Two-Color Drizzle
For that bakery-window look, melt a contrasting color and spoon it into a small piping bag. Snip a tiny hole. Hold the bag 4 inches above the dried cake pop and squeeze while moving in a back-and-forth motion. Test on parchment paper first to get the flow right.
Sanding Sugar and Sprinkles
Apply sprinkles immediately after dipping, while the coating is still wet. If you wait, they’ll slide right off. For sanding sugar, roll the wet pop in a bowl of sugar for full, even coverage. Quality matters here; cheap sprinkles bleed colors into white coating within a few hours.
Flavor Variations Kids Actually Love
You can make these cake pops with almost any cake flavor, but some pair better with the school-day vibe than others.
Classic Flavors
Vanilla with vanilla buttercream is the crowd-pleaser. Chocolate cake with chocolate frosting matches every chocolate coating color. Funfetti cake with cream cheese frosting gives a birthday-party feel that works for first-day-of-school excitement.
Surprising Flavors That Work
Red velvet with cream cheese frosting is a back-to-school classic because it pairs beautifully with red apple-shaped pops. Lemon cake with lemon glaze cuts the sweetness and works perfectly for notebook designs. Cookies and cream (chocolate cake studded with crushed Oreos) has been my most-requested teacher gift flavor two years running.
Box Cake vs. From-Scratch Mix
Honestly, both work. Box cake mix is more forgiving, gives consistent crumbs, and saves about 45 minutes. From-scratch gives more flavor control and avoids any preservatives if that matters for your school.
For school events where dozens of kids will eat them, box mix is the practical choice. For a smaller batch of teacher appreciation gifts, from-scratch tastes noticeably better and shows extra care.
Troubleshooting Common Cake Pop Problems
I’ve made every mistake in this section at least twice. Save yourself the frustration by knowing what to look for before it happens.
Why Are My Cake Pops Falling Off the Sticks?
Three usual suspects. First, the cake-to-frosting ratio is off (too much frosting makes a slippery surface). Second, you skipped the chocolate “glue” step when inserting the stick. Third, your coating was too hot and partially melted the cake ball, breaking the seal.
Fix: re-chill the cake balls for 15 minutes after stick insertion, and let your melted candy cool for 60 seconds before dipping.
Why Is My Chocolate Coating Cracking?
Cold cake balls going into warm coating is the classic culprit. The temperature shock creates micro-fractures as the coating sets unevenly. Let your chilled cake balls sit at room temperature for 5 minutes before dipping.
Humidity also matters. On a rainy day, candy melts can seize or develop a grainy texture. Adding a teaspoon of coconut oil per cup helps stabilize them.
Why Are My Cake Pops Greasy or Heavy?
Too much frosting in the mixture. The dough should hold together when pressed, not feel wet or sticky. If it does, add more cake crumbs (an extra baked cupcake crumbled in works perfectly) until the texture firms up.
Why Is My Coating Lumpy or Thick?
Either the candy melts got too hot and seized, or they weren’t stirred enough between microwave bursts. Add 1 teaspoon of coconut oil at a time and stir gently until smooth. If they’re truly seized (hardened into clumps), you’ll need to start over with fresh melts.
How Do I Get Smooth Cake Pop Surfaces?
Roll the cake balls extra-smooth before dipping. Any bump in the cake ball shows through the coating like a mountain under snow. Spend 10 extra seconds rolling each ball and your finished pops will look professional.
Storage and Make-Ahead Tips for School Events
Cake pops were practically invented for make-ahead baking. Here’s exactly how to plan around your school’s calendar.
Counter Storage
Dipped, decorated cake pops stay fresh at room temperature for up to 2 days in a cool, dry spot. Keep them away from direct sunlight, which melts the coating and fades sprinkles. Airtight containers or cake pop boxes with individual holes work best.
Refrigerator Storage
Up to 1 week in the fridge. Let them come to room temperature before serving (about 20 minutes) so the coating isn’t tacky and the cake inside isn’t cold and dense. Store in a single layer in an airtight container, separated by parchment paper.
Freezer Storage
Up to 6 weeks if properly wrapped. Place fully dried cake pops in a freezer bag, squeeze out the air, and seal. Thaw in the fridge overnight, then bring to room temperature before unwrapping. Condensation can form on cold coating, which ruins the surface.
Make-Ahead Timeline for a Class Party
Two weeks out: bake the cake and freeze it. One week out: roll the cake balls and freeze them on a tray. Three days out: dip and decorate. One day out: package and transport.
Transport Tips
Use a cake pop carrier (those tall boxes with stick holes) or improvise with a tall plastic container and a piece of foam. Place a kitchen towel in the bottom to absorb any condensation. Keep the container out of the car trunk on hot days; back seat with AC is safer.
Cost Per Cake Pop
Working it out from my last batch: ingredients for 24 cake pops cost me roughly $14 total, or about 58 cents each. That’s a fraction of Starbucks cake pops and still cheaper than most bakery options. Buying candy melts, sticks, and sprinkles in bulk cuts the cost per batch by about a third for future rounds.
Frequently Asked Questions
Can I make cake pops 2 days before a party?
Yes, cake pops stay fresh for up to 1 week in the fridge and 2 days at room temperature when stored in an airtight container. For best results, dip and decorate them the day before so the coating looks freshest, but the cake balls themselves can be rolled up to 5 days ahead and kept chilled.
Can I freeze cake pops?
Fully dried cake pops freeze well for up to 6 weeks in a sealed freezer bag with the air pressed out. Thaw overnight in the fridge, then let them come to room temperature for 20 minutes before unwrapping to prevent condensation from damaging the coating.
How long do cake pops last?
Dipped and decorated cake pops stay fresh for 2 days at room temperature, up to 1 week refrigerated, and up to 6 weeks in the freezer. The coating protects the cake from drying out, so properly stored pops actually hold up better than regular frosted cupcakes.
What other cake pop flavors can I make?
Almost any cake flavor works for cake pops. Top kid-friendly options include vanilla, chocolate, funfetti, red velvet, lemon, cookies and cream, strawberry, and banana. Pair the cake flavor with a frosting that complements it, like cream cheese with red velvet or chocolate ganache with vanilla cake.
Are cake pops still popular?
Yes, cake pops remain popular for school events, birthday parties, and bake sales. Their small portion size, easy transport, and customizable designs make them a go-to treat for teachers, classroom celebrations, and back-to-school events. The homemade versions often taste better than store-bought.
Are cake pops allowed in schools?
Most schools allow cake pops since they’re individually portioned and easy to distribute. Check your school’s allergy policy first; many classrooms are nut-free, so avoid peanut butter fillings or candies processed in nut facilities. Pack them with the stick handles visible so teachers can hand them out without mess.
What tools do I need to make cake pops?
You’ll need lollipop sticks, a styrofoam block or cardboard box for drying, a cookie scoop for uniform balls, candy melts in your chosen colors, shortening or coconut oil for thinning the coating, a tall narrow cup for dipping, parchment paper, and a piping bag for drizzling details. A kitchen scale helps with consistent portioning.
How much should I charge for 100 cake pops?
Homemade cake pops typically sell for $1.50 to $3 each depending on complexity. For a basic round pop, $1.50 is standard. Detailed themed designs (apples, buses, pencils) command $2.50 to $3 each. Factor in ingredients (around 60 cents per pop), packaging, and your time when pricing for a school fundraiser.
Final Thoughts
Back to school cake pop recipes have become our family’s official kickoff to the school year. The kids feel proud handing a little apple pop to their teacher, and I love that the whole batch can be made over a weekend and frozen for weeks of lunchbox surprises or classroom events. Start with the apple design; it’s the most forgiving and the most rewarding. Once you’ve nailed the base recipe, every other shape just builds on the same technique.
Happy baking, and may every pop stay firmly on its stick.