
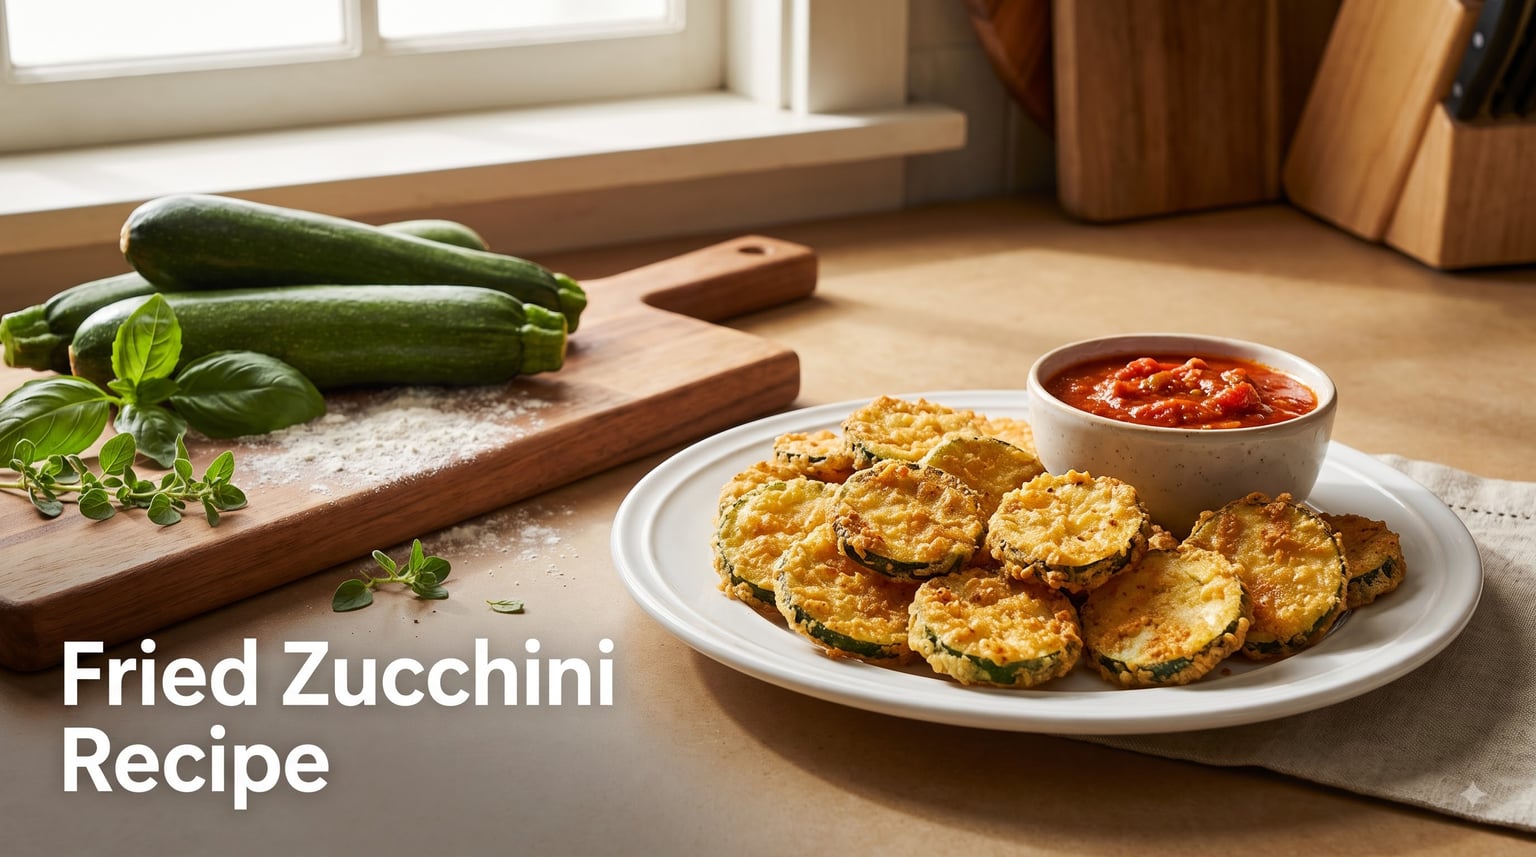
I’ve made fried zucchini more times than I can count, and after testing everything from traditional breading to dry-flour methods, I’ve settled on a recipe that delivers golden, crispy results every single time. This fried zucchini recipe takes about 25 minutes from start to finish and uses a simple three-step coating process that locks in crunch.
Whether you’re drowning in garden zucchini or just craving a restaurant-style appetizer at home, this is the version I keep coming back to. The secret comes down to two things: removing excess moisture before frying and keeping your oil at the right temperature.
In this guide, I’ll walk you through the classic crispy fried zucchini method, plus coating variations, an air fryer shortcut, troubleshooting tips for common problems, and easy dipping sauce ideas.
Table of Contents
Why This Fried Zucchini Recipe Works?
Most fried zucchini recipes fail for one simple reason: zucchini is 95% water. If you skip the moisture-removal step, that water turns to steam in the pan and you end up with soggy, oil-soaked slices instead of crispy ones.
This recipe solves that problem with a salt-and-rest step before coating, a classic flour-egg-breadcrumb dredging sequence, and oil held steady at 350 to 375 degrees Fahrenheit. The result is a light, crunchy exterior with tender zucchini inside.
I’ve tested this with panko breadcrumbs, regular breadcrumbs, cornmeal, and even a gluten-free flour blend. Each variation works, and I’ll cover all of them below so you can pick your favorite.
Ingredients You’ll Need
Here’s what you need for a classic batch serving four people as a side dish or appetizer:
2 medium zucchini (about 1 pound total) — small to medium ones work best because they have fewer seeds and less water
1/2 cup all-purpose flour
1 teaspoon kosher salt, plus extra for drawing out moisture
1/2 teaspoon garlic powder
1/2 teaspoon black pepper
2 large eggs, beaten
1 cup panko breadcrumbs (regular breadcrumbs work too, but panko gives a crunchier coating)
1/3 cup grated Parmesan cheese (optional, but recommended)
1 teaspoon Italian seasoning
Vegetable oil or canola oil for frying (about 1 to 1.5 cups for shallow frying)
For the best results, use fresh, firm zucchini with no soft spots. If you’re growing your own or shopping at a farmers market, check out these summer squash recipes for more ways to use your harvest.
Equipment Needed
You don’t need any special equipment, but a few basics make the process smoother:
Large skillet or cast-iron pan (10 to 12 inches)
Three shallow dishes or pie plates for the dredging station
Tongs or a slotted spoon
Paper towel-lined plate or baking sheet for draining
Candy or instant-read thermometer (helpful but not required)
Sharp knife and cutting board
How to Make Fried Zucchini (Step by Step)
Here is the full fried zucchini recipe, broken down into clear steps. Follow these in order and you’ll get crispy, golden results.
Step 1: Slice the Zucchini
Cut the zucchini into rounds about 1/4 inch thick. You can also cut them into sticks or spears if you prefer that shape for dipping. Avoid slicing thinner than 1/4 inch because thin slices cook too fast and turn mushy before the coating crisps up.
Step 2: Salt and Rest (The Moisture Step)
Place the zucchini slices in a single layer on a paper towel. Sprinkle lightly with salt and let them sit for 10 to 15 minutes. You’ll see beads of water forming on the surface — that’s exactly what you want.
After resting, pat the slices dry with fresh paper towels. Press firmly to remove as much moisture as possible. This step is the single biggest difference between crispy and soggy fried zucchini.
Step 3: Set Up Your Dredging Station
Arrange three shallow dishes in a row:
Dish 1: Flour mixed with salt, pepper, and garlic powder
Dish 2: Beaten eggs (whisk until fully smooth)
Dish 3: Panko breadcrumbs mixed with Parmesan and Italian seasoning
Keep one hand for dry ingredients and one for wet to avoid a gummy mess. This is the clean-hands dredging technique that experienced cooks use.
Step 4: Coat the Zucchini
Working with a few slices at a time, dredge each zucchini round in flour first. Shake off the excess. Next, dip it in the beaten egg, letting the extra drip off. Finally, press it into the breadcrumb mixture, coating both sides evenly.
Set each coated slice on a plate or tray. Don’t stack them or the coating will stick together.
Step 5: Heat the Oil
Pour oil into your skillet to a depth of about 1/4 inch. Heat over medium-high until the oil reaches 350 to 375 degrees Fahrenheit. If you don’t have a thermometer, test the oil by dropping in one breadcrumb — it should sizzle immediately and float to the top within a few seconds.
If the oil smokes, it’s too hot. Remove the pan from the heat for a minute to let it cool slightly.
Step 6: Fry in Batches
Add the coated zucchini slices to the hot oil in a single layer without crowding the pan. Fry for 1 to 2 minutes per side, or until golden brown. Flip carefully with tongs once the bottom is crisp and deeply golden.
Crowding the pan drops the oil temperature and leads to greasy, soggy results. Fry in batches and give each slice room to breathe.
Step 7: Drain and Serve
Transfer the fried zucchini to a paper towel-lined plate or baking sheet to drain excess oil. Sprinkle with a little extra salt while they’re still hot. Serve immediately for the best crunch.
Coating Variations to Try
One of the best things about this recipe is how easily you can swap the coating. Here are four variations I’ve tested extensively:
Traditional Breadcrumb Coating
Use regular fine breadcrumbs instead of panko. The coating is slightly softer and more compact, similar to what you’d find at an Italian restaurant. Add a half teaspoon of garlic powder and Italian seasoning for extra flavor.
Parmesan-Crust Coating
Replace half the breadcrumbs with grated Parmesan cheese. The cheese melts and crisps during frying, creating a savory, golden crust that sticks well to the zucchini. This is my personal favorite for flavor.
Cornmeal Coating (Southern Style)
Skip the breadcrumbs entirely and use a mix of half cornmeal and half flour for the final dredge. The result is a crunchier, slightly sweet coating that’s popular in Southern cooking. Add a pinch of cayenne for a subtle kick.
Gluten-Free Coating
Swap the all-purpose flour for a gluten-free flour blend or rice flour. Rice flour creates an especially light, crispy coating because it absorbs less moisture than wheat flour. Use gluten-free panko for the breadcrumb step.
For more gluten-free and dietary-friendly cooking ideas, browse these keto instant pot recipes that also feature zucchini.
Air Fryer Fried Zucchini
If you want to skip the oil entirely, the air fryer produces a respectable version of fried zucchini. It won’t be quite as rich as pan-fried, but it’s significantly lighter and cleanup is minimal.
To make air fryer fried zucchini, follow the same coating steps above. Then arrange the coated slices in a single layer in your air fryer basket. Lightly spray both sides with cooking spray. Air fry at 370 degrees Fahrenheit for 10 to 13 minutes, flipping halfway through, until golden brown and crispy.
Work in batches to avoid overcrowding the basket, just as you would in a skillet.
Tips for Crispy Fried Zucchini Every Time
These tips come straight from real home cooks on forums like Reddit’s r/Cooking, where the same problems come up again and again. Here’s how to avoid the most common mistakes:
Remove Moisture First
The salt-and-rest method I described in Step 2 is non-negotiable. Zucchini releases a surprising amount of water, and if that moisture meets hot oil, you get sogginess. Pat dry thoroughly before coating.
Don’t Skip the Flour Step
The flour coating creates a dry surface for the egg to cling to, and the egg gives the breadcrumbs something to stick to. If you skip the flour and go straight to egg, the breading slides right off during frying.
Control Oil Temperature
Keep the oil between 350 and 375 degrees Fahrenheit. Too cool and the zucchini absorbs oil. Too hot and the coating burns before the inside cooks. Fry in small batches to maintain temperature.
Use Panko for Maximum Crunch
Panko breadcrumbs are coarser and lighter than regular breadcrumbs. They create a crispier texture that holds up longer after frying. If you want extra crunch, try a double-dip method: flour, egg, flour again, egg again, then breadcrumbs.
Serve Immediately
Fried zucchini is at its best within minutes of coming out of the pan. As it sits, steam softens the coating. If you need to hold a batch, keep it on a wire rack in a 200-degree oven — never on a solid plate, which traps steam underneath.
Dipping Sauce Ideas
Fried zucchini pairs beautifully with a range of dipping sauces. Here are my go-to options:
Marinara sauce: Warm, classic, and the most popular choice for breaded zucchini.
Ranch dressing: Cool, creamy, and a crowd-pleaser for kids and adults.
Garlic aioli: Mix mayonnaise with minced garlic, lemon juice, and a pinch of salt for a gourmet dip.
Homemade pesto: For something different, try this homemade pesto sauce as a fresh, herbaceous dip.
Spicy marinara: Add red pepper flakes to your marinara for a kick.
Serving Suggestions
Fried zucchini works as an appetizer, side dish, or snack. For a complete meal, serve it alongside grilled chicken, fish, or pasta with marinara. It also makes a great party appetizer alongside other vegetable dishes like these vegan casserole recipes.
For a lighter meal, pair fried zucchini with a simple green salad and vinaigrette. The crunch of the zucchini contrasts nicely with fresh greens.
Storage and Reheating
Fried zucchini is best eaten fresh, but you can store leftovers in an airtight container in the refrigerator for up to 3 days. The coating will soften, but you can restore some of the crunch by reheating.
To reheat, place the slices on a baking sheet in a 400-degree oven for 5 to 7 minutes, or until warmed through and re-crisped. Avoid the microwave, which makes the coating rubbery.
To freeze, arrange cooked and cooled slices in a single layer on a baking sheet and freeze until solid. Transfer to a freezer bag and store for up to 2 months. Reheat directly from frozen in a 400-degree oven for 10 to 12 minutes.
Frequently Asked Questions
What’s the best way to fry zucchini?
The best way to fry zucchini is to slice it into 1/4-inch rounds, salt and rest the slices for 10 minutes to draw out moisture, pat dry, then dredge in a three-step coating (flour, beaten egg, breadcrumbs). Fry in oil heated to 350-375 degrees Fahrenheit for 1-2 minutes per side until golden brown. This method produces crispy zucchini with a tender interior.
How do you get breading to stick to zucchini?
To get breading to stick to zucchini, always use the three-step dredging process: coat in flour first, then dip in beaten egg, then press into breadcrumbs. The flour creates a dry surface for the egg to adhere to, and the egg acts as the glue for the breadcrumbs. Also, pat the zucchini slices dry before coating, because excess moisture prevents the flour from sticking properly.
How to fry zucchini without it being soggy?
To fry zucchini without it being soggy, salt the slices and let them rest for 10-15 minutes to draw out moisture, then pat completely dry with paper towels. Keep the oil between 350 and 375 degrees Fahrenheit, fry in small batches so the oil temperature stays consistent, and drain the finished slices on paper towels. Never crowd the pan, and serve immediately for maximum crunch.
How to cook zucchini in the frying pan?
To cook zucchini in a frying pan, heat 1/4 inch of oil over medium-high heat until it reaches 350 degrees Fahrenheit. Add coated zucchini slices in a single layer without overlapping and fry for 1-2 minutes per side until golden brown. Remove with tongs and drain on paper towels. Pan-fried zucchini rounds are ready in about 25 minutes total including prep.
Can you freeze fried zucchini?
Yes, you can freeze fried zucchini. Arrange the cooked and cooled slices in a single layer on a baking sheet and freeze until solid, then transfer to a freezer bag for up to 2 months. Reheat directly from frozen on a baking sheet in a 400-degree oven for 10-12 minutes to restore the crispiness. Avoid microwaving, which makes the coating soft and rubbery.
Should I peel zucchini before frying?
No, you do not need to peel zucchini before frying. The skin helps the slices hold their shape during cooking and adds color and nutrients. Simply wash the zucchini thoroughly, trim the ends, and slice. If you are using very large zucchini with thick, tough skin, you can peel it, but small to medium zucchini have tender skin that fries up well.
Conclusion
This fried zucchini recipe proves that with the right technique, you can turn a watery summer squash into a crispy, golden appetizer that rivals anything from a restaurant. The keys are removing moisture before frying, using the three-step dredging method, and keeping your oil at 350 to 375 degrees Fahrenheit.
Try the classic panko version first, then experiment with the parmesan, cornmeal, or gluten-free variations to find your favorite. And don’t forget the dipping sauces — a good marinara or homemade pesto takes fried zucchini to the next level.
Give this recipe a try the next time you have zucchini on hand. Once you master the coating process, it becomes one of those quick, satisfying dishes you’ll make again and again.