
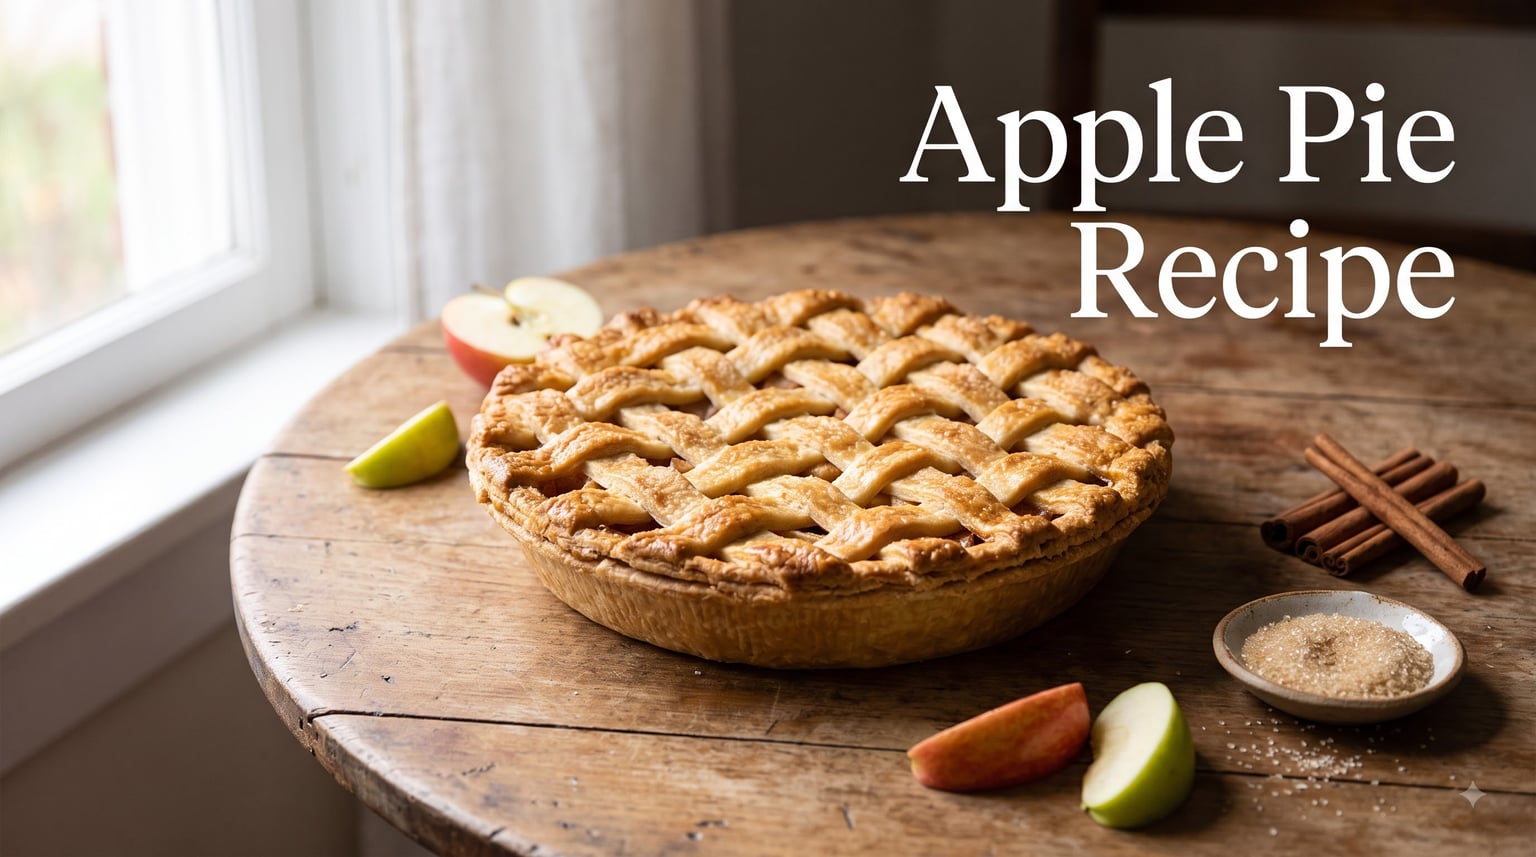
When I was growing up, my grandmother kept a stained index card in her kitchen drawer labeled “Apple Pie.” She pulled it out every Thanksgiving and Christmas, and the whole house smelled like cinnamon, brown butter, and orchard air within an hour. I have rewritten her recipe a dozen times since then, tested it in my own kitchen on four different ovens, and brought it to potlucks where it disappeared before dinner ended. This homemade apple pie recipe is the version that finally nails everything I loved about hers, with the reliability modern bakers need.
In this guide, I will walk you through every step of making a classic apple pie from scratch. You will learn which apples give the best flavor, how to build a flaky all-butter crust, how to assemble a lattice top without losing your mind, and how to bake it so the filling is saucy and the crust is golden. Total time is about 3 hours, with 45 minutes of active work, and it serves 8 generous slices. If you have ever battled a soggy bottom or a runny filling, this is the recipe that finally fixes that.
If you love preserving apple season, you can also check out our canned apple pie filling recipe for year-round enjoyment. And for an unforgettable fall dessert spread, pair a warm slice with an apple cider margarita cocktail pairing.
Table of Contents
Apple Pie Recipe Ingredients You’ll Need
Great apple pie starts with simple pantry staples and fresh fruit. I have organized everything into three groups so you can shop and prep like a pro. Measure everything before you start mixing, since the dough comes together fast and the filling needs to macerate while the crust chills.
Pie Crust Ingredients
- 2 1/2 cups (320g) all-purpose flour, spooned and leveled
- 1 tablespoon granulated sugar
- 1 teaspoon fine sea salt
- 1 cup (226g) cold unsalted butter, cut into 1/2-inch cubes
- 1/4 cup (60g) cold vegetable shortening
- 6 to 8 tablespoons ice water
- 1 tablespoon apple cider vinegar
Apple Pie Filling Ingredients
- 2 1/2 pounds mixed apples (about 6 to 7 medium), peeled, cored, and sliced 1/4-inch thick
- 3/4 cup (150g) light brown sugar, packed
- 1/4 cup (50g) granulated sugar
- 3 tablespoons all-purpose flour
- 1 tablespoon fresh lemon juice
- 2 teaspoons ground cinnamon
- 1/4 teaspoon ground nutmeg
- 1/8 teaspoon ground allspice
- 1/4 teaspoon fine sea salt
- 2 tablespoons unsalted butter, cut into small pieces
Finishing Touches
- 1 large egg, beaten with 1 tablespoon water (egg wash)
- 2 teaspoons sanding sugar, for sparkle
- 1/2 teaspoon extra cinnamon for dusting
For a deeper spice profile, browse our guide to the essential baking spices for apple pie. The right cinnamon and freshly grated nutmeg make a noticeable difference in a finished pie.
Essential Equipment for Homemade Apple Pie
You don’t need a professional kitchen to pull off a beautiful pie. I have made this recipe in a tiny apartment with three pans and a paring knife, and it turned out just as well as in a full test kitchen. Still, a few key tools make the process easier and more consistent.
Must-Have Tools
- 9-inch deep-dish pie plate (glass or ceramic works best for even browning)
- Mixing bowls (one large, one medium)
- Pastry blender or two knives
- Rolling pin (a heavy wooden one gives the most control)
- Sharp paring knife or apple peeler-corer-slicer
- Measuring cups and spoons
- Plastic wrap for chilling dough
Nice-to-Have Tools
- Pie weights or dried beans for blind baking
- Pie shield or strips of aluminum foil to protect crust edges
- Pastry brush for egg wash
- Bench scraper for clean dough handling
- Kitchen scale for precise flour measurement
Best Apples for Apple Pie Baking
The single biggest upgrade you can make to your apple pie is choosing the right apples. After testing more than a dozen varieties over the past two falls, I can tell you that Granny Smith alone gives sharp flavor but tends to break down, while sweet apples like Fuji turn to mush. The winning move is mixing one tart variety with one or two sweet, firm varieties.
Top Apple Variety Comparison
Here is how the most common pie apples stack up based on my testing and community feedback.
- Granny Smith: Very tart, holds shape well, classic pie flavor. Mix with a sweeter apple.
- Honeycrisp: Sweet, crisp, holds shape beautifully. Excellent all-purpose choice.
- Braeburn: Balanced sweet-tart, firm texture. Great for single-variety pies.
- Jonagold: Sweet with bright acidity, holds shape. Underrated pie apple.
- Golden Delicious: Sweet and soft. Best blended with a firmer variety.
- Pink Lady: Tart-sweet, firm. Adds complexity to mixed fillings.
- Northern Spy: Old-fashioned favorite. Tart, firm, classic flavor.
Single-Variety vs Mixed Varieties
Single-variety pies can be elegant, especially when using Honeycrisp or Braeburn. But mixed-variety pies offer deeper, more layered flavor. My favorite blend is 1 pound Granny Smith plus 1 1/2 pounds Honeycrisp, with a few slices of Pink Lady thrown in for brightness.
Whatever you pick, aim for apples that are firm, unbruised, and at peak ripeness. Overripe apples release too much juice, which is the root cause of most runny fillings.
How to Make Flaky Pie Crust from Scratch
An all-butter pie crust is the foundation of a memorable pie. The trick is keeping everything cold, working quickly, and resisting the urge to overmix. Follow these steps and you will get tender, flaky layers every single time.
Mixing the Dough
In a large bowl, whisk together the flour, sugar, and salt. Add the cold butter cubes and shortening. Using a pastry blender, cut the fat into the flour until the mixture looks like coarse crumbs with some pea-sized chunks of butter still visible. Those chunks are what create flakes, so don’t worry about perfection.
Drizzle 6 tablespoons of ice water and the vinegar over the mixture. Stir gently with a fork until the dough just starts to come together. Add the remaining water one tablespoon at a time if needed. The dough should hold together when pinched but should not feel sticky or wet.
Chilling the Dough
Turn the dough out onto a piece of plastic wrap, press it into two equal discs, and wrap tightly. Refrigerate for at least 1 hour, or up to 2 days. You can also freeze the discs for up to 3 months. Cold dough is the number one secret to a flaky crust, so do not skip this step.
Rolling Out the Crust
When you are ready to assemble the pie, remove one disc from the fridge and let it sit on the counter for 5 to 10 minutes until it is pliable but still cold. Lightly flour your work surface and rolling pin. Roll the dough from the center outward, rotating a quarter turn every few passes, until you have a 12-inch circle about 1/8-inch thick.
Gently transfer the dough to your pie plate by rolling it loosely around the rolling pin and unrolling it over the pan. Lift the edges and let the dough settle into the pan without stretching it. Trim the overhang to about 1 inch all around. Save the trimmings. Roll out the second disc the same way for the top crust, then chill both while you make the filling.
How to Make Apple Pie Filling
The filling is where most home bakers struggle. The goal is a balance of sweet, tart, spiced, and thick. With a few simple techniques, you can guarantee a saucy-but-not-runny interior.
Preparing the Apples
Peel, core, and slice your apples into even 1/4-inch slices. Uniform thickness is more important than precision, because uneven slices cook at different rates and leave some pieces crunchy while others turn to applesauce. Toss the slices in a large bowl with the lemon juice as you go. This prevents browning and brightens the flavor.
Mixing the Spices and Sugar
In a small bowl, whisk together the brown sugar, granulated sugar, flour, cinnamon, nutmeg, allspice, and salt. Pour this mixture over the apples and toss gently with a spatula until every slice is coated. The flour is your thickener, and the combination of brown and white sugar gives you depth without overwhelming sweetness.
Combining and Macerating
Let the apple mixture sit for 15 to 20 minutes while your crust chills. This short maceration pulls juices out of the apples, which you will then pour into the pie along with the fruit. Do not drain the liquid. That juice is what makes the filling saucy. If you skip this step, you risk dry spots and uneven thickening in the finished pie.
Step-by-Step Apple Pie Recipe Instructions
Now we bring it all together. Preheat your oven to 425°F (220°C) and place a rimmed baking sheet on the lower rack to catch any drips and to help the bottom crust bake through.
Step 1: Assemble the Bottom Crust
Remove the rolled bottom crust from the fridge. Pour the apple filling into the pie plate, including all the juices. Dot the top of the filling with the small pieces of butter. The butter melts into the filling during baking and adds richness.
Step 2: Build a Lattice or Solid Top
For a solid top, drape the second crust over the filling, trim the overhang to 1 inch, and tuck the edges under. Crimp decoratively with your fingers or a fork, and cut 5 to 6 slits in the top to vent steam.
For a lattice, cut the second crust into 10 to 12 strips about 3/4-inch wide. Lay 5 strips across the pie evenly spaced. Fold back every other strip halfway, lay one perpendicular strip across the center, unfold the strips back over it. Repeat in the opposite direction, weaving as you go. Trim and crimp the edges, and pinch the ends of the lattice strips into the bottom crust to seal.
Step 3: Egg Wash and Sugar Finish
Brush the entire top crust with the egg wash, getting into every crease of the lattice or the surface of the solid crust. Sprinkle generously with sanding sugar and a light dusting of cinnamon. The egg wash creates that bakery-style glossy finish, while sanding sugar adds crunch and sparkle.
Step 4: Bake at High Heat, Then Reduce
Bake at 425°F for 20 minutes. The high initial heat sets the crust quickly and prevents sogginess. Then reduce the oven temperature to 375°F (190°C) and bake for another 35 to 45 minutes. If the edges start browning too fast, loosely tent them with foil or use a pie shield after 25 minutes.
Step 5: Know When the Pie Is Done
The pie is ready when the crust is deep golden brown and you can see the filling bubbling thickly through the lattice or vents. If the crust looks pale but the filling is bubbling, the bottom crust may not be cooked. Slide the pie out and tap the bottom. It should sound hollow and feel firm. If it feels soft or looks damp, return the pie to the oven for another 10 minutes.
Cool the pie on a wire rack for at least 3 hours before slicing. I know it is hard to wait, but this resting time lets the filling set. Cutting too early guarantees a soupy slice.
Tips for the Best Apple Pie Every Time
After making this recipe dozens of times, I have learned that a few small habits make a huge difference. These are the tips I share with every friend who asks for the recipe.
Preventing Soggy Bottoms
The most reliable fix is the hot baking sheet on the lower oven rack. The radiant heat crisps the bottom crust before the filling can soak into it. You can also brush the bottom crust with a thin layer of egg white before adding the filling, which creates a moisture barrier.
Getting a Golden Crust
Egg wash is non-negotiable for that glossy, golden finish. For an even deeper color, swap the water in the egg wash for heavy cream. Brush the crust twice, once before baking and once halfway through, for a deep mahogany shine.
Perfect Filling Consistency
Flour thickens reliably but can leave a slightly cloudy look. Cornstarch gives a clearer, glossier filling. For the best of both worlds, use 1 1/2 tablespoons flour plus 1 1/2 tablespoons cornstarch. The result is a saucy, translucent filling that holds its shape on the plate.
Another tip: taste a slice of your raw apple mixture before adding it to the crust. If it tastes good raw, it will taste great baked. Adjust sugar and spices now, not later.
Troubleshooting Common Apple Pie Problems
Even experienced bakers run into the occasional pie problem. Here is how to diagnose and fix the most common issues based on community feedback and my own trial-and-error notes.
Runny Filling Fix
If your filling runs all over the plate, you either underbaked the pie, used too much liquid, or did not let it cool long enough. Always bake until the filling visibly bubbles in the center, and cool for at least 3 hours. If you know your apples release a lot of juice, add an extra tablespoon of flour or cornstarch to the filling mix.
Burnt Crust Fix
If the edges brown before the filling cooks, tent the crust with foil or a pie shield from the start. You can also lower the oven temperature by 25°F and extend the baking time by 10 to 15 minutes. Glass pie plates conduct heat differently than metal, so keep an eye on yours the first time.
Mushy Apples Fix
Soft, mushy apples usually mean you used a soft variety like McIntosh or overripe fruit. Stick to firm apples and slice them uniformly. If you love the flavor of softer apples, mix them 50/50 with a firm variety like Granny Smith or Honeycrisp.
How to Store Apple Pie and Make-Ahead Tips
Apple pie stores beautifully, which makes it a perfect make-ahead dessert for holidays and gatherings. Here is exactly how to handle each storage scenario.
Room Temperature Storage
A fully baked apple pie will keep at room temperature, loosely covered, for up to 2 days. Keep it away from direct sunlight and heat sources. The crust stays crispest on the counter, but the filling is still safe.
Refrigerator Storage
For longer storage, cover the pie loosely with foil or plastic wrap and refrigerate for up to 4 days. The crust will soften in the fridge, so reheat slices in a 350°F oven for 8 to 10 minutes to bring back some crispness.
Freezer Storage Instructions
You can freeze the pie baked or unbaked. For an unbaked pie, assemble it completely, wrap tightly in two layers of plastic wrap and one layer of foil, and freeze for up to 3 months. Bake directly from the freezer at 425°F for 25 minutes, then reduce to 375°F for 50 to 60 minutes.
For a baked pie, let it cool completely, wrap tightly, and freeze for up to 3 months. Thaw overnight in the refrigerator, then reheat at 350°F for 15 minutes before serving.
Serving Suggestions and Pairing Ideas
Apple pie is wonderful on its own, but the right topping and pairing can turn it into a showstopper. Here are my favorite ways to serve it, from classic to creative.
Classic Toppings
- A scoop of high-quality vanilla bean ice cream
- Freshly whipped cream with a hint of vanilla and sugar
- A drizzle of warm caramel sauce
- A slice of sharp aged cheddar cheese, the traditional New England way
- A dusting of powdered sugar
Beverage Pairings
Hot coffee, spiced chai, or a glass of cold milk are timeless. For something special, try a hot toddy, a glass of late-harvest Riesling, or for a fun fall gathering, our apple cider margarita cocktail pairing alongside the pie. You can also serve small glasses of fresh apple cider for serving for a family-friendly option.
Presentation Tips
Serve pie slightly warm, about 30 minutes out of the oven or after a quick reheat. Wipe the knife between slices for clean cuts. Place each slice on a warmed plate and top with ice cream just before serving, so it melts slightly over the filling.
Frequently Asked Questions About Apple Pie
What is the secret to a good apple pie?
The three biggest secrets are using a mix of tart and sweet apples for layered flavor, keeping your pie crust ingredients ice-cold for maximum flakiness, and baking the pie on a preheated baking sheet to prevent a soggy bottom. Cool the pie for at least 3 hours before slicing so the filling sets properly.
Should you cook apples before making a pie?
For this recipe, no pre-cooking is needed. Tossing the sliced apples with sugar and letting them macerate for 15 to 20 minutes pulls out enough juice to create a naturally saucy filling. Pre-cooking is only necessary if you want a very thick, jam-like filling or are using a particularly juicy apple variety.
Is brown sugar or white sugar better for apple pie?
Both work, but they do different jobs. Brown sugar adds moisture, depth, and a slight molasses flavor that pairs beautifully with cinnamon and nutmeg. White sugar keeps the filling brighter and lets the apple flavor shine. I use a combination of both for the most balanced apple pie filling.
What are the best apples for apple pie?
Granny Smith is the classic tart choice and holds its shape well. Honeycrisp adds sweetness and crispness. Braeburn and Jonagold are excellent all-purpose options. For the most complex flavor, mix two or three varieties such as 1 pound Granny Smith with 1 1/2 pounds Honeycrisp.
How do you keep apple pie crust from getting soggy?
Three reliable methods: bake the pie on a preheated baking sheet on the lower rack, brush the bottom crust with egg white before adding the filling, and start baking at a high temperature (425°F) for the first 20 minutes before lowering it. These techniques crisp the bottom crust before the filling soaks in.
How long does apple pie last?
A fully baked apple pie keeps at room temperature for up to 2 days, refrigerated for up to 4 days, and frozen for up to 3 months. Cover loosely with foil or plastic wrap. To refresh refrigerated or thawed slices, reheat at 350°F for 8 to 10 minutes to crisp the crust.
Can you freeze apple pie?
Yes. Freeze it either unbaked or baked. Wrap tightly in plastic wrap and foil. Unbaked pies can go straight into a 425°F oven from the freezer, adding about 10 to 15 minutes to the bake time. Baked pies should thaw in the refrigerator overnight before reheating.
How do you make a lattice crust for apple pie?
Roll out the top crust and cut it into 10 to 12 strips about 3/4-inch wide. Lay half the strips across the pie, then weave the remaining strips perpendicular to them, folding back alternating strips as you go. Trim the ends, tuck them under the bottom crust edge, and crimp to seal.
What temperature should you bake apple pie at?
Start at 425°F for 20 minutes to set the crust, then reduce to 375°F for another 35 to 45 minutes. The pie is done when the crust is deep golden brown and the filling bubbles thickly through the vents or lattice openings. Total bake time is usually 55 to 65 minutes.
Why is my apple pie filling runny?
Runny filling usually means the pie was underbaked, the apples released too much juice, or the pie was cut before it fully cooled. Make sure to bake until the filling visibly bubbles in the center, and let the pie rest for at least 3 hours before slicing. If your apples are very juicy, add an extra tablespoon of flour or cornstarch.
Final Thoughts on This Homemade Apple Pie Recipe
This homemade apple pie recipe brings together everything I have learned from my grandmother’s kitchen card, professional baking references, and years of testing in my own home. The crust is flaky and buttery. The filling is saucy, warmly spiced, and balanced between tart and sweet. The method is reliable, even for first-time pie makers.
The real secret is patience. Cold dough, a hot start in the oven, and a slow cool-down on the counter make more difference than any single ingredient. If you follow those principles, you will get a pie that looks like it came from a bakery every single time.
I encourage you to make this recipe your own. Try a different apple blend, swap in a crumb topping, or add a handful of cranberries for a holiday twist. Once you have the base technique down, the variations are endless. If you love this recipe, you may also enjoy exploring how to can apple pie filling so you can bake pies from your pantry all year.
Preheat your oven, pull out that rolling pin, and treat yourself to the best apple pie recipe from scratch you have ever made. Your kitchen will smell like fall, and your family will line up for seconds.