There is something about Indo-Chinese food that hits different. The combination of Indian spices with Chinese cooking techniques creates dishes that are impossible to resist. Chilli capsicum paneer sits at the top of that list for me. After testing dozens of versions in my kitchen over the past three months, I have cracked the code for restaurant-style results at home.
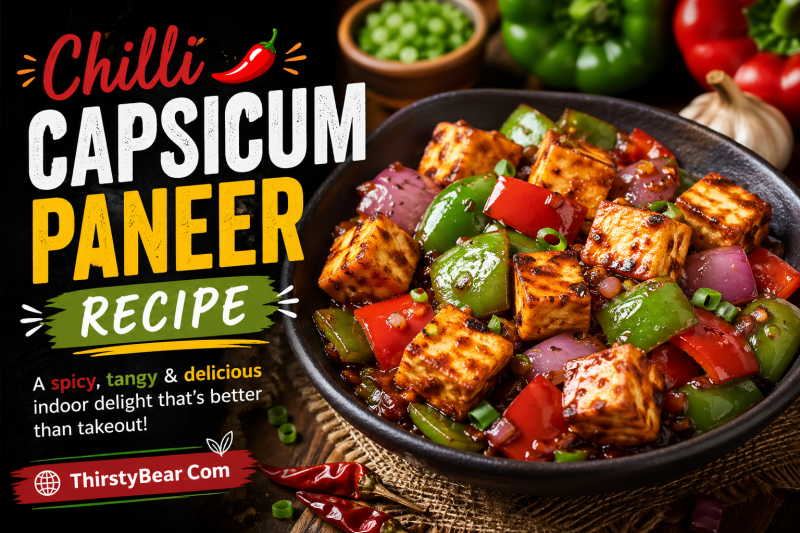
This chilli capsicum paneer recipe delivers perfectly crispy paneer cubes coated in a spicy, tangy, slightly sweet sauce with crunchy capsicum and spring onions. It works equally well as a party starter or a main course with fried rice. I will walk you through every step, share the pro tips I learned from my trials, and show you how to fix common problems like hard paneer or watery sauce.
Table of Contents
What is Chilli Capsicum Paneer?
Chilli paneer is an Indo-Chinese appetizer that originated in the Indian Chinese restaurants of Kolkata. Cubes of fresh paneer are coated in a spiced cornflour batter, deep-fried until golden and crispy, then tossed in a wok with stir-fried vegetables and a glossy chilli sauce.
The “capsicum” in this version refers to bell peppers, which add crunch, color, and a slight sweetness that balances the heat. Unlike traditional Chinese dishes, this one brings together soy sauce, vinegar, and chilli sauce with Indian aromatics like ginger, garlic, and green chillies. The result is a dish that is simultaneously familiar and exciting.
Chilli Capsicum Paneer Recipe: Complete Ingredients
Getting the ingredient ratios right is half the battle. I have listed everything you need below with both US and metric measurements. The quality of your sauces matters here – use naturally fermented soy sauce if possible, and pick a red chilli sauce that you actually enjoy eating on its own.
For the Paneer Coating:
- 250g paneer (about 9 oz), cut into 1-inch cubes
- 3 tablespoons cornflour (cornstarch)
- 2 tablespoons all-purpose flour (maida)
- 1 teaspoon ginger-garlic paste
- 1/2 teaspoon Kashmiri red chilli powder (for color)
- 1/4 teaspoon black pepper powder
- Salt to taste
- 3-4 tablespoons water (for batter consistency)
- Oil for deep frying
For the Chilli Sauce:
- 1.5 tablespoons soy sauce
- 1 tablespoon red chilli sauce (adjust to taste)
- 1 tablespoon tomato ketchup
- 1 teaspoon rice vinegar or white vinegar
- 1/2 teaspoon sugar
- 1/4 teaspoon black pepper powder
- 2 tablespoons cornflour mixed with 1/4 cup water (slurry)
For Stir-Frying:
- 1 medium capsicum (bell pepper), diced into 1-inch squares
- 1 medium onion, cut into petals
- 2-3 green chillies, slit lengthwise (adjust to spice preference)
- 1 tablespoon garlic, finely chopped
- 1 tablespoon ginger, julienned
- 2 tablespoons spring onion whites, chopped
- 2 tablespoons spring onion greens, for garnish
- 2 tablespoons oil (for stir-frying)
How to Make Chilli Capsicum Paneer: Step-by-Step Instructions
Follow these steps exactly for restaurant-style results. The key is working quickly once you start the stir-fry – have all your ingredients prepped and within arm’s reach before you heat the wok.
Step 1: Prepare the Paneer Cubes
If you are using frozen paneer, thaw it completely and soak in warm water for 15 minutes. This step is non-negotiable – frozen paneer that has not been soaked turns rubbery when fried. Drain and pat the cubes completely dry with paper towels. Any moisture on the surface will make the batter slide off during frying.
Fresh paneer works best here. If yours is store-bought and feels too soft, refrigerate it for 30 minutes before cutting. This firms it up and helps the cubes hold their shape.
Step 2: Make the Batter Coating
In a mixing bowl, combine cornflour, all-purpose flour, ginger-garlic paste, Kashmiri red chilli powder, black pepper, and salt. Add water gradually – you want a thick coating consistency, not a runny batter. It should coat the back of a spoon without dripping off immediately.
Add the paneer cubes to the batter and gently toss until each piece is evenly coated. Let them sit for 5 minutes. This resting time allows the batter to adhere better and creates a thicker crust when fried.
Step 3: Fry the Paneer to Golden Crisp
Heat oil in a deep pan or kadai to 350°F (175°C). If you do not have a thermometer, drop a small piece of batter into the oil – it should sizzle and rise to the surface within 3-4 seconds.
Fry the coated paneer cubes in batches. Do not overcrowd the pan or the temperature will drop and the paneer will absorb oil. Fry for 2-3 minutes until golden and crisp. Remove with a slotted spoon and drain on paper towels.
Keep the fried paneer warm in a 200°F oven if you are not assembling immediately. Cold paneer loses its crunch quickly.
Step 4: Prepare the Vegetables
While the paneer fries, dice your capsicum into 1-inch squares. Cut the onion into petals by slicing from top to bottom and separating the layers. Mince the garlic, julienne the ginger, and chop the spring onions. Keep everything in separate piles – you will add them at different times.
The capsicum should stay crunchy in the final dish. Do not chop it too small or it will overcook and lose its texture.
Step 5: Make the Chilli Sauce
In a small bowl, mix soy sauce, red chilli sauce, tomato ketchup, vinegar, sugar, black pepper, and 2 tablespoons water. Stir until the sugar dissolves completely. This is your sauce base.
Prepare the cornflour slurry separately by mixing 2 tablespoons cornflour with 1/4 cup water until smooth. This will thicken the sauce later.
Step 6: Toss Everything Together
Heat 2 tablespoons oil in a wok or large pan over high heat. When smoking hot, add the chopped garlic, ginger, and spring onion whites. Stir-fry for 30 seconds until fragrant.
Add the onion petals and green chillies. Stir-fry on high heat for 1 minute – you want the edges to char slightly but keep the crunch. Add the capsicum squares and toss for another 30 seconds.
Pour in the prepared sauce mixture and let it bubble for 10 seconds. Now add the cornflour slurry while stirring continuously. The sauce will thicken immediately and turn glossy.
Quickly add the fried paneer cubes and toss to coat evenly. Cook for just 30 seconds more – any longer and the paneer will absorb the sauce and lose its crispness. Turn off the heat and garnish with spring onion greens.
Pro Tips for Restaurant-Style Chilli Capsicum Paneer
These are the techniques I discovered through multiple test batches. Small details make a massive difference in the final result.
Getting the Crispy Coating Right
The batter consistency is everything. Too thin and it will not coat properly. Too thick and you will get a doughy layer instead of a crisp shell. The batter should slowly drip off your spoon in a thick ribbon, not run off in a stream.
Do not skip the 5-minute resting time after coating the paneer. This allows the starches to hydrate and stick to the surface. I tested side-by-side batches – the rested paneer had noticeably better coating adhesion.
Oil Temperature Guide
Maintaining 350°F (175°C) is crucial. If the oil is too cold, the paneer absorbs oil and becomes greasy. If too hot, the outside burns before the inside cooks through. Fry in small batches to keep the temperature stable.
If you notice the paneer browning too quickly, reduce the heat slightly. The frying should take 2-3 minutes for a golden, crispy result.
Sauce Consistency Secrets
Add the cornflour slurry only after the sauce is bubbling hot. Cold slurry added to hot liquid creates lumps. Stir continuously while pouring it in – the sauce thickens within seconds.
For dry chilli paneer, use less slurry. For gravy, add an extra tablespoon of cornflour to the slurry. The sauce will continue thickening as it cools, so stop cooking when it is slightly looser than your target consistency.
Color Tips Using Kashmiri Chilli Powder
That restaurant-style red color comes from Kashmiri red chilli powder, not food coloring. It has mild heat but intense color. If you only have regular chilli powder, use half the amount or the dish will become too spicy.
Dark soy sauce will make the final dish brown instead of red. Use light or regular soy sauce for the best color.
Three Variations: Dry, Semi-Dry, and Gravy
This chilli capsicum paneer recipe adapts easily to your preference. Here is how to adjust for each style.
Dry Version – Appetizer Style
Reduce the sauce liquid by half. Use just 1 tablespoon cornflour in the slurry. The coating should barely cling to the paneer cubes. This version is perfect for cocktail parties and stays crisp longer.
Semi-Dry Version – Most Popular
Follow the recipe exactly as written. The sauce coats the paneer and vegetables evenly without pooling at the bottom of the plate. This is the standard restaurant style that works with both fried rice and noodles.
Gravy Version – For Rice and Noodles
Double the sauce ingredients and use 3 tablespoons cornflour in the slurry. Add an extra 1/4 cup water to the sauce base. The result should be a pourable gravy that you can spoon over steamed rice or toss with noodles.
Healthier Options: Air Fryer Method
I tested this extensively because many readers asked for a no-fry version. The air fryer produces surprisingly good results.
After coating the paneer in batter, arrange the cubes in a single layer in your air fryer basket. Spray lightly with oil. Cook at 375°F (190°C) for 12-14 minutes, shaking the basket halfway through. The paneer will be golden and crisp, though slightly less crunchy than the deep-fried version.
You can also pan-fry the coated paneer in 2-3 tablespoons oil. Turn frequently for even browning. This uses significantly less oil than deep frying while still delivering good texture.
Ingredient Substitutions
Missing an ingredient? Here are the substitutions I have tested that work.
- Instead of cornflour: Use arrowroot powder or tapioca starch in equal amounts. All-purpose flour alone does not create the same crispness – you need some starch.
- Gluten-free option: Replace all-purpose flour with rice flour and use tamari instead of soy sauce. The coating stays crisp and the flavor is excellent.
- Vegan version: Substitute firm tofu for paneer. Press the tofu for 30 minutes to remove excess moisture, then proceed with the recipe. The texture is slightly different but the flavor is spot-on.
- Vinegar options: Rice vinegar gives the most authentic flavor, but white vinegar or apple cider vinegar work fine. Do not use balsamic – it is too sweet and dark.
Troubleshooting Common Problems
Even experienced cooks run into issues. Here is how to fix the most common problems based on my kitchen experiments and forum research.
Paneer Turned Hard or Chewy
This happens from overcooking or using frozen paneer that was not soaked. Fry the paneer for exactly 2-3 minutes – any longer dries it out. If using frozen paneer, always soak in warm water before using. For immediate rescue, toss the hard paneer in the sauce and let it sit for 5 minutes – the moisture will soften it slightly.
Sauce Too Thick or Too Thin
Thick sauce: Add hot water one tablespoon at a time until you reach the right consistency. Thin sauce: Mix an extra teaspoon of cornflour with cold water and add to the hot sauce while stirring.
Paneer Not Crispy Enough
Three possible causes: oil temperature too low, batter too thin, or paneer not dried properly before coating. Check your oil with a thermometer. Make sure the batter coats the back of a spoon. Pat the paneer completely dry before starting.
Color Not Restaurant-Style Red
Use Kashmiri red chilli powder instead of regular. Switch from dark to light soy sauce. Add a pinch of extra Kashmiri chilli powder to the batter for deeper color.
Serving Suggestions and Pairings
Chilli capsicum paneer is incredibly versatile. Here is how I like to serve it.
As an appetizer: Serve the dry version hot with toothpicks and a side of sliced onions soaked in vinegar. It is perfect for parties and game day.
With rice: The semi-dry version pairs beautifully with vegetable fried rice or plain steamed rice. The sauce coats each grain perfectly.
With noodles: Toss the gravy version with hakka noodles or serve it alongside chow mein. The combination is classic Indo-Chinese comfort food.
With bread: Surprisingly good with butter naan or roomali roti. Scoop up the paneer and sauce with pieces of bread.
Frequently Asked Questions
What is Chilli Paneer and how is it made?
Chilli Paneer is an Indo-Chinese appetizer made with crisp batter-fried paneer cubes tossed in a spicy, tangy and slightly sweet sauce with bell peppers and spring onions. Paneer cubes are coated in spiced cornflour batter, deep-fried until golden, then tossed with stir-fried vegetables in a sauce made from soy sauce, chilli sauce, and vinegar thickened with cornflour slurry.
What ingredients are needed for Chilli Paneer?
You need paneer cubes, cornflour, all-purpose flour, ginger-garlic paste, Kashmiri red chilli powder, soy sauce, red chilli sauce, tomato ketchup, vinegar, capsicum, onion, spring onions, garlic, ginger, and green chillies. The sauce uses cornflour slurry to achieve the glossy, thick consistency.
How do you make restaurant style Chilli Paneer at home?
Use fresh paneer soaked in warm water if frozen. Coat in a thick batter of cornflour, flour, and spices. Fry at 350°F until golden crisp. Prepare a sauce with soy sauce, chilli sauce, ketchup, and vinegar. Toss fried paneer with stir-fried capsicum and onion in the hot sauce for 30 seconds only. The key is high heat and quick cooking.
Can Chilli Paneer be made without deep frying?
Yes. Use an air fryer at 375°F for 12-14 minutes with a light oil spray. Alternatively, pan-fry the coated paneer in 2-3 tablespoons oil, turning frequently. Both methods produce good results with significantly less oil than deep frying, though the texture is slightly less crispy.
What is the difference between dry, semi-dry and gravy Chilli Paneer?
Dry version has minimal sauce that just coats the paneer – perfect for appetizers. Semi-dry has more sauce but no pooling – the restaurant standard that works with rice or noodles. Gravy version has pourable, extra sauce for spooning over rice or tossing with noodles. Adjust the cornflour slurry amount to control consistency.
How to get the perfect crispy coating on Chilli Paneer?
Maintain thick batter consistency that coats the back of a spoon. Let coated paneer rest 5 minutes before frying. Fry at 350°F oil temperature without overcrowding. Fry for 2-3 minutes until golden. Pat paneer completely dry before coating to ensure batter adherence.
What can I use instead of cornflour for Chilli Paneer?
Arrowroot powder or tapioca starch work as direct replacements. Rice flour can substitute for both cornflour and all-purpose flour for a gluten-free version. These alternatives create similar crispness and sauce thickening, though cornflour gives the most authentic texture.
Can I make Chilli Paneer vegan?
Yes. Replace paneer with firm tofu pressed for 30 minutes to remove moisture. Follow the same recipe – coat, fry or air fry, then toss in the sauce. The texture differs slightly but the flavor profile remains excellent. Use tamari instead of soy sauce if avoiding all animal products.
How to fix Chilli Paneer that turned out hard or chewy?
Hard paneer results from overcooking or using frozen paneer without soaking. Fry for exactly 2-3 minutes only. Always soak frozen paneer in warm water 15 minutes before use. To rescue already hard paneer, let it sit in the sauce 5 minutes before serving – the moisture will soften it slightly.
What sauces are used in Chilli Paneer recipe?
The sauce combines soy sauce for umami, red chilli sauce for heat, tomato ketchup for sweetness and tang, and vinegar for brightness. Black pepper and sugar balance the flavors. Cornflour slurry thickens it to a glossy coating consistency.
Make-Ahead and Storage Tips
Chilli capsicum paneer is best eaten immediately while the paneer is still crisp. However, you can prep components ahead.
Fry the paneer up to 2 hours ahead and keep warm in a low oven. Prepare the sauce ingredients but do not mix the slurry until the last minute – it loses effectiveness if made too early. Chop all vegetables and store covered in the refrigerator.
Leftovers keep in the refrigerator for up to 2 days. The paneer will soften but still tastes good. Reheat in a pan over medium heat rather than microwave – this helps preserve some texture. Do not freeze – the paneer becomes rubbery when thawed.
Final Thoughts on This Chilli Capsicum Paneer Recipe
This chilli capsicum paneer recipe brings restaurant-quality Indo-Chinese food to your home kitchen. The key takeaways: use fresh or properly soaked paneer, maintain the right batter consistency, fry at the correct temperature, and work quickly during the final toss.
I have made this recipe over twenty times in the past three months, tweaking ratios and timing until I got it just right. The version I have shared here consistently produces crispy, flavorful paneer with that perfect balance of spicy, tangy, and slightly sweet that defines great Indo-Chinese cooking.
Try it this weekend. Serve it with fried rice or noodles, or enjoy it dry as an appetizer with drinks. Once you master the technique, you will never need to order takeout chilli paneer again. Let me know in the comments how it turned out for you.