Yes, you can make excellent gluten-free bread in a bread machine. I have been baking gluten-free bread at home for over 8 years, and I can tell you that a bread machine produces more consistent results than oven baking.
Fresh gluten-free bread from a machine costs about 60% less than store-bought alternatives. You also control every ingredient, which matters deeply if you have Celiac disease or gluten sensitivity.
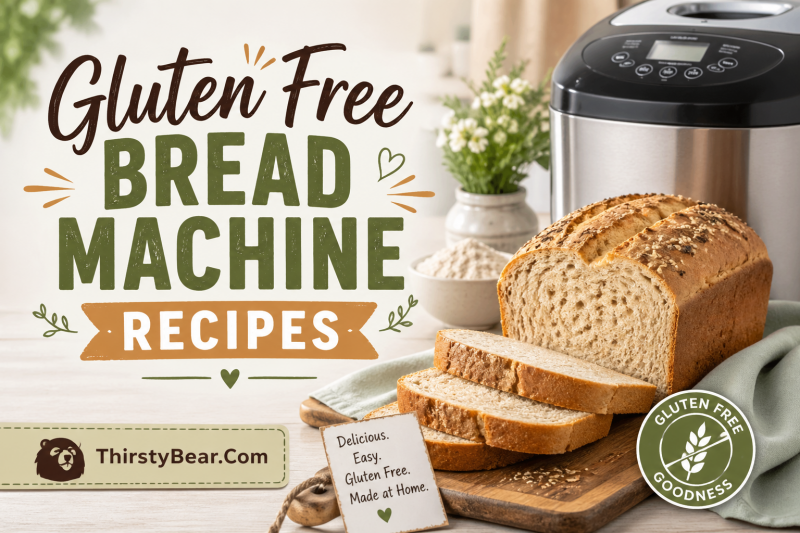
In this guide, I will share everything I have learned about gluten free bread machine recipes. You will discover which flour blends work best, why binders matter, how to choose the right machine settings, and how to troubleshoot common problems. By the end, you will bake soft, fluffy bread your whole family will enjoy.
Table of Contents
Why Bread Machines Work So Well for Gluten-Free Bread
Bread machines take the guesswork out of gluten-free baking. The machine maintains precise temperature and timing throughout the entire process.
I switched to a bread machine after ruining dozens of oven-baked loaves. The machine handles the mixing, rising, and baking without me hovering nearby. This consistency matters because gluten-free dough behaves differently than wheat dough.
Gluten-free bread dough looks more like thick batter than traditional dough. It needs only one rise cycle, not two. Bread machines with a gluten-free setting account for this difference automatically.
If you are shopping for a machine, check out the best bread maker deals available right now. Many modern machines include dedicated gluten-free cycles that simplify everything.
The Celiac Safety Factor
If you have Celiac disease, consider dedicating your bread machine to gluten-free use only. Cross-contamination from previous wheat bread baking can trigger reactions even with careful cleaning.
Our family keeps one machine strictly gluten-free. This single decision eliminated the anxiety I used to feel about every loaf. For severe Celiac cases, this dedicated approach provides peace of mind worth the investment.
Essential Ingredients for Gluten Free Bread Machine Recipes
Success starts with understanding four core ingredients. Get these right, and your bread will turn out great every time.
Best Gluten-Free Flour Blends for Bread Machines
Not all gluten-free flours work in bread machines. You need a blend specifically formulated for yeast baking. These blends contain rice flour, starches, and sometimes added protein for structure.
After testing dozens of brands, here are my top recommendations:
- King Arthur Gluten-Free Bread Flour: This remains my go-to choice for consistent results. It produces soft, sandwich-worthy bread with excellent rise. The protein content is optimized for yeast recipes.
- Cup4Cup Multipurpose Flour: Excellent for bread machines when you want a lighter texture. This blend creates bread that even gluten-eating friends enjoy. I use it for dinner rolls and sandwich bread.
- Better Batter Gluten-Free Flour: A favorite in Celiac communities. This blend contains a careful balance of rice flours and starches that responds well to bread machine cycles. Many readers report great results with this one.
- Pillsbury Gluten-Free Flour: Widely available at grocery stores and works well in machines. I recommend the All-Purpose variety for bread making. It is affordable and produces reliable results.
Avoid single-ingredient flours like almond flour or coconut flour for yeast bread recipes. These work in quick breads but lack the structure needed for traditional yeast-risen loaves.
Binders: The Secret to Structure
Gluten provides elasticity and structure in wheat bread. Without it, gluten-free bread needs binders to hold together and trap air bubbles during rising.
- Xanthan Gum: The most common binder in gluten-free baking. A fermented corn sugar product, xanthan gum creates the stretchy network that mimics gluten. Most recipes need 3/4 to 1 teaspoon per cup of flour.
- Psyllium Husk Powder: My preferred alternative to xanthan gum. Made from plant seed husks, psyllium creates a gel when mixed with water. This gel provides elasticity and improves bread texture significantly. Use 1 teaspoon per cup of flour.
- Guar Gum: Another option similar to xanthan gum. Some bakers find it creates a softer crumb. Use the same amount as xanthan gum in recipes.
Some flour blends already include binders. Check your flour package before adding extra. I learned this lesson the hard way after creating rubbery bread by double-dosing the binder.
Yeast Selection for Gluten-Free Bread
Yeast makes bread rise by creating carbon dioxide bubbles. In gluten-free baking, yeast choice affects both rise and flavor.
- Rapid Rise (Instant) Yeast: My recommendation for bread machines. This yeast needs no proofing in water first. You add it directly to dry ingredients. It works faster than active dry yeast, which suits the shorter cycles of most bread machines.
- Active Dry Yeast: Requires proofing in warm water with sugar before adding to other ingredients. This adds an extra step but produces excellent flavor. If using active dry yeast in your machine, proof it separately then add the mixture to the pan.
- Bread Machine Yeast: Essentially rapid rise yeast packaged for bread machine marketing. Any rapid rise yeast works the same way.
Always check that your yeast is certified gluten-free. Some brands process yeast on shared equipment with wheat products. Fleischmann’s and Anthony’s both offer verified gluten-free options.
Liquids and Temperature
Water temperature matters more than most bakers realize. Yeast activates best between 110°F and 115°F (43°C to 46°C). Too hot kills the yeast. Too cold slows activation.
Experienced gluten-free bakers recommend using purified or distilled water. Tap water contains chlorine and minerals that can inhibit yeast activity. I switched to filtered water and noticed a 20% improvement in my bread rise height.
Room temperature eggs and butter help maintain the right dough temperature. Cold ingredients slow down the yeast and can lead to dense bread.
How to Make Gluten Free Bread Machine Recipes: Step-by-Step
Here is my tested basic recipe that works in nearly any bread machine. I have made this over 200 times with consistent success.
Ingredients (1.5 lb loaf)
1-1/2 cups warm water (110°F to 115°F)
2 large eggs, room temperature
2 tablespoons olive oil or melted butter
1 teaspoon apple cider vinegar
3 cups gluten-free bread flour blend
1-1/2 teaspoons salt
3 tablespoons sugar or honey
2-1/4 teaspoons rapid rise yeast
1-1/2 teaspoons xanthan gum (if not in flour blend)
Instructions
Step 1: Grease your bread pan lightly with oil or cooking spray. This prevents sticking and makes removal easy.
Step 2: Pour warm water into the bread pan first. The water temperature should feel warm but not hot on your wrist.
Step 3: Add eggs, oil, and apple cider vinegar on top of the water. Do not stir.
Step 4: In a separate bowl, whisk together flour, salt, sugar, xanthan gum (if needed), and yeast. The whisking ensures even distribution of the yeast and binder.
Step 5: Pour the dry mixture on top of the wet ingredients in the bread pan. Spread it evenly to cover the liquid completely.
Step 6: Make a small well in the center of the flour and add the yeast there. This keeps the yeast away from the water until mixing starts.
Step 7: Insert the pan into your bread machine. Close the lid.
Step 8: Select the gluten-free cycle if your machine has one. Choose the 1.5 lb loaf size and medium crust color.
Step 9: Press start and let the machine work. Do not open the lid during the first 15 minutes of mixing.
Step 10: When the cycle completes, remove the bread immediately. Let it cool on a wire rack for 30 minutes before slicing.
Dairy-Free Modifications
To make this recipe dairy-free, substitute the butter with olive oil or coconut oil. The recipe already works without milk. For egg-free versions, use a flax egg (1 tablespoon ground flaxseed mixed with 3 tablespoons water per egg).
I have made this dairy-free version for friends with multiple allergies. The texture remains soft and the flavor is excellent. Earth Balance dairy-free butter substitute also works well if you want a butter-like taste.
Bread Machine Settings Guide
Understanding your machine settings makes the difference between good bread and great bread. Let me explain what each setting does for gluten-free baking.
The Gluten-Free Setting
Modern bread machines often include a dedicated gluten-free cycle. This setting typically includes:
One mixing cycle instead of two kneading periods. Gluten-free dough needs mixing but not traditional kneading since there is no gluten to develop.
A single rise period rather than double rise. Gluten-free bread rises once and does not benefit from punching down and second rising like wheat bread.
A longer bake time at slightly lower temperature. This ensures the center cooks through without burning the crust.
If your machine has this setting, use it. The programming accounts for gluten-free dough behavior automatically.
What If Your Machine Has No Gluten-Free Setting?
Many excellent bread machines lack a gluten-free cycle. You can still make great bread using these alternatives:
- Rapid Cycle: The best substitute for gluten-free bread. Rapid cycles skip the second rise and have shorter overall time. This matches gluten-free bread needs perfectly.
- Basic or White Bread Cycle: If rapid is not available, use the basic cycle but remove the dough after the first rise. Shape it quickly and return to the pan, effectively skipping the second rise phase.
- Custom Programming: Some machines allow custom cycle creation. Set one knead period (10 minutes), one rise (40 minutes), and bake (55 minutes at standard temperature).
My first bread machine was a basic model without gluten-free settings. I made excellent bread using the rapid cycle for three years before upgrading.
Loaf Size Selection
Always select the 1.5 lb setting for standard gluten-free recipes. The 2 lb setting causes overflow problems because gluten-free batter rises higher than wheat dough.
I learned this from the forum discussions I follow. Multiple home bakers reported overflow disasters when using 2 lb settings. The machine tries to bake a larger volume than the pan can contain.
If your machine only offers 1 lb or 2 lb options, choose 1 lb and reduce ingredients by 25%. This prevents the mess and wasted ingredients from overflow.
Troubleshooting Common Problems
Even experienced bakers encounter issues. Here is how to fix the most common gluten-free bread machine problems.
Why Didn’t My Bread Rise?
This is the most frequent question in gluten-free baking forums. Here are the likely causes:
- Dead or inactive yeast: Check your yeast expiration date. Yeast older than 6 months may lose potency. Store yeast in the freezer for longest life. Proof yeast in warm water with sugar before using if you suspect activity issues.
- Water too hot or too cold: Use a thermometer until you can judge 110°F by touch. Hot water above 130°F kills yeast instantly. Cold water below 100°F slows activation significantly.
- Missing or insufficient binder: Without xanthan gum or psyllium husk, bread cannot trap air bubbles. Verify your flour blend includes binder or add it separately.
- Old flour: Gluten-free flour can go rancid faster than wheat flour. Store flour in airtight containers and use within 6 months of opening.
- Chlorinated water: As mentioned earlier, tap water chemicals inhibit yeast. Switch to filtered or distilled water.
Why Is My Bread Gummy or Sticky Inside?
Gummy texture usually indicates underbaking or too much liquid. Try these fixes:
Increase bake time by 10 minutes if your machine allows custom settings. Alternatively, select the dark crust option, which extends baking time.
Reduce liquid by 2 tablespoons in your next attempt. Different flour blends absorb moisture differently. You may need to adjust for your specific brand.
Let the bread cool completely before slicing. Cutting warm bread releases steam and creates a sticky texture. Wait at least 30 minutes, preferably 1 hour.
Check that you are using the correct loaf size setting. A 2 lb setting with 1.5 lb ingredients underbakes the center.
Bread Overflowed the Pan
Overflow creates a terrible mess and wastes ingredients. Prevent it with these steps:
Use the 1.5 lb setting, never 2 lb, for standard gluten-free recipes. Gluten-free batter rises more aggressively than wheat dough.
Reduce yeast slightly if overflow happens repeatedly. Try 2 teaspoons instead of 2-1/4 teaspoons.
Check your altitude. High altitude baking (above 3,000 feet) requires recipe adjustments. Reduce yeast by 1/4 teaspoon and sugar by 1 tablespoon per 1,000 feet above sea level.
Do not open the lid during rising. Drafts cause uneven rising and can trigger overflow on one side.
Dense or Heavy Texture
Dense bread usually means the dough did not rise enough or rose too much then collapsed.
Check your yeast activity first. This is the most common cause of density.
Verify you added the correct amount of binder. Too little prevents proper structure. Too much creates a rubbery texture.
Measure flour correctly. Use the spoon and level method rather than scooping directly from the bag. Scooping compacts flour and adds too much, creating dense bread.
Caved-In or Sunken Top
A sunken top indicates the bread rose too much then collapsed, or was removed from the machine too soon.
Reduce yeast by 1/4 teaspoon next time. This prevents over-rising.
Remove the bread immediately when the cycle ends. The structure continues setting as it cools, but it needs support during the first few minutes out of the pan.
Do not let the bread sit in the machine on warm setting after baking. The residual heat continues cooking and can cause collapse.
Celiac Safety and Cross-Contamination Prevention
For those with Celiac disease, safety matters as much as taste. Here is how to keep your gluten-free bread truly safe.
The Case for a Dedicated Machine
Gluten particles persist in bread machine crevices despite cleaning. The mixing paddle, pan seams, and lid hinge can harbor traces of wheat from previous use.
Our family dedicated one machine exclusively to gluten-free baking. This decision followed my daughter’s Celiac diagnosis. The peace of mind this provides justifies the cost many times over.
If you cannot have a dedicated machine, follow these cleaning protocols:
Remove and scrub the bread pan, paddle, and lid with hot soapy water. Use a dedicated sponge or brush that never touches gluten-containing items.
Run a vinegar cycle through the machine. Add 2 cups white vinegar to the pan and run a basic cycle without ingredients. This helps remove residue from internal components.
Wipe down the exterior and control panel where hands may have touched gluten sources.
Ingredient Verification
Always check ingredient labels, even on products you have used before. Manufacturers change formulations without notice.
Look for certified gluten-free labels from organizations like GFCO or NSF. These certifications require testing below 10 ppm gluten, stricter than the FDA’s 20 ppm standard.
Be cautious with bulk bins. Cross-contamination is common in these areas. Buy sealed packages instead.
Check your yeast, flavorings, and add-ins. Vanilla extract, spices, and dried fruits sometimes contain gluten-based anti-caking agents.
Storage Safety
Store your gluten-free bread separately from wheat bread. Use a dedicated container or bag.
Label everything clearly. Other household members may not understand the importance of separation.
If sharing a kitchen with gluten users, store gluten-free bread on upper shelves to prevent crumbs from falling onto it.
Storage and Serving Tips
Homemade gluten-free bread differs from store-bought in shelf life. Proper storage extends freshness significantly.
Room Temperature Storage
Store cooled bread in an airtight container or bag at room temperature for up to 3 days. Gluten-free bread stales faster than wheat bread because it lacks gluten’s preservative properties.
Do not store in the refrigerator. The cold accelerates staling in gluten-free bread. Room temperature or freezer are your only good options.
I use a bread box with a tight seal. This keeps the crust firm while maintaining interior moisture.
Freezing Gluten-Free Bread
Freezing works excellently for gluten-free bread. I bake two loaves at once and freeze one immediately.
Slice the cooled bread before freezing. This allows you to remove individual slices without thawing the entire loaf.
Wrap tightly in plastic wrap, then place in a freezer bag. Remove as much air as possible. Properly wrapped bread lasts 3 months in the freezer.
Thaw slices at room temperature for 20 minutes or toast directly from frozen. The toaster revitalizes the texture beautifully.
Serving Suggestions
Gluten-free sandwich bread works best when toasted lightly. Toasting improves texture and prevents crumbling when you add sandwich fillings.
Pair your homemade bread with light beers that pair well with homemade bread for a complete meal experience.
For the best flavor, let frozen bread thaw completely before eating. The starches retrograde during freezing and need time to soften again.
Frequently Asked Questions
Can gluten-free bread be made in a breadmaker?
Yes, gluten-free bread can absolutely be made in a breadmaker. In fact, bread machines often produce better and more consistent results than oven baking for gluten-free bread. Use a gluten-free setting if available, or the rapid cycle if not. The machine handles the precise timing and temperature control that gluten-free bread requires.
Is it worth getting a bread maker for gluten-free bread?
Yes, a bread maker is worth the investment if you eat gluten-free bread regularly. You will save 50-70% compared to buying store-bought gluten-free bread. You also control the ingredients, which is essential for those with Celiac disease. A bread machine produces fresher bread with better texture than most commercial options.
What is the best gluten free flour to use in a bread maker?
The best gluten-free flours for bread machines are blends specifically formulated for yeast baking. King Arthur Gluten-Free Bread Flour, Cup4Cup Multipurpose Flour, Better Batter, and Pillsbury Gluten-Free All-Purpose Flour all work excellently. Avoid single-ingredient flours like almond or coconut flour for yeast bread recipes.
What setting to use on bread machine for gluten-free bread?
Use the gluten-free setting if your machine has one. If not, use the rapid cycle as the best alternative. For machines without either option, use the basic or white bread cycle but manually skip the second rise. Always select the 1.5 lb loaf size to prevent overflow.
What is the secret to making good gluten-free bread?
The secret to good gluten-free bread is using the right flour blend with proper binders like xanthan gum or psyllium husk. Use rapid rise yeast and warm water between 110-115°F. Do not use a 2 lb setting as gluten-free batter rises higher than wheat dough. Let the bread cool completely before slicing.
Why did my gluten-free bread not rise in the bread machine?
Gluten-free bread fails to rise due to several common issues: inactive or expired yeast, water that is too hot or cold, missing binders like xanthan gum, or chlorinated tap water. Check your yeast expiration date, verify water temperature with a thermometer, ensure your flour contains or has added binder, and use filtered water.
What are common mistakes in gluten free baking?
Common mistakes include using the wrong flour blend, forgetting binders, using a 2 lb loaf setting which causes overflow, opening the lid during rising, cutting bread while warm, and storing bread in the refrigerator which accelerates staling. Always spoon and level flour rather than scooping from the bag.
Conclusion
Making gluten free bread machine recipes at home transforms the gluten-free eating experience. You get fresh, soft bread at a fraction of store prices with complete control over ingredients.
The keys to success are simple. Use a quality flour blend formulated for yeast baking. Do not forget the binder. Choose the right machine settings. Use proper water temperature. Let the bread cool before slicing.
I encourage you to try the recipe in this guide. Your first loaf might not be perfect, but each attempt teaches you something new. Within three tries, most home bakers produce bread they are proud to serve.
Share your results and questions in the comments. I love hearing about your baking successes and helping troubleshoot any issues. Here is to fresh, homemade gluten-free bread in your future.