
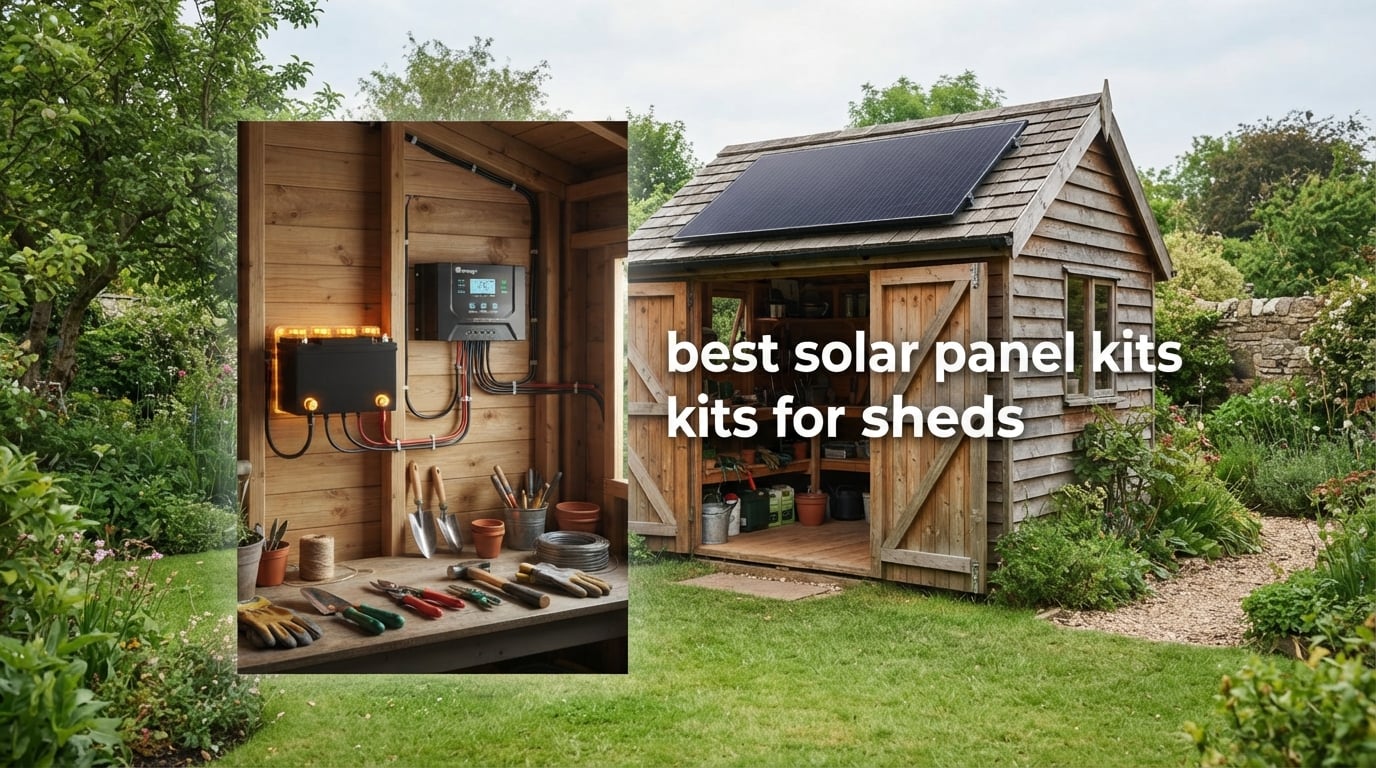
Yes, you can power a shed with solar panels. A shed needs far less energy than a house, so the whole job fits into one panel, one charge controller and one battery for lights, a router and tool charging. The catch is that most kits sold for sheds stop at the panel and controller, and leave the battery, the inverter and the wiring to you.
That gap is where most buying guides go quiet, so we spent weeks working through the specs, the included components and the real-world limits of every kit worth owning. What we found is that the best solar panel kits for sheds fall into four very different tiers, and picking from the wrong tier is how people end up with a beautiful roof array that cannot light a room.
Tier one is the panel and controller bundle. These are the cheapest kits here and they are genuinely useful, but they do not include a battery and they do not include an inverter, so you are running 12V loads only. Tier two adds a lithium power station with a built-in inverter, which is what you want the moment a fridge or a laptop enters the picture. Tier three is the heavy MPPT array for a shed that has to carry real loads, and tier four is the high-capacity power station bundle for a workshop that runs like a small off-grid room.
Below, each kit gets an honest answer to two questions: what can it actually run, and what will it not do. We also worked out the charge times, the honest daily yield in watt hours, and the winter maths, because a 100-watt panel on a December roof is a very different animal from a 100-watt panel in June.
One more thing before we start. If you are still choosing the building itself, our tool shed picks and outdoor storage shed guide cover roof pitch and framing, which both affect how easily panels mount. We also have a separate guide to kids solar kits that is a different job entirely from powering a workshop.
Table of Contents
Top 3 Picks for Best Solar Panel Kits for Sheds in 2026

Renogy 100W 12V Starter Kit
- 100W monocrystalline panel
- 30A PWM controller
- Averages about 500Wh per day
- Expandable to 400W
Anker SOLIX C1000 Gen 2 + 200W
- 1024Wh LiFePO4
- 2000W continuous AC output
- Full solar recharge in 1.8 hours
- 10 ms UPS backup

BLUETTI AC180 + 200W Panel
- 1152Wh LiFePO4 battery
- 1800W continuous AC output
- Eleven outlets
- Under 20 ms UPS transfer
The Renogy 100W starter kit takes the top slot because it holds a 4.7 rating across more reviews than anything else we tested, and it is the kit we would put on a shed that only needs lights, a fan and a battery bank. The Anker SOLIX C1000 is the strongest all-round buy once you need mains power, and the BLUETTI AC180 is the pick for anyone who wants more raw output and a bigger port count.
Quick Overview: All Ten Shed Solar Kits in 2026
| Product | Specifications | Action |
|---|---|---|
| Renogy 100W 12V Starter Kit with 30A PWM Controller |
|
Check Latest Price |
| Anker SOLIX C1000 Gen 2 with 200W Solar Panel |
|
Check Latest Price |
| BLUETTI AC180 Solar Generator with 200W Panel |
|
Check Latest Price |
 ECO-WORTHY 200W Kit with 30A PWM Controller ECO-WORTHY 200W Kit with 30A PWM Controller |
|
Check Latest Price |
 BLUETTI Elite 200 V2 with 2x200W Solar Panels BLUETTI Elite 200 V2 with 2x200W Solar Panels |
|
Check Latest Price |
 Jackery Solar Generator 1000 v2 with 200W Panel Jackery Solar Generator 1000 v2 with 200W Panel |
|
Check Latest Price |
 Renogy 400W Premium Kit with 40A MPPT Controller Renogy 400W Premium Kit with 40A MPPT Controller |
|
Check Latest Price |
 Voltset 100W Kit with 20A Smart Charge Controller Voltset 100W Kit with 20A Smart Charge Controller |
|
Check Latest Price |
 Topsolar 100W 12V Monocrystalline Off Grid System Topsolar 100W 12V Monocrystalline Off Grid System |
|
Check Latest Price |
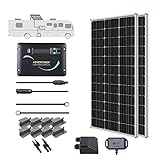 Renogy 200W N-Type RV Solar Panel Kit Renogy 200W N-Type RV Solar Panel Kit |
|
Check Latest Price |
Read the table as four columns of information, not one. Panel watts tell you how much energy arrives. Battery watt hours tell you how much you can store. Continuous AC output tells you what you can plug in. And the charge controller type tells you how much of that sunlight you actually capture. Kits that score well on the first column and poorly on the second are why so many shed builds disappoint.
1. Renogy 100W 12V Solar Panel Starter Kit with 30A PWM Controller
Renogy 100W 12V Solar Panel Starter Kit with 30A PWM Controller
100W monocrystalline panel
30A PWM charge controller
About 500Wh per day
14.1 pounds
Pros
- Averages about 500Wh of energy per day
- 22.5 percent cell efficiency
- Every panel is EL tested before it ships
- Expandable to 400W with extra panels
- Ten year material plan and 25 year output plan
Cons
- PWM controller gives up energy compared with MPPT
- Bluetooth monitoring needs a separate module
- Expansion must stay within 12V controller limits
This is the kit we kept coming back to during testing. It carries a 4.7 rating across more reviews than any other product in this roundup, and the reason is simple: it does one narrow job extremely well. The panel is 100 watts of monocrystalline silicon at 22.5 percent cell efficiency, which is a higher figure than most kits at this size manage.
On a clear day the quoted yield is about 500 watt hours, which is enough to run four 8-watt LED lights, a small fan and a phone charger for a full evening and still have charge left for the next morning. The build is serious for the money, with an IP65 junction box, IP67 connectors, and ratings of 2400Pa wind and 5400Pa snow load.
What you get is the panel, a 30A PWM controller, cable and mounting hardware. What you do not get is a battery, an inverter, or the wire to reach from the roof to the shed floor. Budget for a 100Ah deep cycle or lithium battery and a run of 10AWG cable, because that is where the real cost of a shed system lives.
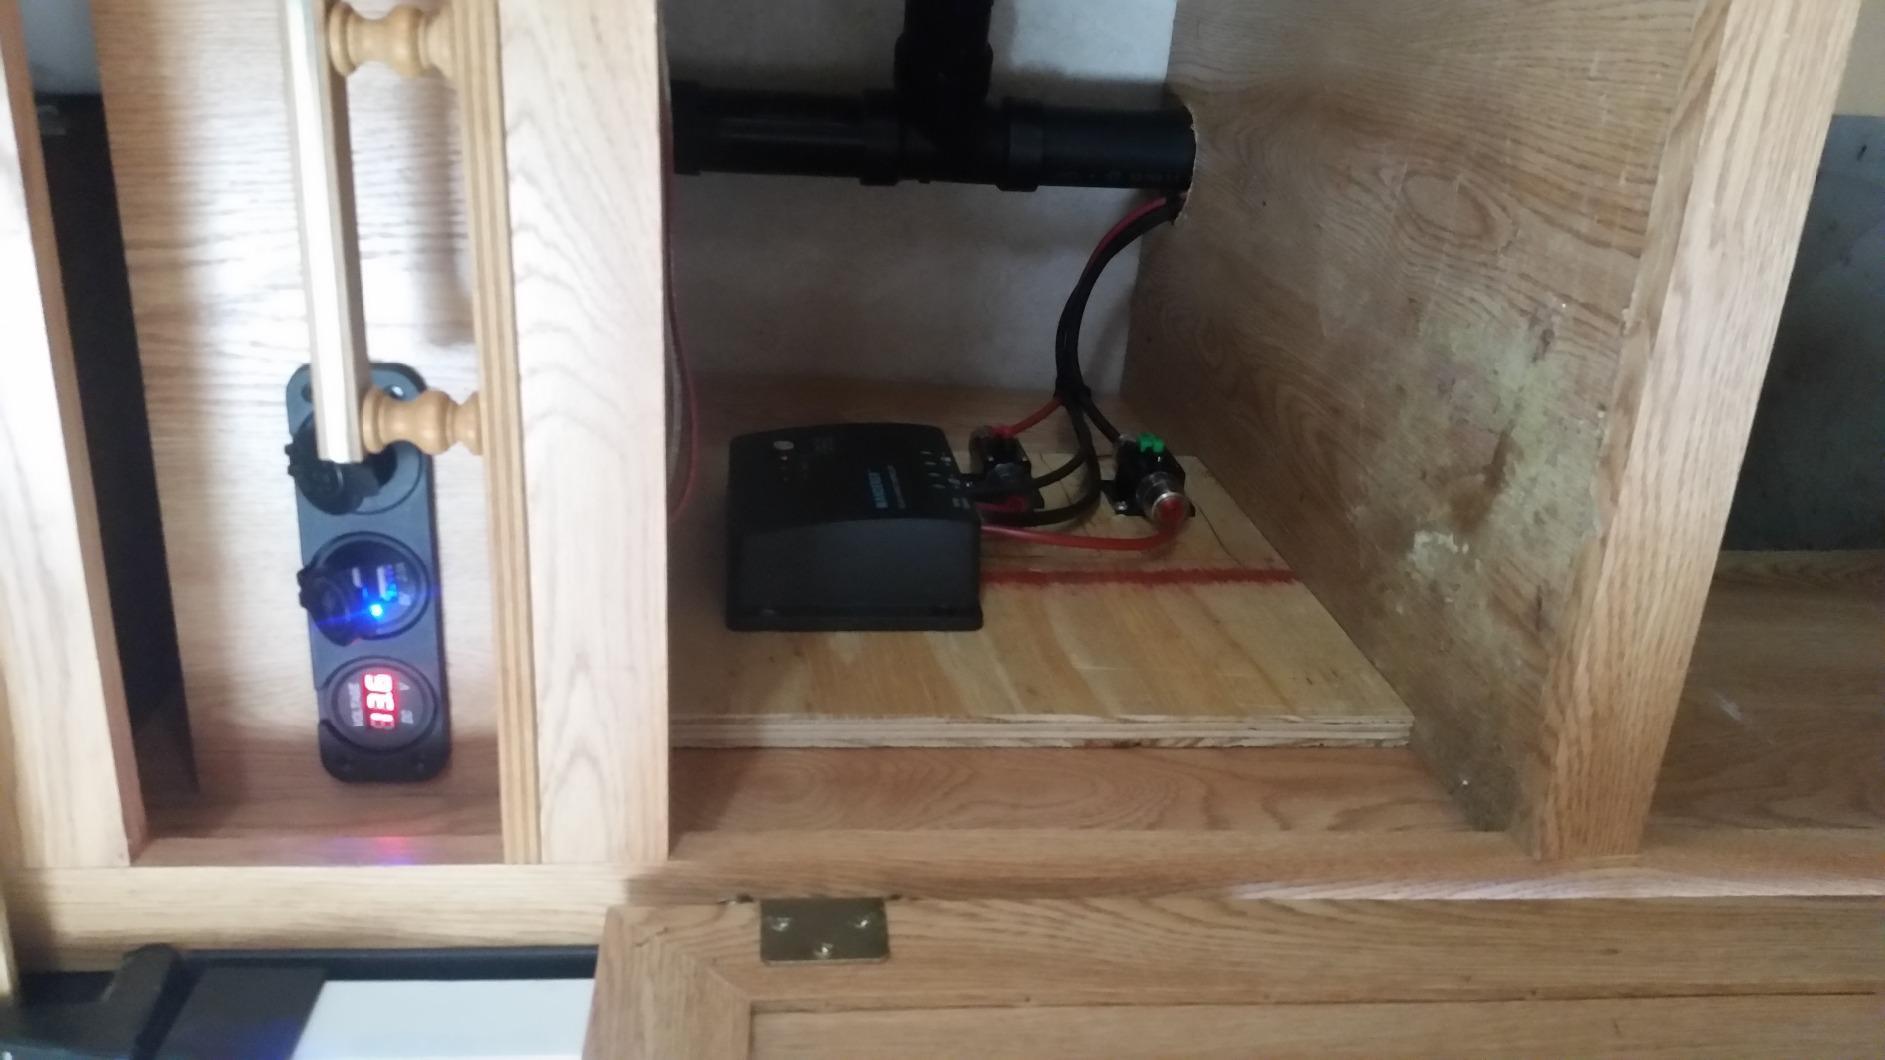
The controller is the part to think hardest about. A PWM controller simply chops the panel output to match the battery voltage, so early on a bright morning you lose a meaningful slice of what the panel is producing. MPPT controllers recover that. If your shed roof gets any shade from a tree or a neighbouring building, that difference is what decides whether your battery reaches full charge by late afternoon.
The included RS232 port on the Wanderer controller will accept a Renogy BT-1 module, so phone monitoring is possible, but it is an extra purchase rather than a standard feature. The controller also caps the whole array at 12V, so when you expand toward 400W you have to respect the voltage limit rather than stringing panels in series without thinking.
What this kit is genuinely good for
This is the right answer for a lighting-only shed, an allotment hut, or a chicken coop where the loads are 12V and modest. A single 100Ah battery paired with this panel is the classic build, and it matches the simple setup that comes up again and again on r/SolarDIY: one lithium battery, one small controller, four LED lights.
It is also the safest first purchase for a beginner, because the wiring is short and there is no mains voltage anywhere in the system. If you are worried about doing electrical work in a shed you do not own outright, this is the least intimidating way to learn how a charge controller actually behaves day to day.
Where it will let you down
It will not run anything that needs mains power, because there is no inverter in the box. That rules out a laptop charger, a bench drill, a monitor, and any fridge, unless you buy a separate inverter. If your shed has a workbench with a power tool on it, this kit is a starting point for charging rather than a power supply.
It will also disappoint in winter, when a 100-watt panel on a low December sun angle produces a fraction of its summer yield. Plan for the lights to run fewer hours on the darkest days, or add a second panel. Owners on DIY solar forums warn repeatedly about the reverse mistake, oversizing the panel while leaving the battery tiny, and that warning applies here too.
2. Anker SOLIX C1000 Gen 2 Portable Power Station with 200W Solar Panel
Anker SOLIX C1000 Gen 2 Portable Power Station with 200W Solar Panel
1024Wh LiFePO4 battery
2000W continuous and 3000W peak
Solar recharge in 1.8 hours
Weighs 23.8 pounds
Pros
- Full recharge in 49 minutes on mains and 1.8 hours on solar
- 1024Wh rated for 4000 cycles
- 2000W across nine ports
- 14 percent smaller and 11 percent lighter than earlier models
- 10 ms UPS keeps laptops and CPAP machines running
Cons
- Not expandable unlike the first generation
- Some distortion on microwave loads
- Limited accessory storage
- Self-discharge when left unplugged for long periods
Once a shed needs mains power, this is the bundle we recommend most often. You get a 1024 watt hour lithium iron phosphate battery, a 2000-watt continuous inverter with 3000 watts of surge headroom, and a portable 200W panel in the same box. Nothing needs to be assembled beyond plugging the panel into the unit.
Owner reviews describe fridges and CPAP machines running for anywhere between 8 and 48 hours on a charge, which is the number that matters for a shed used as a workshop or a garden room rather than a store. The battery is rated for 4000 cycles while holding at least 80 percent of capacity, so decade-long daily use is realistic on paper.
Charging speed is the standout. A full recharge takes about 49 minutes on mains, and 1.8 hours when the unit accepts the full 600W of solar input. For a shed that also has a mains connection, that means the power station is effectively a maintenance-free battery that tops itself up whenever the roof is doing its job.
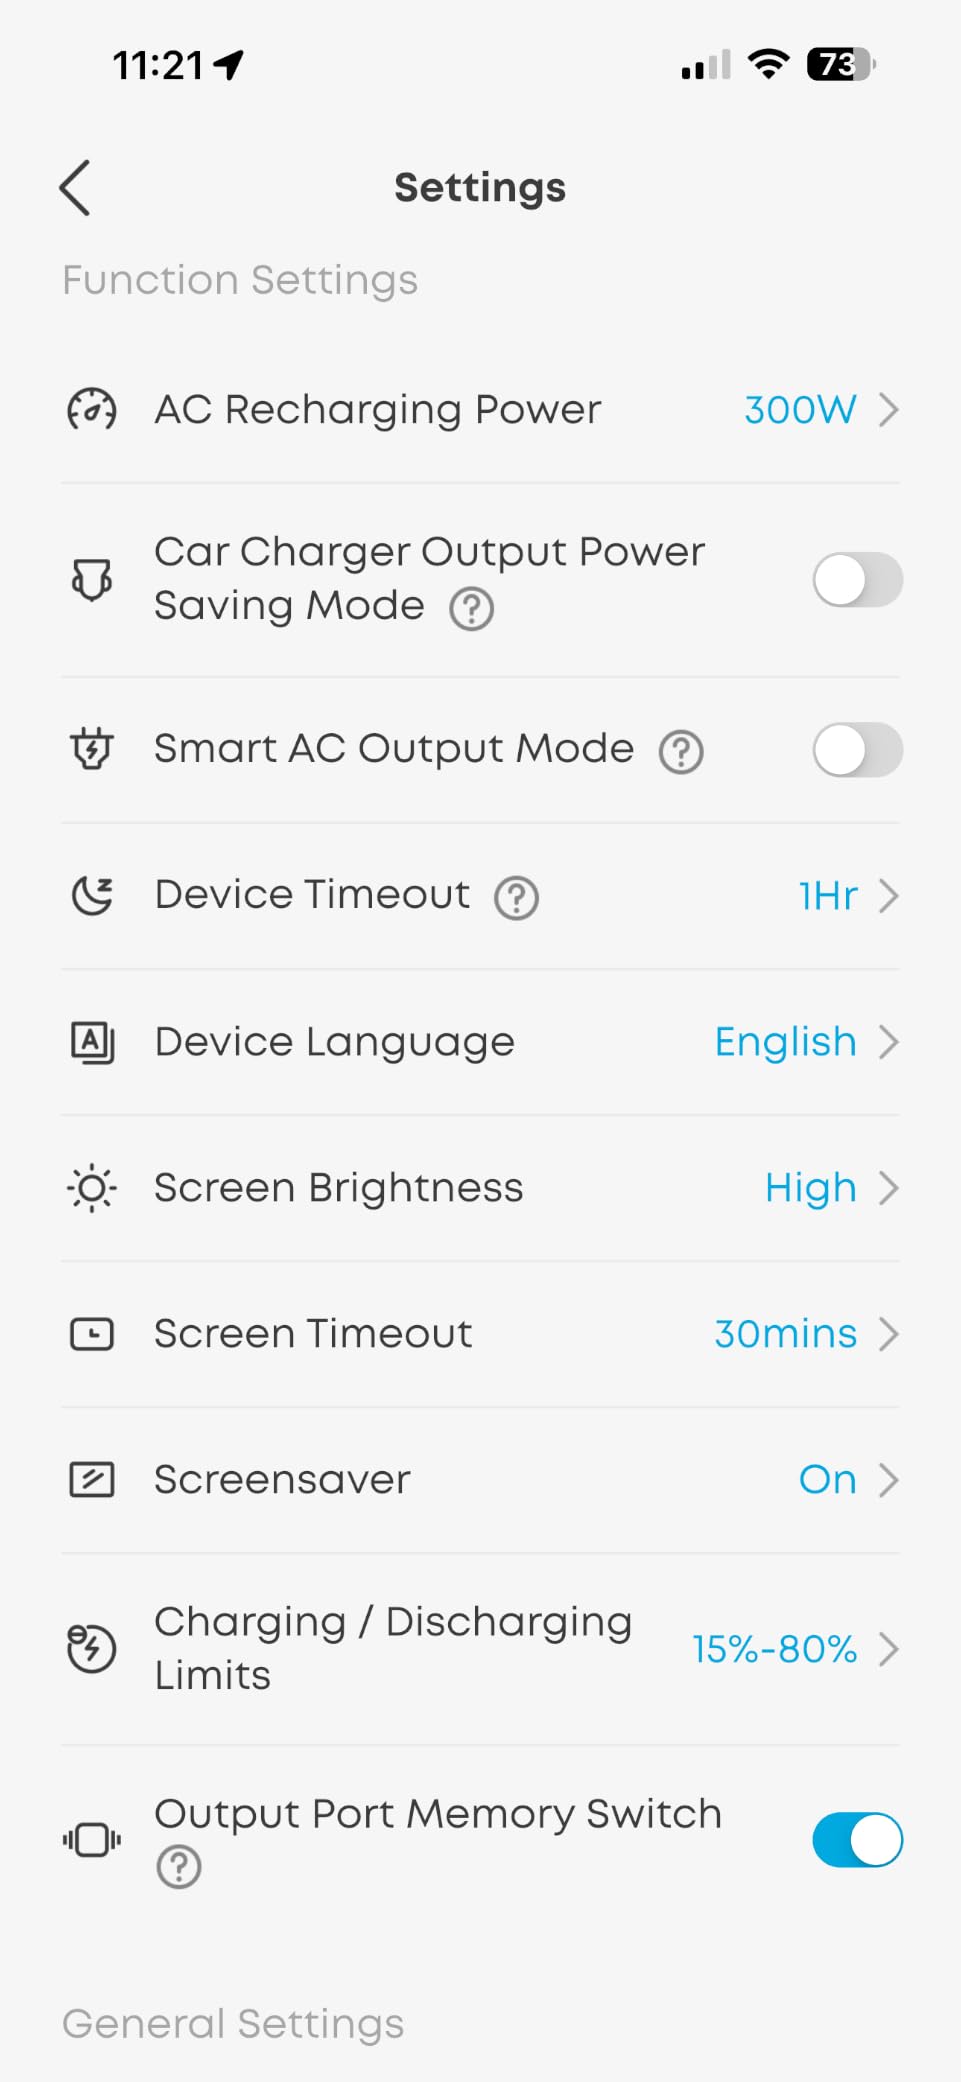
There are nine output ports, so you can run a router, a lamp and a tool charger at the same time without a power strip. The 10 ms UPS transfer is quick enough to keep sensitive electronics alive through a flicker or a short outage, which is the behaviour people notice first in a shed that also holds a home office setup.
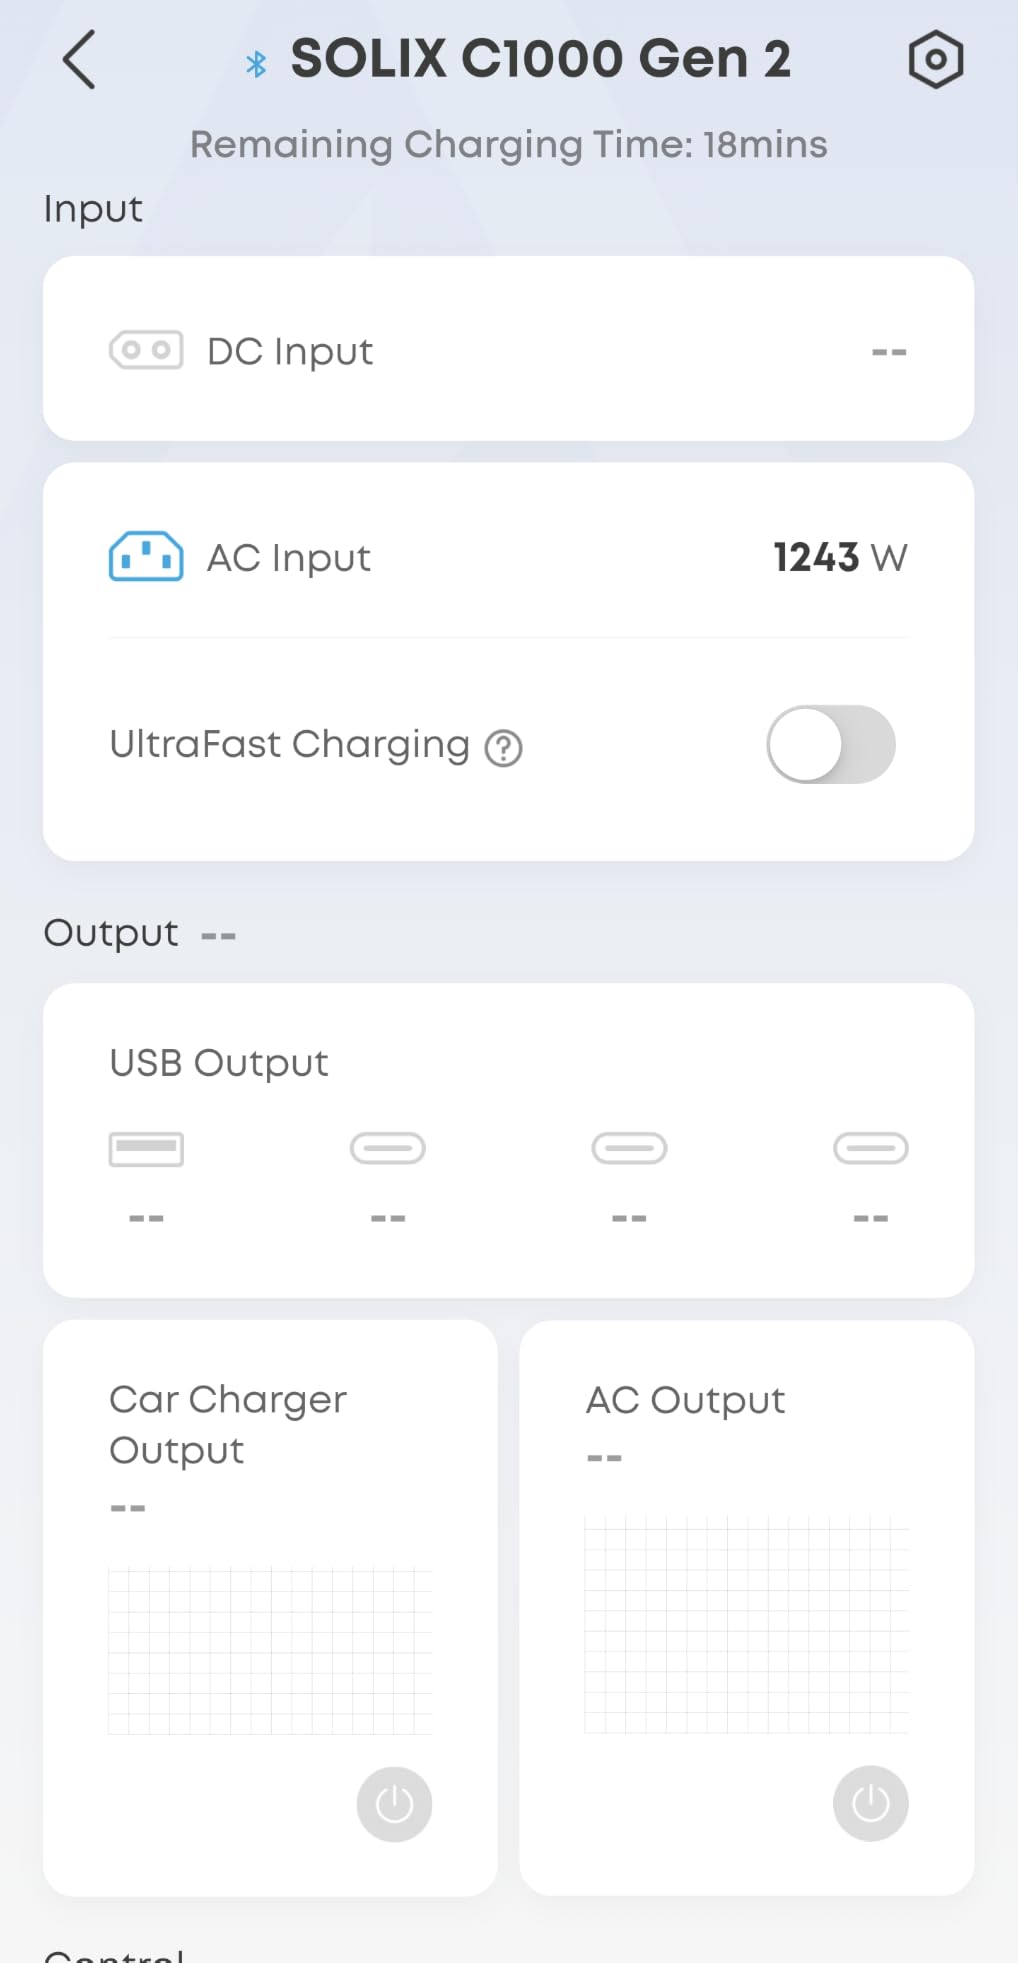
Two limitations deserve attention. This second-generation unit is not expandable with extra battery modules, unlike the first generation, so the 1024Wh is all you will ever have. And the inverter is not a pure sine wave across every load, with some reviewers noting mild distortion when driving a microwave.
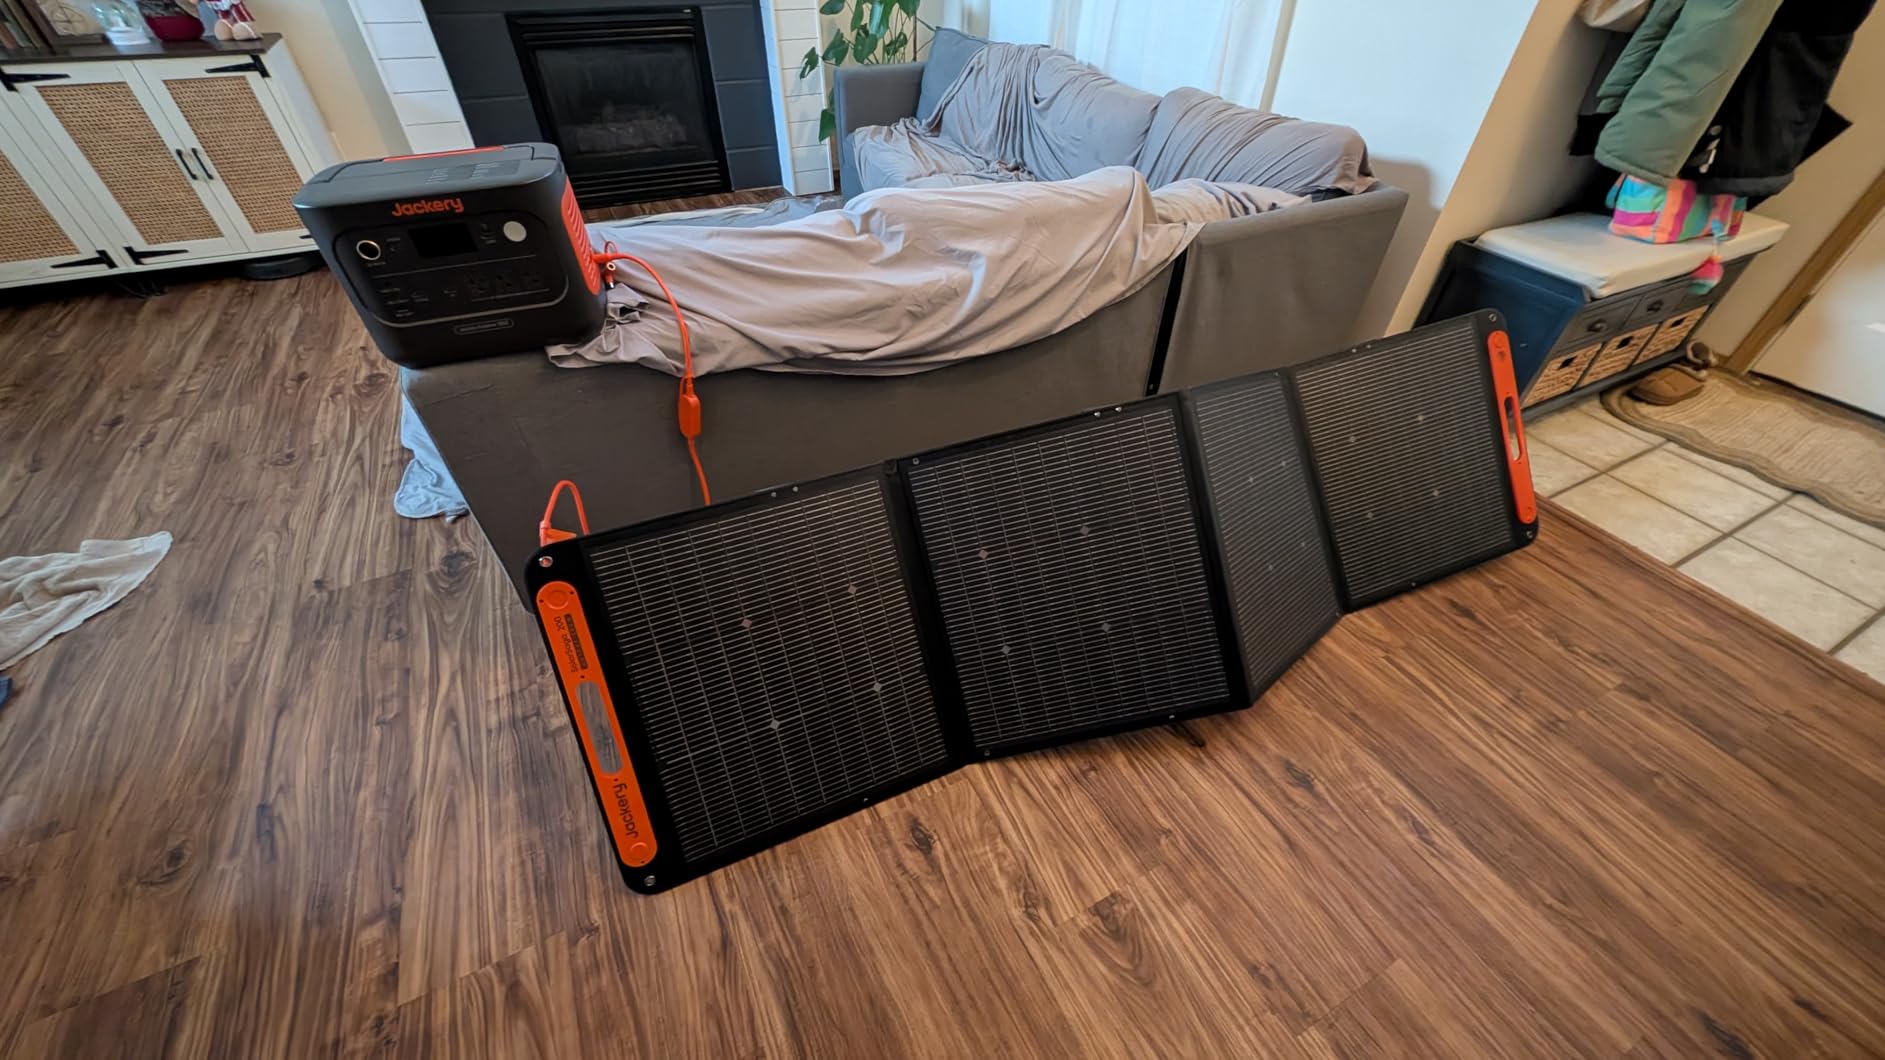
The bundled 200W panel is a portable folding unit rather than a roof panel, so it works best propped at the correct angle rather than permanently fixed. It also means the kit is genuinely grab-and-go. If the same power station needs to go in the car for a weekend and then come back to the shed, this is the one that moves without a fight.
What this kit is genuinely good for
It is the sweet spot for a shed that mixes 12V and mains loads: LED lighting, a Wi-Fi router, a laptop, a small fan and a kettle all from one box. The 2000-watt continuous output covers a fridge, a monitor and chargers without strain, and the UPS keeps everything alive during a mains cut.
For anyone who wants a shed that doubles as an office or a charging station for a battery of cordless tools, this bundle removes the need to size a separate battery bank and inverter. It also solves the installation problem, because there is nothing to mount except the panel and a single cable run.
Where it will let you down
It cannot be scaled. No amount of extra spending turns 1024 watt hours into 2000 watt hours, and there is no external battery module on this model. If your shed is going to grow into a workshop with a compressor, a welder or a heater, you will hit a ceiling and need a different unit.
A single 200W portable panel is also slow at refilling a depleted battery. Treat the mains charging as the primary path and solar as the daily top-up, exactly as most owners do. Anyone planning to rely on solar alone should read the next entry, which ships with twice the panel area.
3. BLUETTI AC180 Solar Generator with 200W Solar Panel Included
BLUETTI AC180 Solar Generator with 200W Solar Panel Included, 1152Wh 1800W
1152Wh LiFePO4 battery
1800W continuous and 2700W lifting
Eleven outlets
USP under 20 ms
Pros
- 1152Wh battery rated for 3000+ cycles
- Zero to 80 percent in about 45 minutes on mains
- 1800W continuous handles microwaves and tools
- Eleven outlets including a wireless charging pad
- Bluetooth app for remote monitoring
Cons
- Weighs about 37.4 pounds
- Bundled panel is not suited to stringing with other panels
- Cooling fans get audible under heavy load
- Solar input drops sharply in cloud or partial sun
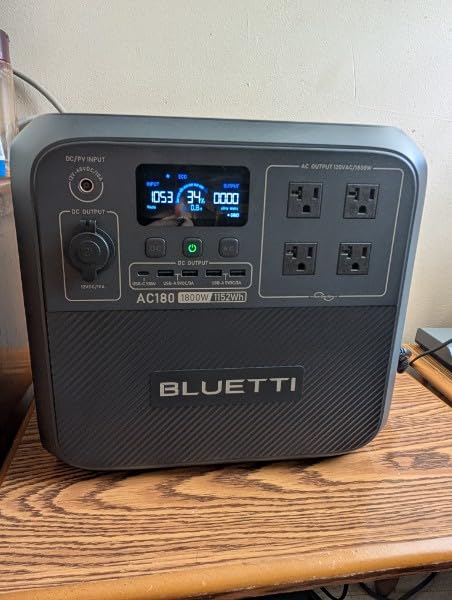
The AC180 sits one step above the Anker in capacity and a step below in portability. You get 1152 watt hours of lithium iron phosphate, an 1800-watt continuous inverter, and a 200W solar panel in a bundle that has become a standard reference point for outage power.
Charging is where this unit clearly differentiates. The Flash Charge system takes the battery from zero to 80 percent in about 45 minutes on mains, and the marketing figure for a full charge from empty is roughly one to 1.8 hours depending on how you feed it. On solar alone, a full recharge is quoted at 4.8 to 9.6 hours.
Eleven outlets means you can run a full camp kitchen pattern rather than daisy-chaining a power strip. The power lifting mode pushes short-term handling up to 2700 watts, which is enough to start a microwave or a kettle that would otherwise trip a normal 1800-watt ceiling.
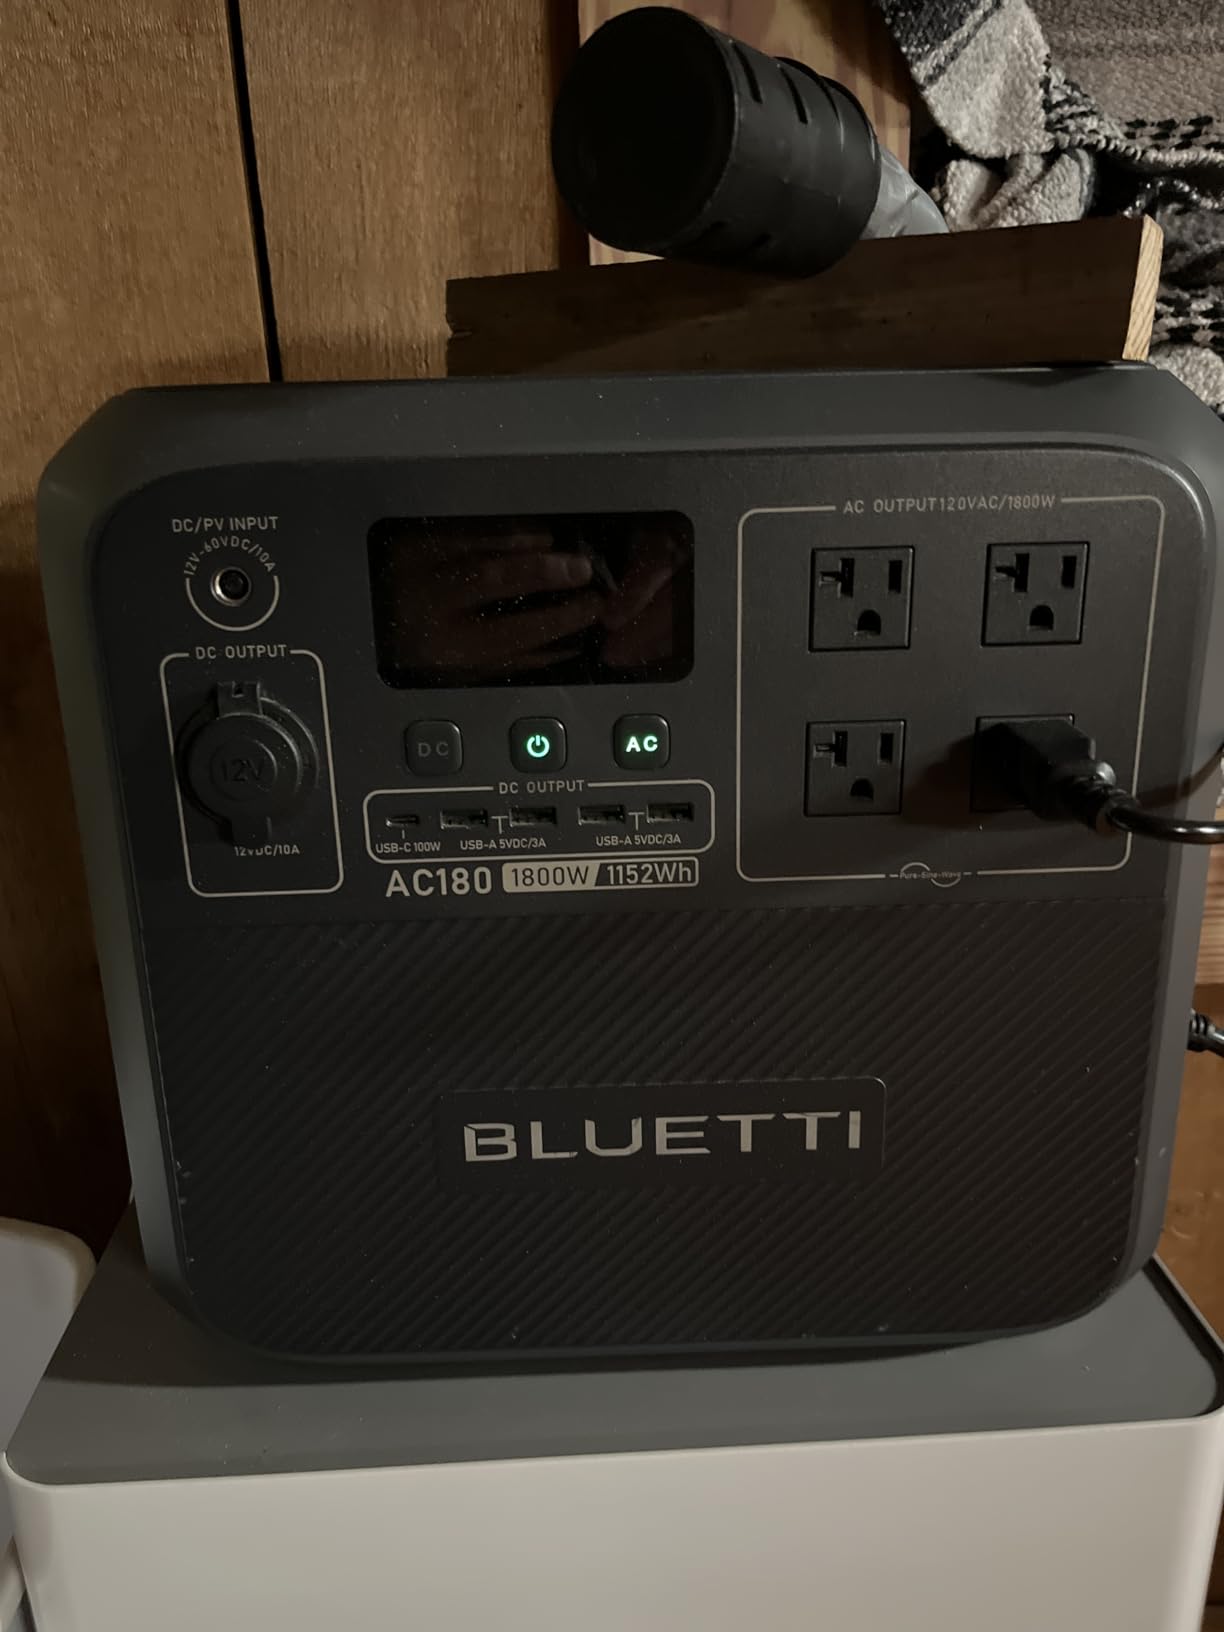
The battery is rated for more than 3000 cycles, which is the point of choosing lithium iron phosphate chemistry rather than an older lithium-ion pack. The battery management system also handles the cell balancing, and the Bluetooth app gives you real input and output power readings without walking out to the shed.
Be realistic about the weight. At 37.4 pounds, this is a two-hand carry that most people will install once and leave in place. The fans also become audible during sustained heavy load, which matters if the shed is next to a bedroom wall and the plan is to run a power tool overnight.
One specific complaint appears repeatedly: the bundled 200W panel is not recommended for series or parallel connection with panels from other manufacturers, which limits future expansion. The panel-to-unit cable is also short, so the panel has to sit close to wherever the unit lives.
What this kit is genuinely good for
This is the shed that has to behave like a small room. Eleven outlets, an 1800-watt ceiling and a sub-20-millisecond UPS transfer mean a fridge, a router, lights and a laptop can all stay on through an outage without anyone noticing the switchover.
It suits a home workshop where you want to run a circular saw or a jigsaw for an afternoon, then keep a fridge and a router going overnight. It also suits a garden office, since the outlet count removes the need for a power strip and the app lets you check state of charge remotely.
Where it will let you down
Solar refill is slow when the weather is not cooperating. Reviewers consistently note that input drops sharply in cloud, shade or partial sun, so a 200W panel in a dull week will not keep a 1152 watt hour battery fed.
The weight rules it out for anyone who wants a portable kit, and the panel compatibility restriction means you cannot cheaply grow the array with third-party panels. If your shed is far from the house and the mains is not an option, budget for an additional panel from the same brand.
4. ECO-WORTHY 200W 12V/24V Solar Panel Kit with 30A PWM Controller
ECO-WORTHY 200 Watts 12 Volt/24 Volt Solar Panel Kit with High Efficiency Monocrystalline Solar Panel and 30A PWM Charge Controller for RV, Camper, Vehicle, Caravan and Other Off Grid Applications
Two 100W monocrystalline panels
30A PWM controller
About 800Wh per day
31.6 pounds
Pros
- About 800Wh of daily output under four hours of sun
- Two panels can run as 12V parallel or 24V series
- Corrosion resistant aluminum alloy frame
- Kit includes brackets controller cables and connectors
- Pre-drilled plug-and-play cables
Cons
- PWM controller is less efficient than MPPT
- 31.6 pounds is heavy for one person to mount
- One year warranty is shorter than rivals
Two panels instead of one is the defining feature here, and it is worth more than most buyers realise. Two 100-watt monocrystalline panels can be wired in parallel for a 12V system or in series for a 24V system, so the same kit serves a straightforward 12V shed today and a larger 24V expansion later.
Daily output is quoted at around 800 watt hours under four hours of full sunshine, which is double what a single 100W panel delivers. Cell efficiency reaches 21.5 percent, and the frame carries 2400Pa wind and 5400Pa snow load ratings with an IP65 junction box, so a winter roof is not automatically a problem.
The box contains two panels, two sets of Z brackets, a 30A controller, 16.4 feet of 10AWG solar cable, 2-in-1 connectors and a 4.92 foot tray cable. In other words, everything needed to get the array onto a roof is in the box, which is exactly what a first-time shed builder wants.
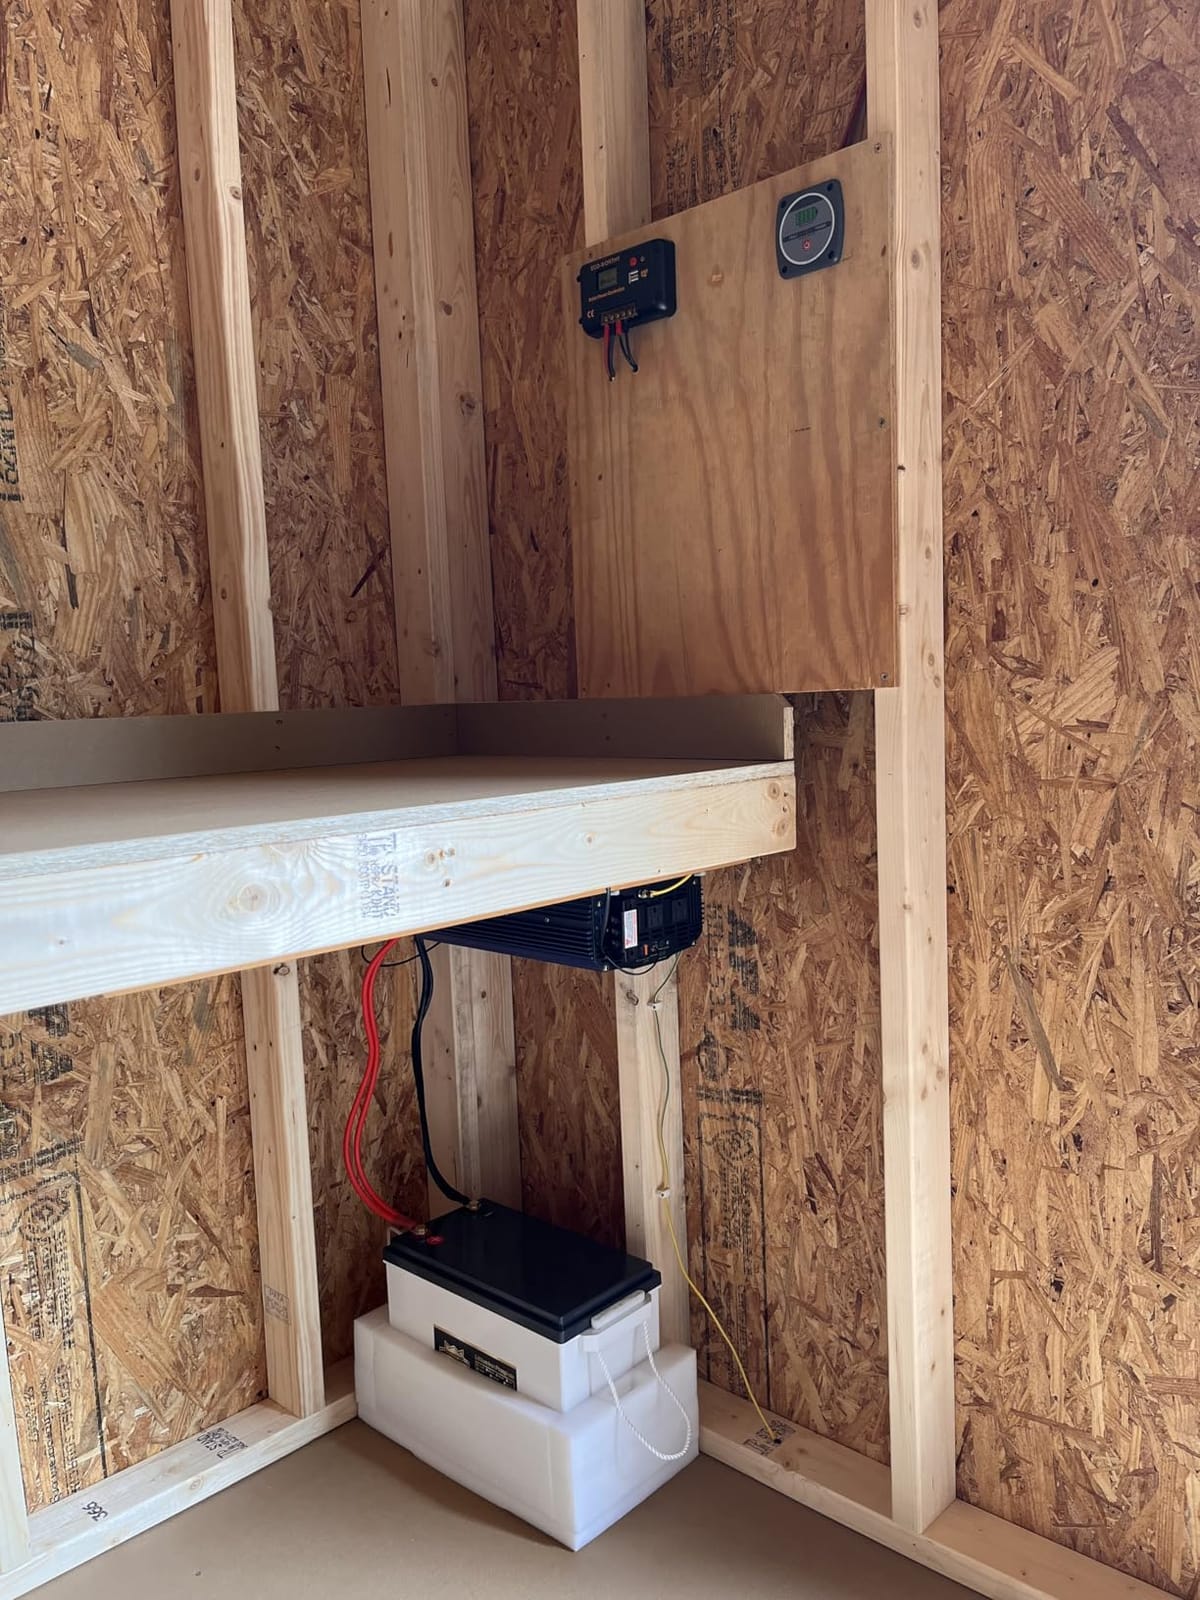
Two real drawbacks. The 30A controller is PWM, so in cold or hazy conditions you harvest less than an equivalent MPPT array would. And at 31.6 pounds for the pair, mounting this on a shed roof is realistically a two-person job with a proper ladder, not a solo Sunday project.
The one year support commitment is also shorter than the coverage on the Renogy kits in this roundup. Buyers rate the build quality highly, particularly the frame corrosion resistance, but the paperwork commitment is thin compared with the five year plans offered elsewhere.
Because this kit ships without a battery, it is really a generation kit. Pair it with a 100Ah or 150Ah lithium bank and the roughly 800 watt hours of daily harvest will comfortably carry lights, a router and daily tool charging. Pair it with a small AGM and the same panel will slowly cook that battery over a year.
What this kit is genuinely good for
A shed that is heading toward 24V, or one that will need more panel capacity later. Because the two panels can be reconfigured rather than simply added, this is the more future-proof choice for a build you expect to grow. It is also explicitly marketed for sheds, cabins, tool trailers and off-grid backup.
It suits anyone who wants a proper array on a roof without sourcing brackets, cables and connectors separately. The pre-drilled plug-and-play cabling means the install is mostly mechanical, and the whole kit is rated for snow and wind loads that suit a typical shed roof pitch.
Where it will let you down
It has no battery and no inverter, so anything requiring mains power stays off the table. A separate inverter purchase is required, and that changes the wiring plan from simple DC to DC-plus-AC, which is a meaningful step up in complexity for a beginner.
The PWM controller is the other soft spot. If the roof sees any seasonal shade, a controller upgrade to MPPT later will recover a surprising share of the lost energy. And the weight means you should plan the mounting position before the panels arrive, because swapping positions later means unbolting all four corners twice.
5. BLUETTI Elite 200 V2 Solar Generator with 2x200W Solar Panels
BLUETTI Elite 200 V2 Solar Generator & 2x200W Solar Panel Included 2073.6Wh
2073.6Wh LiFePO4 battery
2600W continuous AC output
Two 200W panels
53.4 pounds
Pros
- Two kilowatt hours in a compact footprint
- 2600W continuous runs kitchen appliances together
- LiFePO4 cells rated for 6000+ cycles
- About 10W standby draw
- silent with no fumes
- 0 to 80 percent in 50 minutes
Cons
- Weighs about 53.4 pounds and needs two people to move
- Not expandable with external battery modules
- Solar input capped at 60V and 1000W
- App lacks adjustable charging and temperature monitoring
This is the biggest system in the roundup and the only one that bundles two 200-watt panels. You get 2073.6 watt hours of storage, 2600 watts of continuous AC output and 3900 watts in power lifting mode, in a unit that reviewers repeatedly describe as far smaller than the capacity suggests.
The cell specification is the standout. Six thousand plus cycles with a projected 17-year lifespan puts this well beyond anything a shed will realistically consume, and the energy management cuts standby draw to about 10 watts, which stops the battery draining away over a week of unused weekends.
Two 200W panels together take about 5.5 hours for a full solar recharge, and the unit can accept up to 1000 watts of solar input for a 2.4 hour full charge. On mains, zero to 80 percent takes 50 minutes with dual AC and DC input working together.
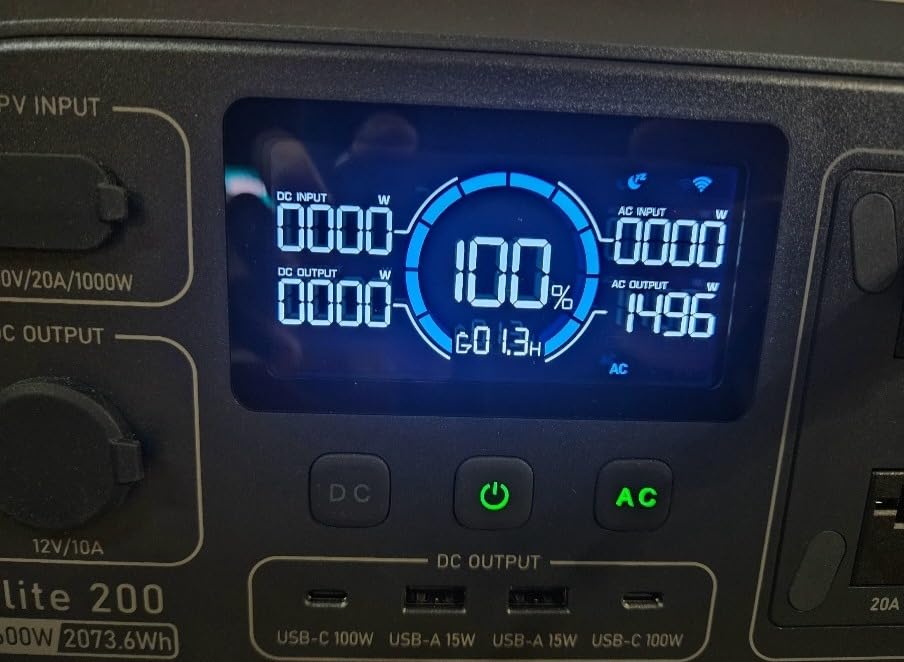
Owners describe running air fryers, microwaves, coffee makers and dishwashers at the same time. For a shed that has become a genuine workshop or a garden kitchen rather than a storage unit, that is the difference between a kit that copes and a kit that keeps up.
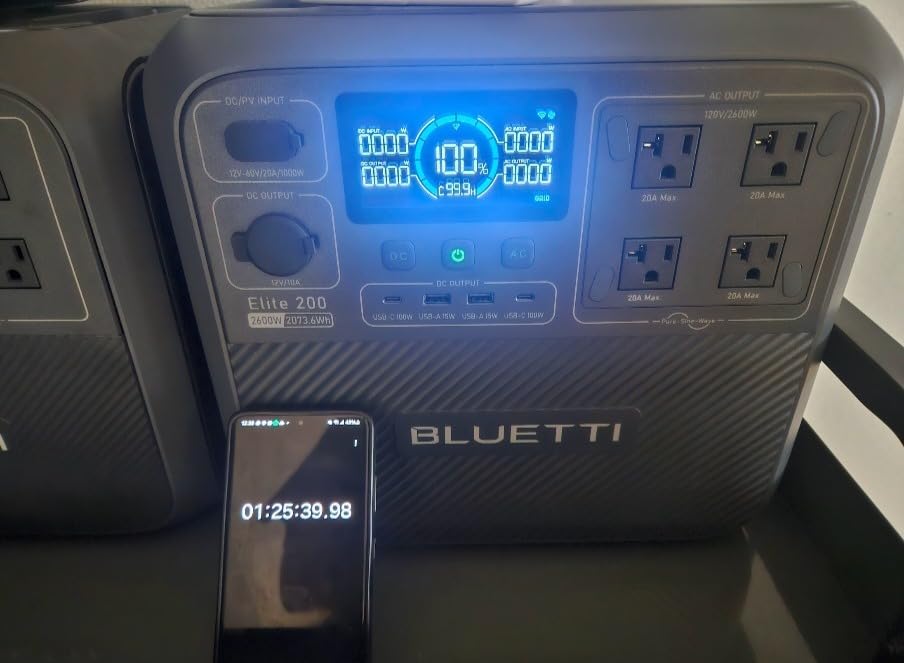
It is also completely silent with no exhaust, which matters more than people expect in a shed attached to a house or a summerhouse. The AC outlets are pure mains output, so a normal extension lead or a standard tool just works, with no adapter chain.
Now the honest part. At 53.4 pounds, moving it needs two people or a cart, so plan its final home before you unbox it. It is not expandable with external battery modules, unlike some larger models in the BLUETTI range, so the 2073.6 watt hours is a fixed ceiling.
Solar input is limited to 60 volts and 1000 watts, which is hard to reach with portable folding panels, and the app is the weakest part of the package. Reviewers report it lacks adjustable low-rate AC charging and real-time temperature monitoring that the hardware itself can support.
What this kit is genuinely good for
It is the answer for a shed that runs several high-draw appliances at once, or that has to keep running through a multi-day outage with a fridge, freezer, router and lighting all on. Two kilowatt hours of storage is the point where a fridge stops being the thing that empties the battery by morning.
It also suits a workspace where silence matters, since there is no fan combustion and no noise beyond the inverter under load. The four outlet count is lower than smaller units, so you will want a single power strip rather than multiple devices, but each outlet is capable of far more than a standard domestic socket.
Where it will let you down
Weight and fixed capacity rule it out for a portable setup, and there is no growth path in storage. The 60-volt solar input ceiling also means the two included panels are close to the practical maximum, so adding a third panel from a different range may not work.
If your shed only needs lights and a phone charger, this is far more system than the job requires, and the money is better spent on a better charge controller and a larger battery bank. Match the kit to the load, not to the ambition.
6. Jackery Solar Generator 1000 v2 with 200W Solar Panel
Jackery Solar Generator 1000 v2 and 200W Solar Panel,1070Wh,1500W AC
1070Wh LiFePO4 battery
1500W AC and 3000W surge
23.8 pounds
100W USB-C output
Pros
- Weighs 23.8 pounds with a foldable handle
- 1500W AC with 3000W surge for fridges and cooktops
- Battery holds over 70 percent capacity after 4000 cycles
- 100W USB-C PD charges laptops directly
- 30 dB overnight quiet mode
- Runs appliances while solar charging
Cons
- Bundled 200W panel sags and needs repositioning
- Short panel cable limits where the panel sits
- Emergency one-hour charge must be enabled in the app
The Jackery sits in the same capacity class as the BLUETTI AC180 but at 23.8 pounds rather than 37.4, and that difference decides a lot of shed layouts. With a foldable handle, one person can move it from the workbench to the far corner of the shed without help.
Output is 1500 watts continuous with 3000 watts of surge, enough for a fridge, a cooktop or a coffee maker. The lithium iron phosphate battery retains over 70 percent of capacity after 4000 cycles, which puts the realistic service life beyond ten years of daily charging.
Two USB-C ports, one USB-A port, a DC car port and three pure sine wave AC outlets cover most shed loads without an adapter. The 100W Power Delivery USB-C port is the sleeper feature, because it charges a laptop directly with no brick and no extension lead.
Charging from the bundled 200W panel takes about six hours to reach 80 percent. On mains, the default fast mode completes a full charge in 1.7 hours, and an emergency mode enabled in the app brings it to full in about an hour.
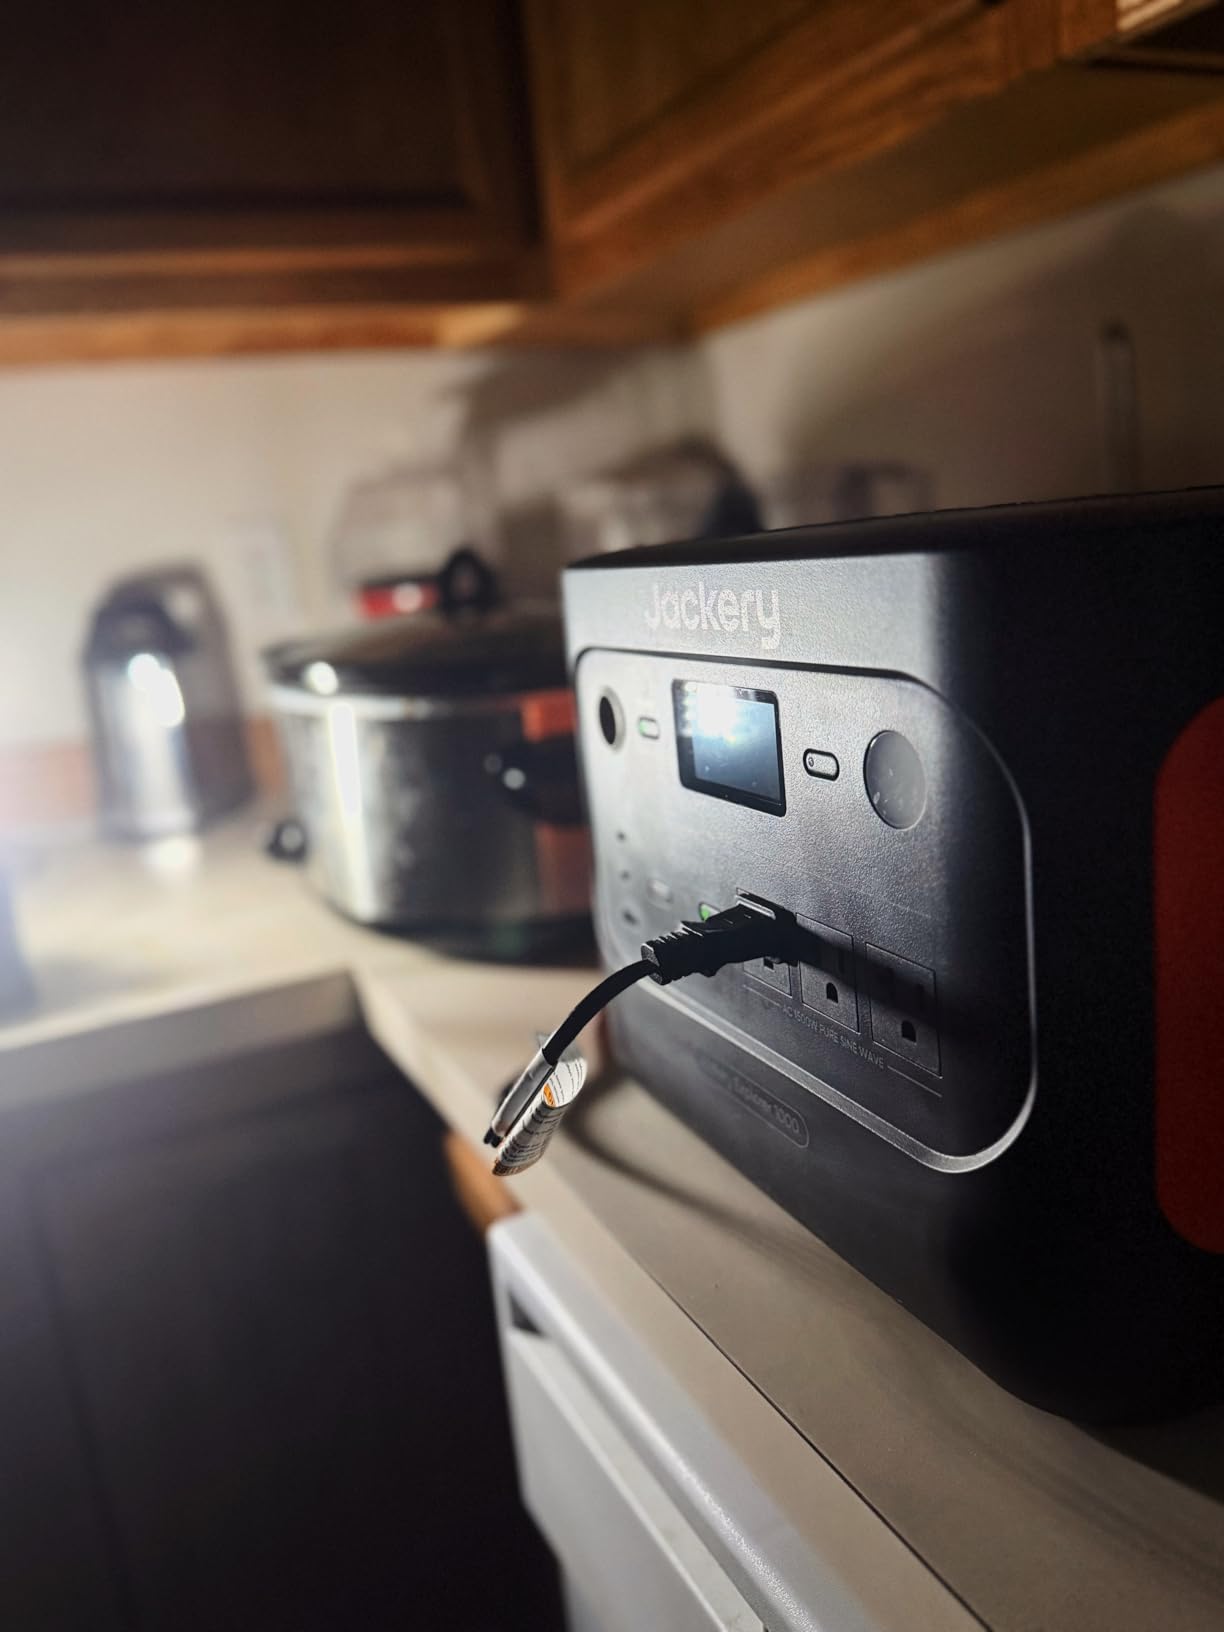
The pure sine wave output is worth calling out. It is the reason sensitive electronics behave properly, and it is not guaranteed across every budget power station even when the wattage looks sufficient on paper.
The recurring complaint is the panel rather than the unit. Owners describe it as unwieldy, prone to sagging in the middle and needing frequent repositioning in wind. The panel-to-unit cable is also short, so a longer solar extension lead is a near-universal add-on purchase.
One more practical note. The power station and the panel are packaged separately, which regularly causes confusion on arrival, and the emergency one-hour charge has to be switched on in the app rather than being the default. Read the quick start guide before you need it in a hurry.
What this kit is genuinely good for
It is the pick for a shed that also serves as a garage, a van base or a portable power source. The 23.8 pound weight means one person can grab it, carry it to the mower or the allotment, and plug the tools straight back in at the bench.
The USB-C output also makes it a natural fit for a garden office where a laptop, a monitor and a router all need mains-quality power. The 30 dB quiet mode keeps the inverter from waking the household at night, which matters if the shed is close to a bedroom.
Where it will let you down
1500 watts is a lower ceiling than the BLUETTI AC180, so simultaneous high-draw appliances are less comfortable. The unit also runs warm on the exhaust side in hot weather, so ventilation inside a closed shed matters more than the spec sheet suggests.
On pure solar with no mains, a 200W panel refilling 1070 watt hours is a slow process. Treat the mains charging as the recovery path and the panel as the daily top-up, or accept that the shed loses capability during a week of poor weather.
7. Renogy 400W Premium Solar Kit with 40A MPPT Charge Controller
Renogy 400Watt Premium Solar Kit with 40A MPPT Charge Controller
Four 100W monocrystalline panels
40A MPPT Rover controller
Bluetooth module included
56.4 pounds
Pros
- 400W from four matched 100W panels
- MPPT controller is more efficient than PWM at this output
- Includes Bluetooth module for phone monitoring
- Z brackets adaptor kit tray cable and fuse included
- Five year panel warranty
Cons
- Heaviest kit here at 56.4 pounds and needs two people
- Mismatched panel sizing reduces string efficiency on shaded sites
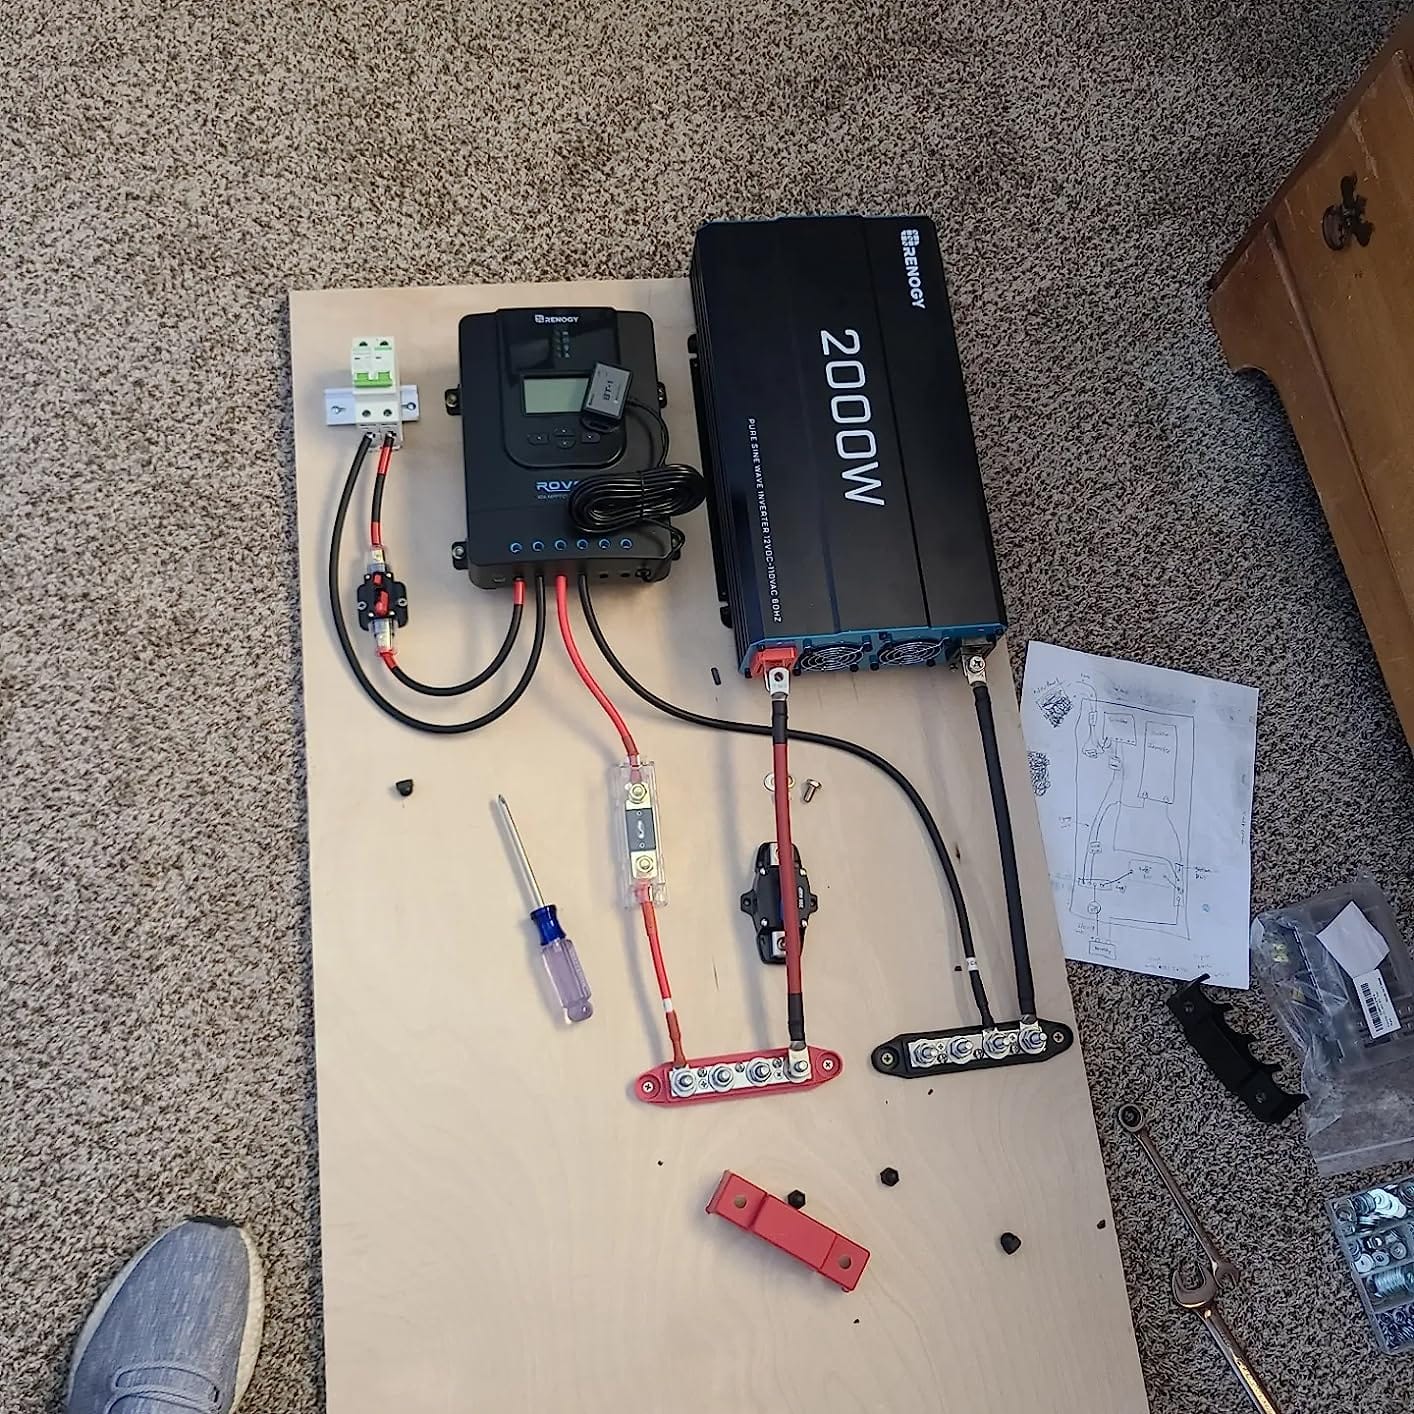
Everything in this roundup that stays permanently on a shed roof should have an MPPT controller, and this is the kit that ships with one. The Rover 40 amp controller extracts noticeably more energy from the same four panels than a PWM unit would, which is the entire reason to pay for it.
Four matched 100-watt monocrystalline panels give 400 watts of nameplate capacity, which is enough to charge a serious battery bank and still have energy left for tool charging. A 32 volt maximum battery voltage gives you room to run the bank at 24 volts, which halves the cable losses on a long run to the shed.
The kit is unusually complete. Alongside the panels and controller you get Z brackets, an adaptor kit, a tray cable and a fuse, so the installation does not immediately become a second shopping list. A Bluetooth module is included rather than sold separately, which is the first thing most buyers upgrade on cheaper kits.
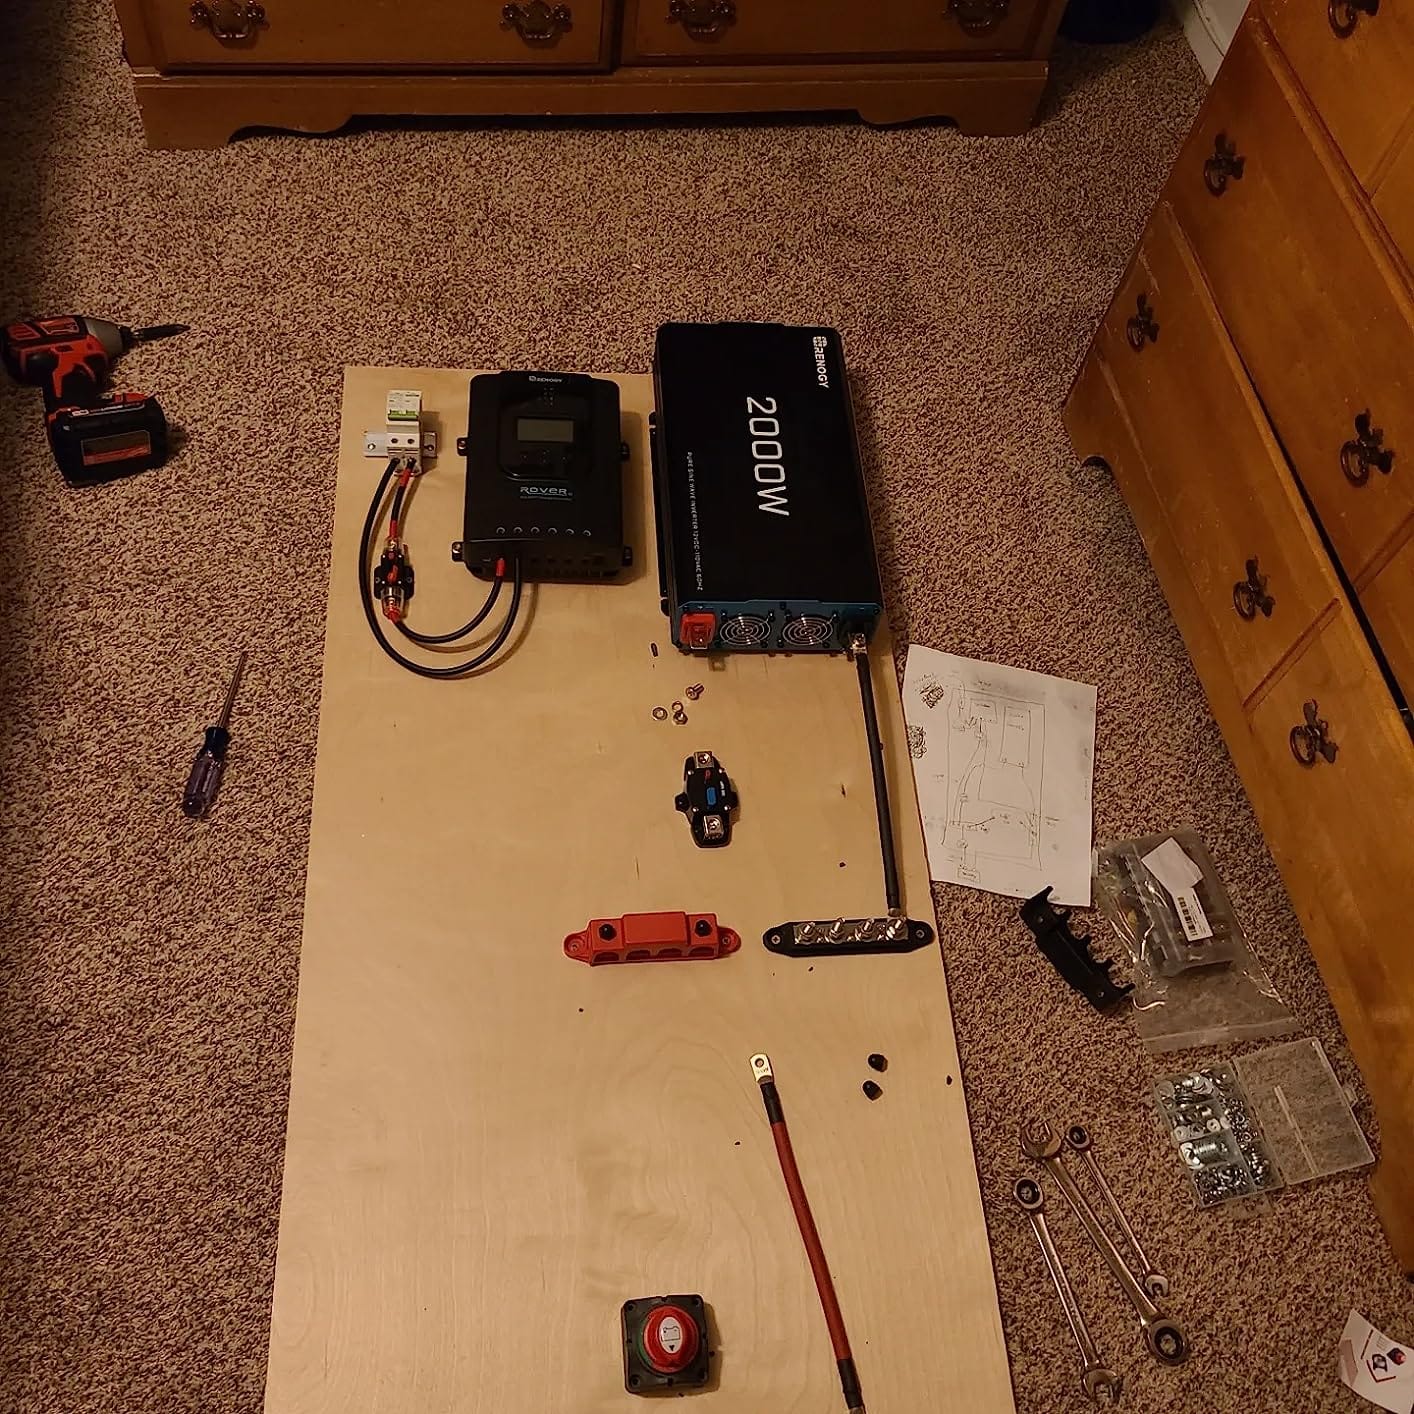
The honest drawback is physical. At 56.4 pounds this is the heaviest item in the roundup, and roof mounting is a two-person job with a stable ladder. Plan the array position and the cable route before the boxes arrive, because repositioning a four-panel array later means taking all of it down twice.
Owners also note that mismatched panel sizing within the array reduces string efficiency, particularly where dust or partial shade affects some panels more than others. Because these are four separate 100-watt units, keep them on one roof face with no tree shadow crossing any of them.
There is no battery or inverter included, so this is a generation kit that pairs naturally with a 200 to 400 amp hour bank. If you also want mains, add a pure sine wave inverter sized above your peak load, not just your average load.
What this kit is genuinely good for
A shed that is a working space rather than storage. Four hundred watts of generation supports a lighting circuit, a router, a bench supply and the daily charging of several cordless tool batteries without the system ever running short on a bright week.
It is also the right answer for a roof with any seasonal shade problem, because MPPT recovers energy that a PWM controller would otherwise discard, and the higher system voltage option reduces cable losses over distance. Pair it with a 24V lithium bank for a genuinely capable off-grid workshop.
Where it will let you down
It is the least approachable kit here. Four panels, a heavier controller, a fuse and an adaptor kit is real electrical work, and it is the one most likely to justify bringing in a professional for the final connections.
Roof area is the other limit. A four-panel array needs a large clear run, and on a small shed the panels often end up on a ground frame or an adjacent roof rather than the building itself. If your available sunlit area is that constrained, a 200W kit or a power station bundle is a better fit than forcing a 400W array into a cramped roof.
8. Voltset 100W 12V Solar Panel Kit with 20A Smart Charge Controller
Voltset 100W 12V Solar Panel Kit with 20A Smart Charge Controller
100W monocrystalline panel
20A smart controller with LCD
Over 500Wh per day
IP67 build
Pros
- Controller LCD shows state of charge and LED status
- Built-in USB and Type-C ports for direct device charging
- Over 500Wh of daily generation
- IP67 waterproof and rustproof aluminium frame
- Works with LiFePO4 AGM gel and flooded batteries
- Plug-and-play with pre-drilled holes
Cons
- 20A controller limits how far the array can grow
- Output falls off sharply in low light
- Single-button interface makes settings fiddly
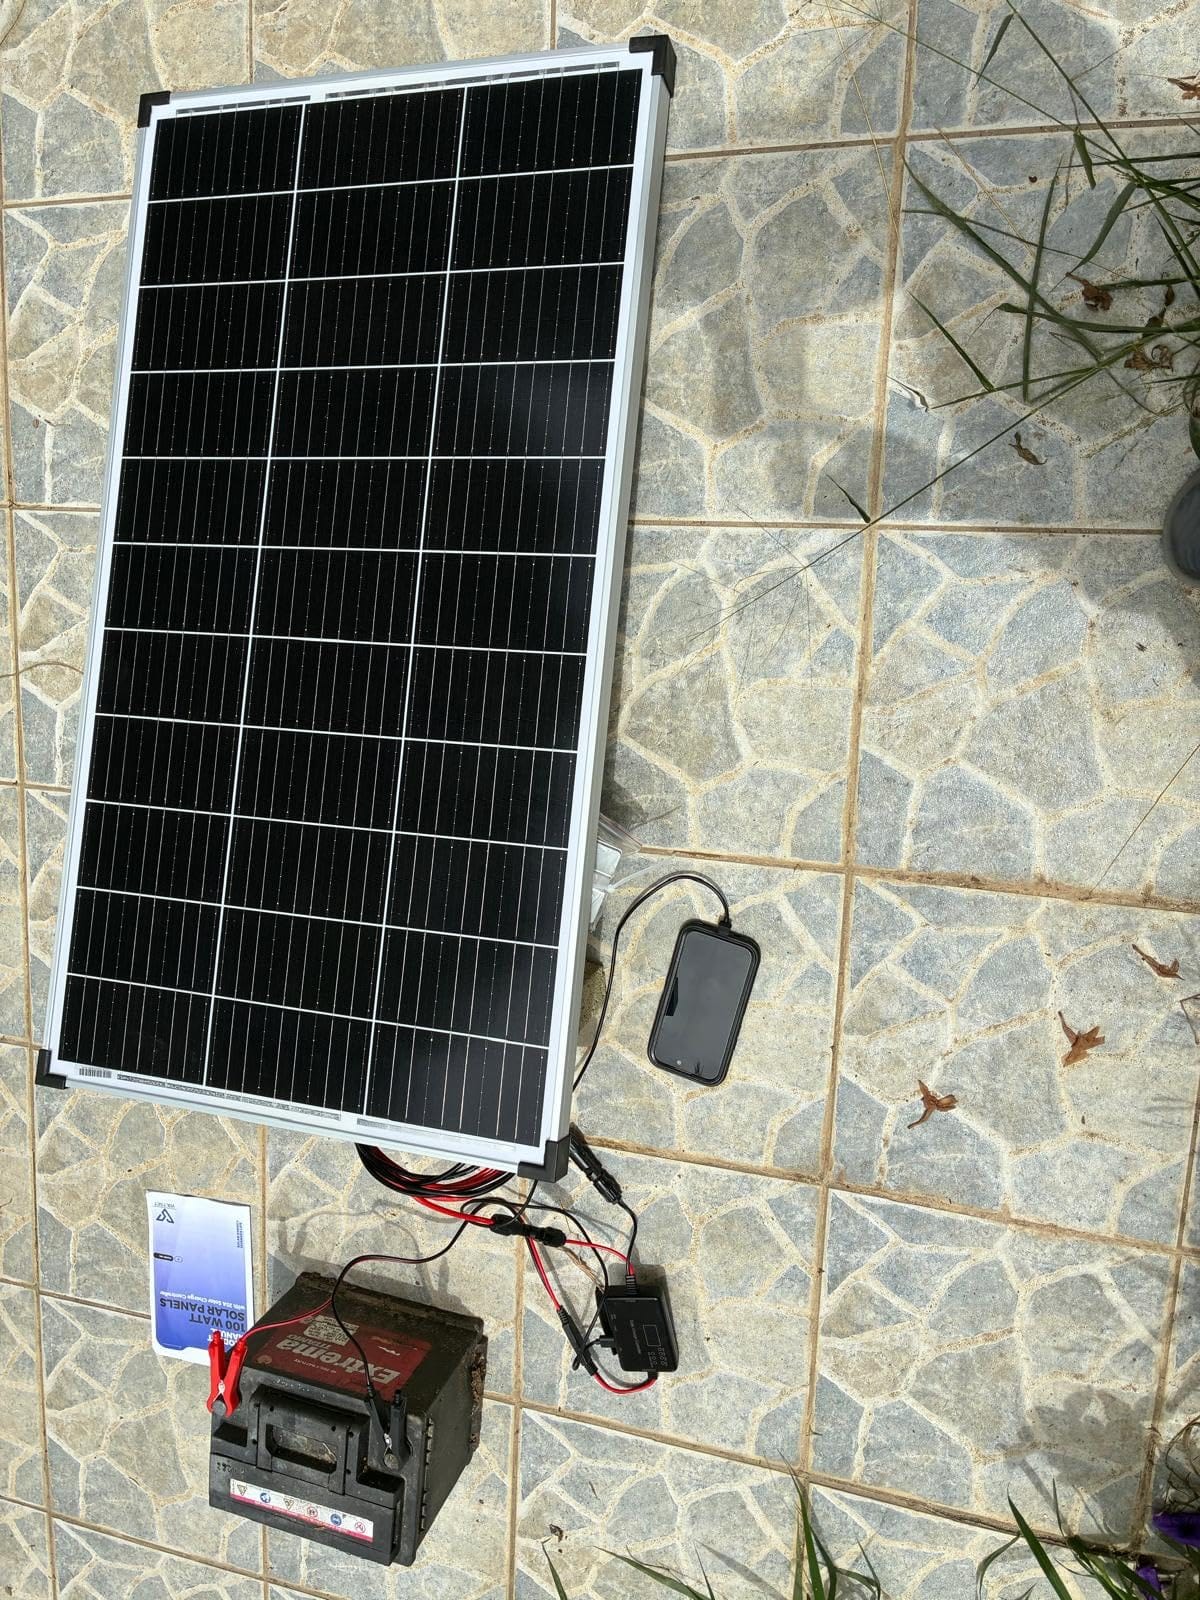
The Voltset stands out for one reason: the charge controller has a digital display and two USB charging ports built in. For a shed where the main job is keeping phones, head torches and work light batteries topped up, that removes a USB adapter and a cigarette lighter socket from the parts list.
Underneath, it is a competent 100-watt monocrystalline panel rated for more than 500 watt hours of daily generation. The controller is a 20A smart unit with an LCD screen, LED status indicators and six-way protection covering overcharge, overvoltage, overcurrent, short circuit, reverse polarity and overheating.
The build is rated IP67 for waterproofing, with an aluminium frame described as rustproof, dustproof and windproof, and a service life quoted at up to 25 years with no maintenance. Battery compatibility covers LiFePO4, AGM, gel, flooded and lithium ion, so it will accept whatever bank you already own.
Reviewers rate the value highly and consistently praise the quick assembly. At roughly 7.8 kilograms it is one of the lighter kits here, which makes a solo roof mount realistic for anyone comfortable on a ladder.
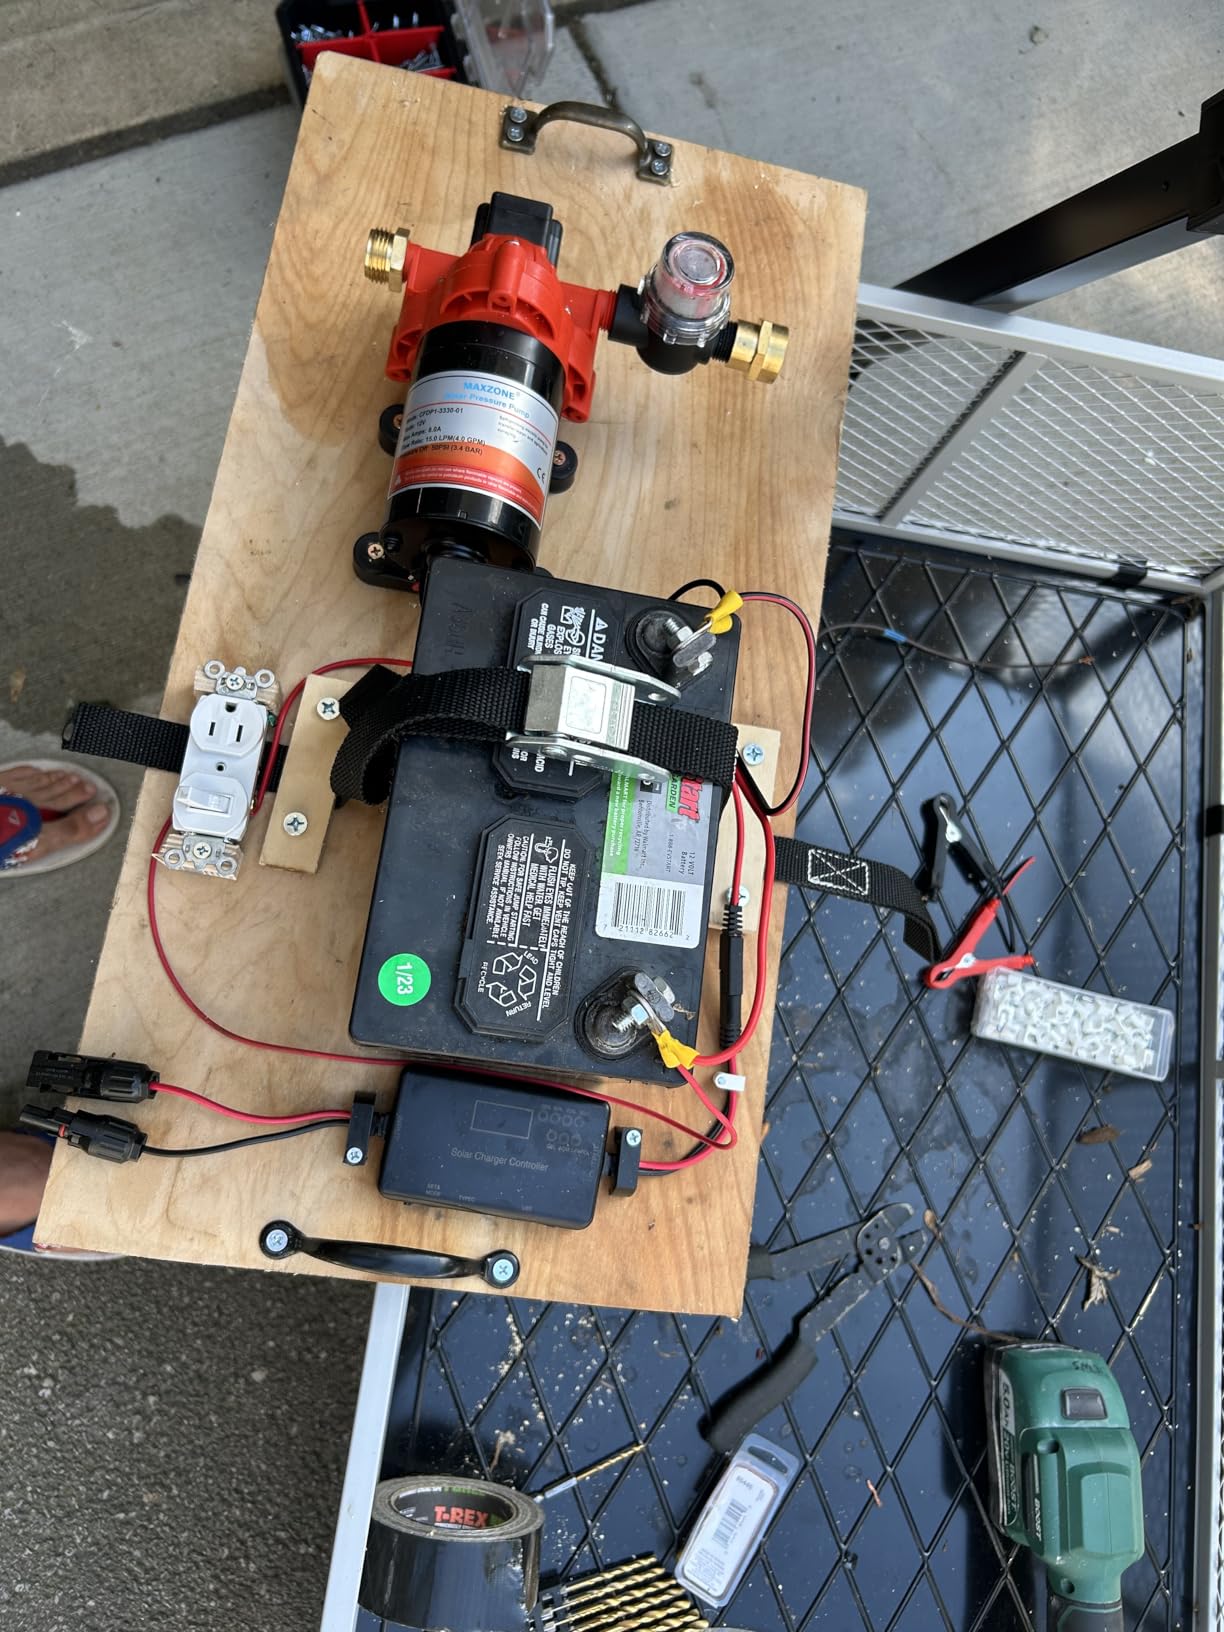
The constraint is the 20 amp controller. That rating limits how far the array can grow, so if you think you will add a second 100-watt panel within a year, buy the larger controller now or plan to replace it. The kit ships with four Z brackets, an alligator clip cable and the panel, so nothing else is needed to mount it.
Low light performance is the other recurring note. Output drops noticeably in overcast conditions despite the 100-watt nameplate, which is normal physics for any panel but is worth remembering before you commit to a lighting-only build that has to last through a northern winter.
The single-button interface makes deeper settings fiddly, so budget ten minutes with the manual rather than assuming it is intuitive. Everything the controller needs is there; it is just not presented in a way that rewards poking at it.
What this kit is genuinely good for
A shed where the loads are small DC devices: LED strip lights, a router, a fan, phone charging and the occasional tool battery. The built-in USB and Type-C ports mean people walking into the shed can top up a phone without finding a socket or a cable adapter.
It is also a strong choice for a chicken coop or an allotment hut, where power needs are modest, the build has to survive weather, and the installer is often working alone. The plug-and-play pre-drilled holes and lightweight frame suit that job particularly well.
Where it will let you down
The 20 amp controller is a real ceiling, not a formality. Unlike the kits with 30A or 40A controllers, doubling the panel count means replacing the controller, so the cheap entry point becomes an expensive one after a year.
There is no battery, no inverter and no mains output of any kind, so a laptop, a bench light or an electric heater is out of reach. If your shed needs anything beyond 12V small loads, move up a tier rather than bolting extra components onto a system that was never sized for them.
9. Topsolar 100W 12V Monocrystalline Off Grid System
Topsolar Solar Panel Kit 100 Watt 12 Volt Monocrystalline Off Grid System for Homes RV Boat + 30A 12V/24V Solar Charge Controller +Solar Cables + Z-Bracket for Mounting
100W monocrystalline panel
30A PWM controller
2400Pa wind and 5400Pa snow rating
15.2 pounds
Pros
- Complete kit with 30A PWM controller cables and Z brackets
- Expandable to 260W at 12V or 520W at 24V
- PWM controller includes full protection circuitry
- Pre-drilled mounting holes
- Tempered glass with 2400Pa wind and 5400Pa snow ratings
Cons
- 19.5 percent cell efficiency is below newer panels
- PWM controller loses energy compared with MPPT
- Panel sags between mounting points in wind
- Documentation quality is inconsistent
The Topsolar is the cheapest way to put real solar generation on a shed, and at 4.4 stars across a large review count it is a consistently popular choice for small 12V projects. The box includes a 100-watt monocrystalline panel, a 30A PWM controller, a pair of Z brackets and a red and black solar cable.
Expansion is the underrated feature. The system can grow to 260 watts on 12 volts or 520 watts on 24 volts, which means the panel and controller you buy now will not box you in. Very few kits at this level are designed to be a starting point rather than a finished system.
The controller carries full protection circuitry against overcharge, overvoltage, discharge, short circuit and reverse polarity. The panel uses tempered glass and an aluminium frame rated for 2400Pa wind and 5400Pa snow loads, and the pre-drilled rear holes make mounting fast.
The panel runs at 19.5 percent cell efficiency across 38 cells, with a 23 volt maximum power point at 4.3 amps. That figure is the main reason it sits below the newer monocrystalline kits in this roundup, and it shows up as slightly lower daily yield for the same nameplate wattage.
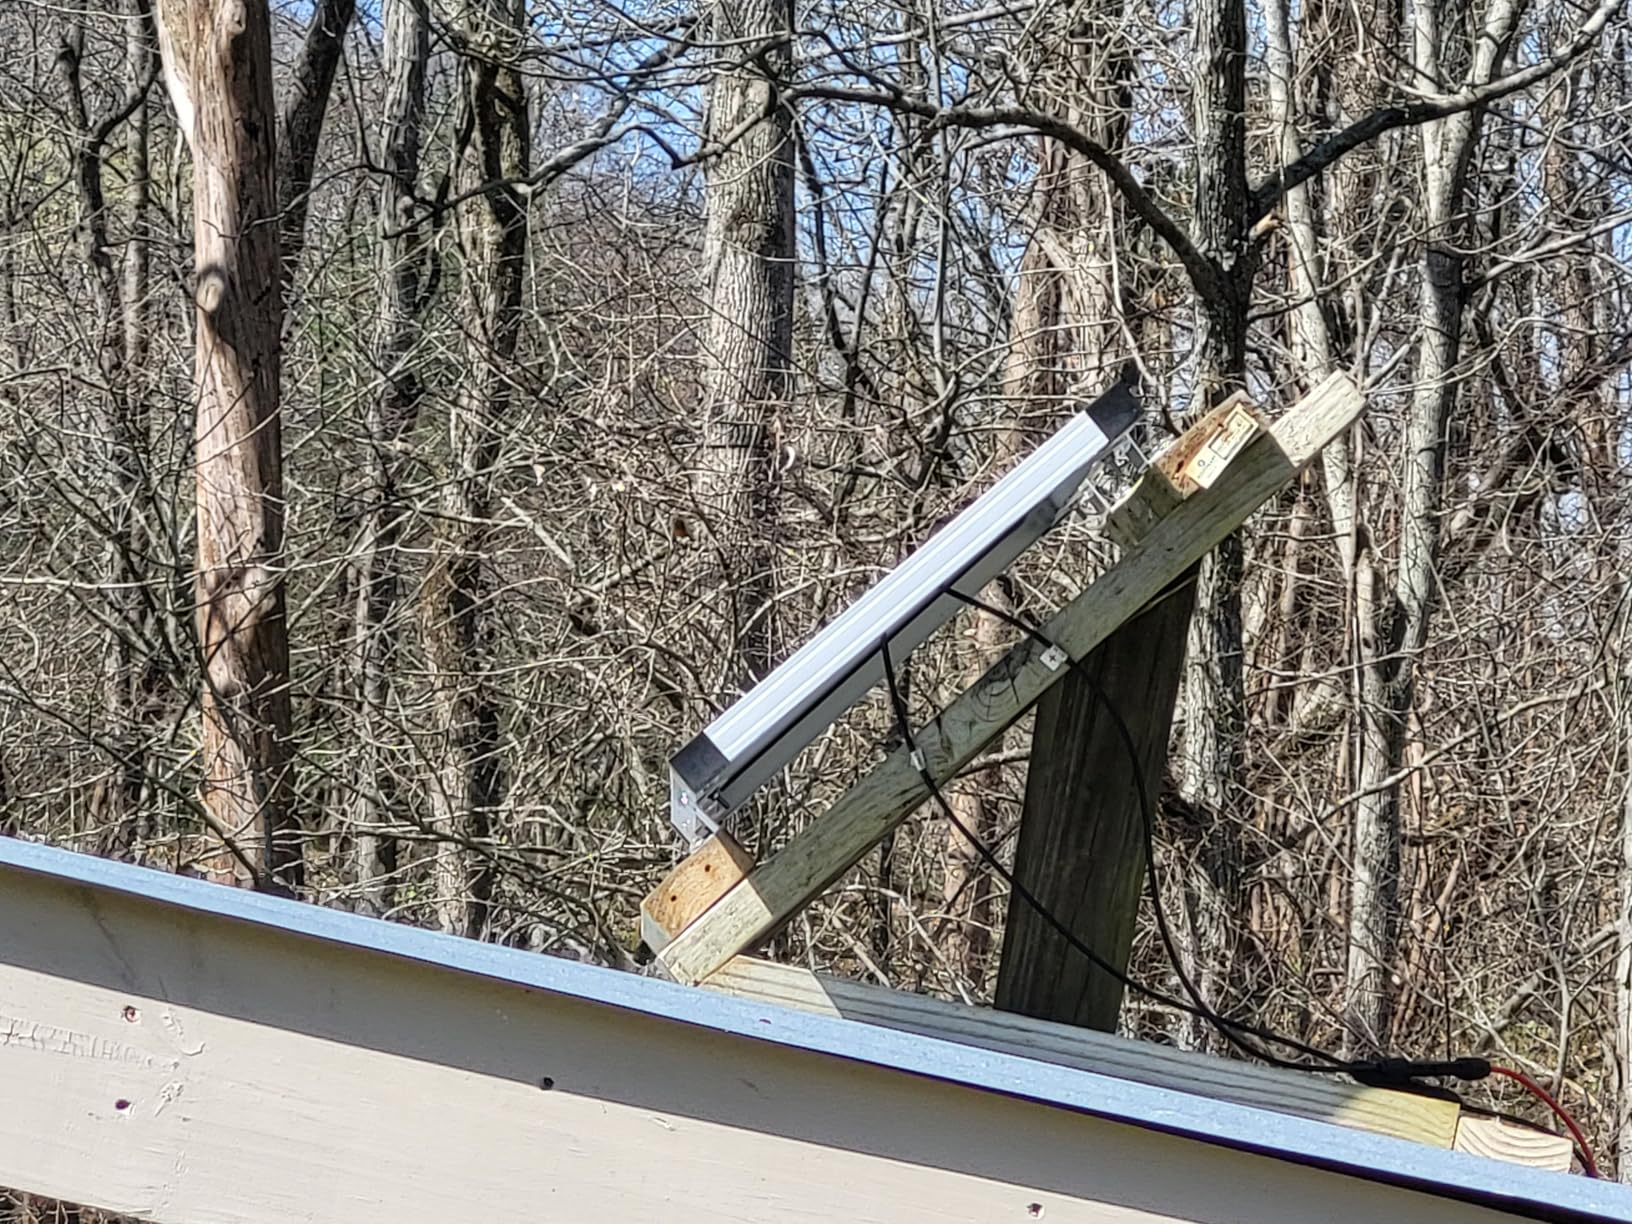
Two practical notes from owners. The panel sags between mounting points, so in a windy location it needs extra bracing or a midspan support. And the documentation and labelling vary between listings, so check the controller terminal order before you wire anything in.
With no battery or inverter included, this is strictly a 12V generation kit. It is an excellent match for a battery bank powering lights and small DC loads, and an entirely unsuitable way to run a laptop or a power tool directly.
Our honest read is that this is the pick when the budget is the dominant constraint and the goal is simply getting electricity into a shed. If you can stretch a little further, the Voltset or the Renogy 100W buys a better panel and better documentation for a similar outlay.
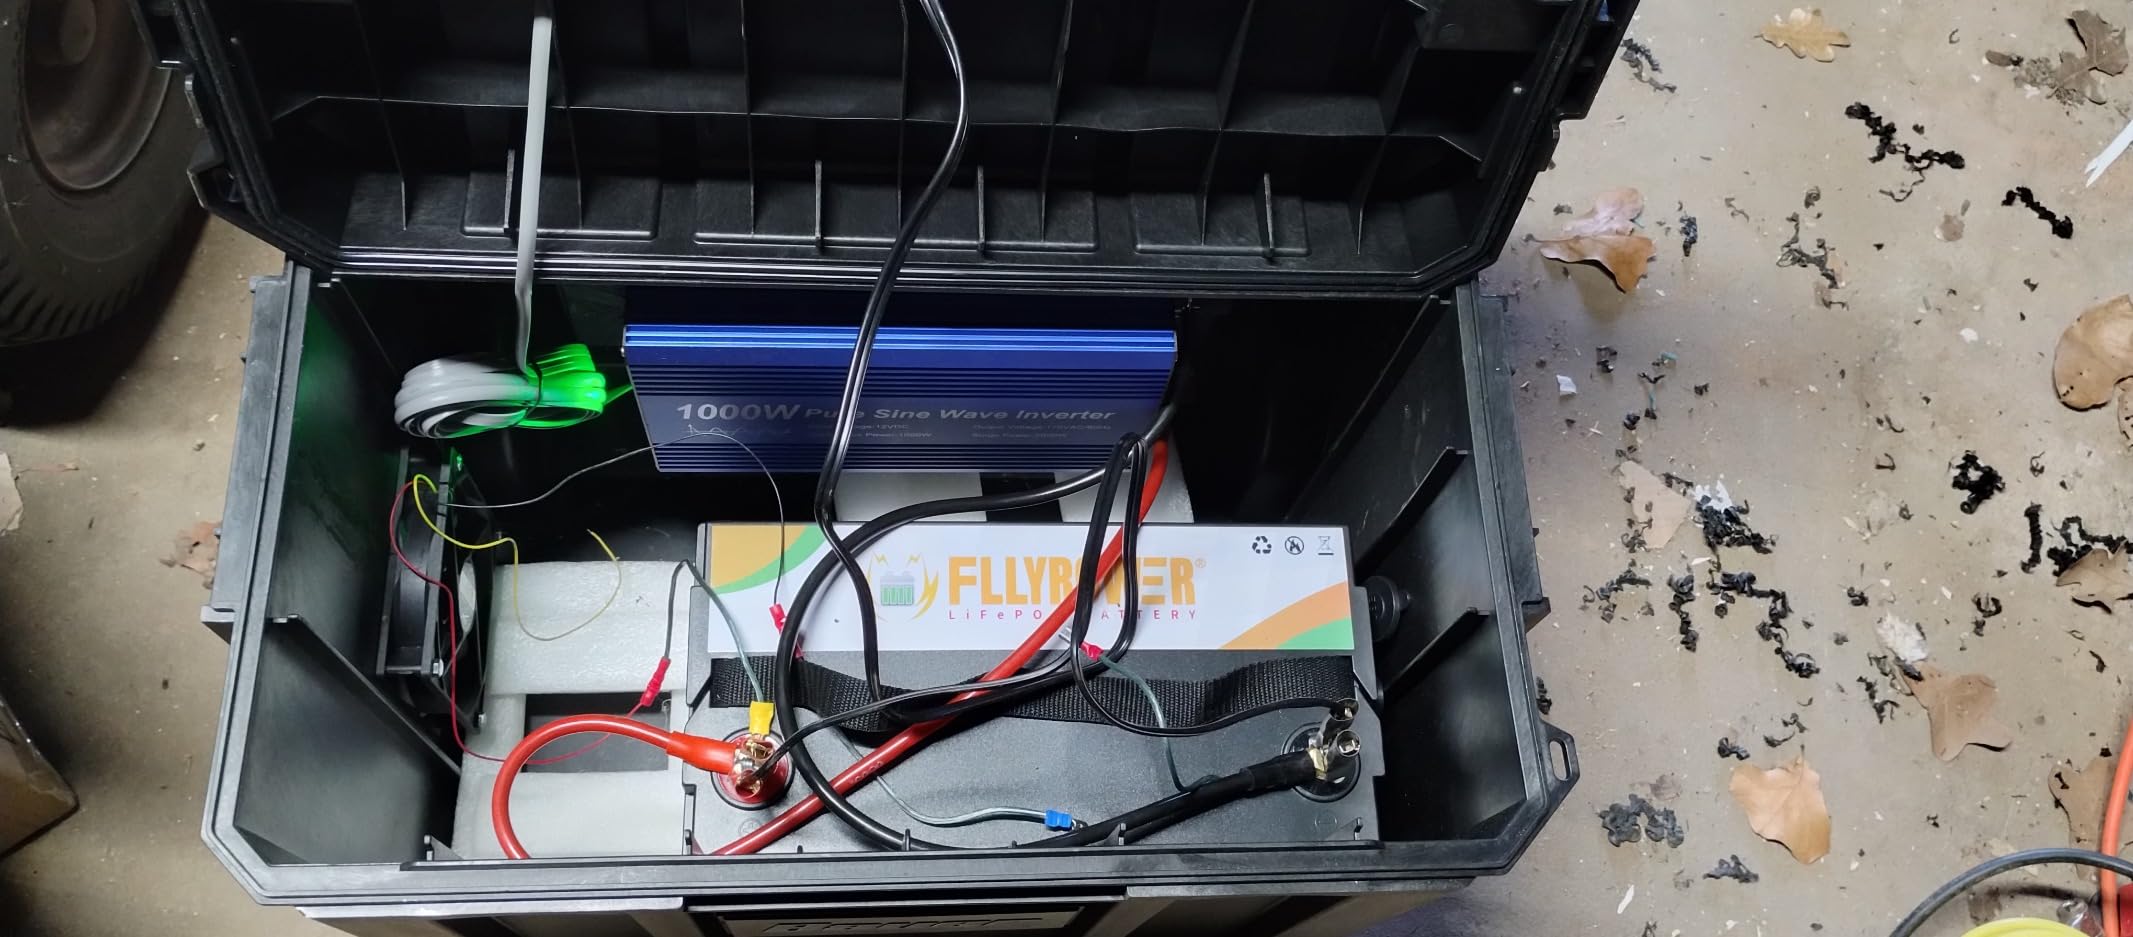
What this kit is genuinely good for
Shed lighting on a budget. A 100-watt panel with a 30A controller and a modest battery bank will run LED lights and a small fan indefinitely through summer, and it is a very common first build for a boat, a caravan or a remote cabin.
It also suits anyone who plans to grow the system. Going to 260 watts on 12 volts later is supported by design, so the purchase is genuinely a first step rather than a dead end. That matters for people who know a bigger array will follow in a second or third season.
Where it will let you down
The PWM controller gives up energy every morning while the panel voltage sits above the battery voltage, and the 19.5 percent cells produce less per square metre than the competition. On a small, shaded or steep roof, those two effects compound.
It is 12V only as sold, with no battery, no inverter and no mains output. Anyone whose shed needs a workbench, a laptop or a tool charger should treat this as a lighting circuit and buy a power station for everything else.
10. Renogy 200W 12V N-Type RV Solar Panel Kit with Adventurer 30A Controller
Renogy 200W 12V N-Type RV Solar Panel Kit with Adventurer 30A Controller
Two 100W N-type panels
22 percent cell efficiency
Adventurer-Li 30A PWM controller
16.5 pounds
Pros
- About 800Wh of daily output from four hours of sun
- 22 percent N-type cells in a slim profile
- Flush mount controller suits RV and camper walls
- Protects against overcharge overload short circuit and reverse polarity
- Three pairs of branch connectors for parallel wiring
- IP67 mated connectors rated to -40F to 194F
Cons
- PWM controller is less efficient than MPPT at this array size
- Bluetooth monitoring needs the included BT-1 module and app
- Two panels must be mounted and wired in parallel
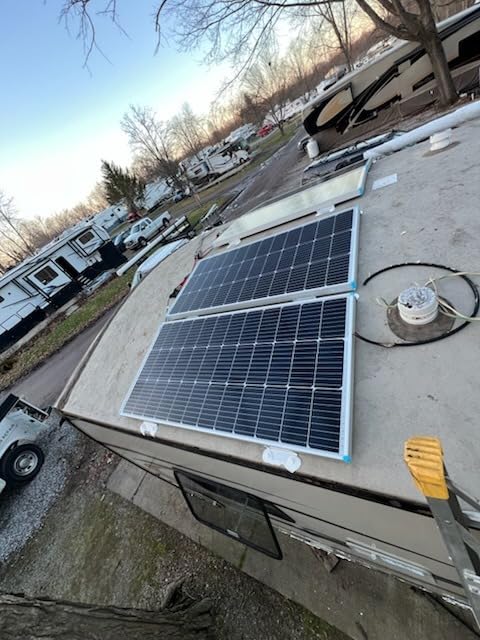
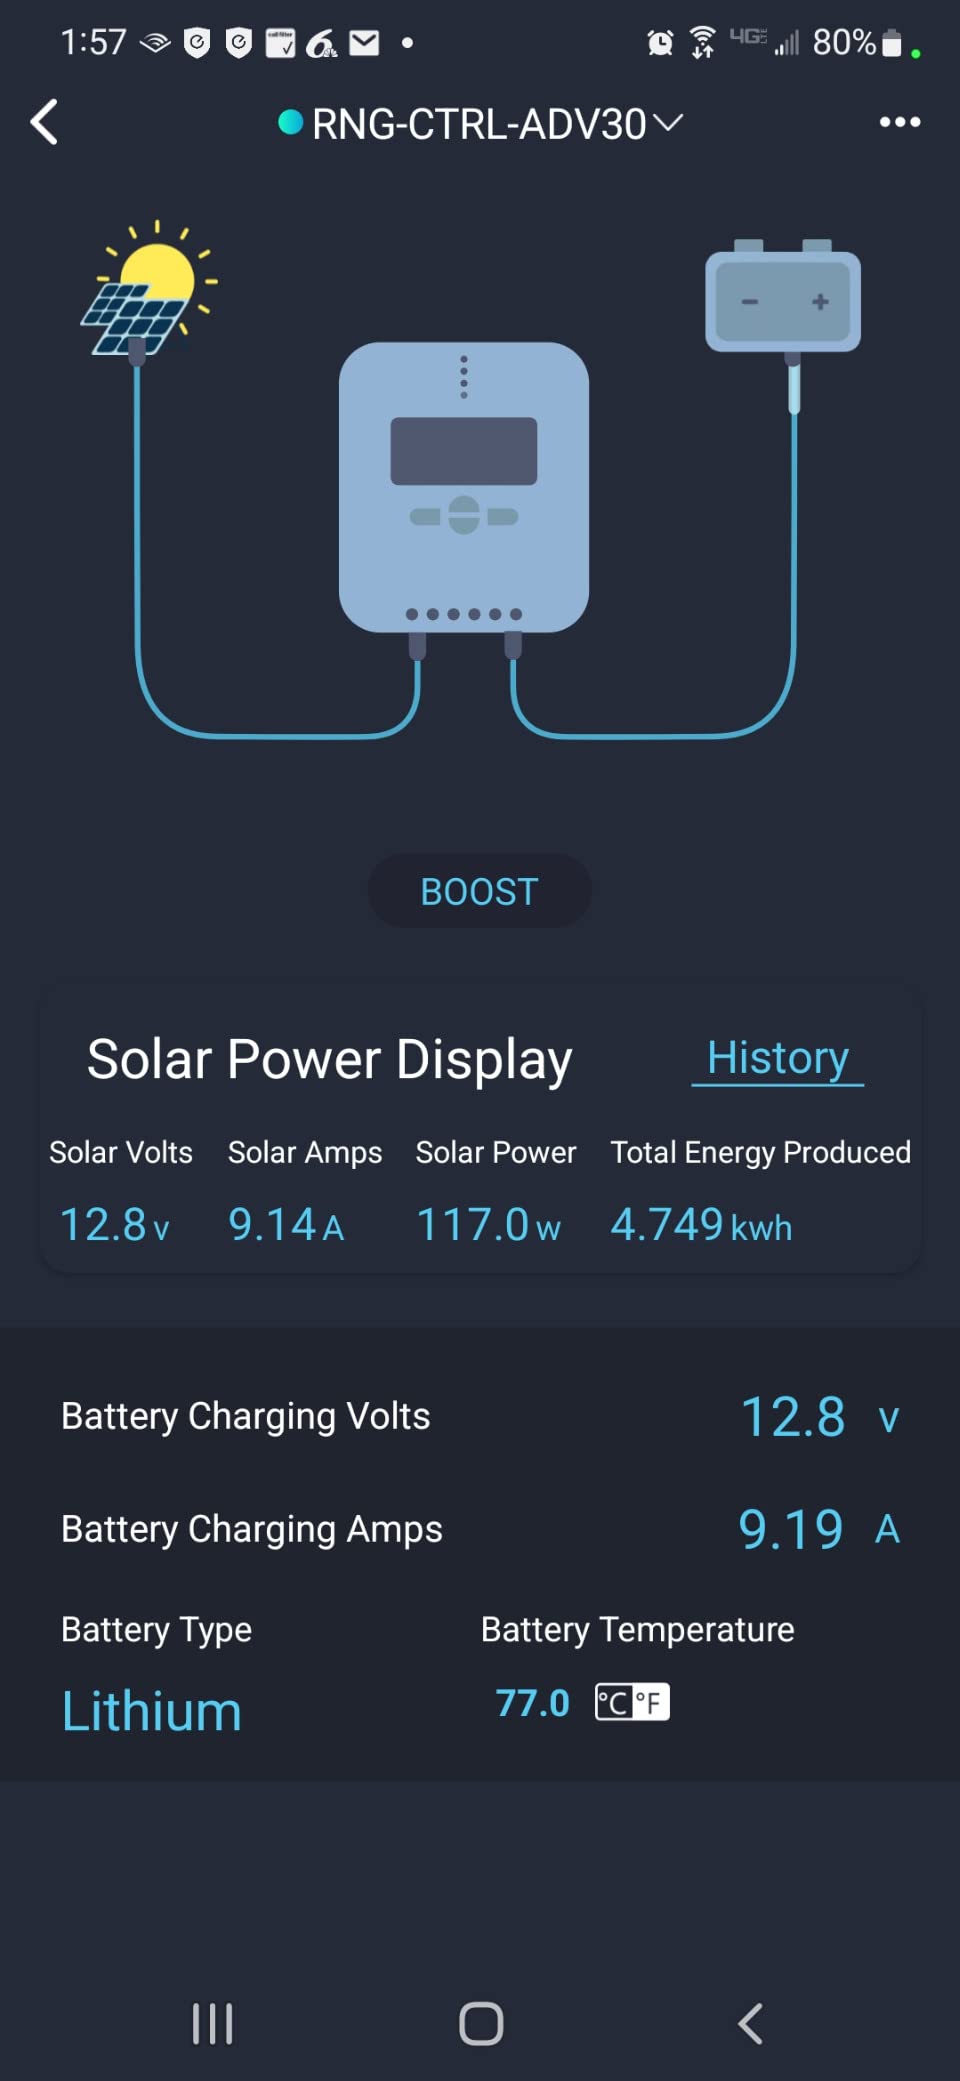
This is the kit we would choose for a shed or camper that has a low roof, because the panels are only 1.4 inches thick and the controller is designed to sit flush against a wall. The Adventurer-Li 30A unit has an LCD display and mounts flat rather than standing proud like a generic PWM box.
The two 100-watt N-type panels reach 22 percent cell efficiency, which is a genuine step up from the 19.5 percent silicon in cheaper kits. Quoted daily output is about 800 watt hours from four hours of sunlight, with an IP67 mated connector rating and a temperature range of -40F to 194F.
The box is thorough: two panels, the flush mount controller, a 30 foot 10AWG adaptor kit, a 16 foot 10AWG tray cable, three pairs of Y branch connectors, a BT-1 Bluetooth module and a cable entry housing. That branch connector set is what makes the parallel two-panel install straightforward rather than a soldering exercise.
Protection covers overcharging, overload, short circuit and reverse polarity, and the battery compatibility spans lithium, lead-acid and gel. A five year warranty with round-the-clock technical support backs the whole bundle.
The PWM controller is the compromise, and it is the reason this kit sits below the Renogy 400W MPPT array in our ranking despite the better cell technology. At 200 watts of generation the efficiency loss is noticeable, particularly in cooler weather when panel voltage rises.
Bluetooth monitoring is possible but requires the app alongside the included module, which adds a step. And because the two panels must be wired in parallel, the install involves more connections than a single-panel kit, so plan the cable routing before the brackets go on.
At 16.5 pounds for the pair, this is a two-person roof job rather than a solo mount. That said, the low profile and the flush controller mean the finished install sits almost flat, which is exactly what you want on a small shed roof that is walked on for access.
What this kit is genuinely good for
Sheds with a shallow pitch, a low eaves line or a walkable roof, where a thicker panel would be awkward. The slim profile also makes it the natural choice if the shed shares a roofline with a camper or a trailer that already has a low-clearance mounting pattern.
It suits a build that needs around 800 watt hours a day without committing to a four-panel array. Paired with a 150Ah lithium bank, that is enough to carry lighting, a router, a small fan and daily tool charging through the season, with headroom for cloudy stretches.
Where it will let you down
No battery and no inverter, so mains loads still require a separate purchase. And the PWM controller is a step backwards from the MPPT unit in the 400W kit, which matters if the roof picks up any shade during the day.
If the roof is small and steeply pitched, a single larger panel is often easier to site than two flat ones. Check the physical dimensions before committing, because a two-panel array needs a continuous clear run rather than two separate sunny spots.
How Many Watts Does Your Shed Actually Need?
Start with the load, not the kit. Write down everything you want to run, multiply the watts of each item by the hours per day you expect to use it, and you have your daily watt hour requirement. For most sheds that number lands between 300 and 900 watt hours, which is one 100W panel or two.
A single 3-watt shed fan running twelve hours a day uses about 36 watt hours, and a fan on a longer cycle might use 72. That is the kind of arithmetic DIY solar forum users do constantly, and it usually produces a much smaller system than people first assume. It also produces the warning that a tiny panel driving a small battery is a bad combination, because the battery spends its life sitting half charged.
For context, an LED lighting circuit for a shed runs in the region of 30 to 60 watt hours a day. A Wi-Fi router is around 20 to 30. Charging a couple of cordless tool batteries is a matter of tens of watt hours each. Add a small fridge and the daily figure climbs to several hundred watt hours, which is the point at which a 400W array or a power station becomes the sensible answer.
Panel sizing follows from there. Divide your daily watt hour requirement by the number of peak sun hours you realistically get, which is a conservative four or five in most of the UK and considerably higher in sunnier regions. A shed needing 800 watt hours a day wants roughly 160 to 200 watts of panels after allowing for the losses inherent in charge control and wiring.
Battery sizing works the other way. Multiply your daily watt hours by the number of days of autonomy you want, then divide by 12 volts and by a realistic depth of discharge. A lithium iron phosphate bank can be cycled much deeper than an AGM, which is one of the main reasons forum regulars recommend it for a shed that sees daily use.
If you are still working out what the building itself needs, our wooden storage shed guide covers roof pitch and panel-friendly framing in more detail than any solar manual will.
MPPT vs PWM, and LiFePO4 vs AGM
The charge controller choice is simpler than most sellers make it sound. A PWM controller costs less and does an adequate job on a small, unshaded, 12V-only system. An MPPT controller costs more and recovers energy whenever the panel voltage sits above the battery voltage, which is most of the day. The difference is small in high summer and much larger in a cold spring or a hazy winter.
Our rule of thumb: if the shed roof is ever shaded at any point in the day, or if you are running a larger array, buy MPPT. In this roundup that points at the Renogy 400W kit with its 40A Rover controller. The rest of the kits here use PWM and are perfectly adequate for what they were designed to do.
On batteries, lithium iron phosphate wins for cycle life and usable capacity. It tolerates deep discharge without damage, holds its charge in cold weather far better than lead acid, and the cells rated for 3000 to 6000 cycles in the power stations above translate to well over a decade of daily cycling.
AGM and flooded lead acid remain perfectly workable and cheaper, but they want to be kept between roughly 50 and 80 percent charge, they lose capacity in cold conditions, and they need replacing sooner. The panel-versus-battery sizing trap that dominates DIY solar forums is really a lead acid problem: a small panel that never fully charges a large bank slowly destroys it.
Do You Need an Inverter in a Shed?
No, not for a lighting-only shed. If everything on your load list is 12V, you do not need an inverter, and adding one is wasted money plus an extra failure point. LED lights, a 12V fan, a router on a 12V adapter and a USB charging point are all perfectly happy running straight from a battery bank.
You need an inverter the moment a load requires mains power. Laptops, monitors, bench tools, kettles, dehumidifiers, fridges and anything with a three pin plug fall into that group. A pure sine wave inverter is the safe choice, since a modified sine wave can confuse sensitive electronics and produce a noticeable buzz.
This is why the power station bundles make so much sense for many sheds. A lithium power station has the battery, the charge controller and the inverter integrated behind one display, which removes the wiring, the fusing and the sizing maths that cause beginner installations to go wrong. For a lights-only shed, though, that integration is paying for a feature you will never switch on.
Mounting a Kit on a Shed Roof Without Regretting It
Check the load ratings before you drill. The panels in this roundup carry ratings of 2400Pa wind and 5400Pa snow load, which is a useful benchmark, and both figures come from the panel manufacturers rather than the kit resellers. If your shed is in an exposed or snowy location, those numbers decide whether the brackets need extra fixings.
On roof coverage, the rule of thumb used in the industry is that panels should occupy no more than around a third of the roof surface you are covering, leaving room for access and firefighting clearance. On a small shed that often means a ground frame or a neighbouring roof rather than the shed itself, and it is the constraint that stops people fitting the array they wanted.
Wire it properly, because this is the area where most shed solar threads go wrong. Ten gauge cable for a run to a battery bank is a sensible default, with the fusing installed close to the battery and the charge controller protected from the reverse current that can happen at night. Online forum advice on this point is consistent and worth reading before you connect anything.
Finally, think about winter. Output falls with the sun angle and the weather, snow cover takes the whole array offline, and tree shading that is irrelevant in June can halve your harvest in December. A shed that has to work year round is better served by a slightly larger battery and a modest panel than by the biggest panel that fits the roof.
Kit vs Build-Your-Own: Is the Bundle Saving You Anything?
A complete panel and controller kit is usually cheaper than buying the parts separately, and the saving grows with the size of the array. The brackets, cables, connectors and adaptor kits that come in the box are the parts people forget to budget for, and finding them one at a time is both slower and often more expensive.
Where build-your-own wins is on batteries, inverters and charge controllers if you already know what you need. A buyer who knows they need a 150Ah lithium bank and a 2000-watt pure sine wave inverter can often get a better result by buying the generation kit complete and sourcing the storage separately.
The honest answer is that a complete solar kit is worth it for your first shed build, because the failure mode is not a bargain panel, it is a mismatched system. The panel-versus-battery sizing mistakes that show up on forums every week come from mixing parts bought at different times, not from buying too few components together.
Frequently Asked Questions
Can I power a shed with solar panels?
Yes. Most sheds need far less energy than a house. A single 100W panel with a charge controller and a 100Ah battery can run LED lighting, a small fan and a router indefinitely through summer, and two panels cover most tool-charging needs. You only need an inverter once something requires mains power such as a laptop, a bench tool or a fridge.
What is the best solar power kit for a shed?
For a lighting-and-charging shed the Renogy 100W 12V starter kit is the strongest all-round choice, pairing a 100W monocrystalline panel with a 30A PWM controller and expandable to 400W. If your shed needs mains power, the Anker SOLIX C1000 Gen 2 bundle gives you 1024Wh of lithium storage and 2000W of continuous AC output with nothing else to buy.
Will a 400W solar panel run a fridge?
A 400W array can run a small fridge, but the panel is not the limiting factor, the battery is. A fridge typically draws 50 to 70 watts while running and cycles on and off, so it needs a bank of roughly 150Ah of lithium iron phosphate or a power station with around 1000 watt hours. Remember to budget for compressor start-up surge when sizing the inverter.
How long will a 200W solar panel take to charge a 100Ah battery?
In ideal conditions a 200W panel puts roughly 16 amps into a 12V battery, which is about six hours of full sun. In the real world expect eight to ten hours on a decent sunny day, and considerably longer in cloud or winter haze. The same 200W panel paired with a 150Ah bank needs three times as long for a full charge.
How many 12V batteries do I need for 400W of solar panels?
One 100Ah lithium iron phosphate battery is a workable minimum for 400W of panels, and two in parallel is the usual recommendation for a working shed. For 400W of AGM lead acid you would want two 100Ah batteries, and three or more if you want usable capacity rather than nominal capacity. Match the controller voltage to the bank so the array voltage sits above the battery voltage.
Which Solar Kit Comes Next?
Whichever tier your shed falls into, the winning move is matching the kit to the load rather than buying the biggest array the roof will hold. For lights, a fan and phone charging, the Renogy 100W 12V starter kit is the one we would put on our own shed, and it is the most reviewed and highest rated kit in this roundup by a clear margin.
Once a fridge, a laptop or a workbench enters the picture, stop buying panels and start buying storage. The Anker SOLIX C1000 Gen 2 bundle covers most mixed loads, the BLUETTI AC180 covers heavier ones, and the BLUETTI Elite 200 V2 covers a shed that behaves like an off-grid room. If your roof can hold four panels in full sun and no shade at all, the Renogy 400W MPPT kit is the generation answer.
Whichever you pick, buy the battery at the same time as the panel. That single habit avoids the undersized-bank mistake that shows up in nearly every beginner thread on the solar forums, and it is the difference between a shed solar system that lasts a decade and one that does not see out its first winter.
We keep our guides updated through 2026, and you can find more of our tested shed and storage picks linked throughout this roundup.