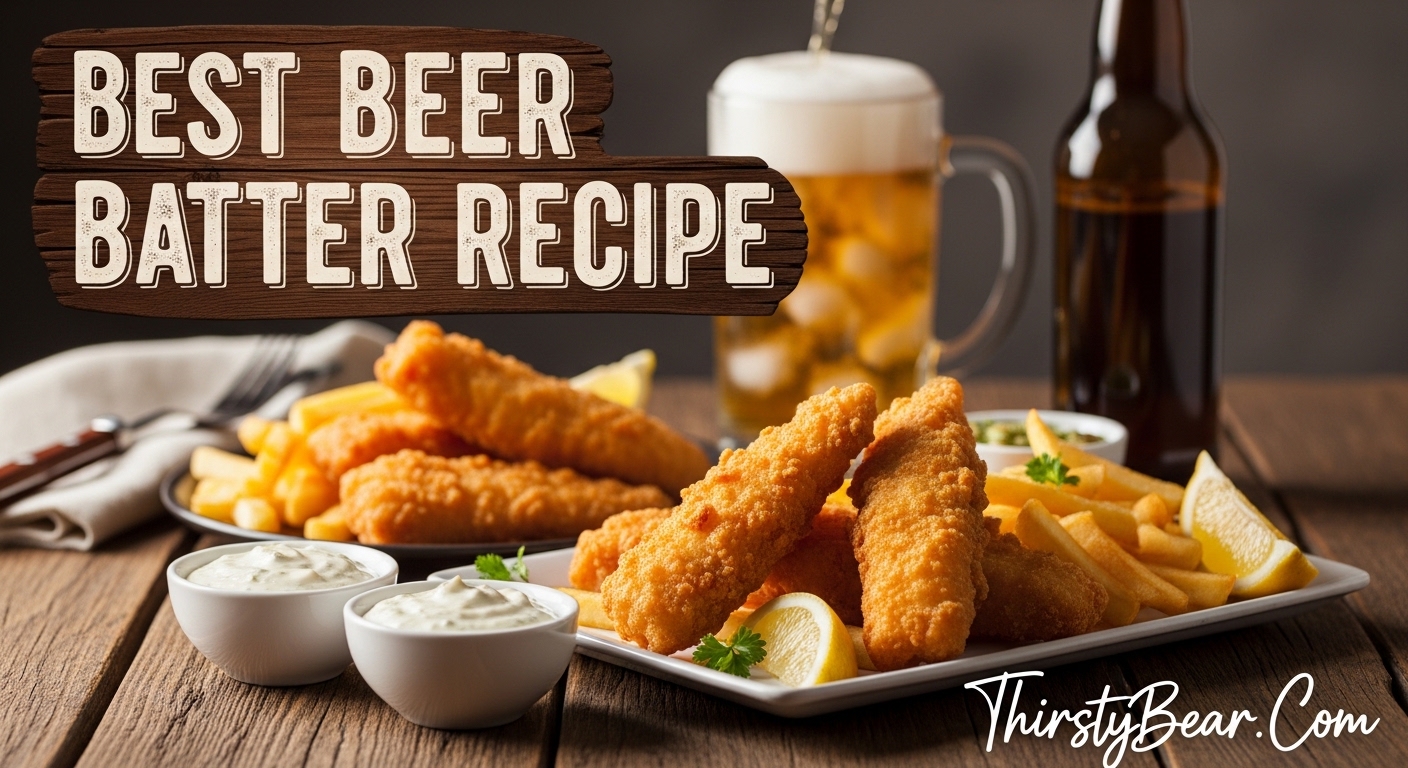
If you have ever wondered why restaurant fish and chips tastes so much better than what you make at home, the secret lies in the beer batter. That impossibly crispy, golden brown, light and airy coating that shatters when you bite into it does not happen by accident. I spent three months testing different ratios, beer types, and techniques to figure out exactly what makes beer batter work.
The best beer batter recipe creates a coating that stays crispy for over 15 minutes after frying, something most home versions cannot manage. The key is understanding how carbonation creates those tiny bubbles, why ice cold beer matters, and how a small amount of rice flour changes everything. This recipe works for fish, onion rings, vegetables, and just about anything you want to fry.
What I discovered through all that testing is that most home cooks are making subtle mistakes that cost them crispiness. None of these mistakes are obvious unless you understand the science behind what makes beer batter special. Once you know why certain techniques work, you can execute them with confidence and get consistent, professional results every time.
Table of Contents
Why Beer Batter Creates the Crispiest Coating
Beer batter works better than plain flour and water because of what happens when beer meets hot oil. The carbonation in beer contains thousands of tiny bubbles that expand rapidly when exposed to heat, creating a lighter, more delicate coating structure. This is why beer battered fish has that characteristic puffy, golden appearance rather than the dense, heavy crust you get from a simple flour batter.
Beyond carbonation, beer contains natural yeast from the fermentation process. This yeast adds complexity to the flavor and contributes to browning. When the alcohol in beer vaporizes during frying, it creates additional steam pockets that make the batter even lighter. The result is a crispy beer batter that crunches satisfyingly while keeping the fish moist and flaky inside.
Regular water-based batters cannot replicate this effect. Without carbonation and yeast, you get a denser coating that tends to become soggy within minutes of leaving the fryer. For classic bar food recipes like fish and chips, beer batter is genuinely the superior choice.
The carbonation effect is particularly important for fish because fish is delicate and can easily become dried out. The steam created by the batter helps cook the fish gently from the outside while the coating sets. This two-pronged approach means the interior stays moist and flaky while the exterior becomes shatteringly crisp.
What Goes Into the Best Beer Batter Recipe
Our recipe uses a combination of flours to achieve maximum crispiness. The base is all-purpose flour, but we add cornstarch and rice flour to the mix. Cornstarch creates a more tender, less gluten-heavy coating that browns better. Rice flour is the secret weapon that makes the difference between batter that stays crispy for 5 minutes and batter that stays crispy for 15.
The combination of flours is not arbitrary. All-purpose flour provides structure and the right amount of gluten for adhesion. Cornstarch reduces gluten formation slightly while promoting browning. Rice flour, with its smaller starch granules, creates a smoother, more glass-like surface when fried that resists moisture remarkably well.
The beer selection matters more than you might think. A pale ale or lager works best because these styles have enough carbonation to create bubbles without overpowering the fish flavor. Dark beers like stouts can work but tend to overwhelm milder fish. The beer must be ice cold when you mix the batter. Warm beer loses its carbonation immediately and produces flat, dense results.
Some home cooks worry about the alcohol content in beer batter. The high heat of frying vaporizes most of the alcohol, leaving only the flavor compounds behind. This means you get the benefit of beer flavor without significant alcohol remaining in the finished dish. If you prefer to avoid alcohol entirely, non-alcoholic beer works surprisingly well since the carbonation and flavor elements are still present.
Complete Ingredients List
For approximately 1.5 pounds of fish (4 fillets), you need:
- 1 cup all-purpose flour
- 1/4 cup cornstarch
- 2 tablespoons rice flour
- 1 teaspoon baking powder
- 1/2 teaspoon garlic powder
- 1/2 teaspoon paprika
- 1/4 teaspoon cayenne pepper (optional)
- 1 teaspoon salt
- 12 ounces ice cold pale ale or lager
- 1 egg white, beaten until frothy
The leavening agents matter. We use both baking powder for immediate lift and the carbonation from beer for those thousands of tiny bubbles. Using beer alone without baking powder produces acceptable results, but the combination creates noticeably better lift and crispiness. For the best beer types for cooking, pale ales and Mexican lagers work exceptionally well.
The seasonings can be adjusted based on your preferences. Old Bay seasoning is a popular addition that adds a distinctive briny flavor. Some cooks prefer a simpler approach with just salt and pepper. Others add dried herbs like thyme or dill. The recipe below is a solid foundation that you can customize to match your taste preferences.
Step-by-Step Instructions for Perfect Beer Battered Fish
- Step 1: Prepare your fish at least 30 minutes before frying. Pat fillets completely dry with paper towels, then season both sides lightly with salt. Drying the fish is critical because moisture creates steam that can make the batter soggy. Let the seasoned fish rest on a wire rack while you prepare the batter.
- Fish selection matters for this recipe. Cod, haddock, halibut, and tilapia all work well. Cod is the traditional choice in British fish and chips because it flakes easily and has a mild flavor. Alaskan pollock is what many fast-food chains use because it is affordable and widely available. Whatever fish you choose, ensure the fillets are uniform in thickness for even cooking.
- Step 2: Combine all dry ingredients in a large bowl and whisk together thoroughly. This ensures even distribution of leavening agents. Sift the mixture if you have a fine mesh strainer, as lumps create uneven coating. The dry ingredients can be mixed up to 24 hours in advance and stored in an airtight container at room temperature.
- Step 3: Add the egg white to the dry ingredients and mix briefly. Pour in the ice cold beer all at once. Stir with a fork just until combined. The batter should look lumpy and slightly thick. This is good. Overmixing develops gluten and makes the coating tough rather than tender. A few visible streaks of flour are fine and expected.
- Batter consistency is crucial. The ideal consistency resembles pancake batter. If it pours off your fork in a steady stream, it is too thin. If it clings heavily and drops in chunks, it is too thick. Add flour by the tablespoon to thin it or a splash more beer to thicken it as needed.
- Step 4: Heat your oil to exactly 375F. Use a deep-fry thermometer and do not rush this step. Oil that is too cool results in greasy, soggy fish. Oil that is too hot burns the exterior before the fish cooks through. Maintain this temperature throughout frying by working in small batches. Peanut oil is the traditional choice for frying fish because of its high smoke point and neutral flavor. Canola oil and vegetable oil are acceptable alternatives.
- Step 5: Lightly dredge each fillet in additional flour before dipping in batter. This extra step helps the batter adhere better and creates a more substantial crust. Some recipes skip this step, but we recommend it for more reliable results. Shake off excess flour before dipping.
- Step 6: Dip each fillet into the batter, letting excess drip off for several seconds. The batter should coat the fish in a thin, even layer. If batter slides off immediately, it is too thin. If it sits in heavy clumps, it is too thick. Work quickly because batter left sitting loses carbonation.
- Step 7: Carefully lower each fillet into the hot oil away from you to avoid splashes. Fry for 3-4 minutes per side depending on thickness. The batter should turn golden brown and look puffy. Do not flip more than once. Each piece of fish should have adequate space in the pan to float freely.
- Step 8: Remove fish to a wire rack set over a baking sheet. Never place fried fish on paper towels or closed containers as this traps steam and makes the coating soggy. Let rest for 2 minutes before serving. The resting period allows the coating to set properly and finish cooking through residual heat.
The Double-Fry Technique for Extra Crispiness
For professional-level results, try the double-fry method used by most fish and chip shops. Fry the fish once at 350F for 2 minutes to set the exterior without browning too deeply. Remove and let rest for 1 minute on the wire rack. Then fry again at 375F for 1-2 minutes until deeply golden and extra crispy.
This two-stage process creates an even crispier coating that holds up longer than single-fried fish. The first fry cooks the fish through and sets a preliminary crust. The second fry creates the final golden, crunchy exterior while the fish finishes cooking. The resting period between stages allows the interior to relax and finish cooking evenly.
Professional establishments use this technique because it produces more consistent results when cooking large batches. For home cooks with a dinner party, the extra effort is absolutely worth it. Your guests will notice the difference immediately.
Secrets for Perfect Beer Batter Every Time
The most common question I receive about beer batter is how to keep it crispy longer. The answer lies in the rice flour addition. Rice flour has smaller starch granules than wheat flour, creating a smoother, more glass-like surface when fried. This surface resists moisture better than regular flour, keeping the coating crunchier for longer periods.
Another critical secret is using ice cold beer straight from the refrigerator. The temperature difference between the cold batter and hot oil creates more vigorous bubble formation. Some chefs even add a few ice cubes to the batter mixture itself. This extra carbonation boost translates directly to lighter, crispier results. The colder you keep the batter, the better it performs.
Never overmix your batter. A few lumps are not just acceptable, they are preferable. When you overwork the flour, you develop gluten strands that create a chewy texture instead of a crispy one. The goal is tender and light, not tough and dense. Mix just until the flour is incorporated and no dry spots remain.
Keep your oil clean and at the proper temperature. Old oil or oil contaminated with batter residue from previous batches will cause uneven cooking and off-flavors. Fry in batches small enough that the temperature recovers fully between additions. The oil should return to 375F within 30 seconds of adding fish before you continue.
Rest your fish on a wire rack rather than paper towels. This allows air circulation around the entire coating, preventing steam from softening any surfaces. Paper towels trap moisture against the batter and cause sogginess within minutes. A simple wire cooling rack makes a significant difference in maintaining crispness.
Common Mistakes to Avoid
Using warm or room temperature beer is the number one mistake home cooks make. The carbonation dissipates quickly once beer warms up, leaving you with a flat batter that produces dense, heavy results. Always use beer right from the refrigerator and work quickly. If you forget to chill your beer, you can chill a glass of it rapidly by setting it in a bowl of ice water for 10 minutes.
Frying too much fish at once overwhelms the oil temperature. Each piece of fish should have enough space to float freely without touching other pieces. Overcrowding causes the oil temperature to drop dramatically, resulting in greasy, soggy fish that sticks together. If in doubt, fry one piece at a time for maximum control over the final result.
Skipping the resting time after frying is another frequent error. Freshly fried fish needs 2 minutes to set the coating properly. Cutting into fish too soon causes the coating to become soft before it has had a chance to firm up. The exterior needs time to fully crystallize and become stable.
Not patting the fish dry is a subtle but impactful mistake. Even a small amount of surface moisture creates steam between the fish and batter, preventing proper adhesion. Take the extra minute to thoroughly dry your fillets before seasoning and battering. This single step dramatically improves how well the coating adheres.
Using the wrong type of fish can also affect your results. Frozen fish often has more moisture than fresh, which can compromise the batter. If using frozen fish, thaw it completely in the refrigerator overnight and then pat it very dry before using. Some cooks prefer to dust frozen fish with a light coating of cornstarch before battering to help absorb excess moisture.
What to Serve with Beer Battered Fish
Classic accompaniments exist for good reason. Tartar sauce made with dill pickles, capers, and lemon juice cuts through the richness of fried fish beautifully. Fresh lemon wedges provide brightness and help balance the oily coating. Real tartar sauce takes 10 minutes to make and tastes nothing like the jarred versions.
Making tartar sauce at home is simple. Combine finely chopped dill pickles, capers, a squeeze of lemon juice, a dollop of mayonnaise, and a pinch of salt. Some versions include fresh dill or parsley. Let the mixture rest for 30 minutes in the refrigerator before serving to allow the flavors to meld together.
Mushy peas are the traditional British side that many Americans overlook. Canned peas heated with butter and mint are acceptable, but properly made mushy peas with a bit of lemon zest and olive oil are extraordinary. The creaminess complements the crispy coating perfectly. For a quick version, warm canned peas with butter, a squeeze of lemon, and fresh mint leaves.
For a complete meal, serve with thick-cut chips (french fries) that have been double-fried for extra crispiness. A side of coleslaw adds crunch and tang that balances the richness. Some people enjoy malt vinegar on their chips, which is an acquired taste worth trying at least once. The tangy vinegar cuts through the richness and adds an extra dimension to the dish.
Other excellent accompaniments include mushy peas, pickled onions, curry sauce, and garlic mayo. In Australia and New Zealand, fried fish is often served with chicken salt and tomato sauce. The possibilities are endless, but starting with classic accompaniments helps you appreciate the dish as it was meant to be eaten.
Storing and Reheating Beer Battered Fish
Beer battered fish is best eaten immediately after frying. However, leftovers can be stored and reheated with acceptable results. Place cooled fish in an airtight container and refrigerate for up to 2 days. The coating will not be as crispy as fresh, but it will still be enjoyable.
Reheating requires a different approach than simple microwave heating. Microwaves make fried coatings soggy and limp. The best method is to reheat in a 400F oven for 10-15 minutes. Place the fish on a wire rack set over a baking sheet to allow air circulation. This approach restores some crispness to the exterior while gently reheating the fish.
For better results, use an air fryer set to 375F for 5-7 minutes. The circulating hot air helps restore some of the original crispness. Check halfway through and flip the fish if needed. This method works better than oven reheating for maintaining the coating texture.
Freezing fried fish is not recommended. The coating will become extremely soggy upon thawing, and the fish will lose its appealing texture. If you must freeze it, freeze only the cooked fish without the batter and prepare fresh batter when ready to eat. This way you can enjoy freshly fried results even with frozen fish.
Variations and Adaptations
Once you master the basic beer batter recipe, you can adapt it in many ways. Adding Cajun seasoning or curry powder to the dry ingredients creates flavor variations that work well with different proteins. The batter itself is versatile and accepts additions without compromising the structural integrity.
For a spicier version, increase the cayenne pepper or add a teaspoon of hot sauce to the batter. For herbed fish, add dried thyme, oregano, or Italian seasoning to the flour mixture. Lemon zest added to the batter creates a bright, fresh flavor that pairs especially well with the rich fried coating.
Substituting different beers creates notable variations in flavor. Wheat beers produce a slightly sweet, lighter coating. IPAs add bitterness that stands up to richer fish. Brown ales create a more complex, malty flavor. Experimenting with different beer styles allows you to customize the flavor profile to match your preferences and the protein you are using.
The technique also works for other proteins. Chicken tenders, shrimp, calamari, vegetables like zucchini and mushrooms, and even cheese all work well with beer batter. Adjust frying times based on the thickness and type of protein. Vegetables typically fry more quickly than meat, while thicker cuts of chicken require longer cooking times.
Frequently Asked Questions
What are the secrets for perfect beer batter?
The key secrets are using ice cold beer for maximum carbonation, adding rice flour to the flour mix for stay-crispy results, never overmixing the batter, maintaining oil at exactly 375F, and using the double-fry technique for extra crispiness. Patting fish dry before battering is also essential for the coating to adhere properly.
How does Gordon Ramsay make beer batter?
Gordon Ramsay uses a simple beer batter with flour, salt, and beer, but he emphasizes keeping the batter very cold, using sparkling beer for extra carbonation, and most importantly, he double-fries the fish at different temperatures to achieve professional-level crispiness.
What are common beer batter mistakes?
The most common mistakes are using warm beer instead of ice cold beer, overmixing the batter which develops tough gluten, frying at too low temperature causing soggy greasy results, overcrowding the oil which drops temperature, and not letting fried fish rest before serving.
Can I use non-alcoholic beer for beer batter?
Yes, non-alcoholic beer works in beer batter and produces similar results since the carbonation and flavor compounds are present. Choose a non-alcoholic pale ale or lager rather than a sweet non-alcoholic beer for the best flavor balance.
What fish works best for beer batter?
Cod is the traditional choice because it flakes easily and has a mild flavor, but haddock, halibut, tilapia, and Alaskan pollock all work well. The key is choosing fillets of uniform thickness for even cooking, and ensuring the fish is thoroughly dried before battering.
Perfect Beer Batter Recipe Summary
The best beer batter recipe comes down to understanding why each ingredient matters. Cold beer provides carbonation that creates those thousands of tiny bubbles making the coating light and airy. The combination of all-purpose flour, cornstarch, and rice flour produces a coating that browns beautifully and stays crispy for 15 minutes or longer.
Proper technique matters just as much as ingredients. Keep everything cold, maintain oil at 375F, never overcrowd the fryer, and give fried fish time to rest before serving. The double-fry technique takes your results from good to exceptional, creating that signature shatter that defines restaurant-quality fish and chips.
This recipe works for more than just fish. Try it with onion rings, chicken tenders, fried vegetables, or anything that deserves a crispy golden coating. Once you master the basic technique and understand why it works, you can adapt it to any protein or vegetable you want to fry.
The investment in learning this technique pays dividends every time you make it. Restaurant-quality fish and chips at home is achievable once you understand the science and apply the proper techniques. The key is patience and attention to detail throughout the process.